• projects.
    • neon space moon.
    • the shape of refractive memory.
  • places.
    • new york.
    • bali.
    • paris.
    • los angeles.
    • australia.
    • japan.
    • sedona.
    • england.
  • people.
    • sports.
    • portraits.
    • events.
  • things.
    • wildlife.
  • itp blog.
    • itp_general.
    • itp_icm_f18.
    • itp_physical computing_f18.
    • itp_video&sound_f18.
    • itp_visual language_f18.
    • itp_animation_f18.
    • itp_wearables_s19
    • itp_fandom_s19
    • itp_turning_s19
    • itp_uxdesign_s19
    • itp_fungus_s19
    • itp_softrobotics_s19
    • itp_augmentedreality_f19
    • itp_fabrication_f19
    • itp_light&interactivity_s20
  • connect with me.
  • Menu

Madshutter Photo

  • projects.
    • neon space moon.
    • the shape of refractive memory.
  • places.
    • new york.
    • bali.
    • paris.
    • los angeles.
    • australia.
    • japan.
    • sedona.
    • england.
  • people.
    • sports.
    • portraits.
    • events.
  • things.
    • wildlife.
  • itp blog.
    • itp_general.
    • itp_icm_f18.
    • itp_physical computing_f18.
    • itp_video&sound_f18.
    • itp_visual language_f18.
    • itp_animation_f18.
    • itp_wearables_s19
    • itp_fandom_s19
    • itp_turning_s19
    • itp_uxdesign_s19
    • itp_fungus_s19
    • itp_softrobotics_s19
    • itp_augmentedreality_f19
    • itp_fabrication_f19
    • itp_light&interactivity_s20
  • connect with me.
Final Product, Spinning Grooves

Final Product, Spinning Grooves

Final | Spinning Grooves

March 15, 2019

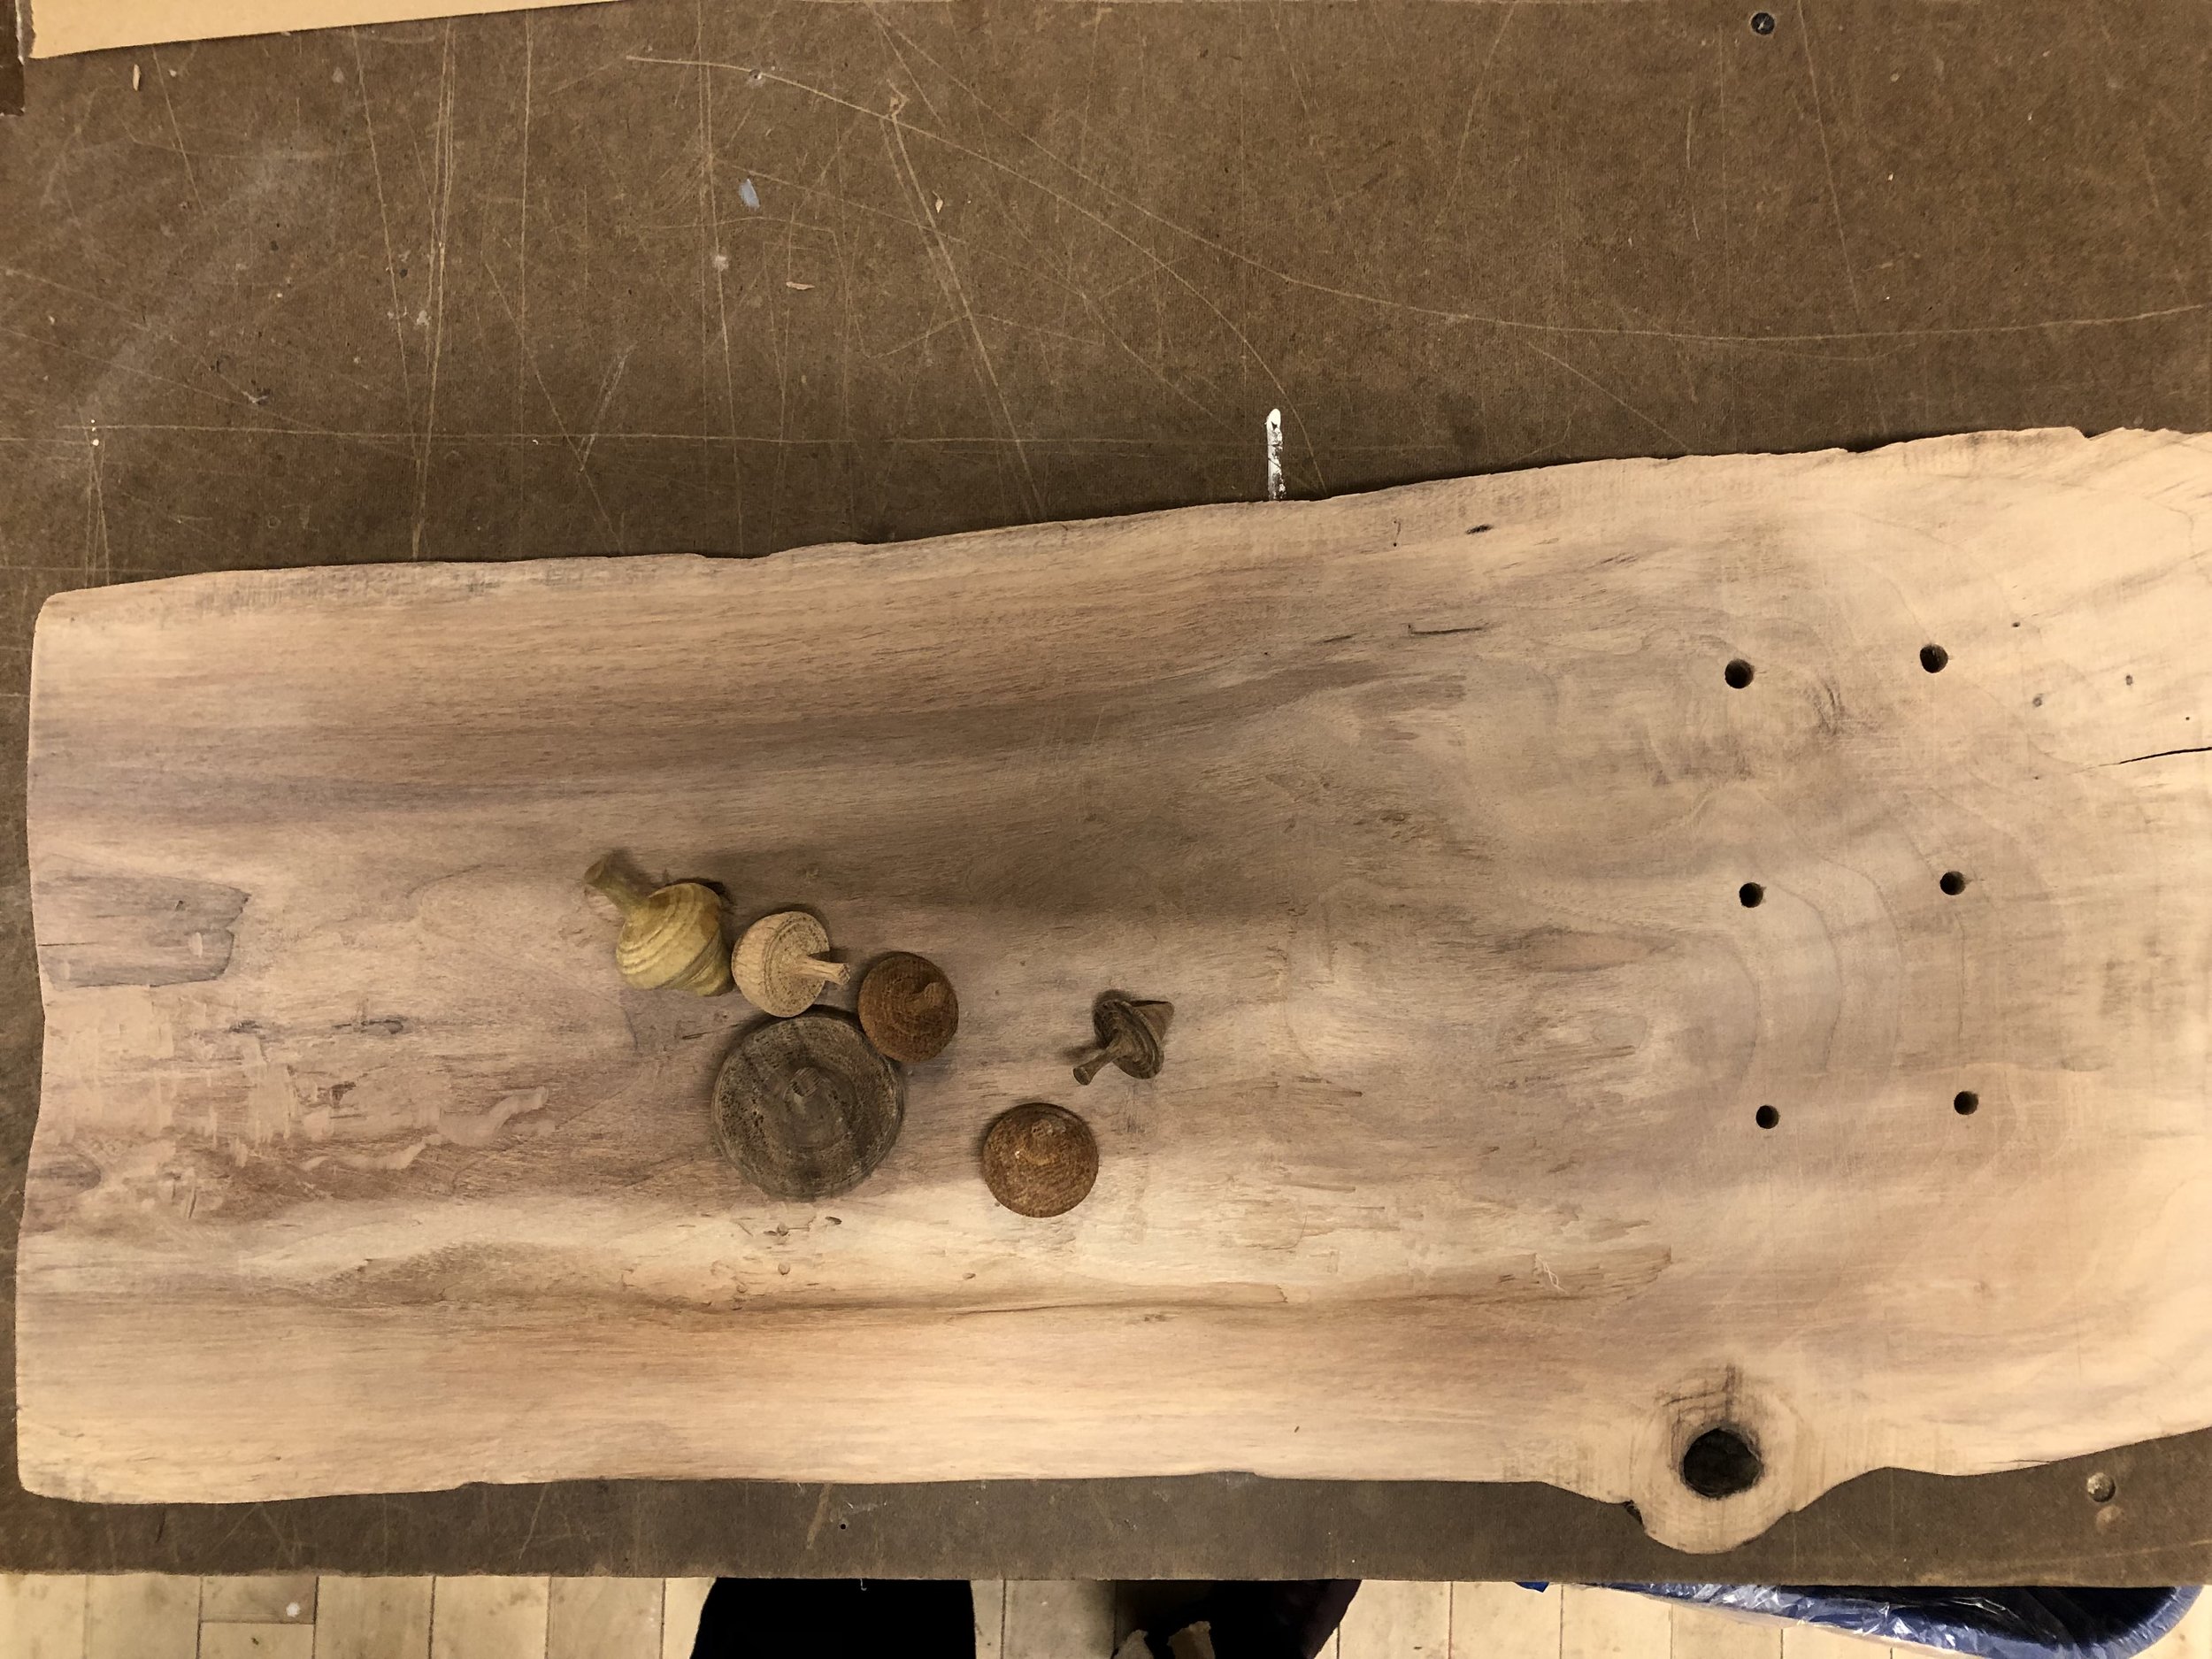
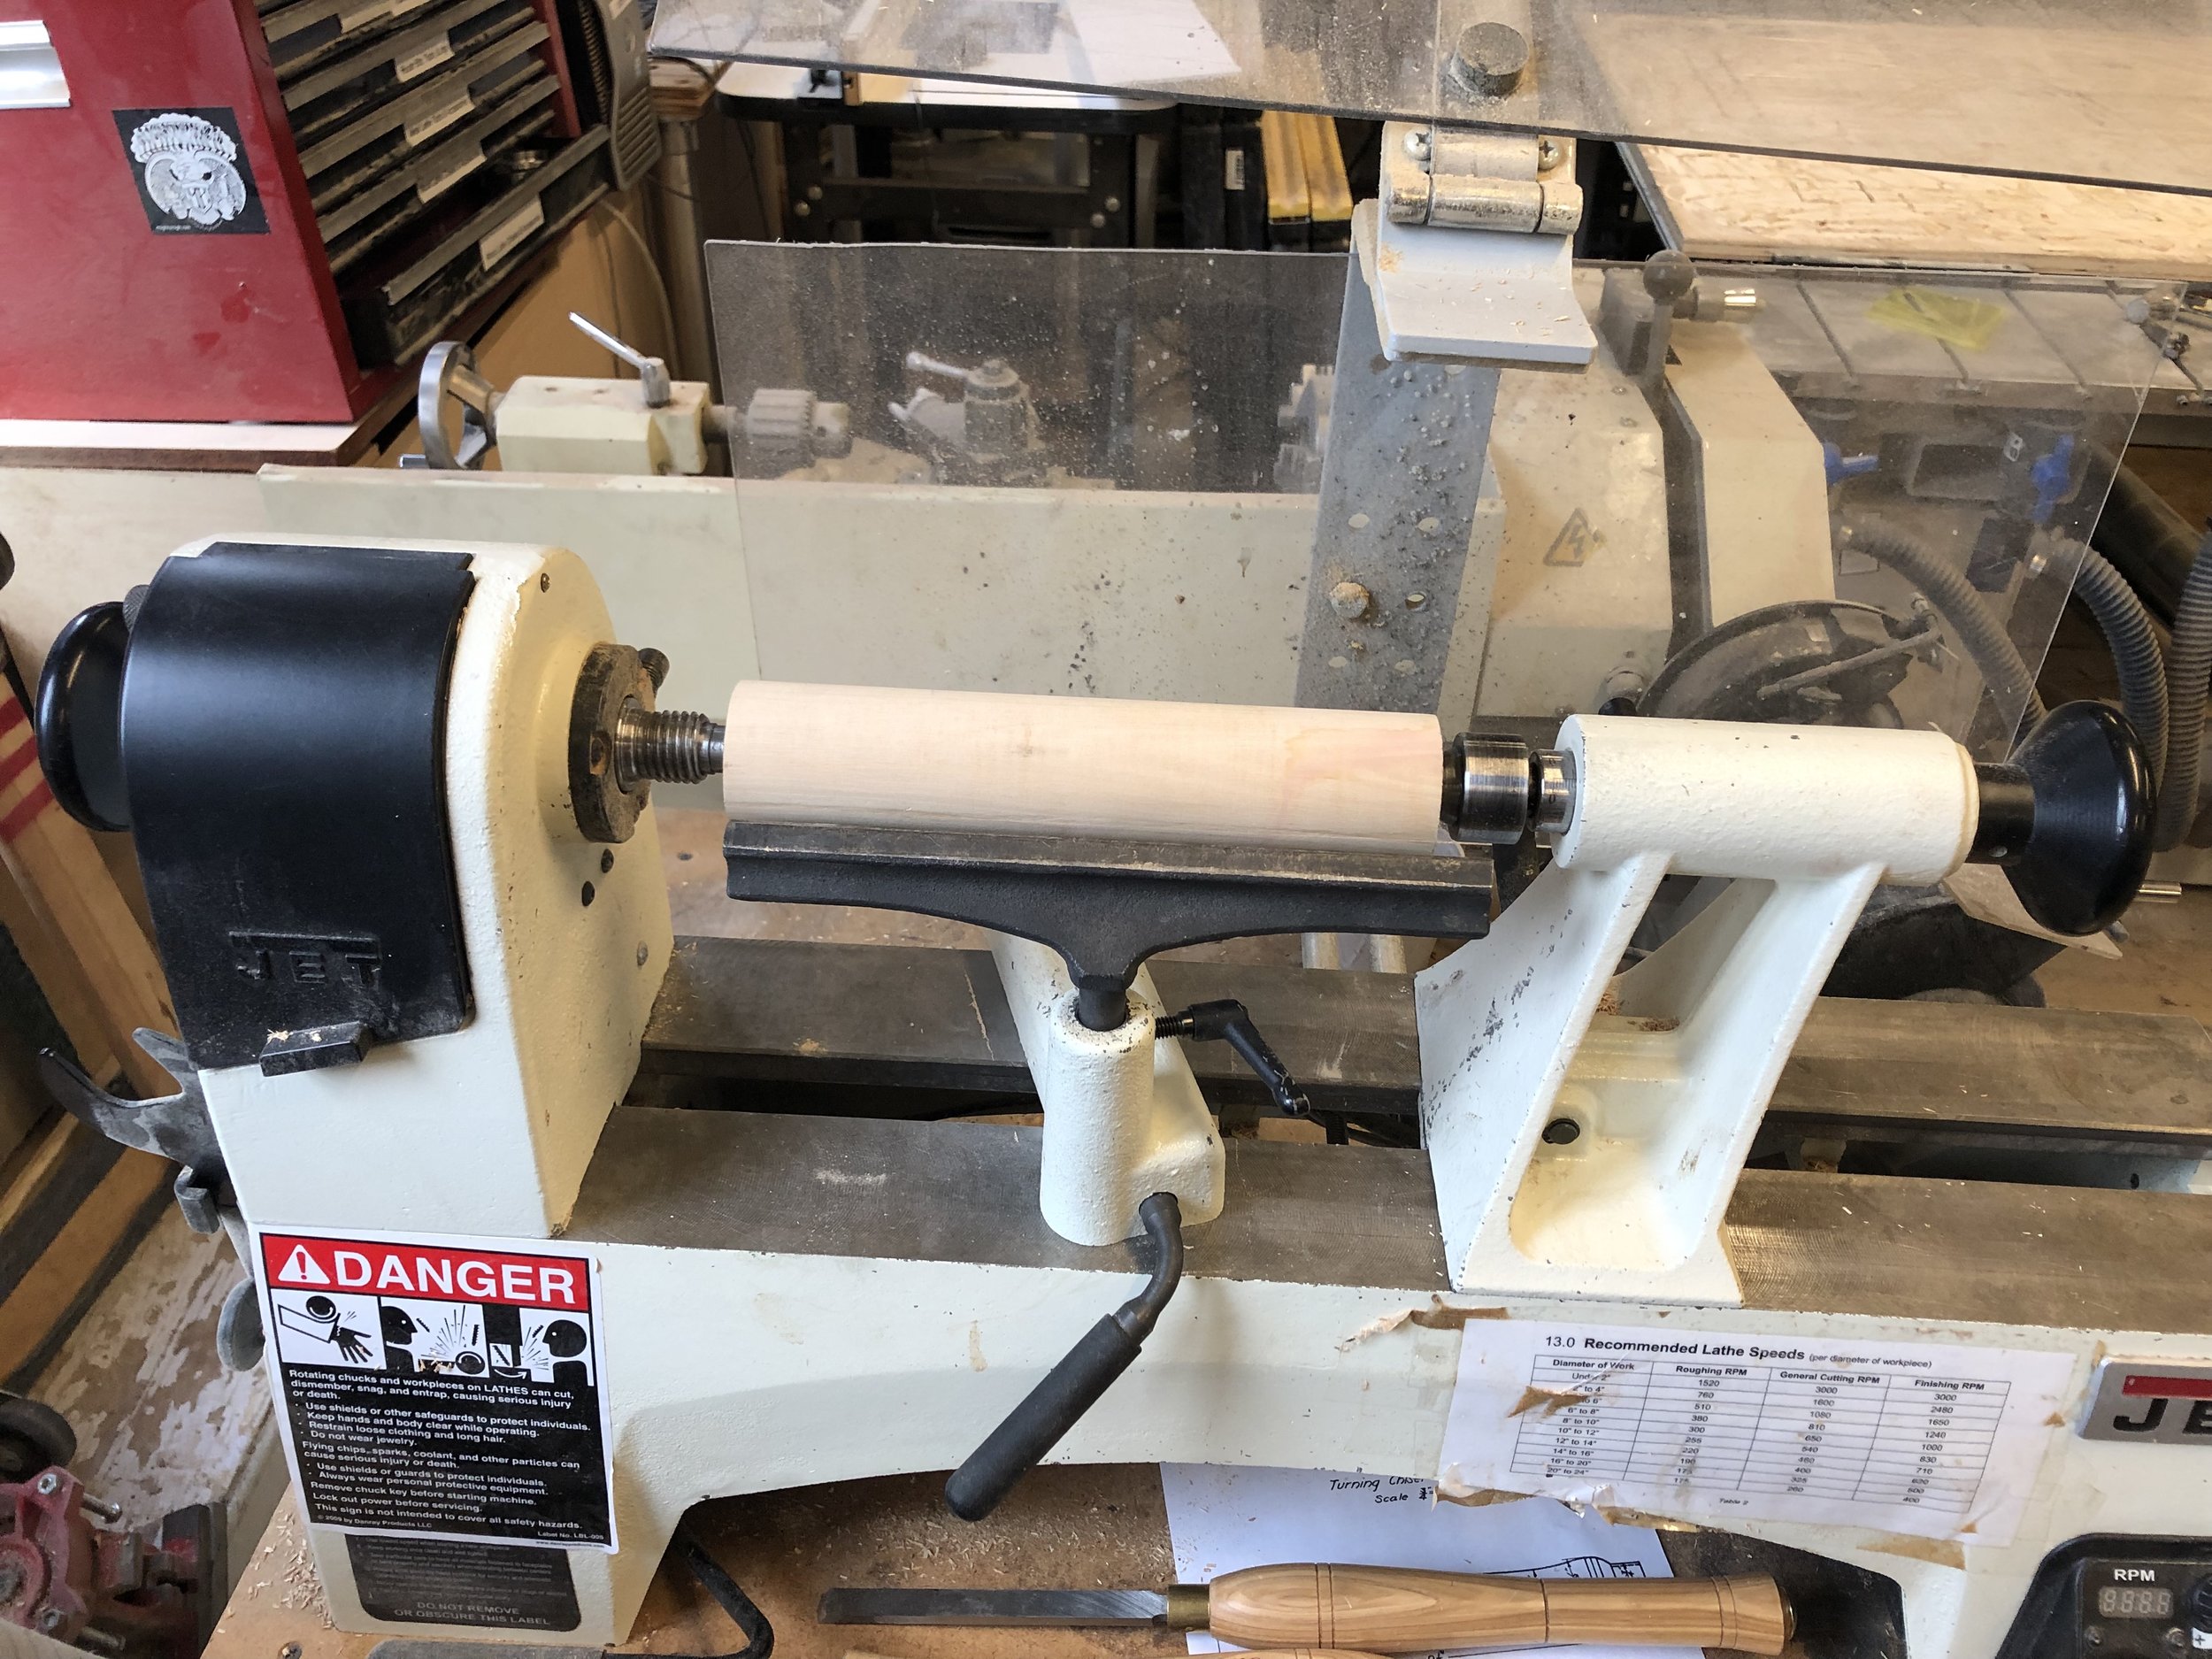
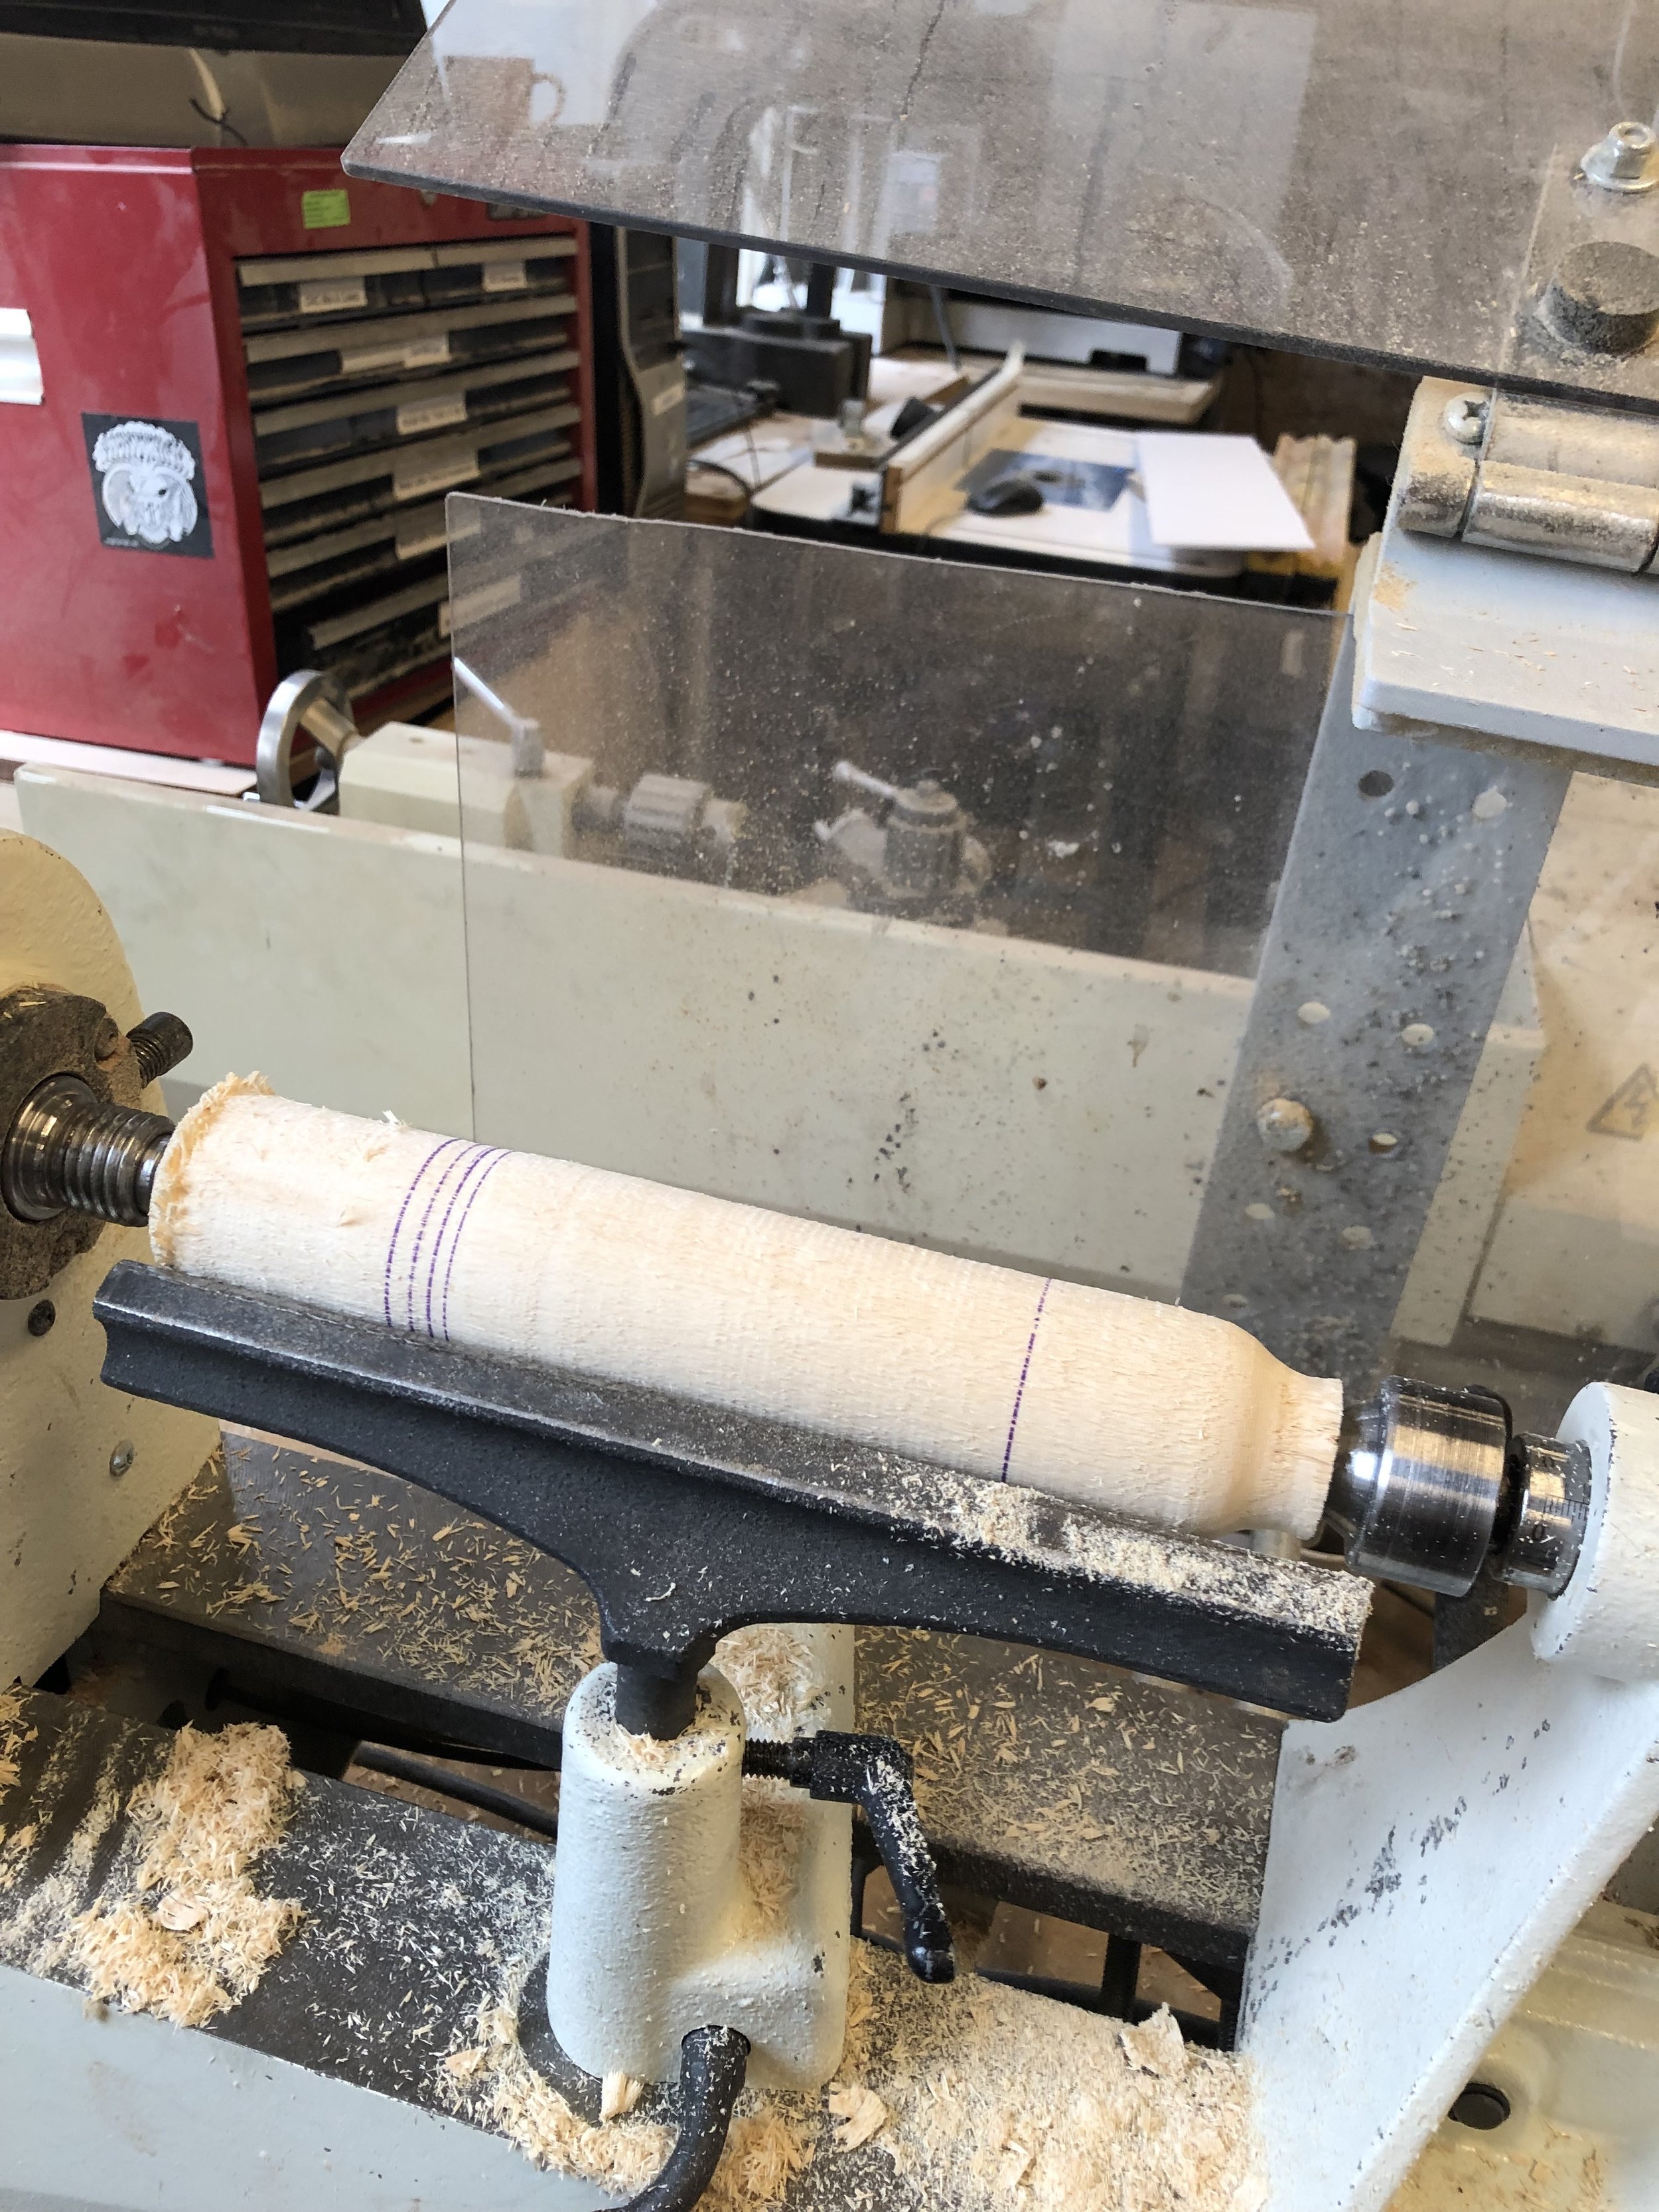
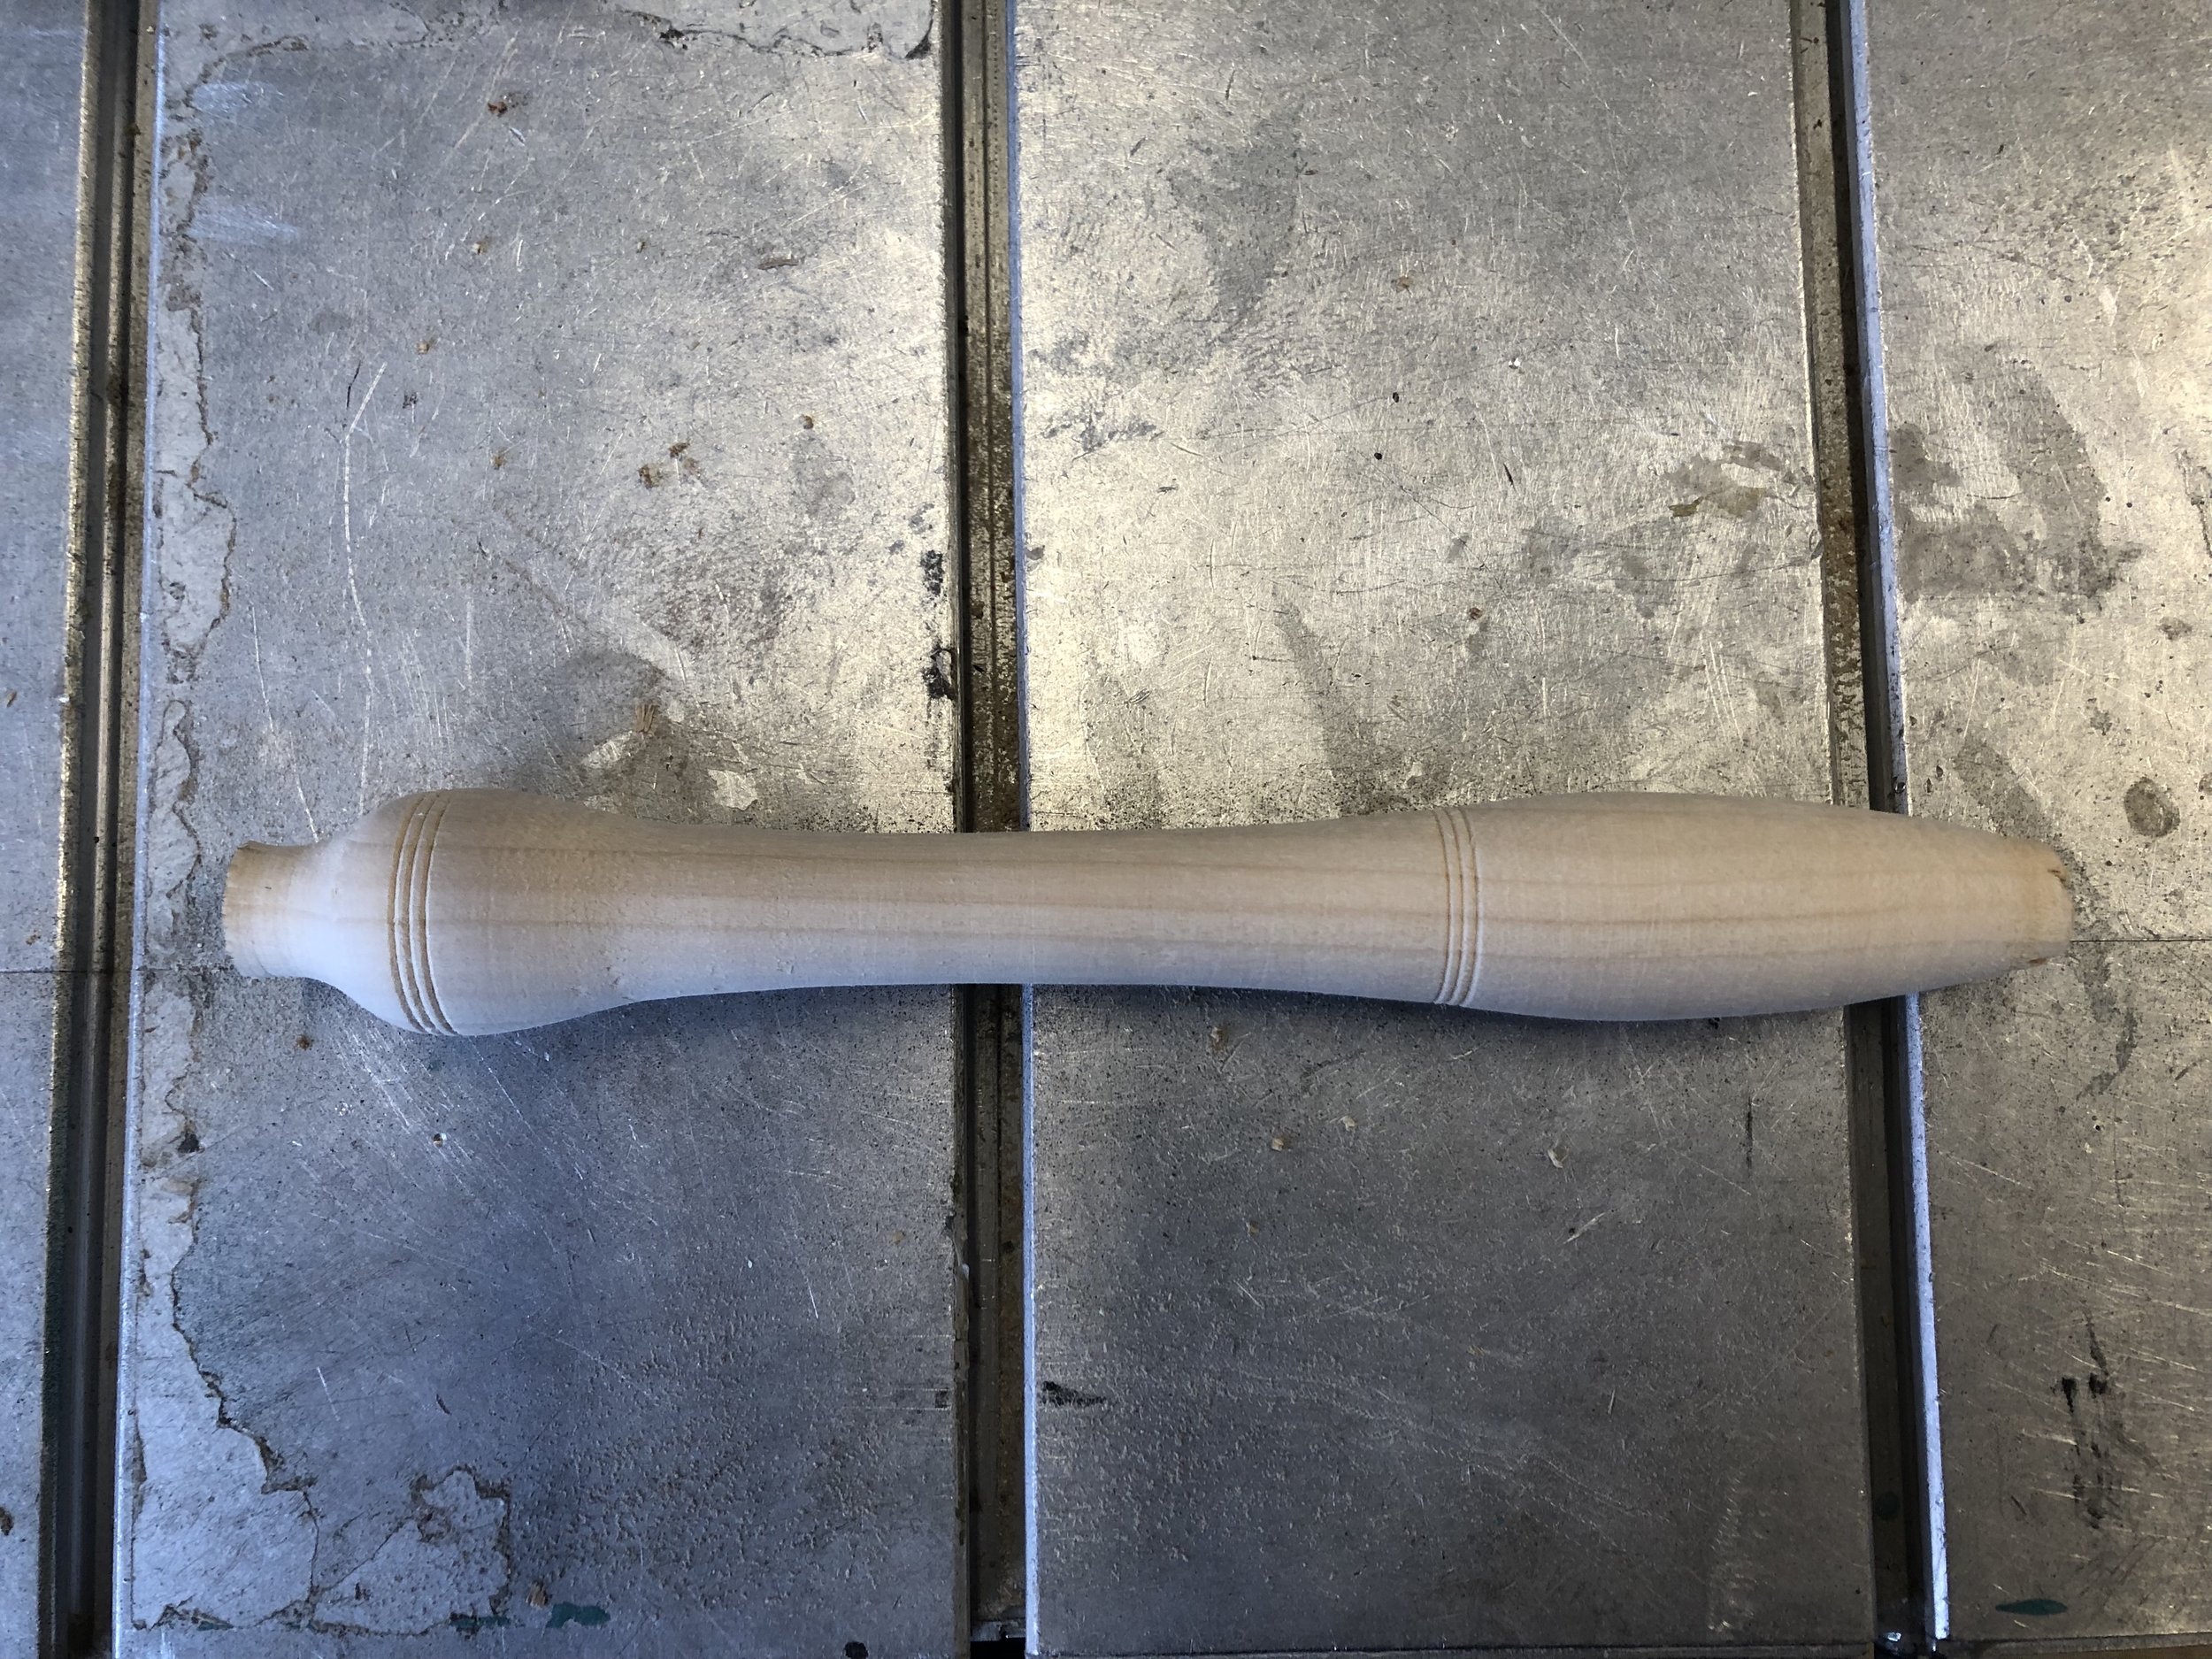
For the final, I decided to make a very low-tech game board for wood lathed tops to spin on. My experience using the wood lathe this semester has been incredible thus far and I very much so have enjoyed learning the process with different types of woods. One morning I woke up and decided that I would make a top. I chose to make this out of Poplar wood because I wanted to see how poplar turned and wanted to make something that I could fidget with that was not plastic. I also liked the natural greens that were in the wood and thought I’d try it out.

IMG_2753.jpg IMG_2754.jpg IMG_2755.jpg IMG_2756.jpg IMG_2760.jpg

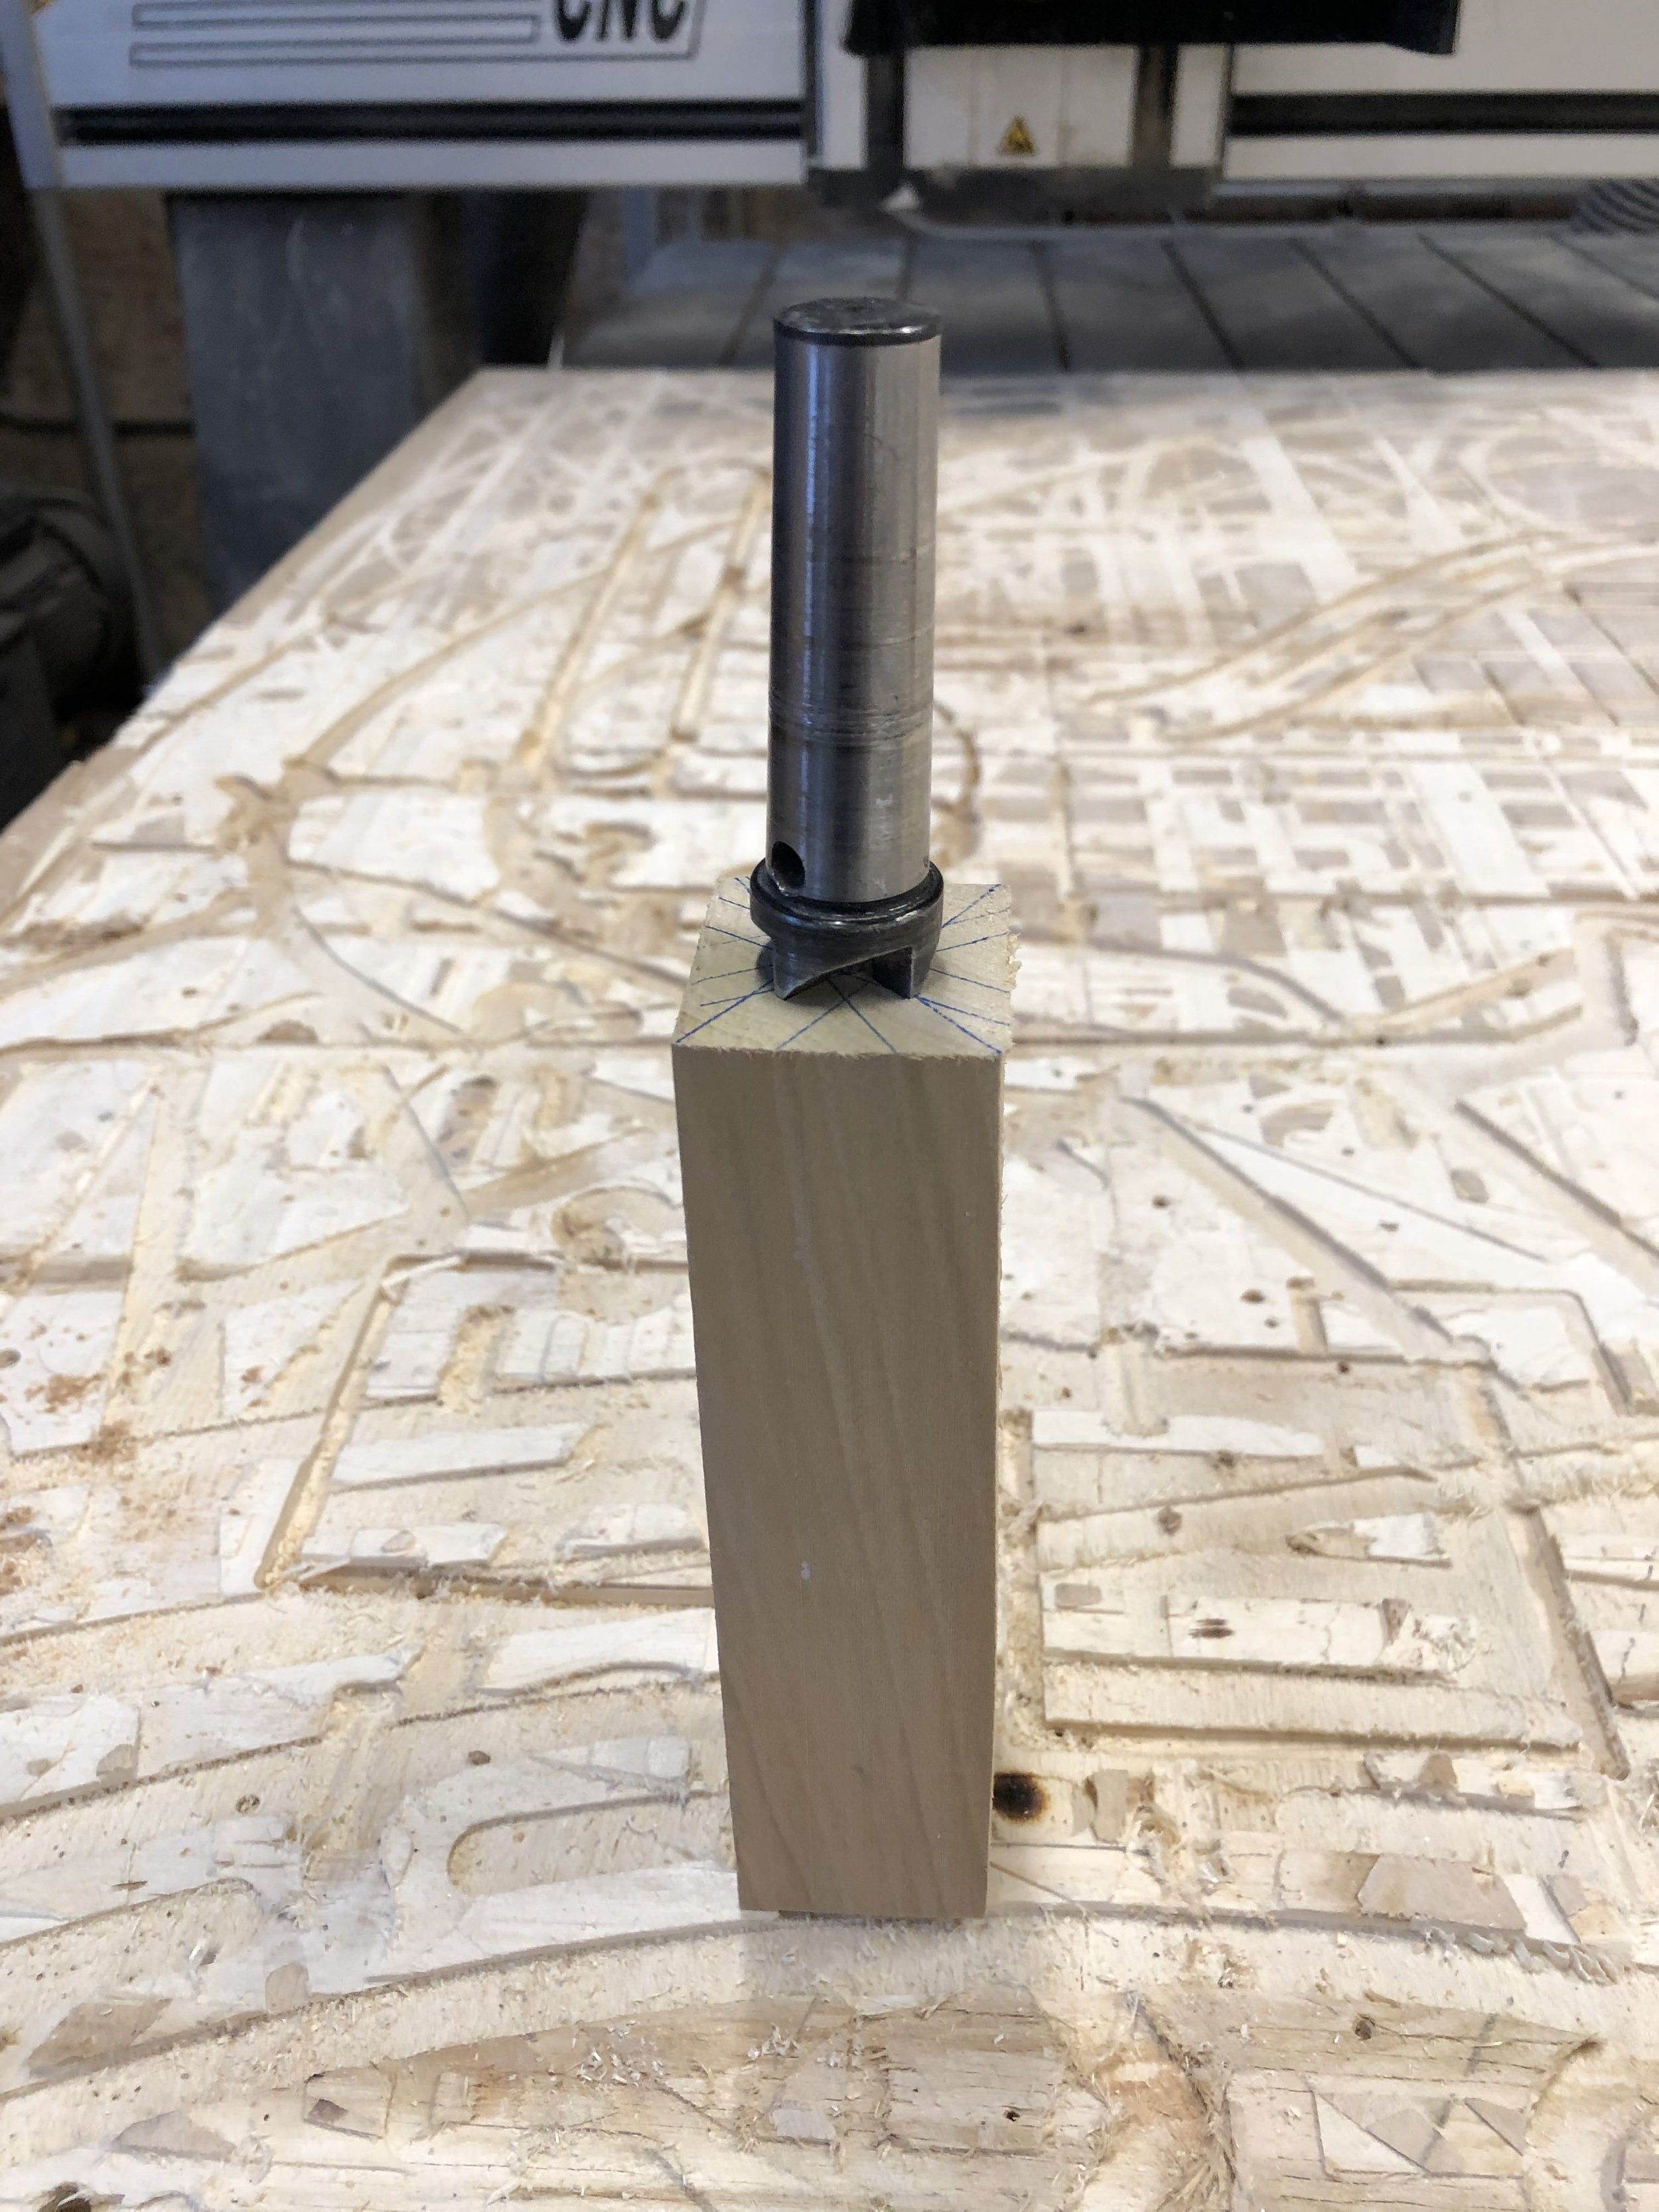
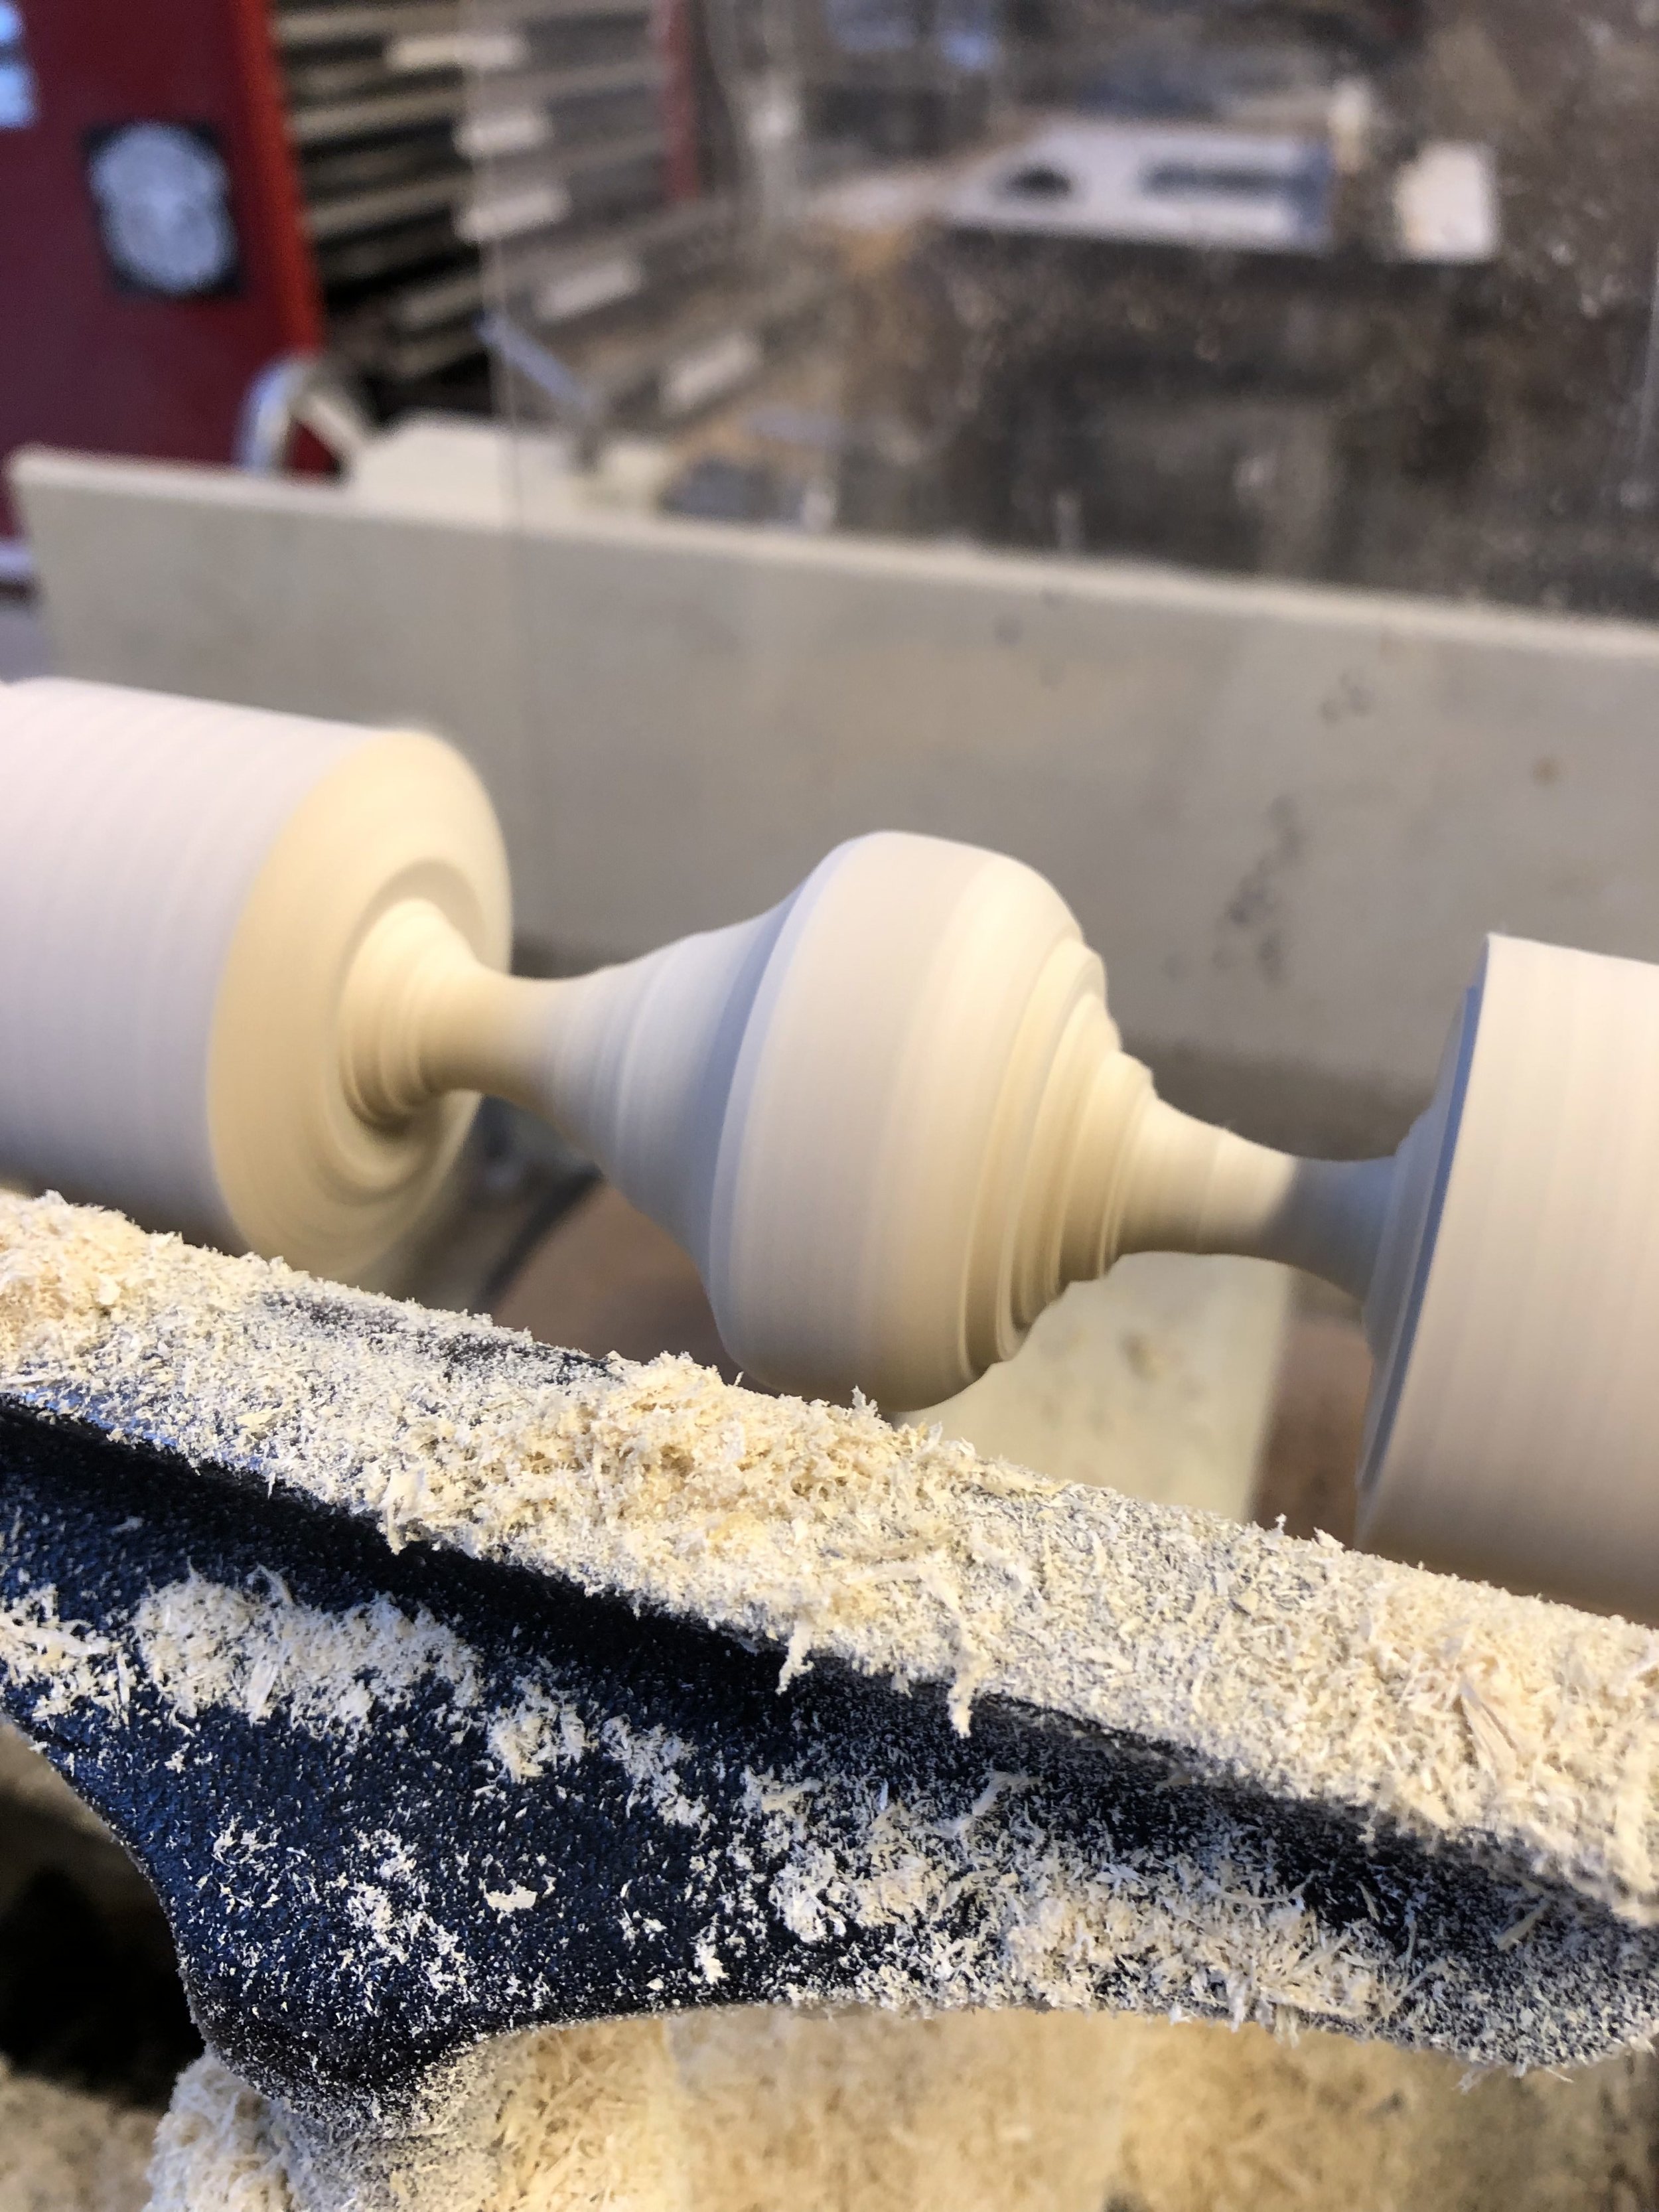
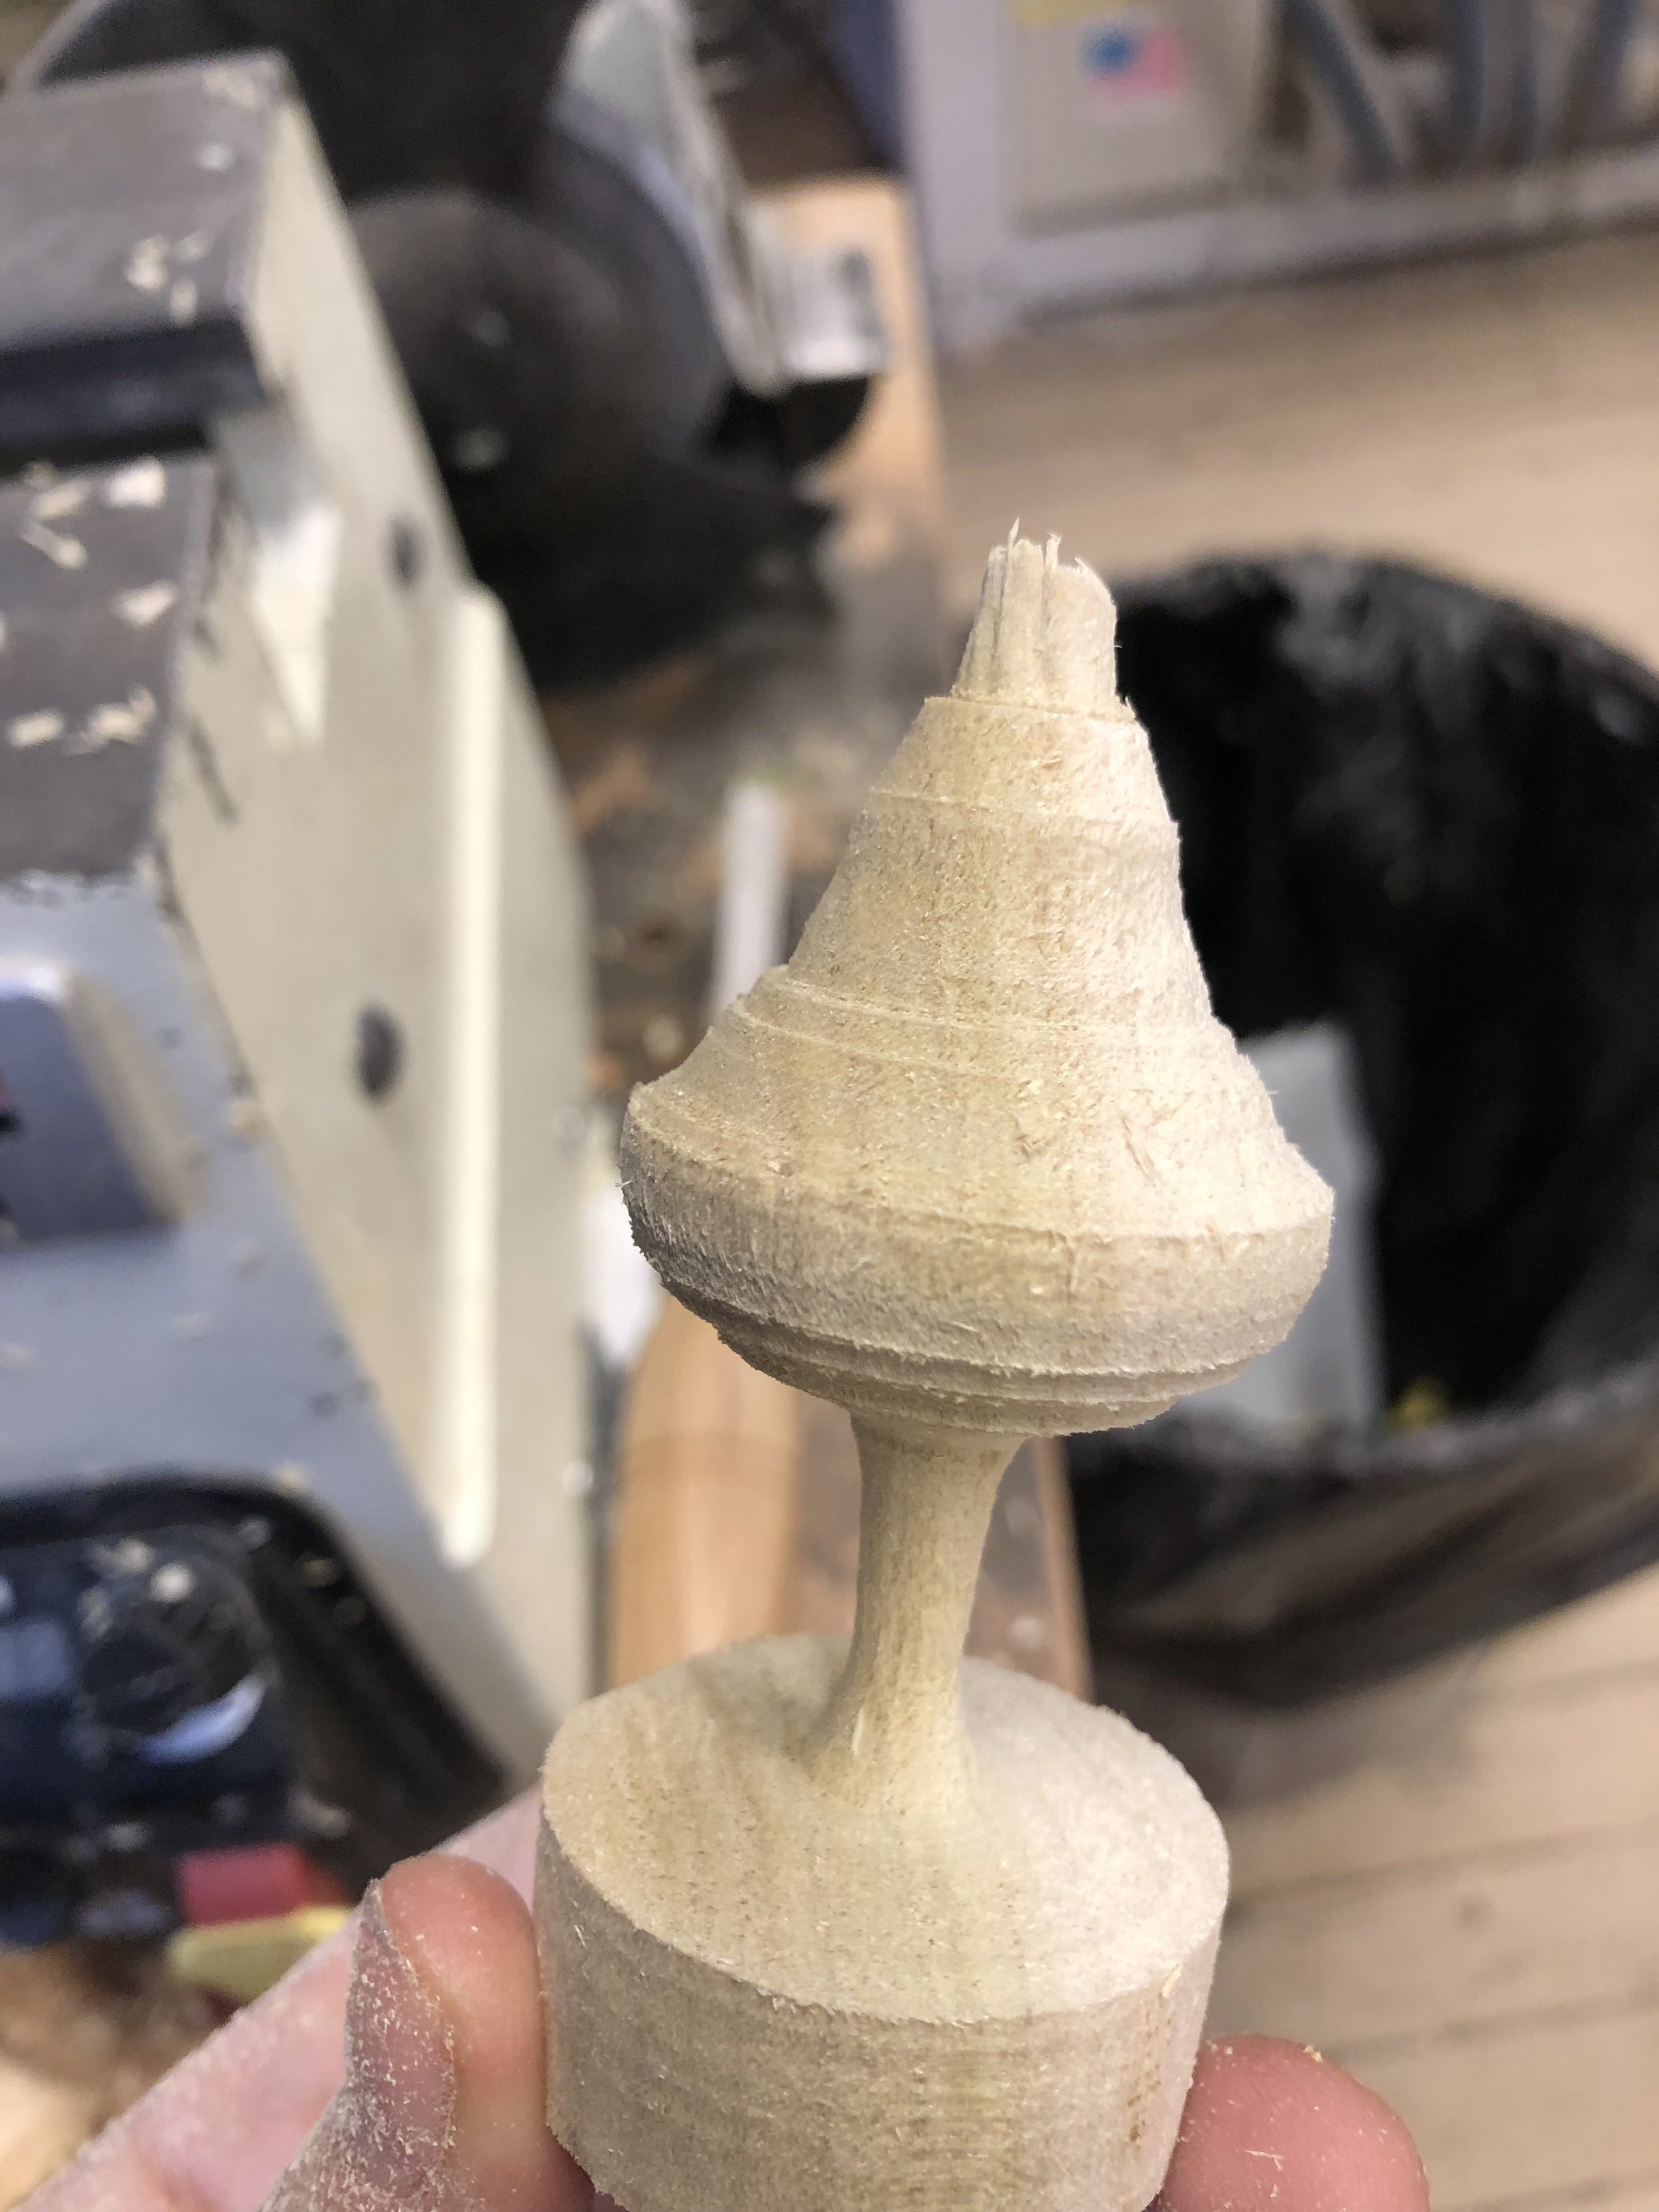
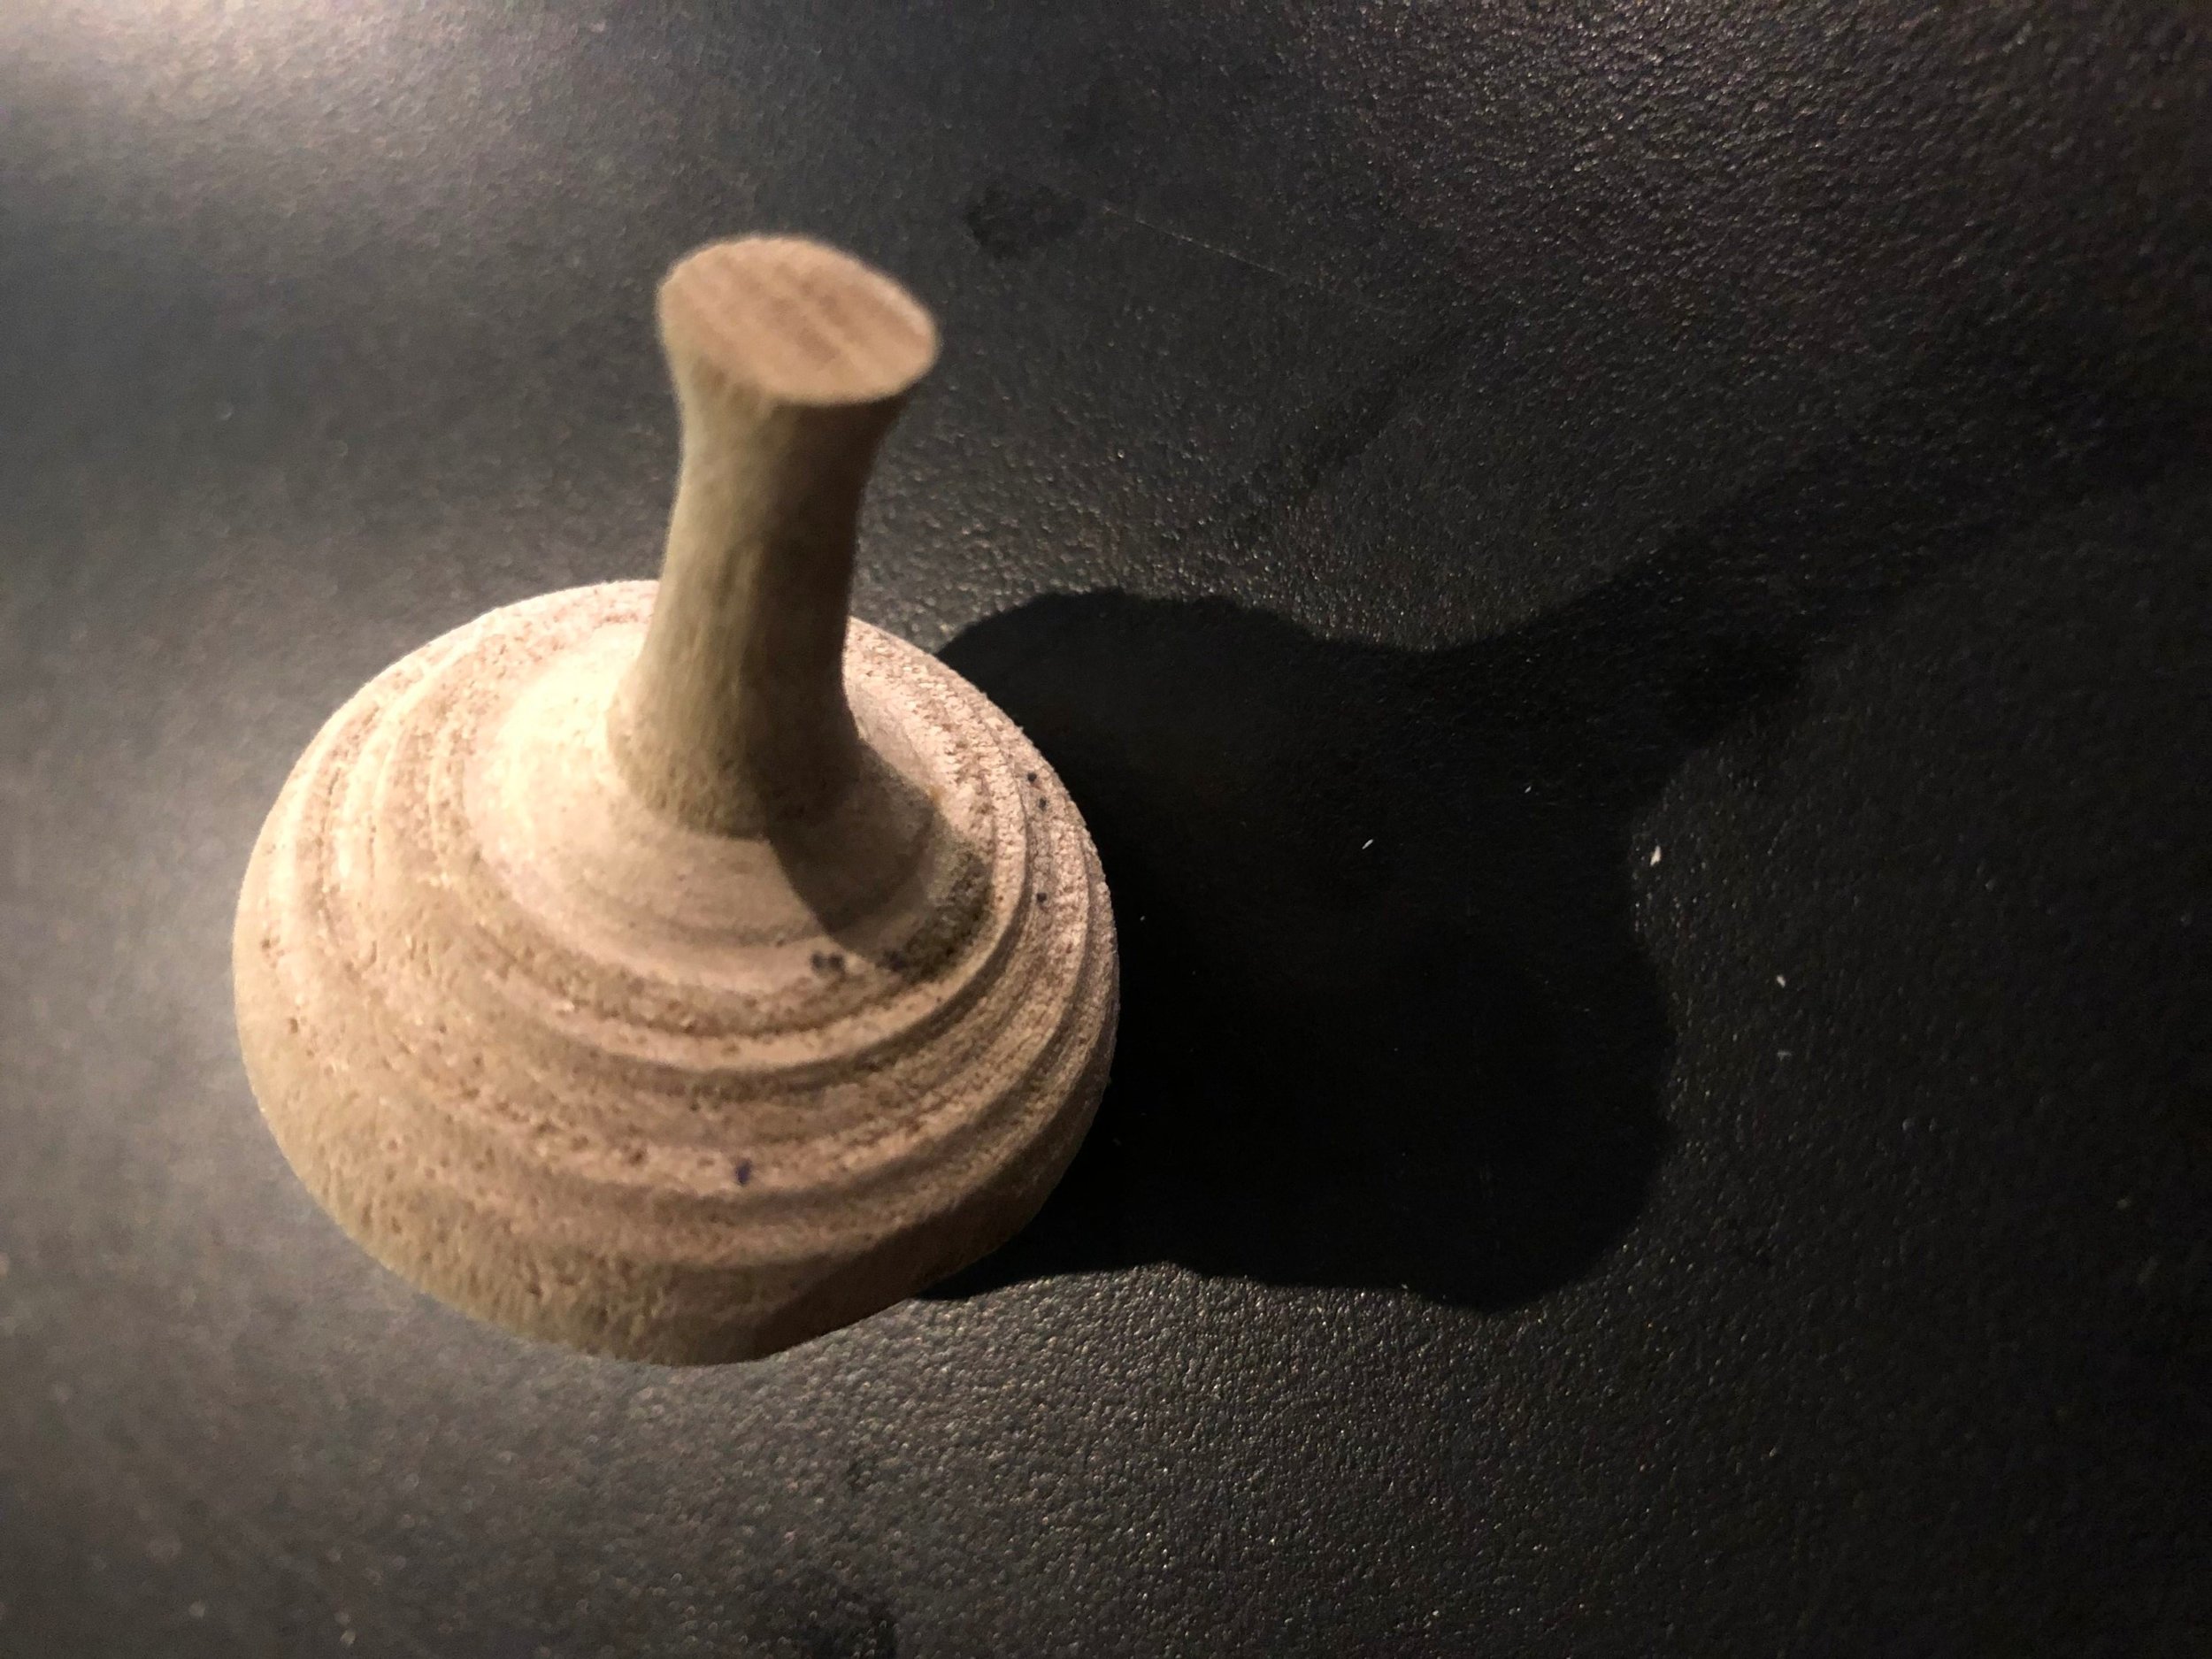
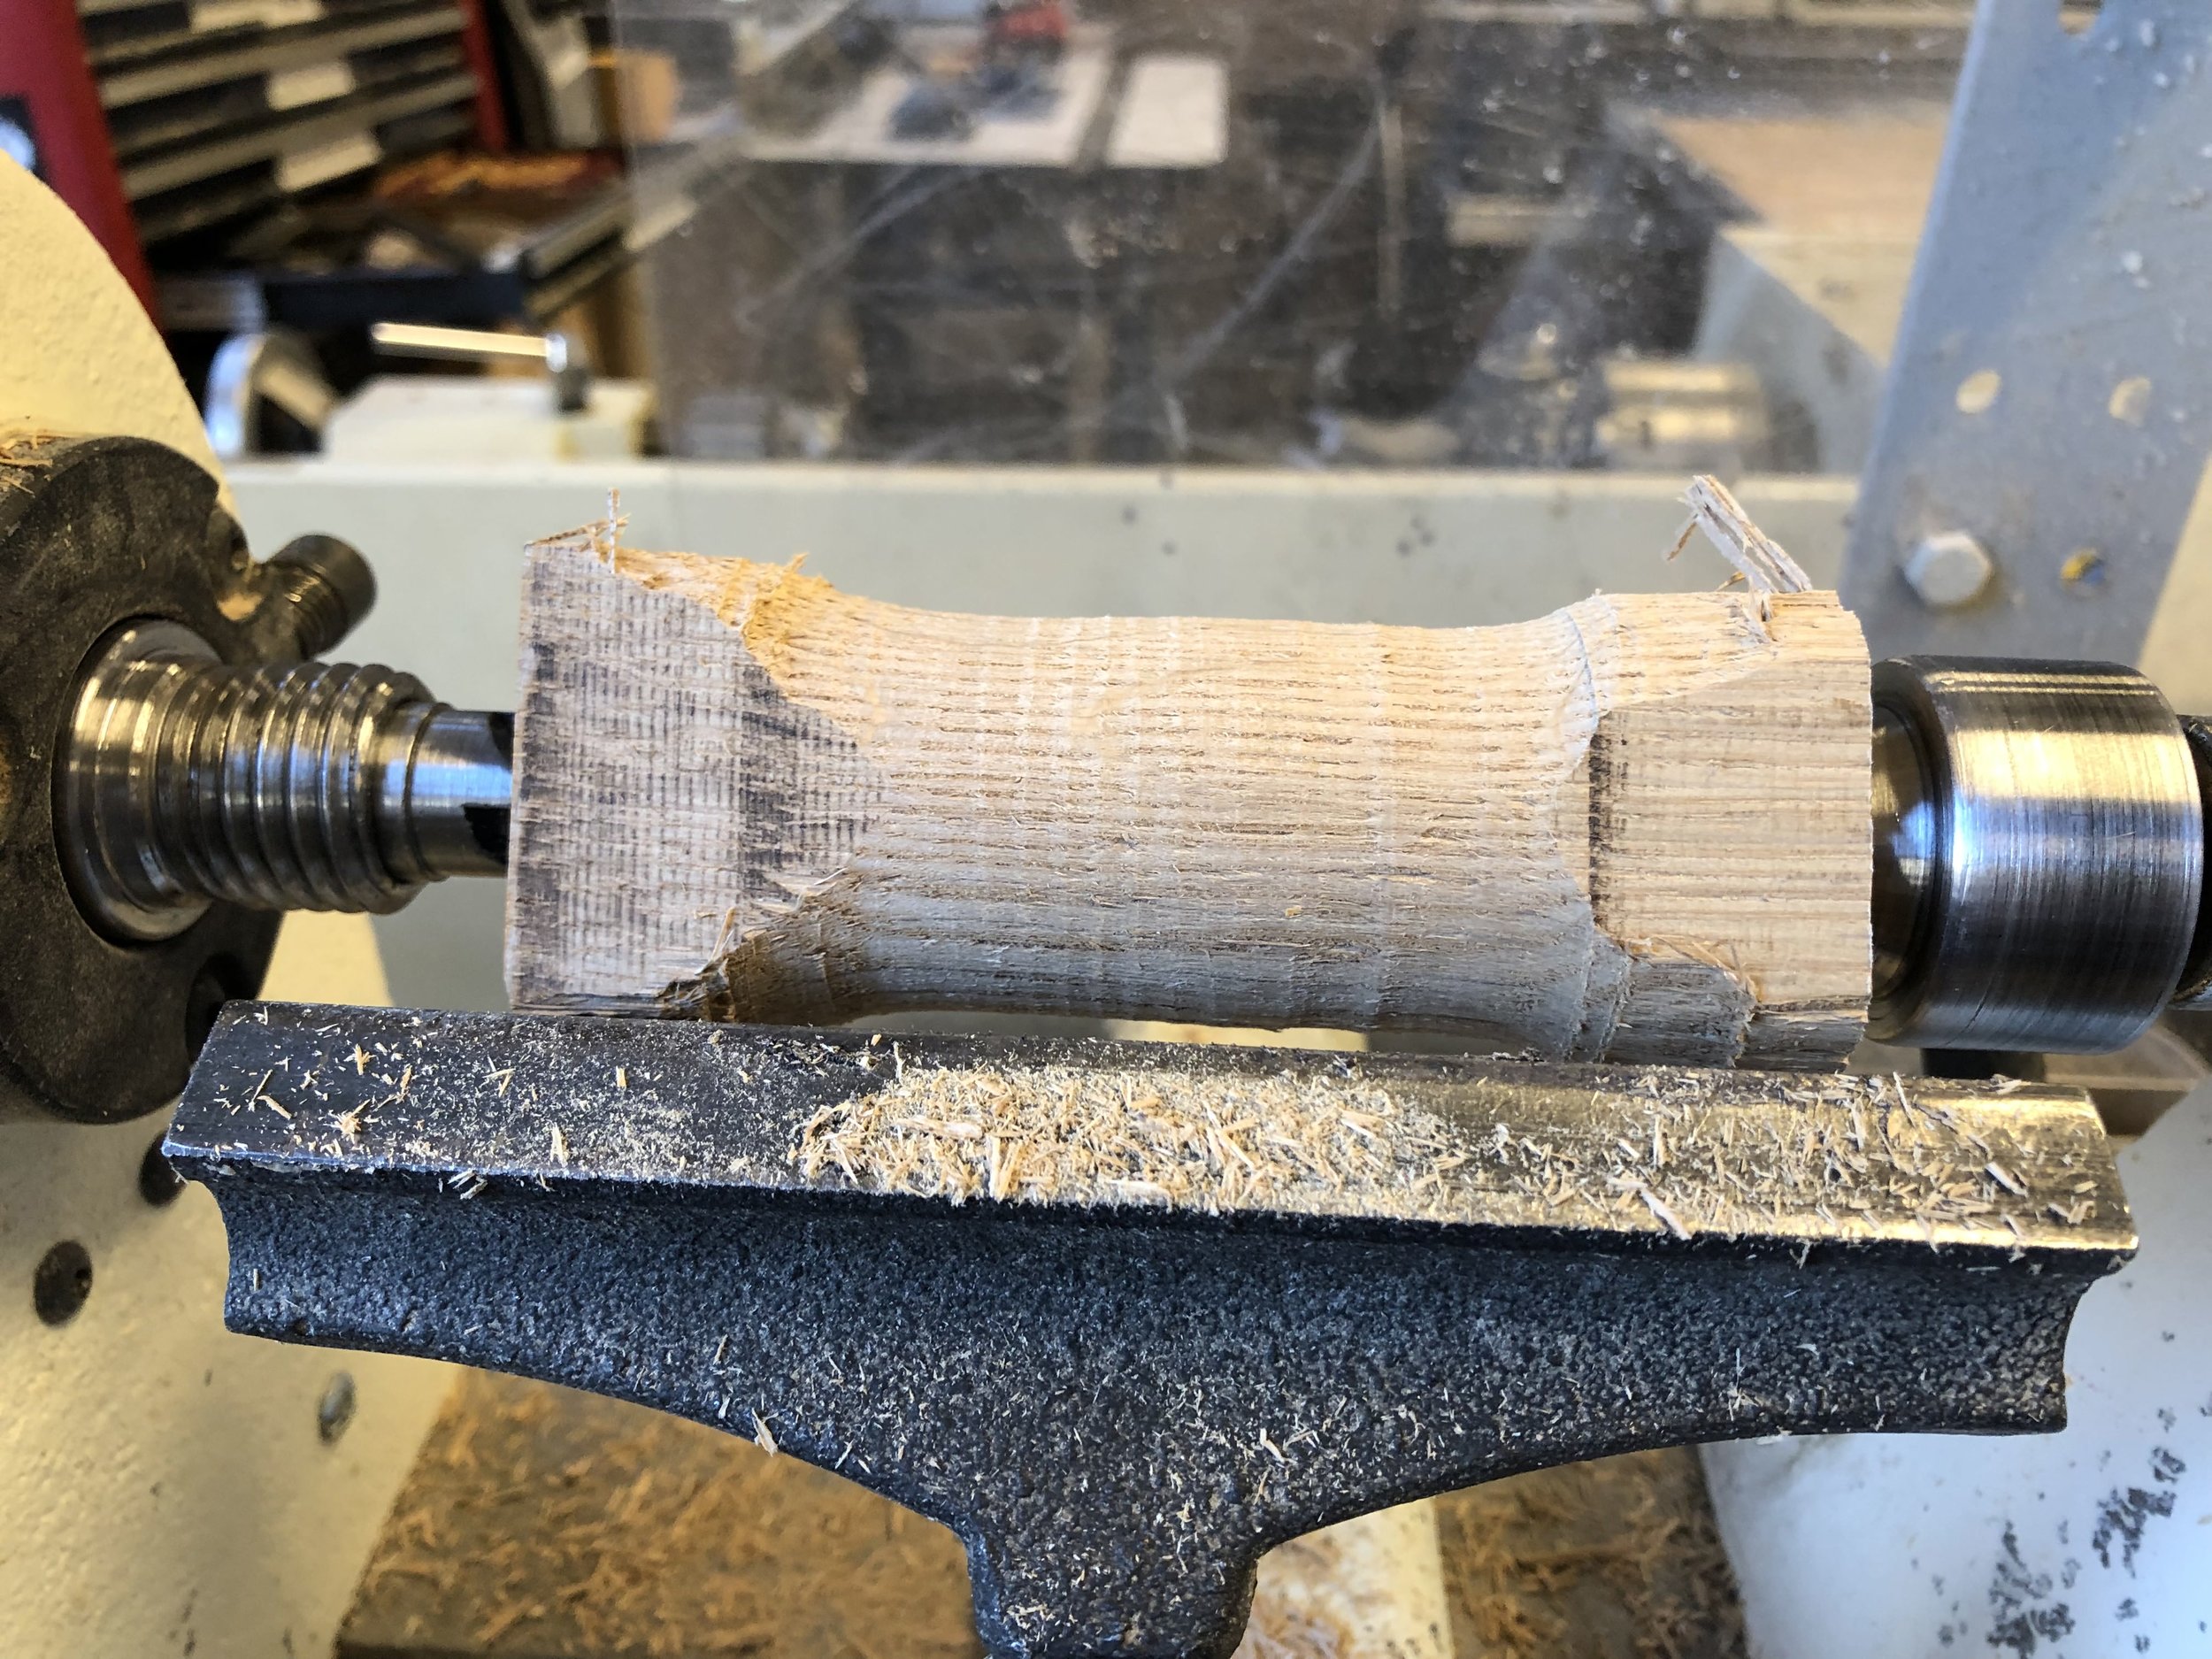
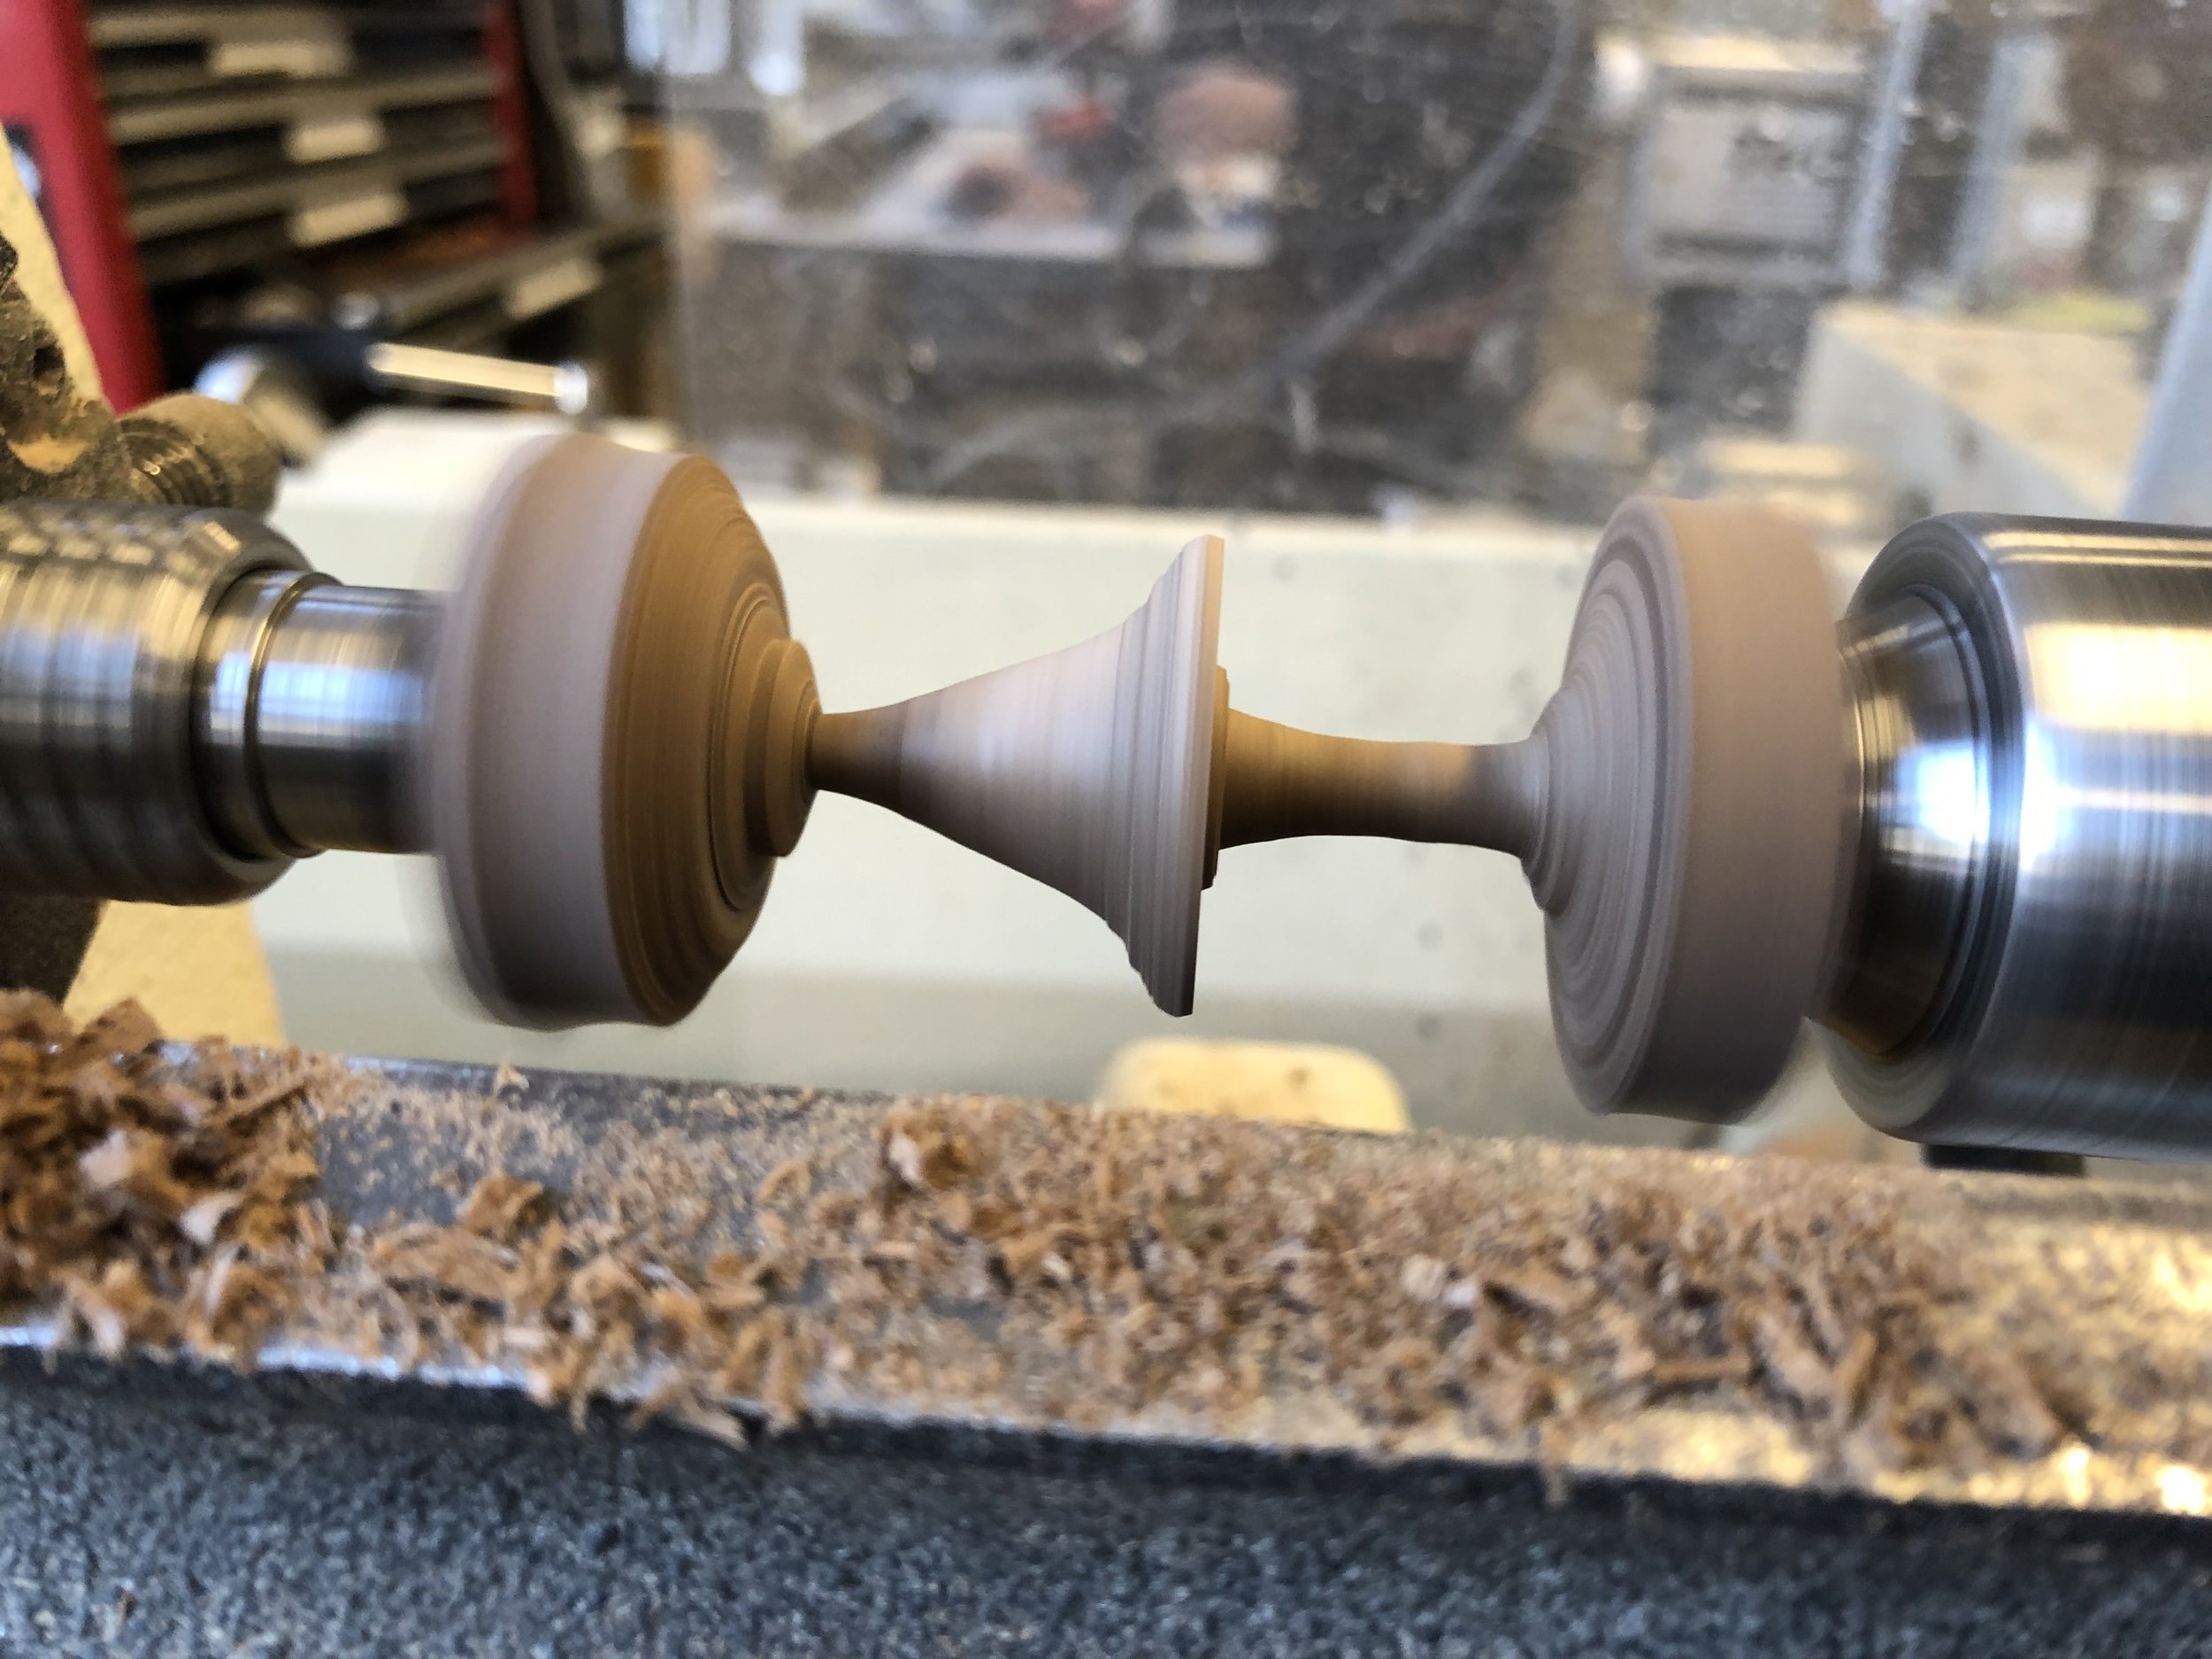
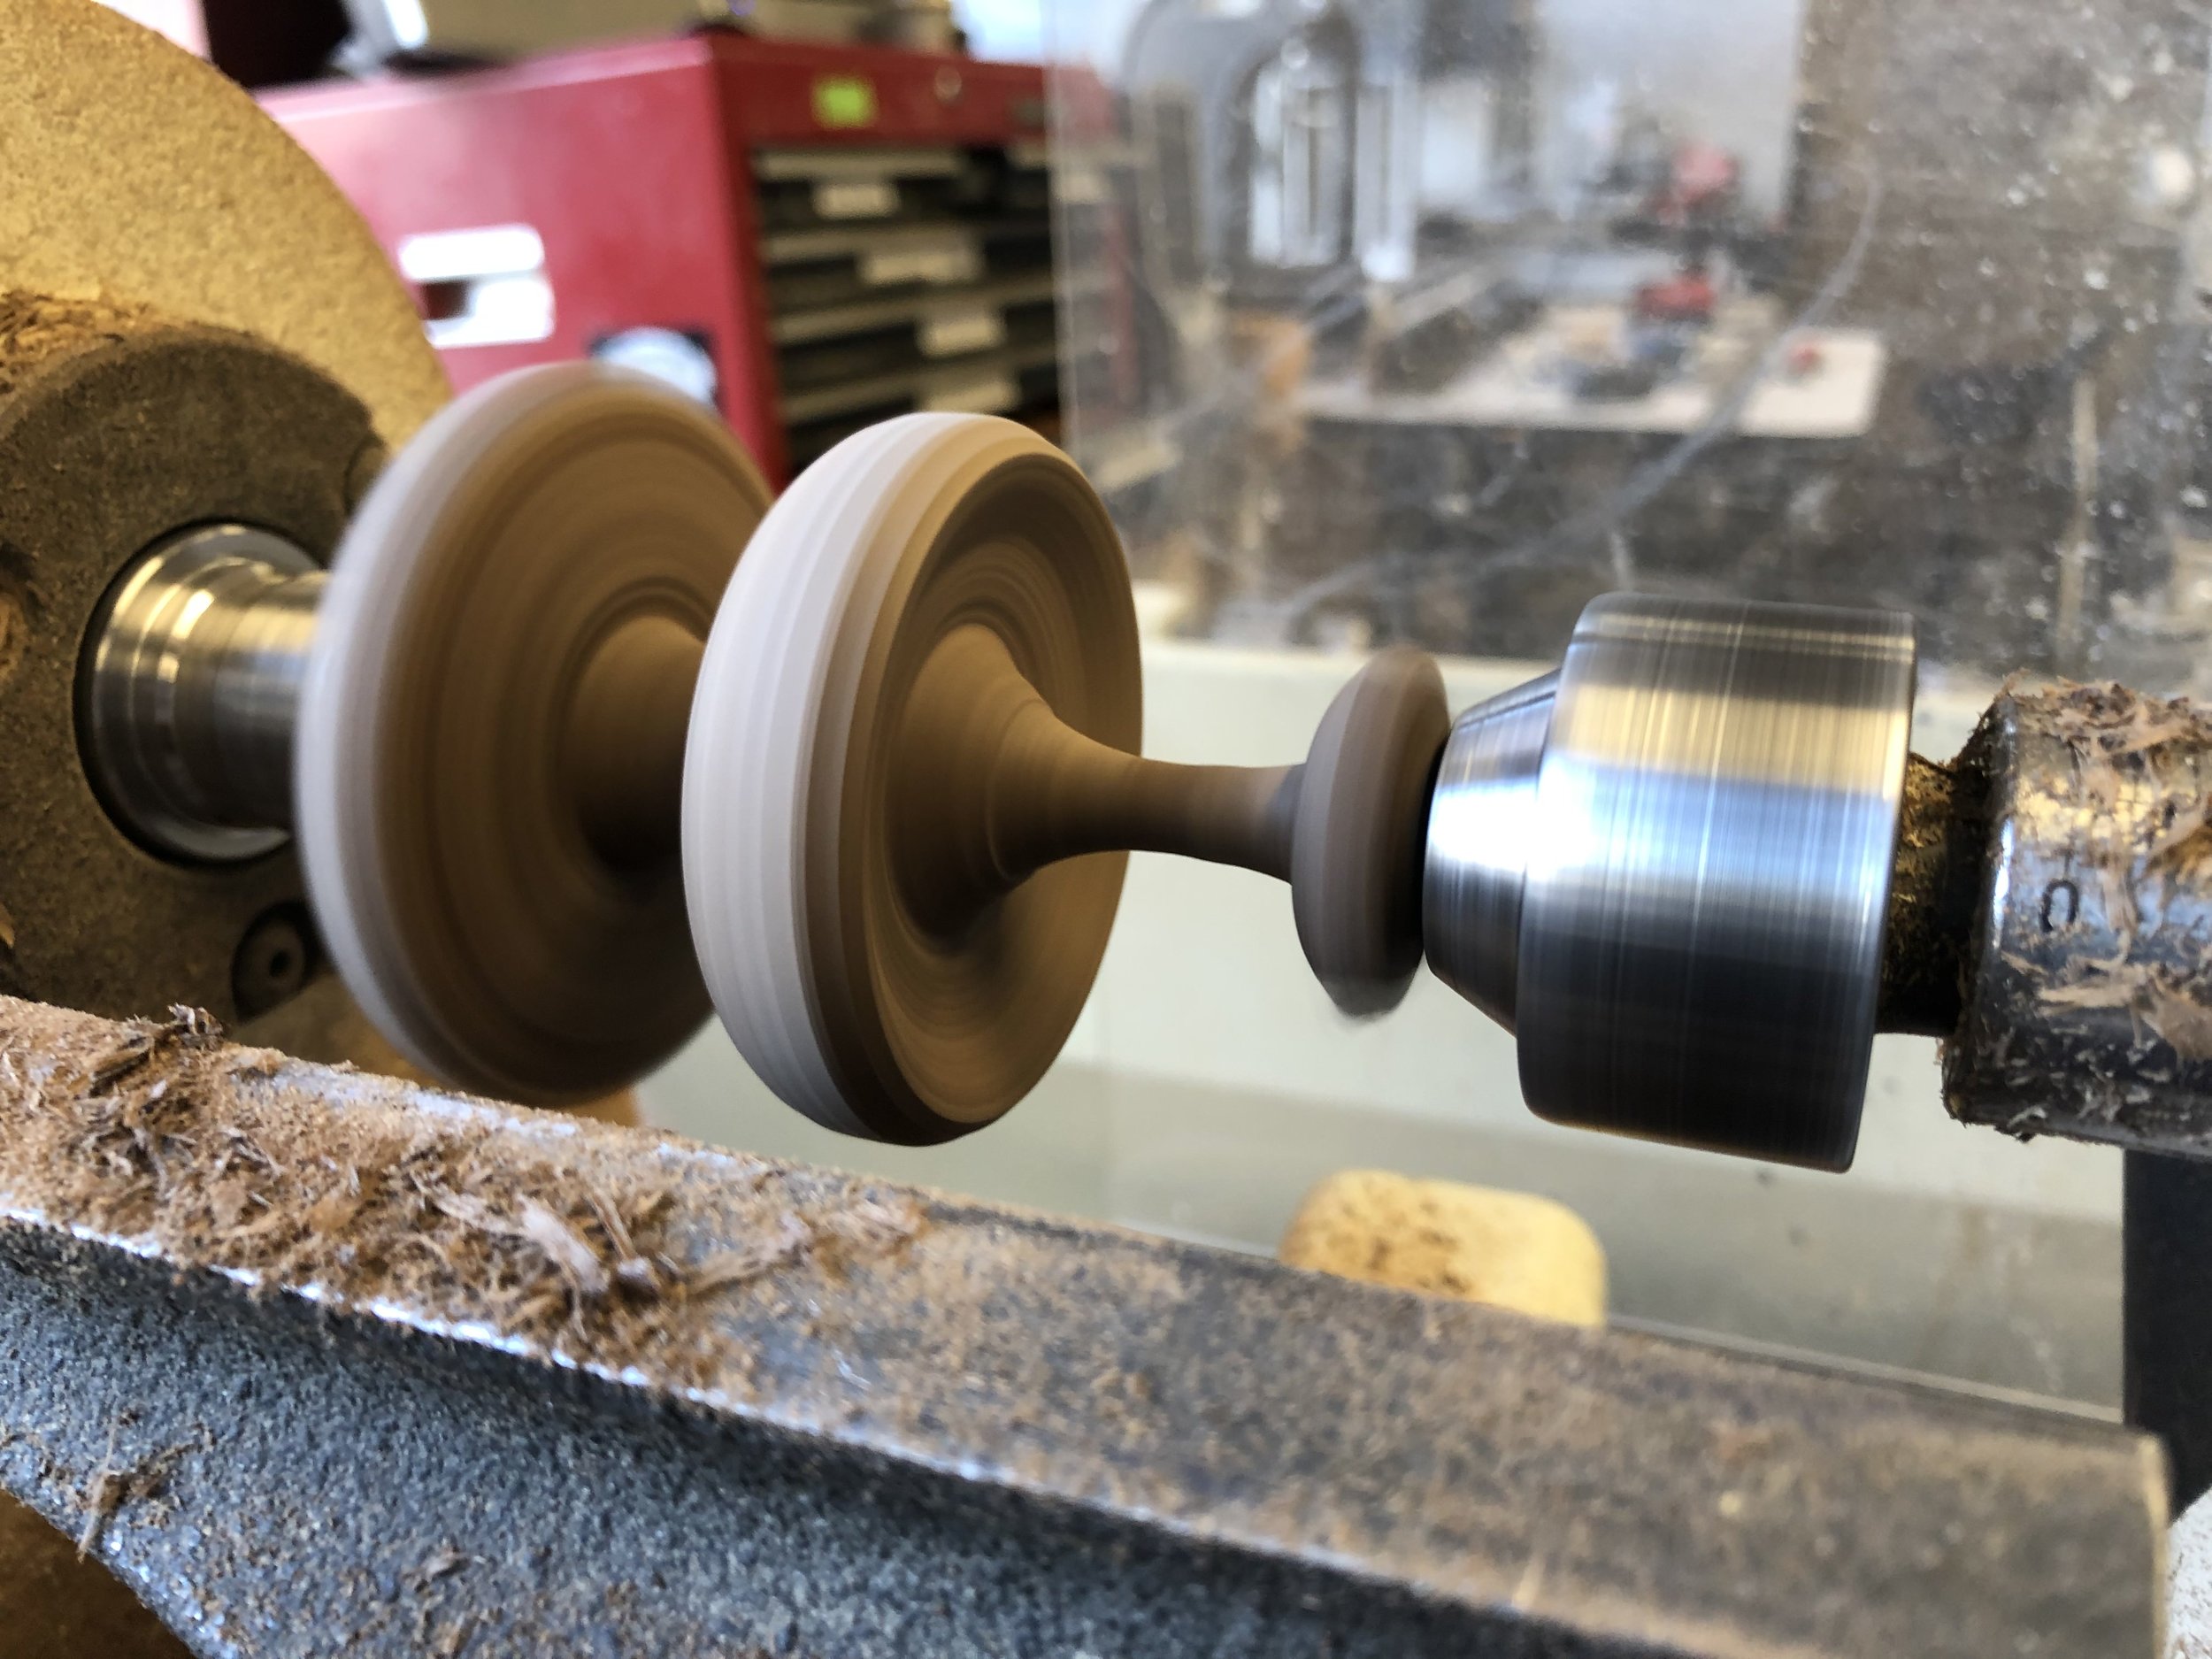
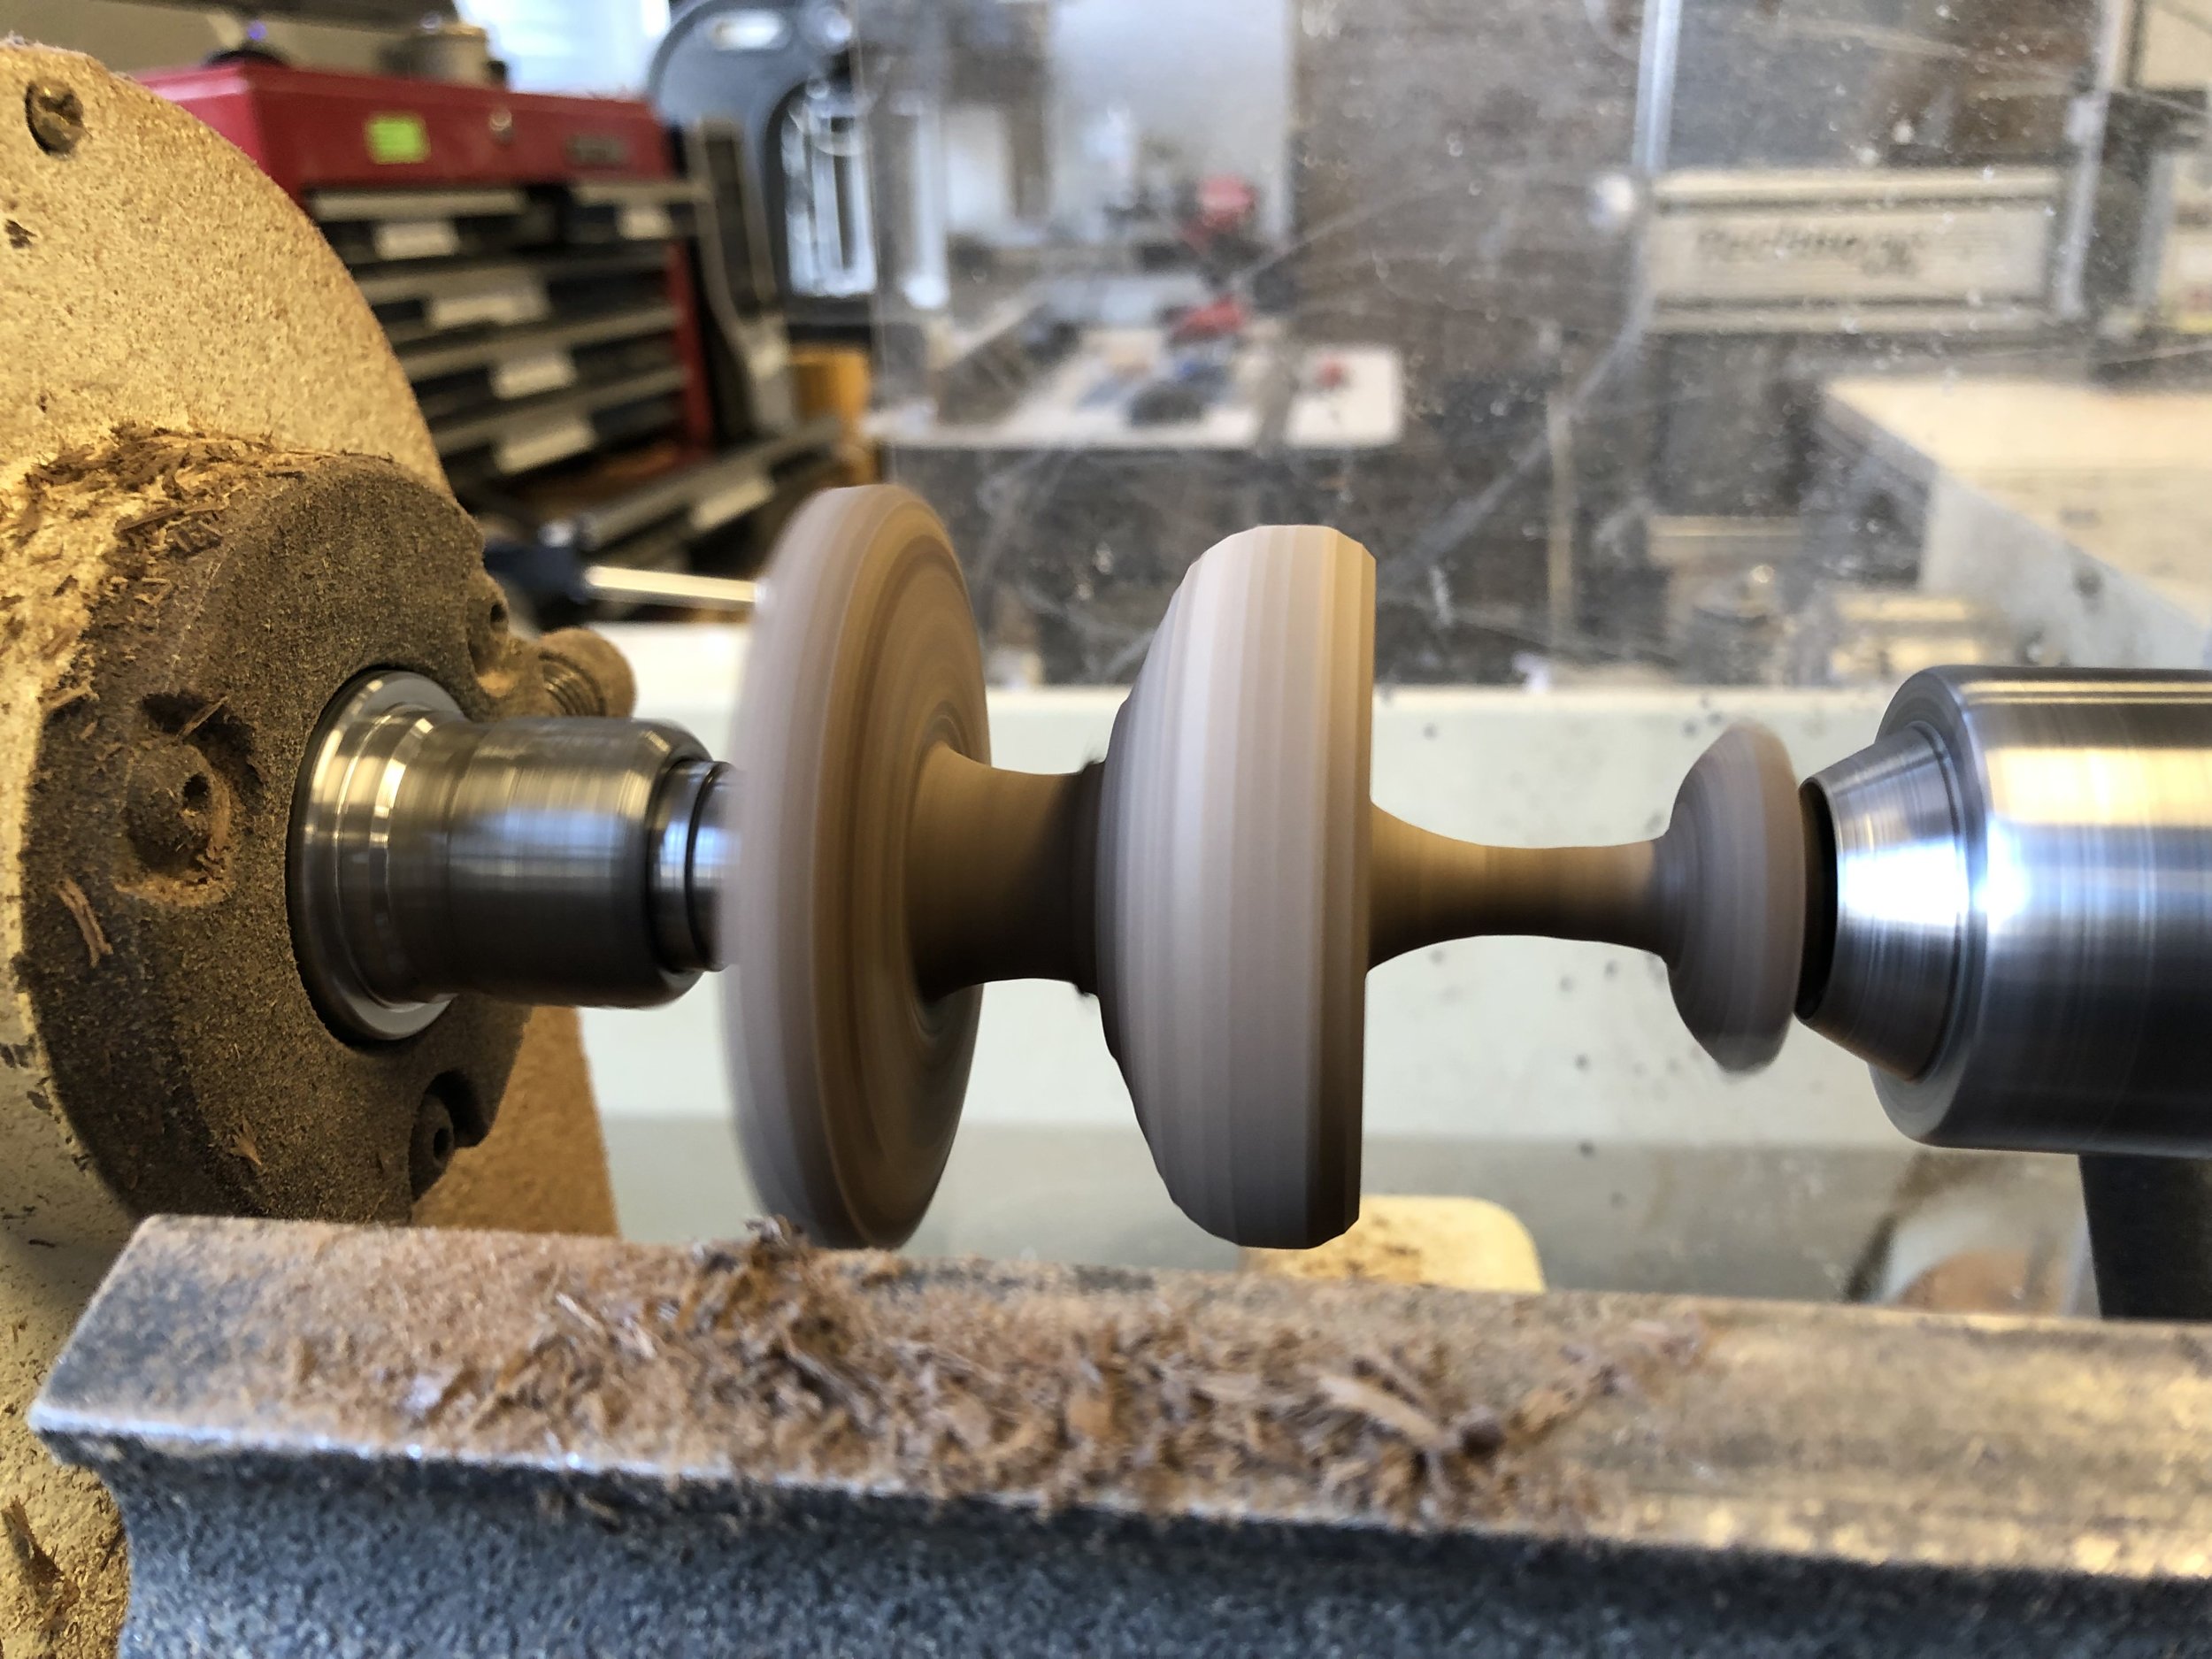
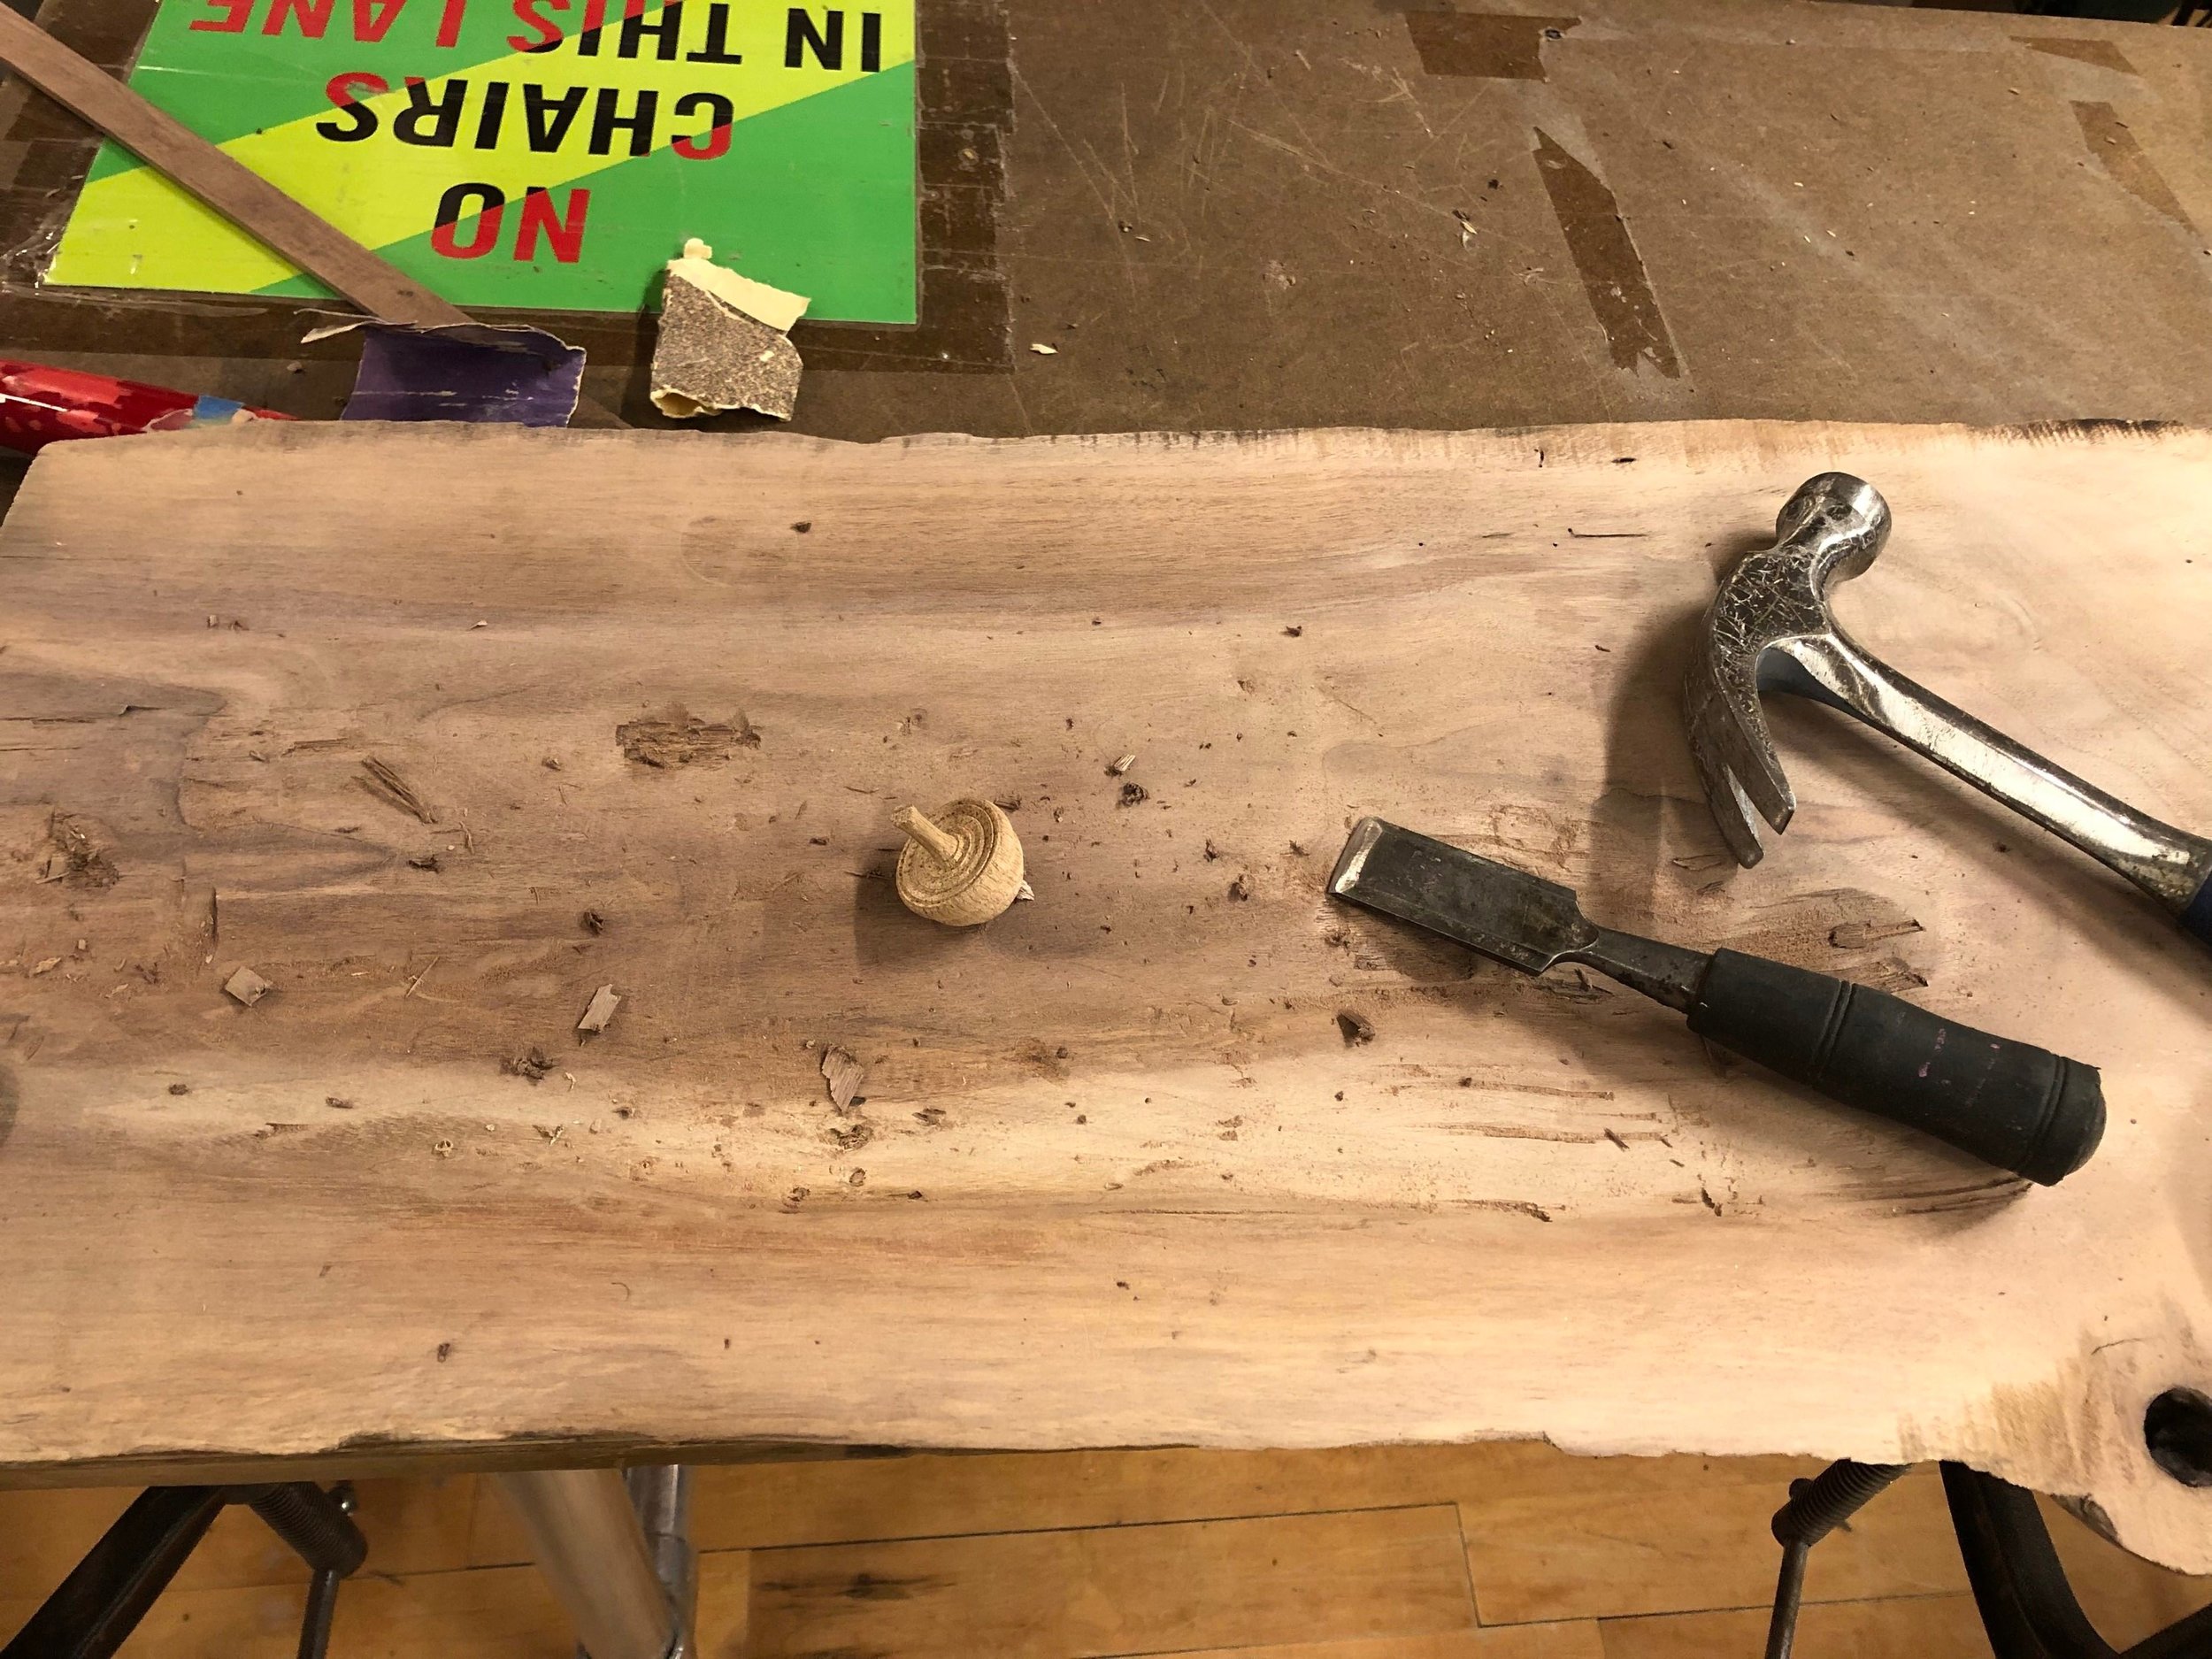
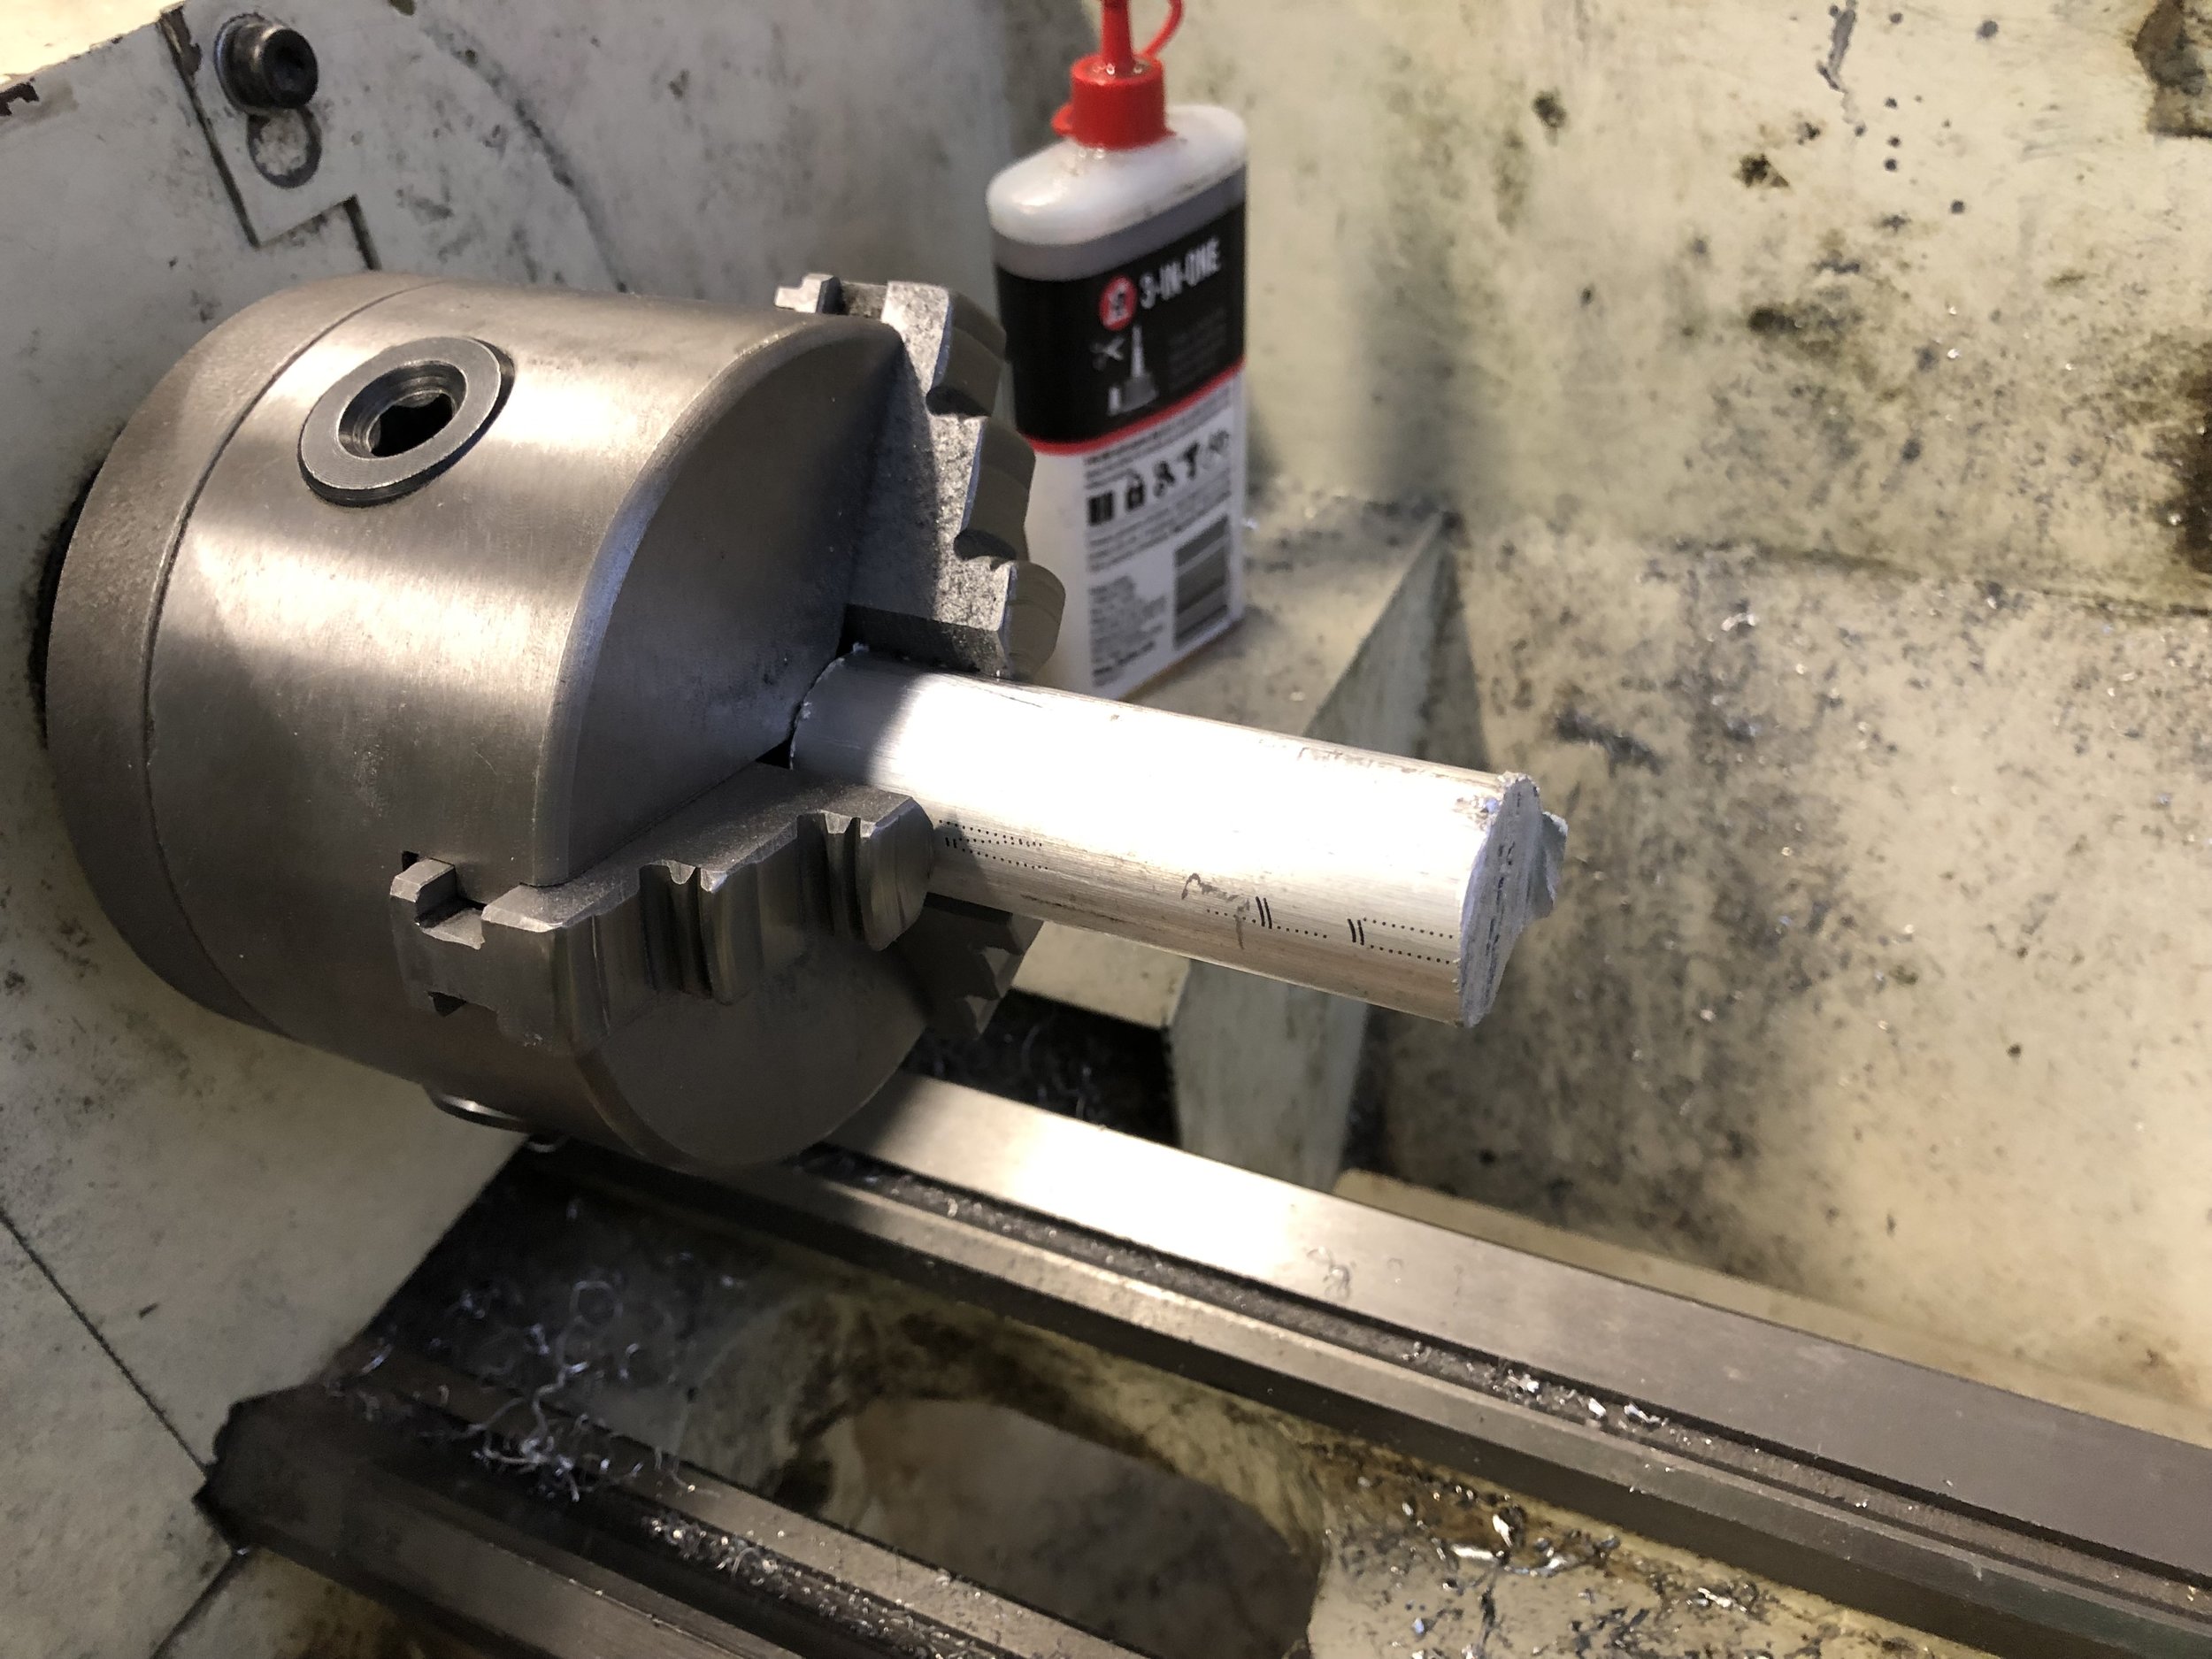
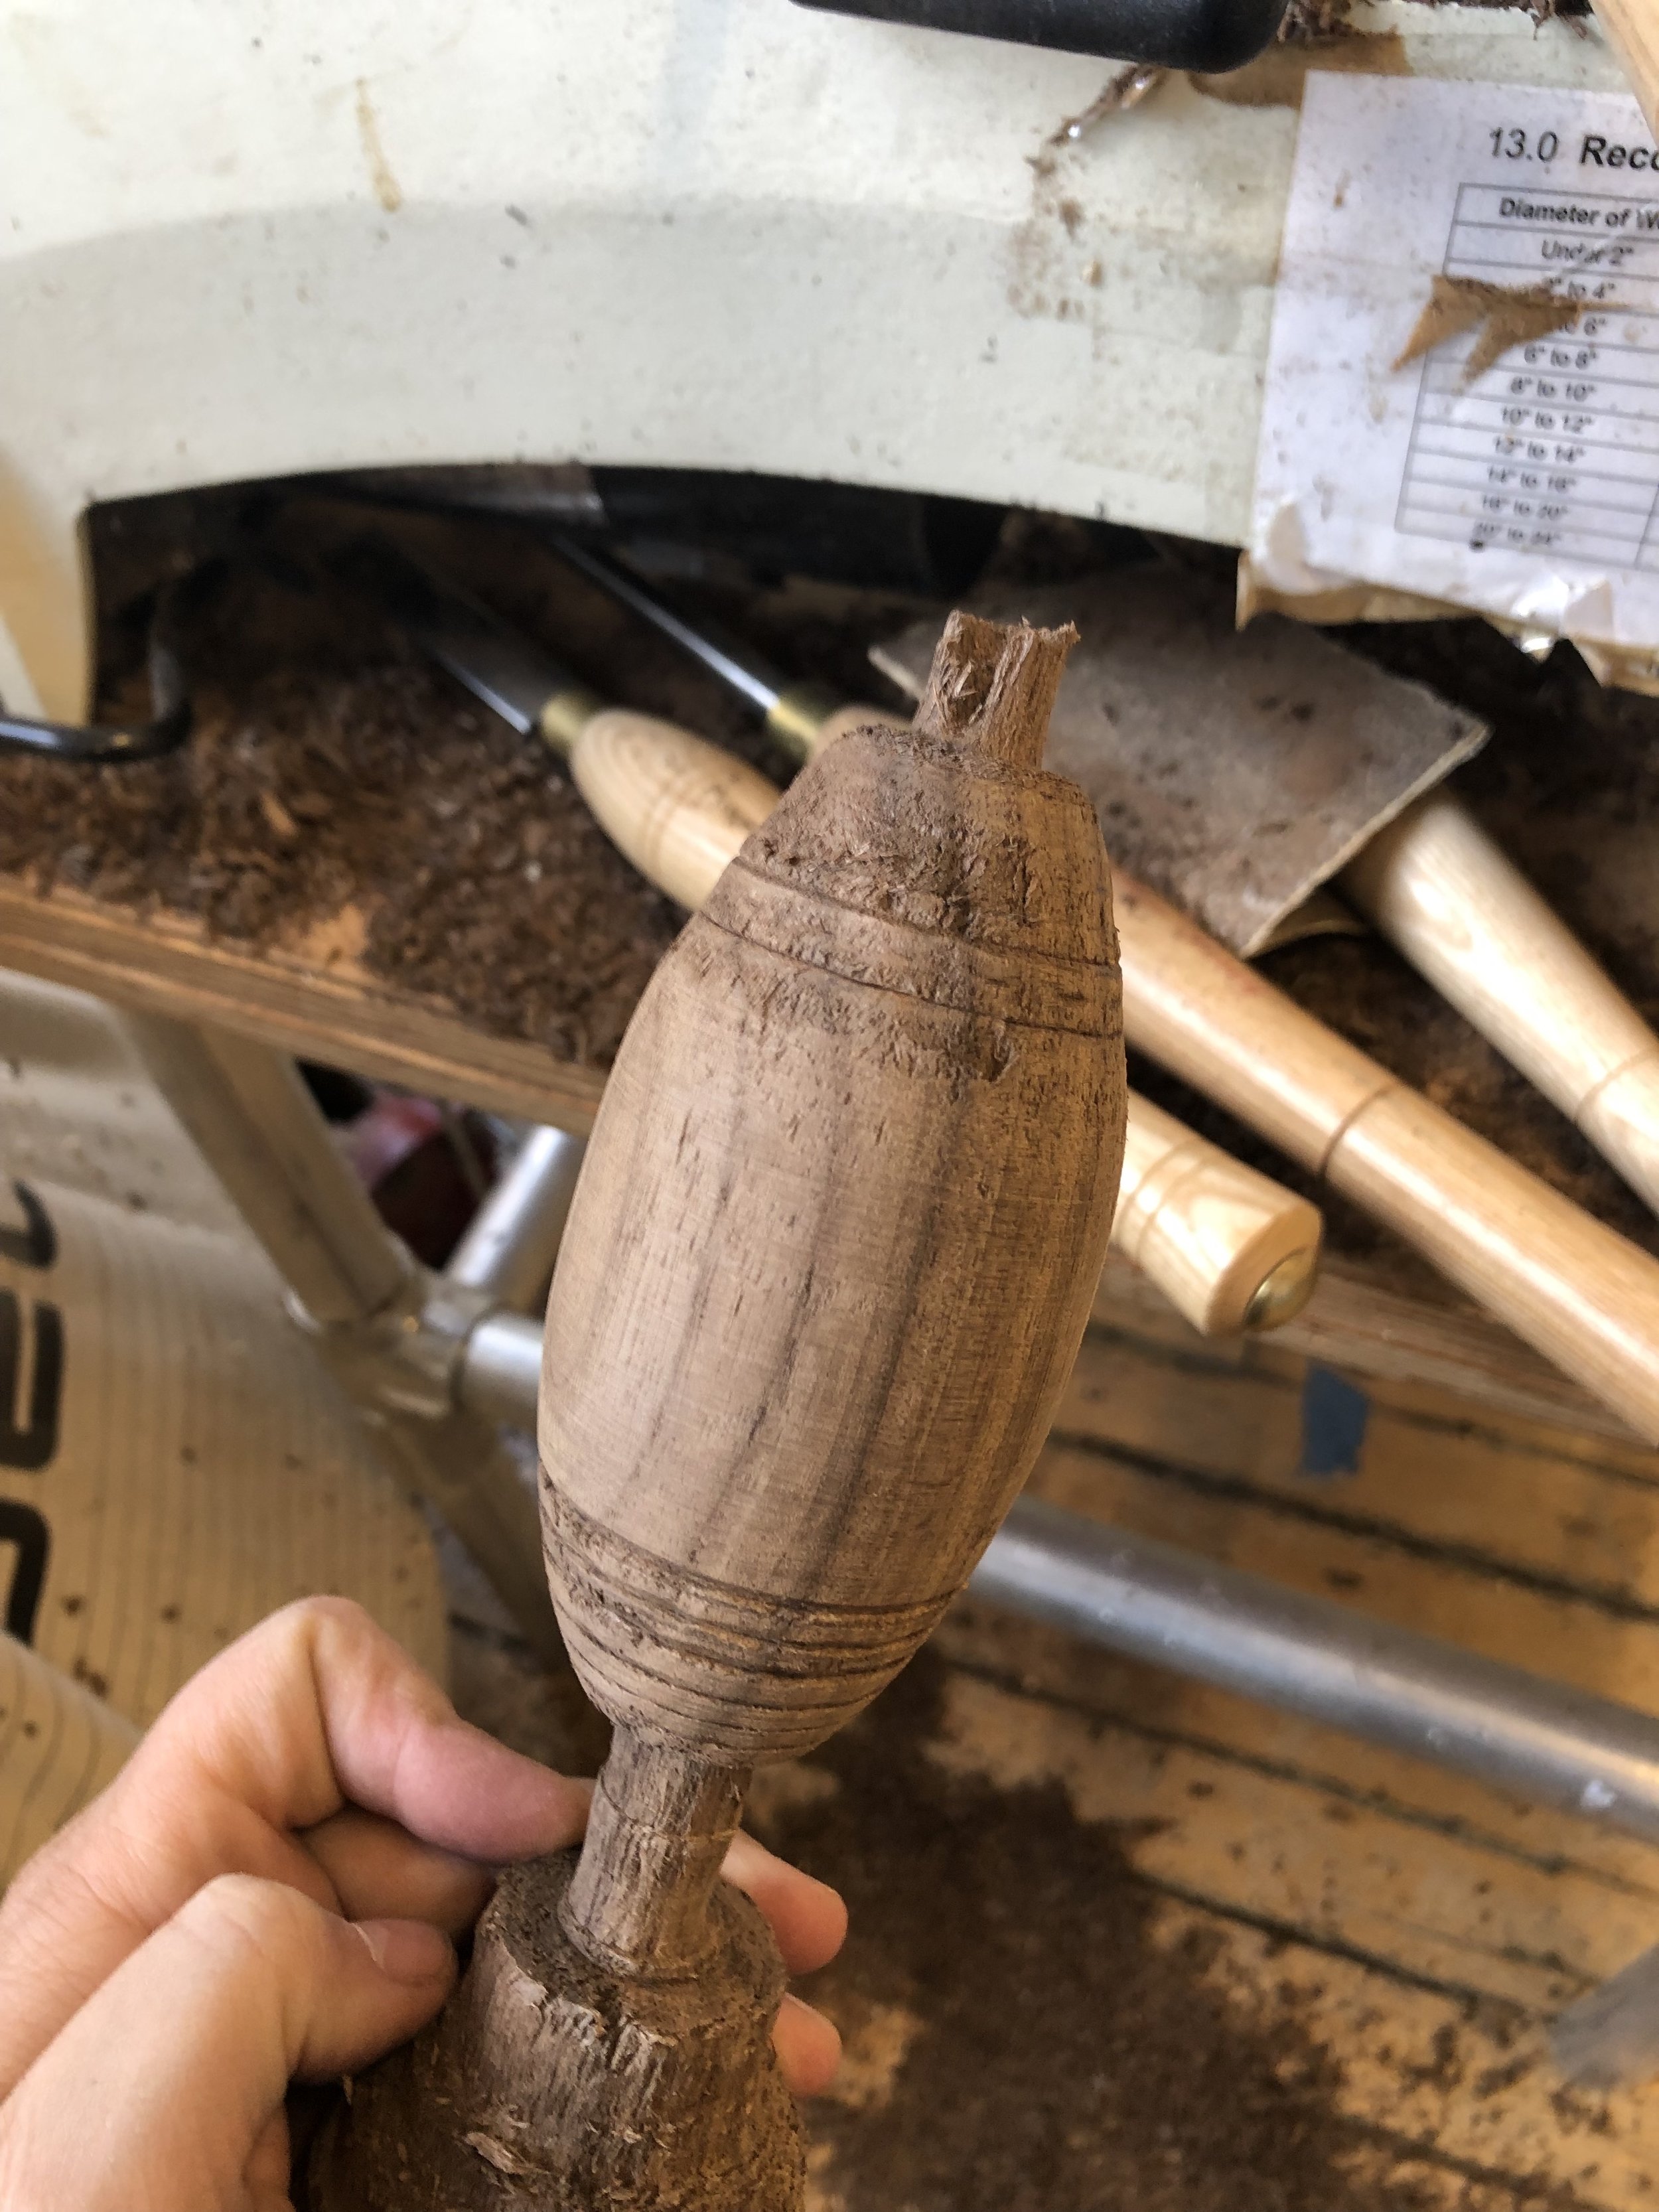
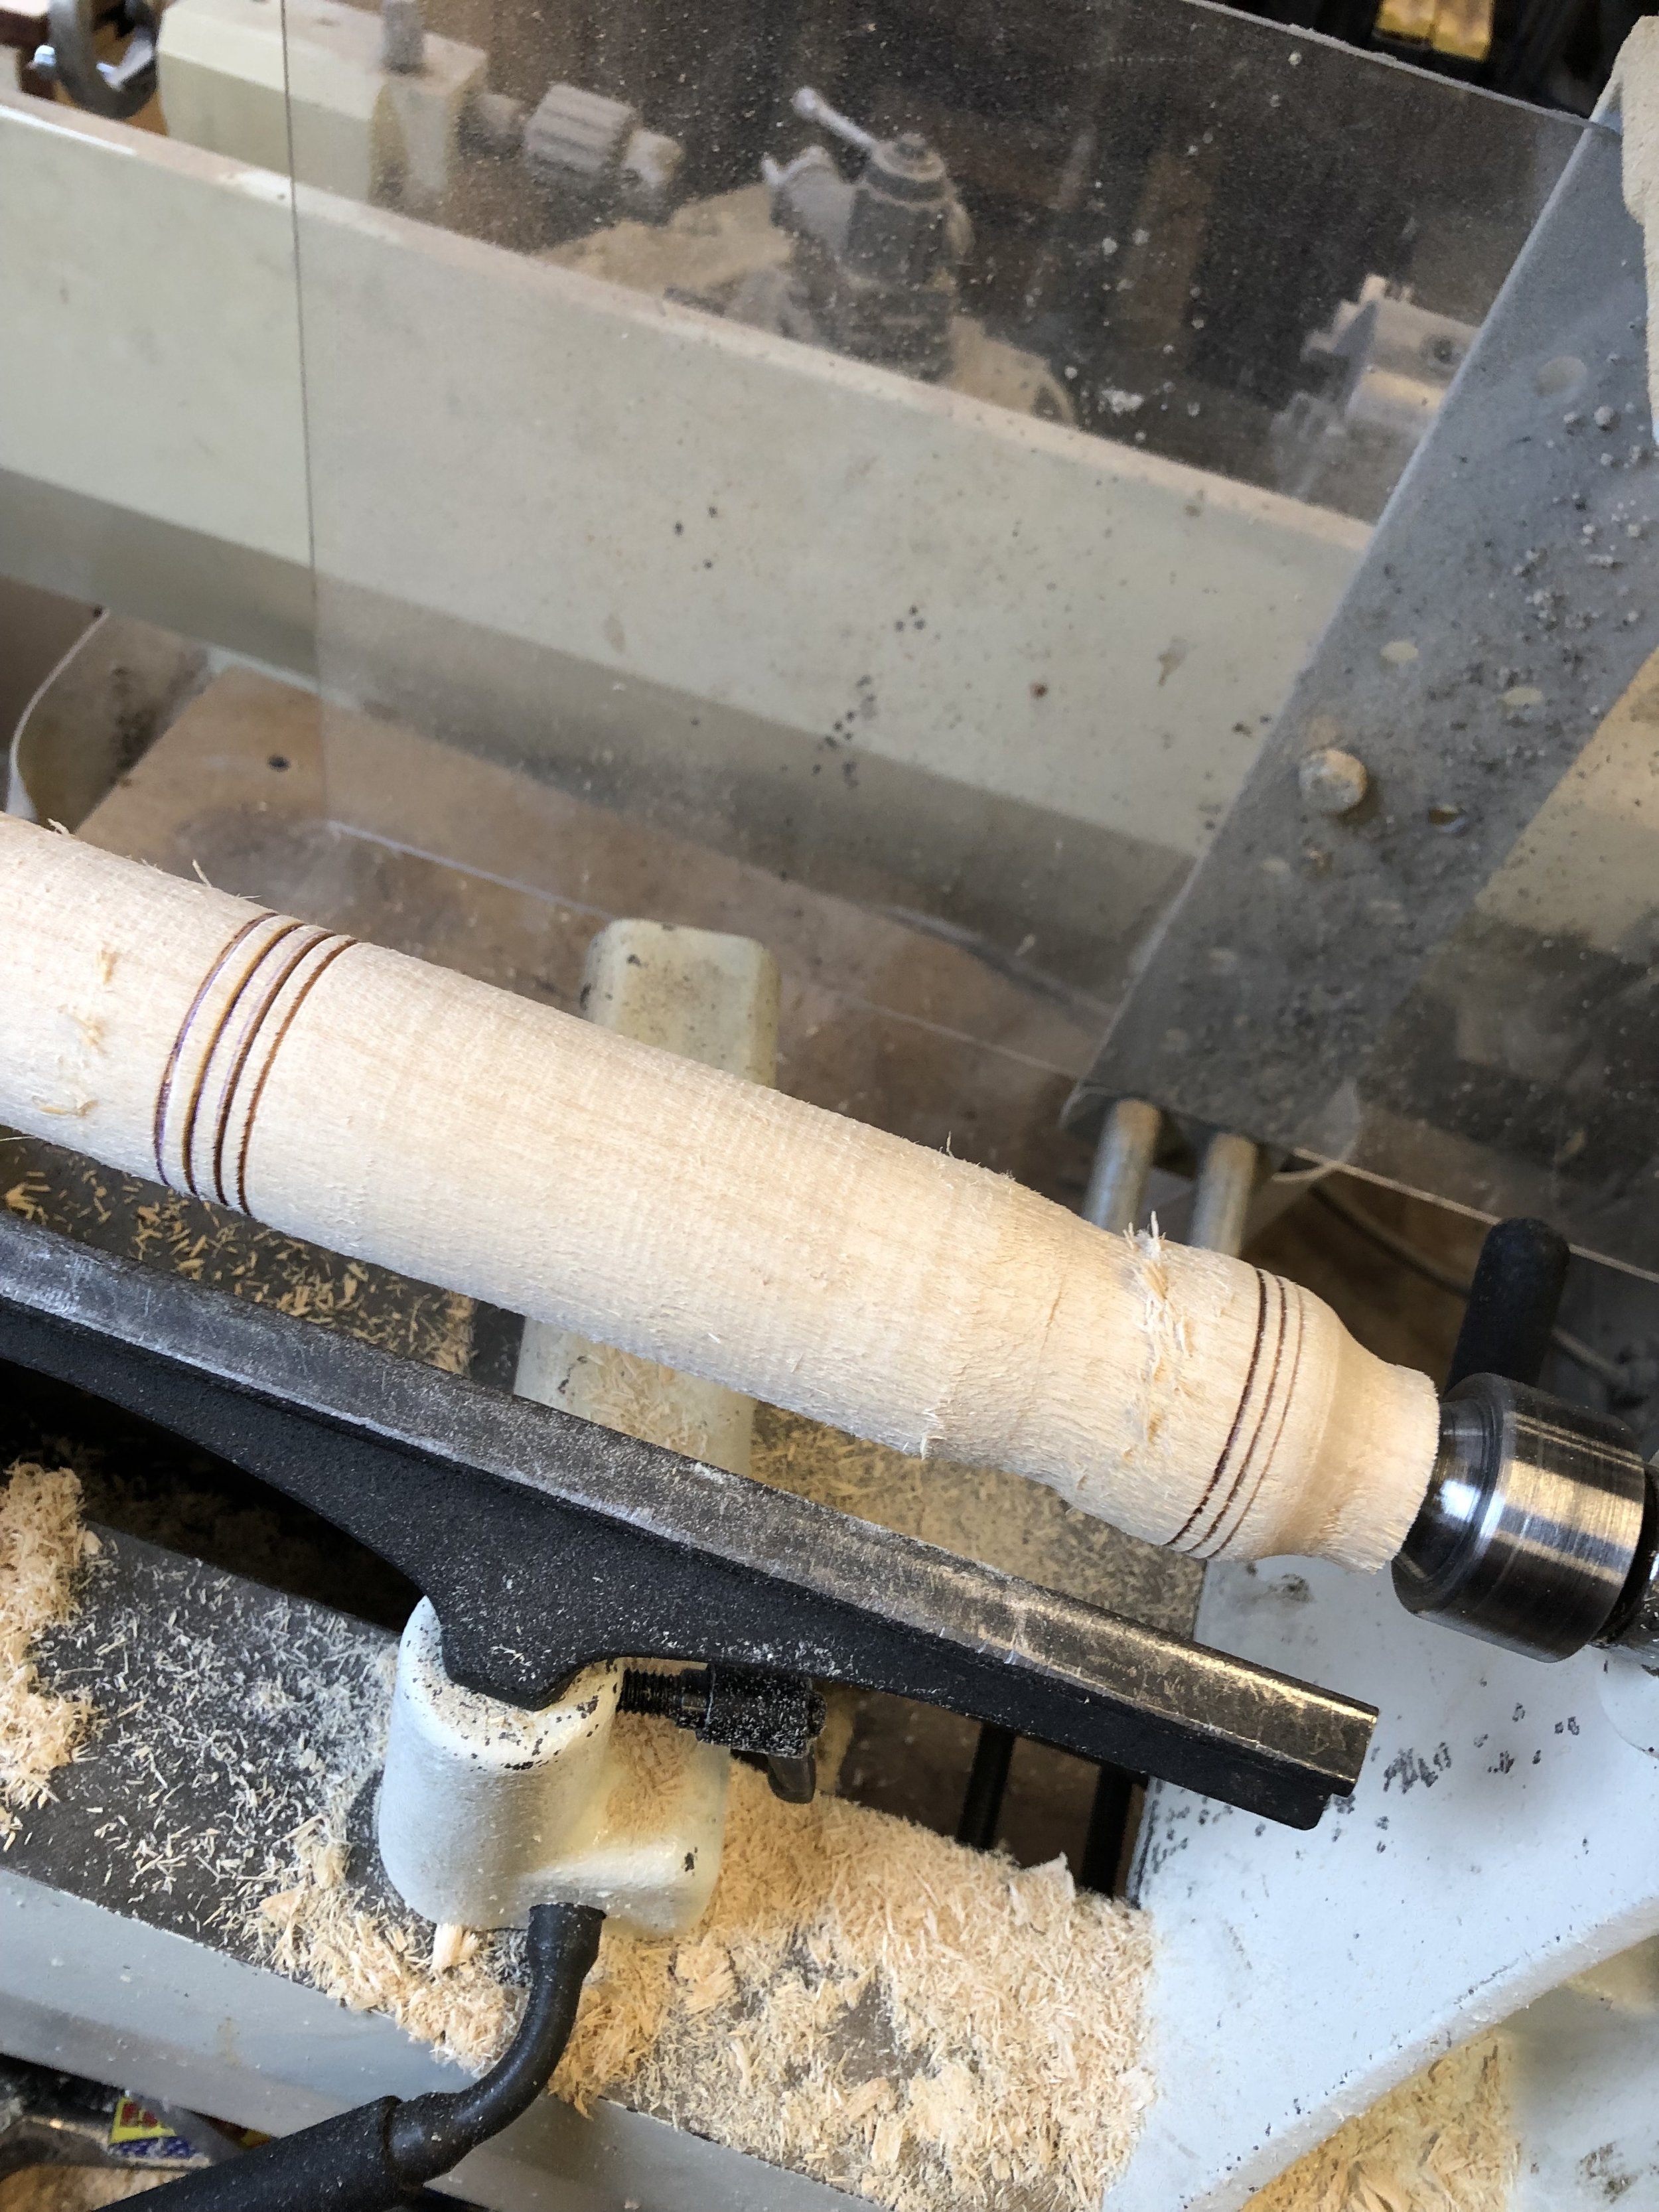
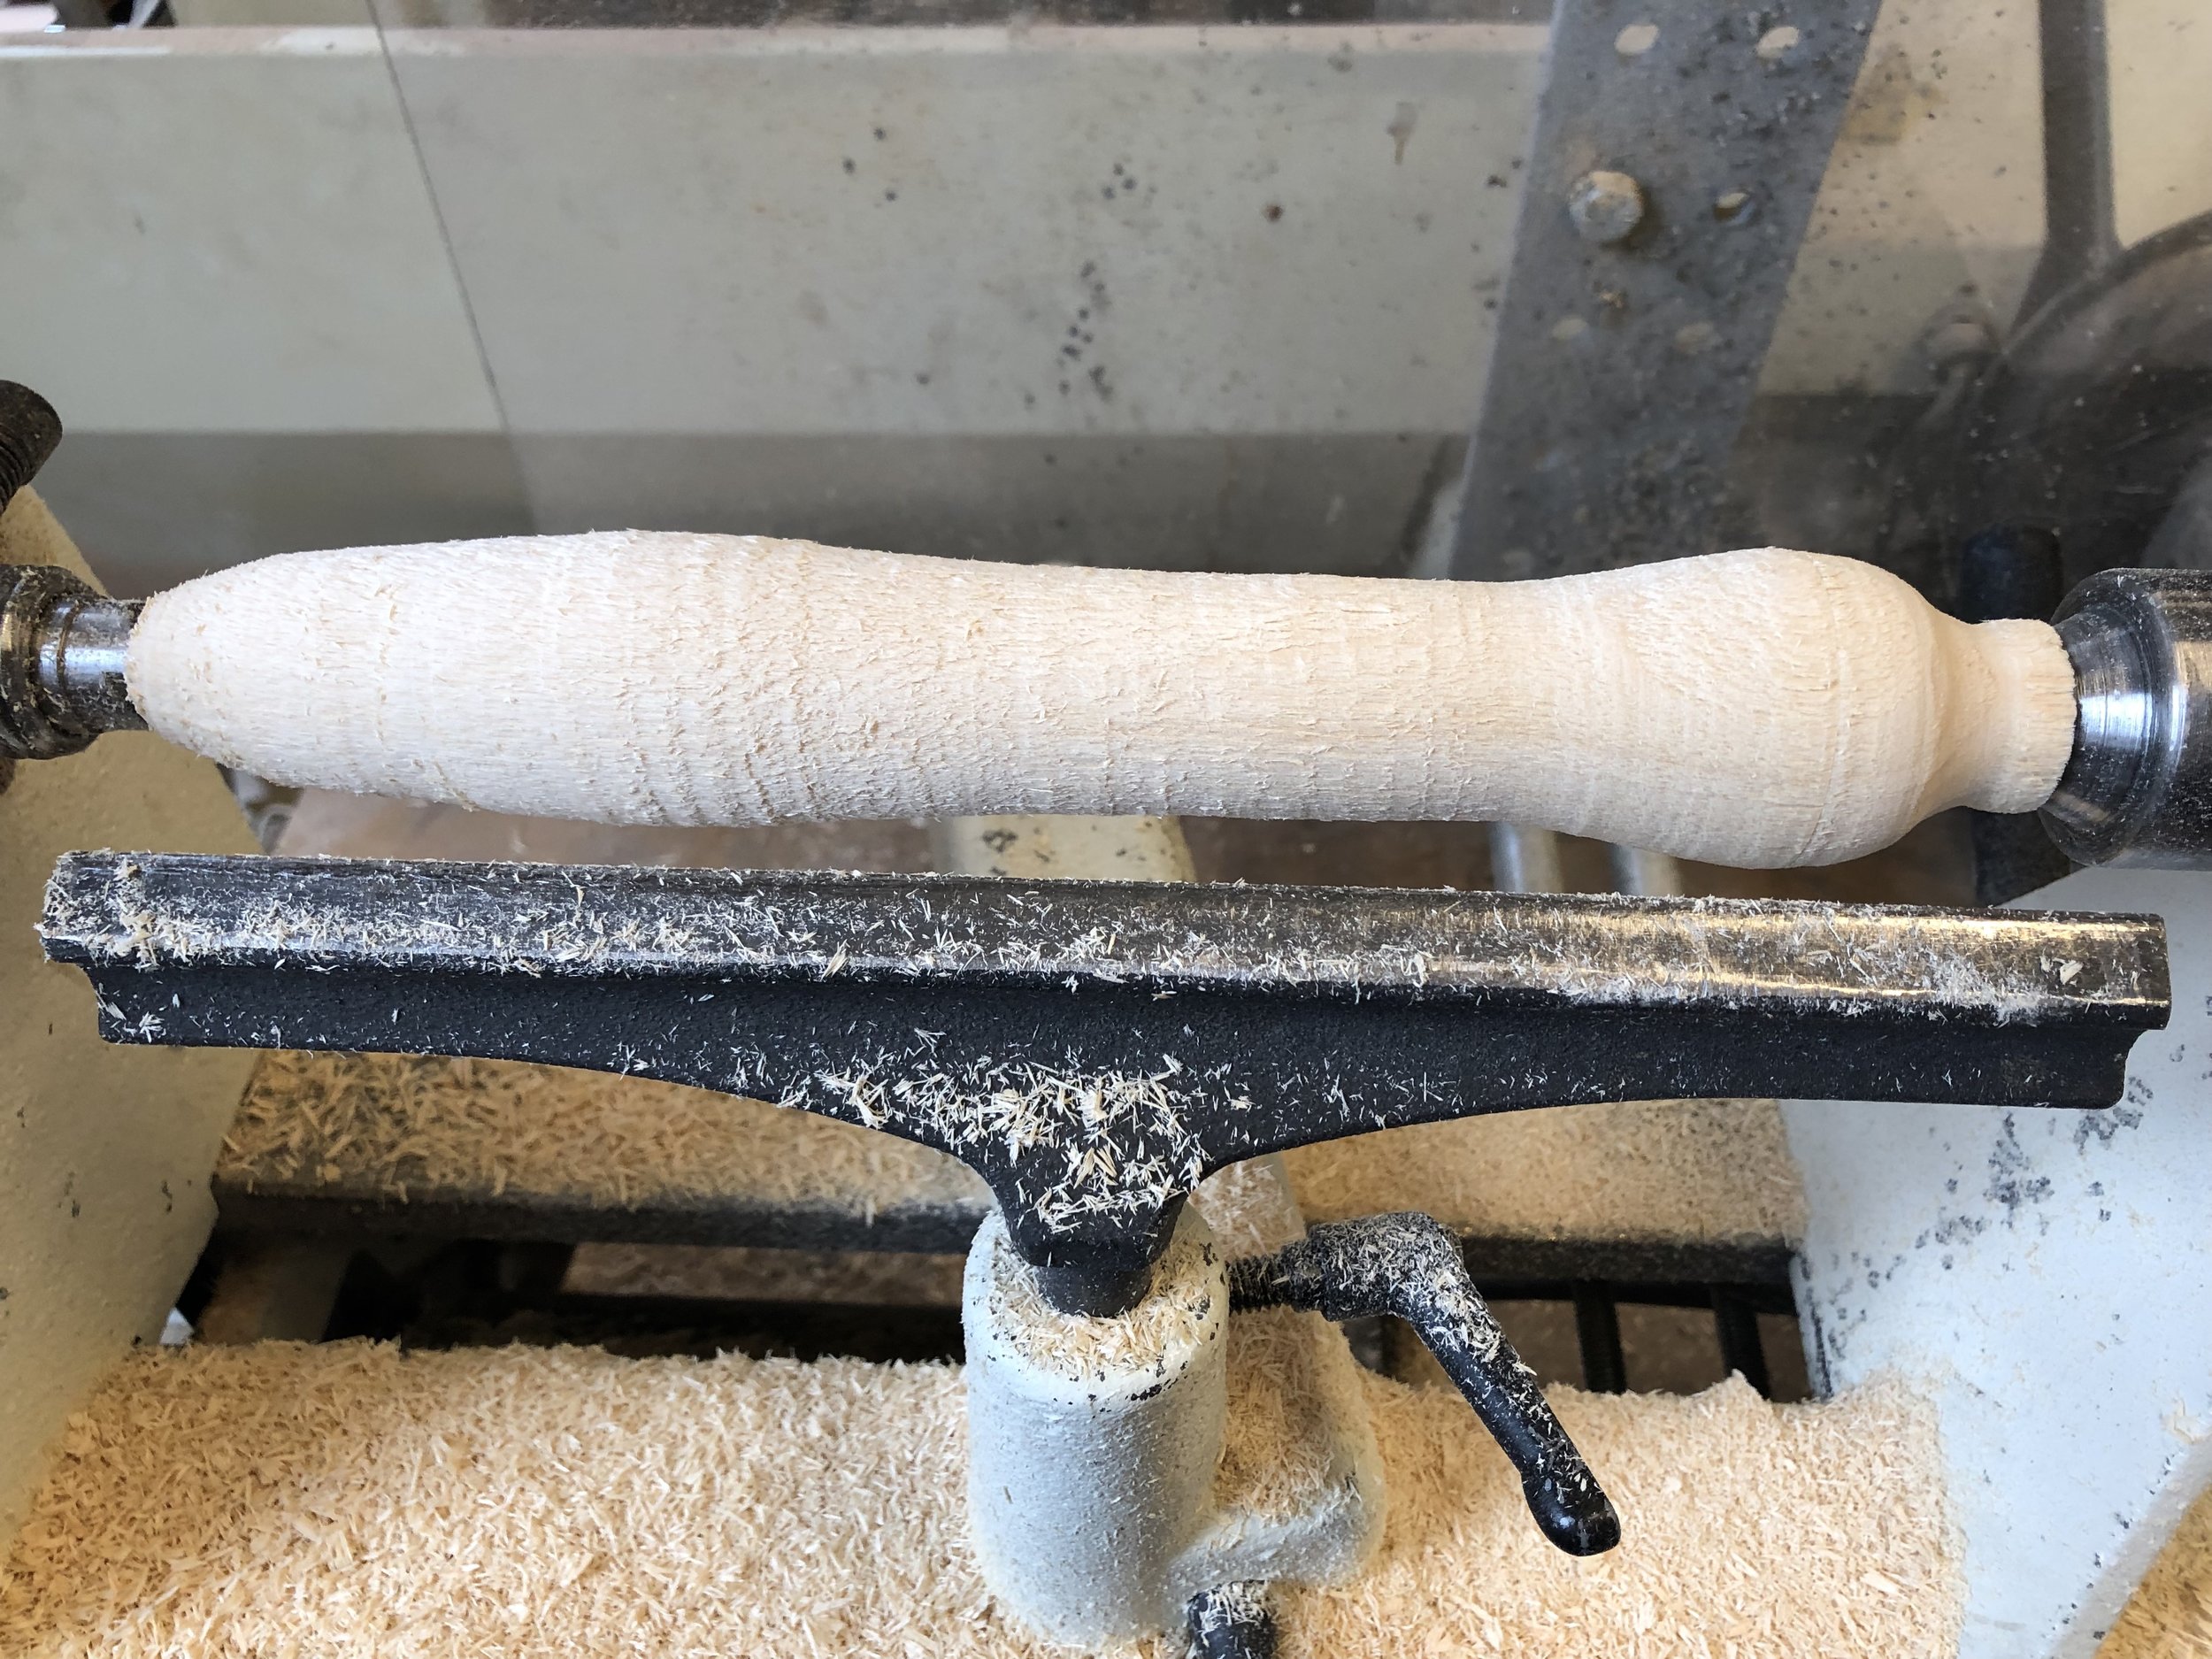
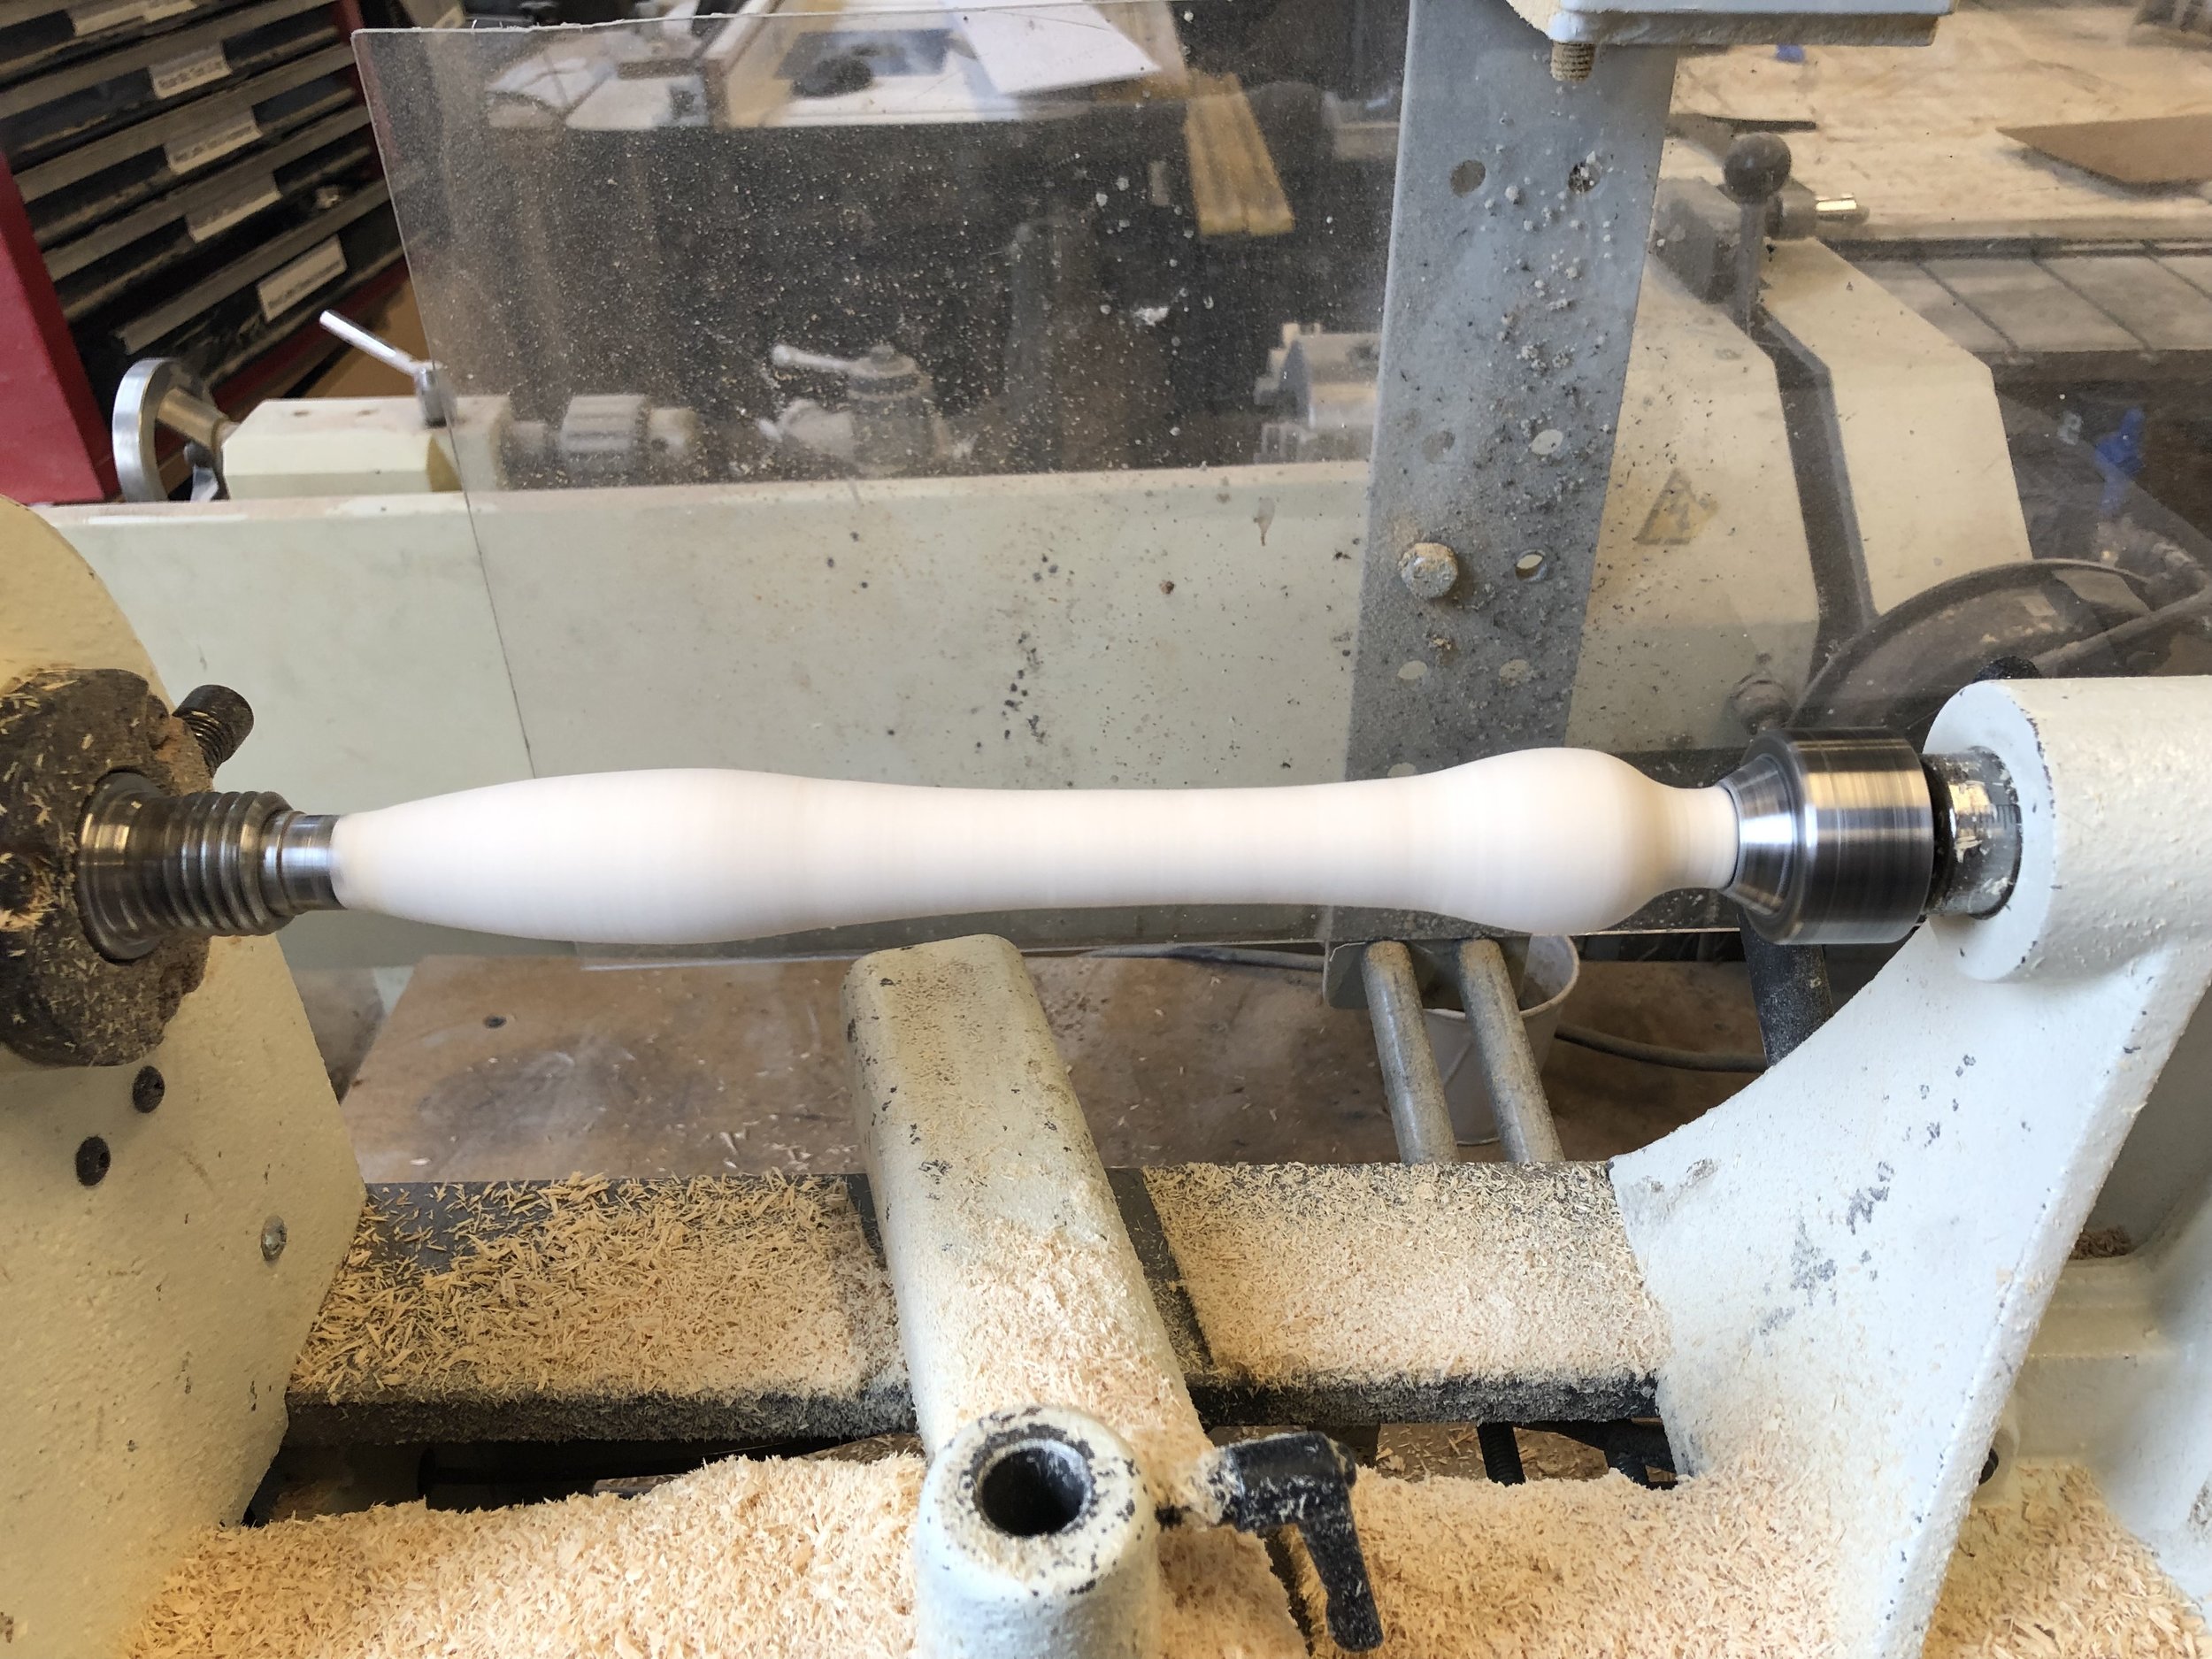
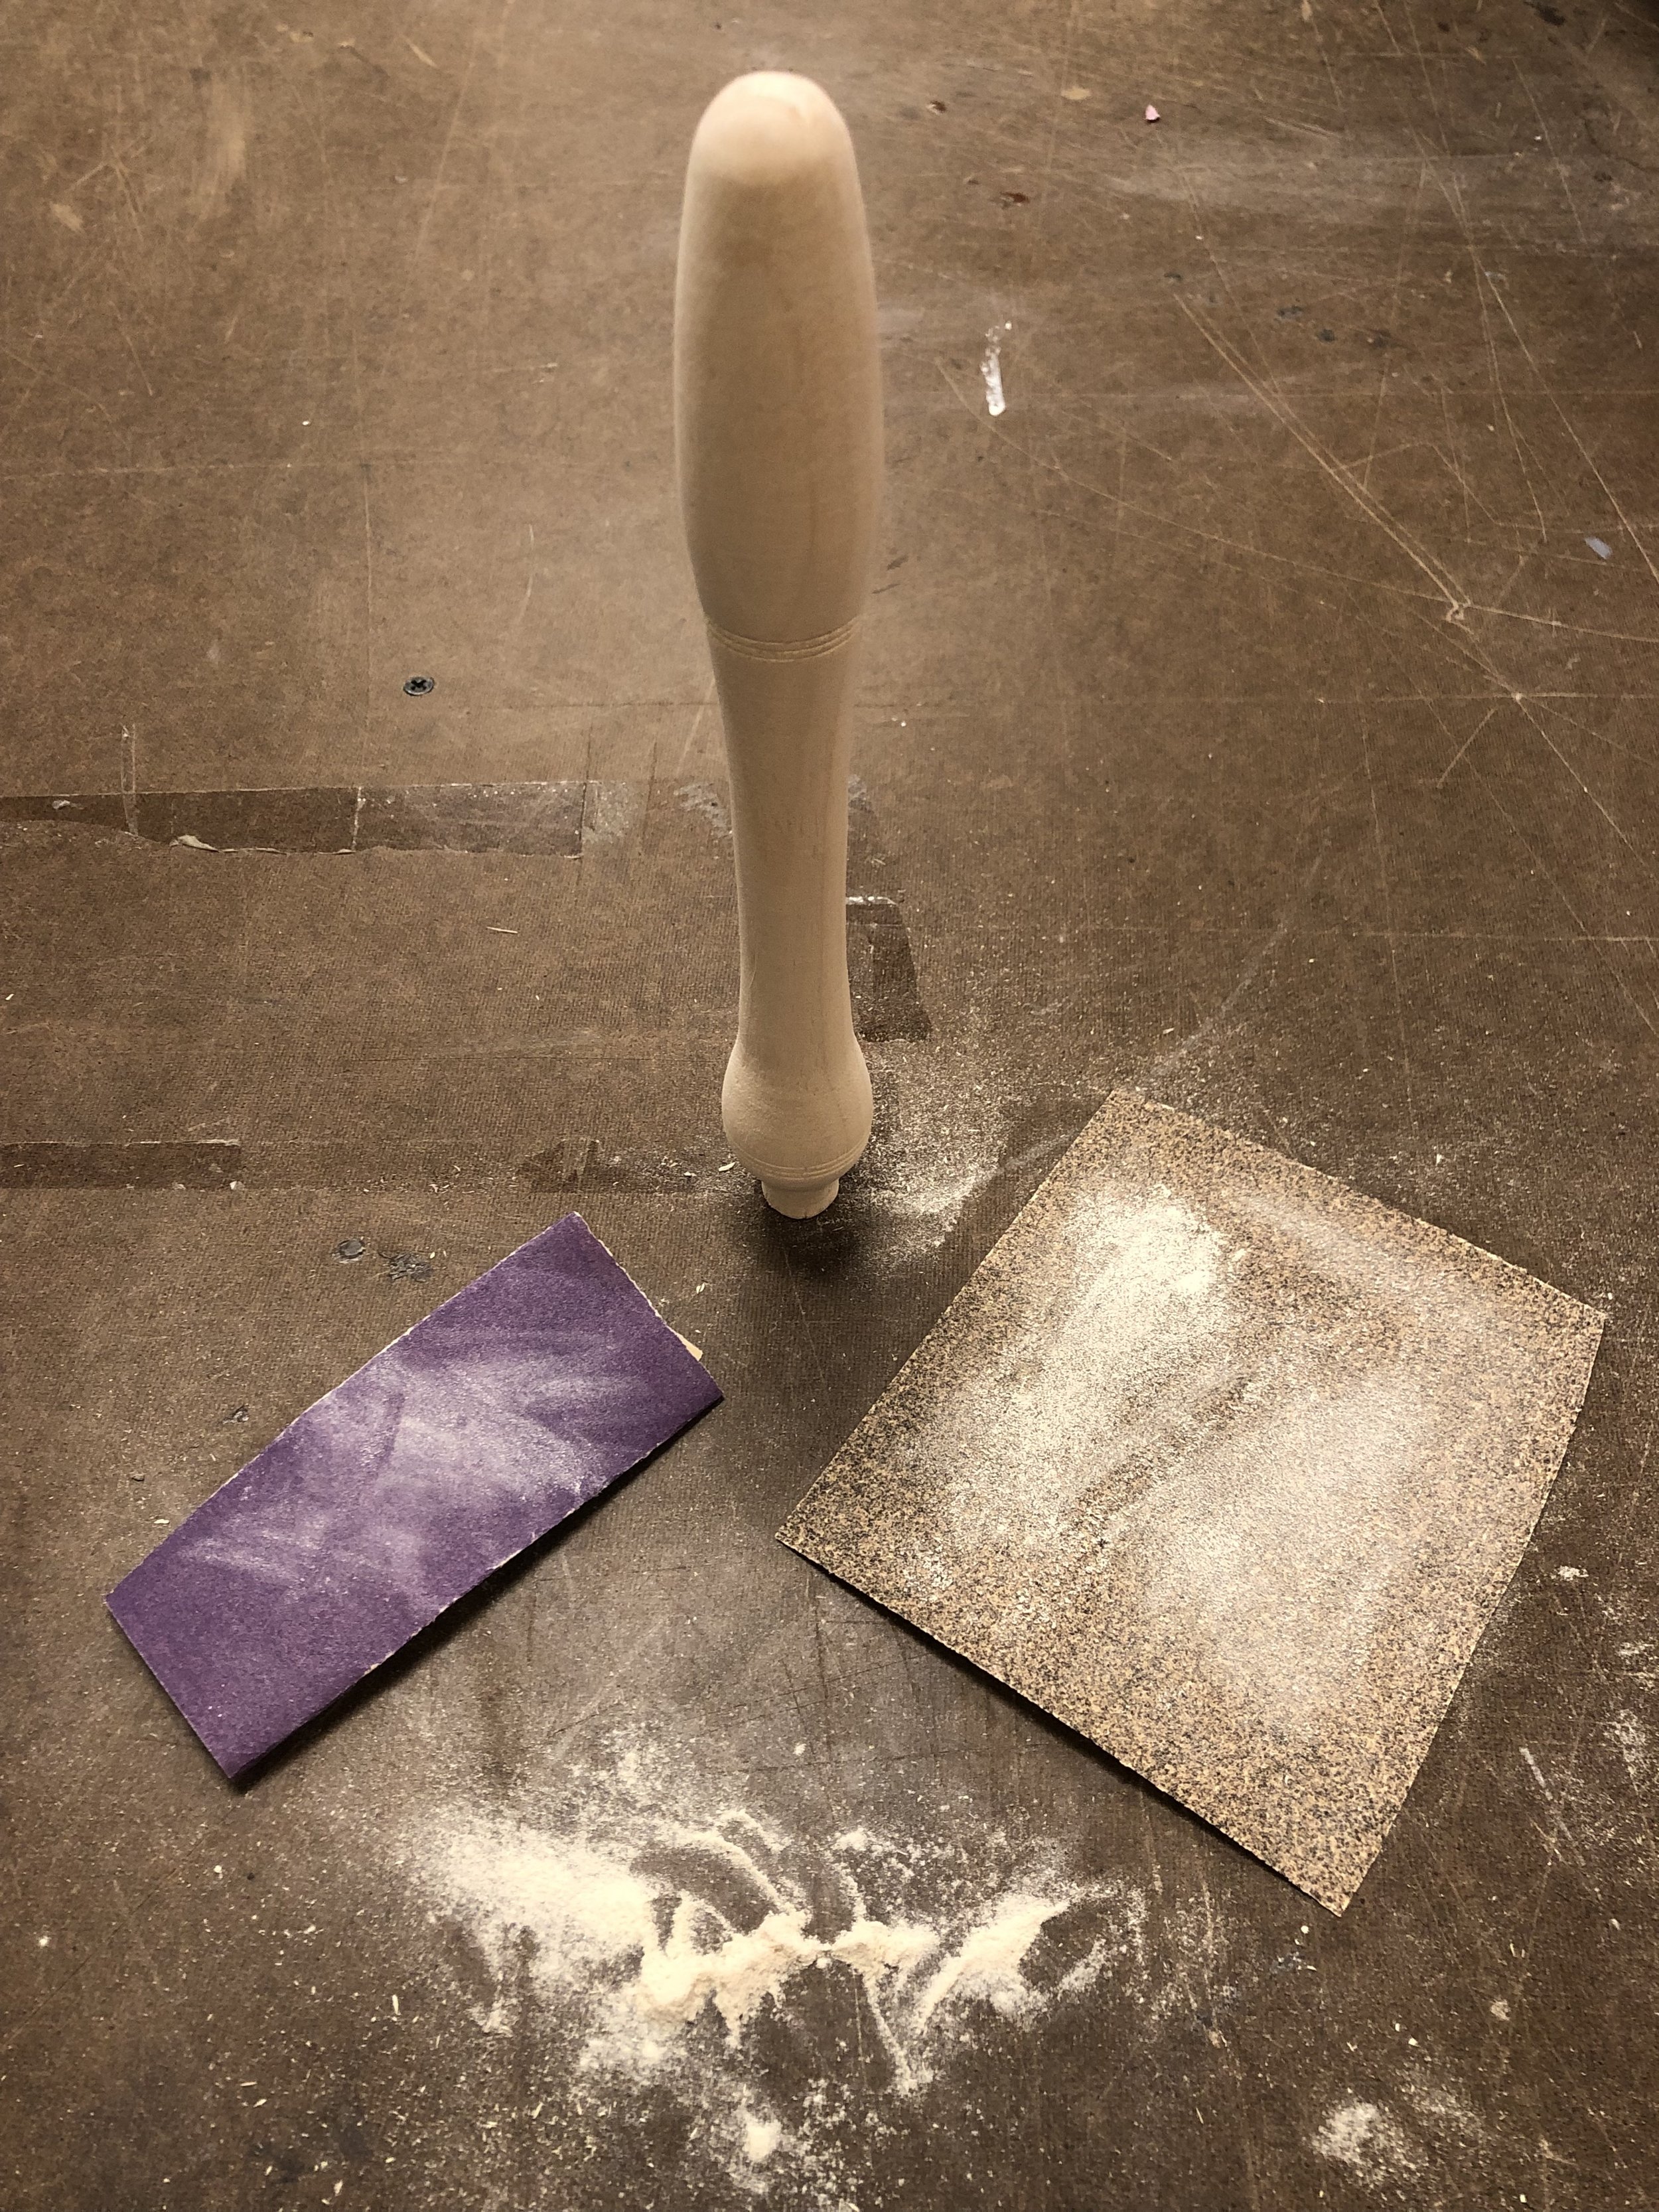
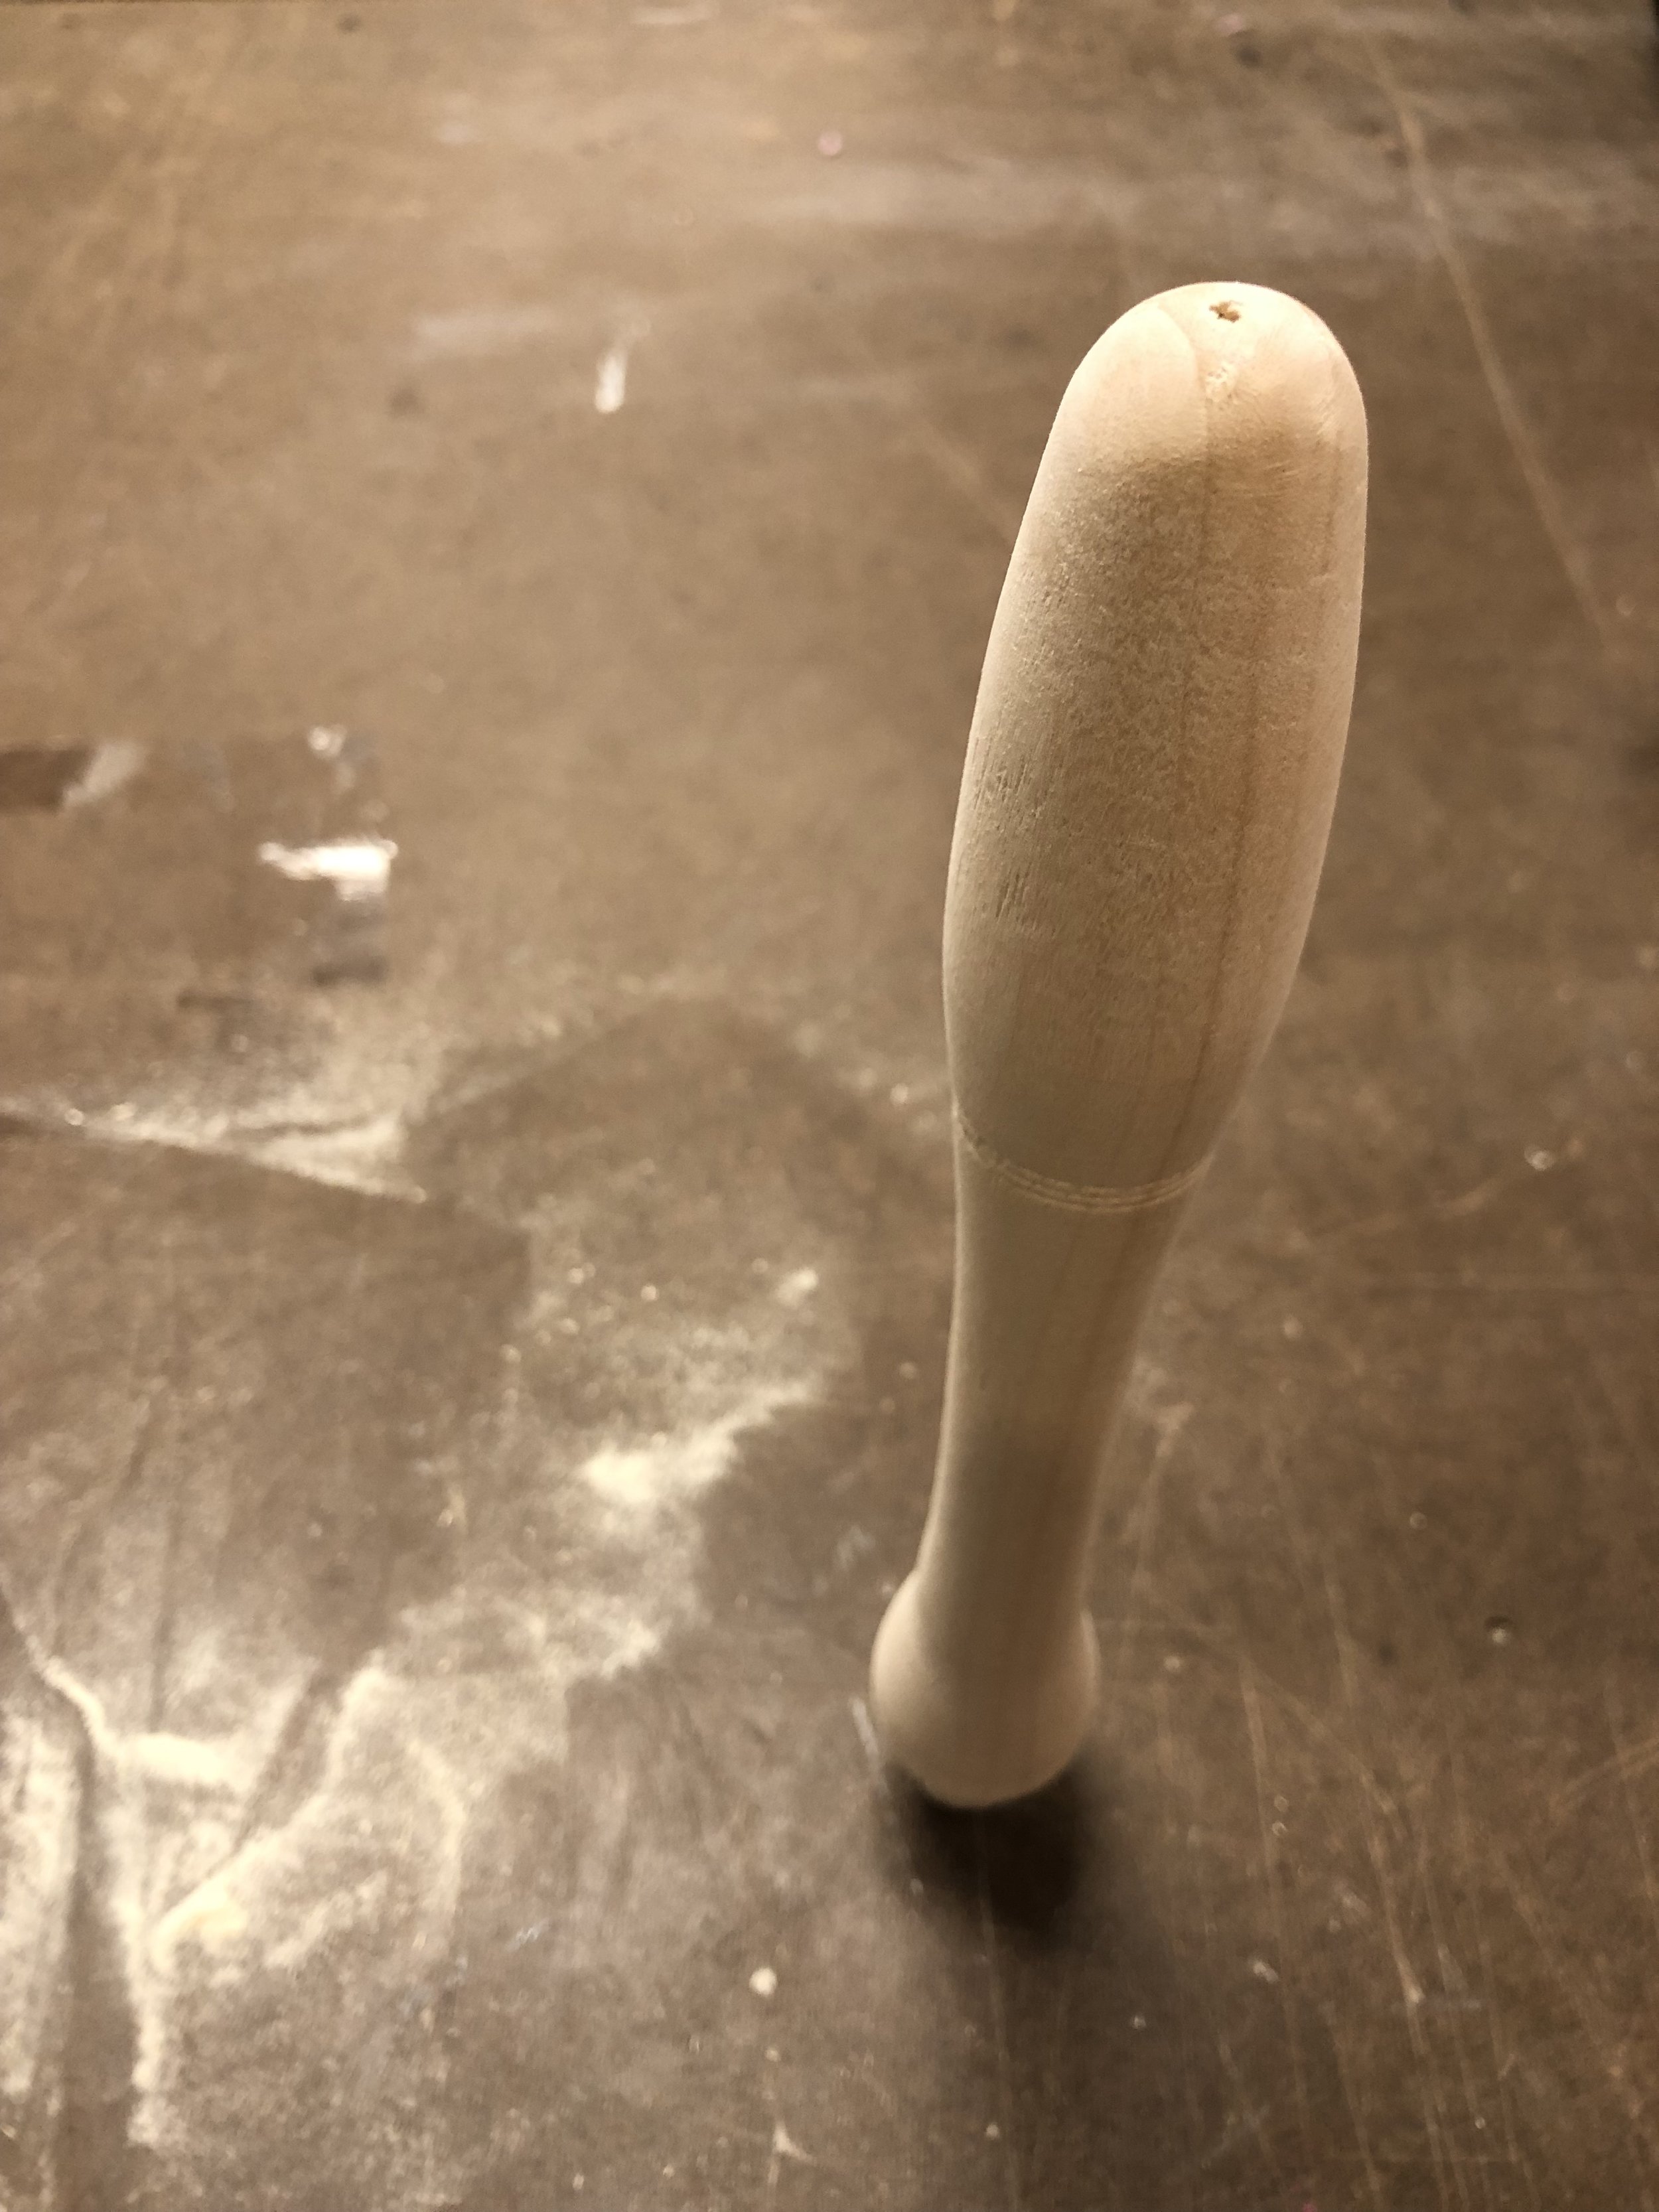
When I was turning the top I didn’t try to shape it too much or add too many details. It was my first time turning with Poplar and I wanted to get a hang of it, as I bought a bit of wood for the future to use. A big lesson I learned immediately was that the turning process is a bit tricky towards the end when creating the tip for it to spin on. With the poplar top, I decided to hand-sand the bottom to perfect the tip for a good spin and then had to clean up and run to class.

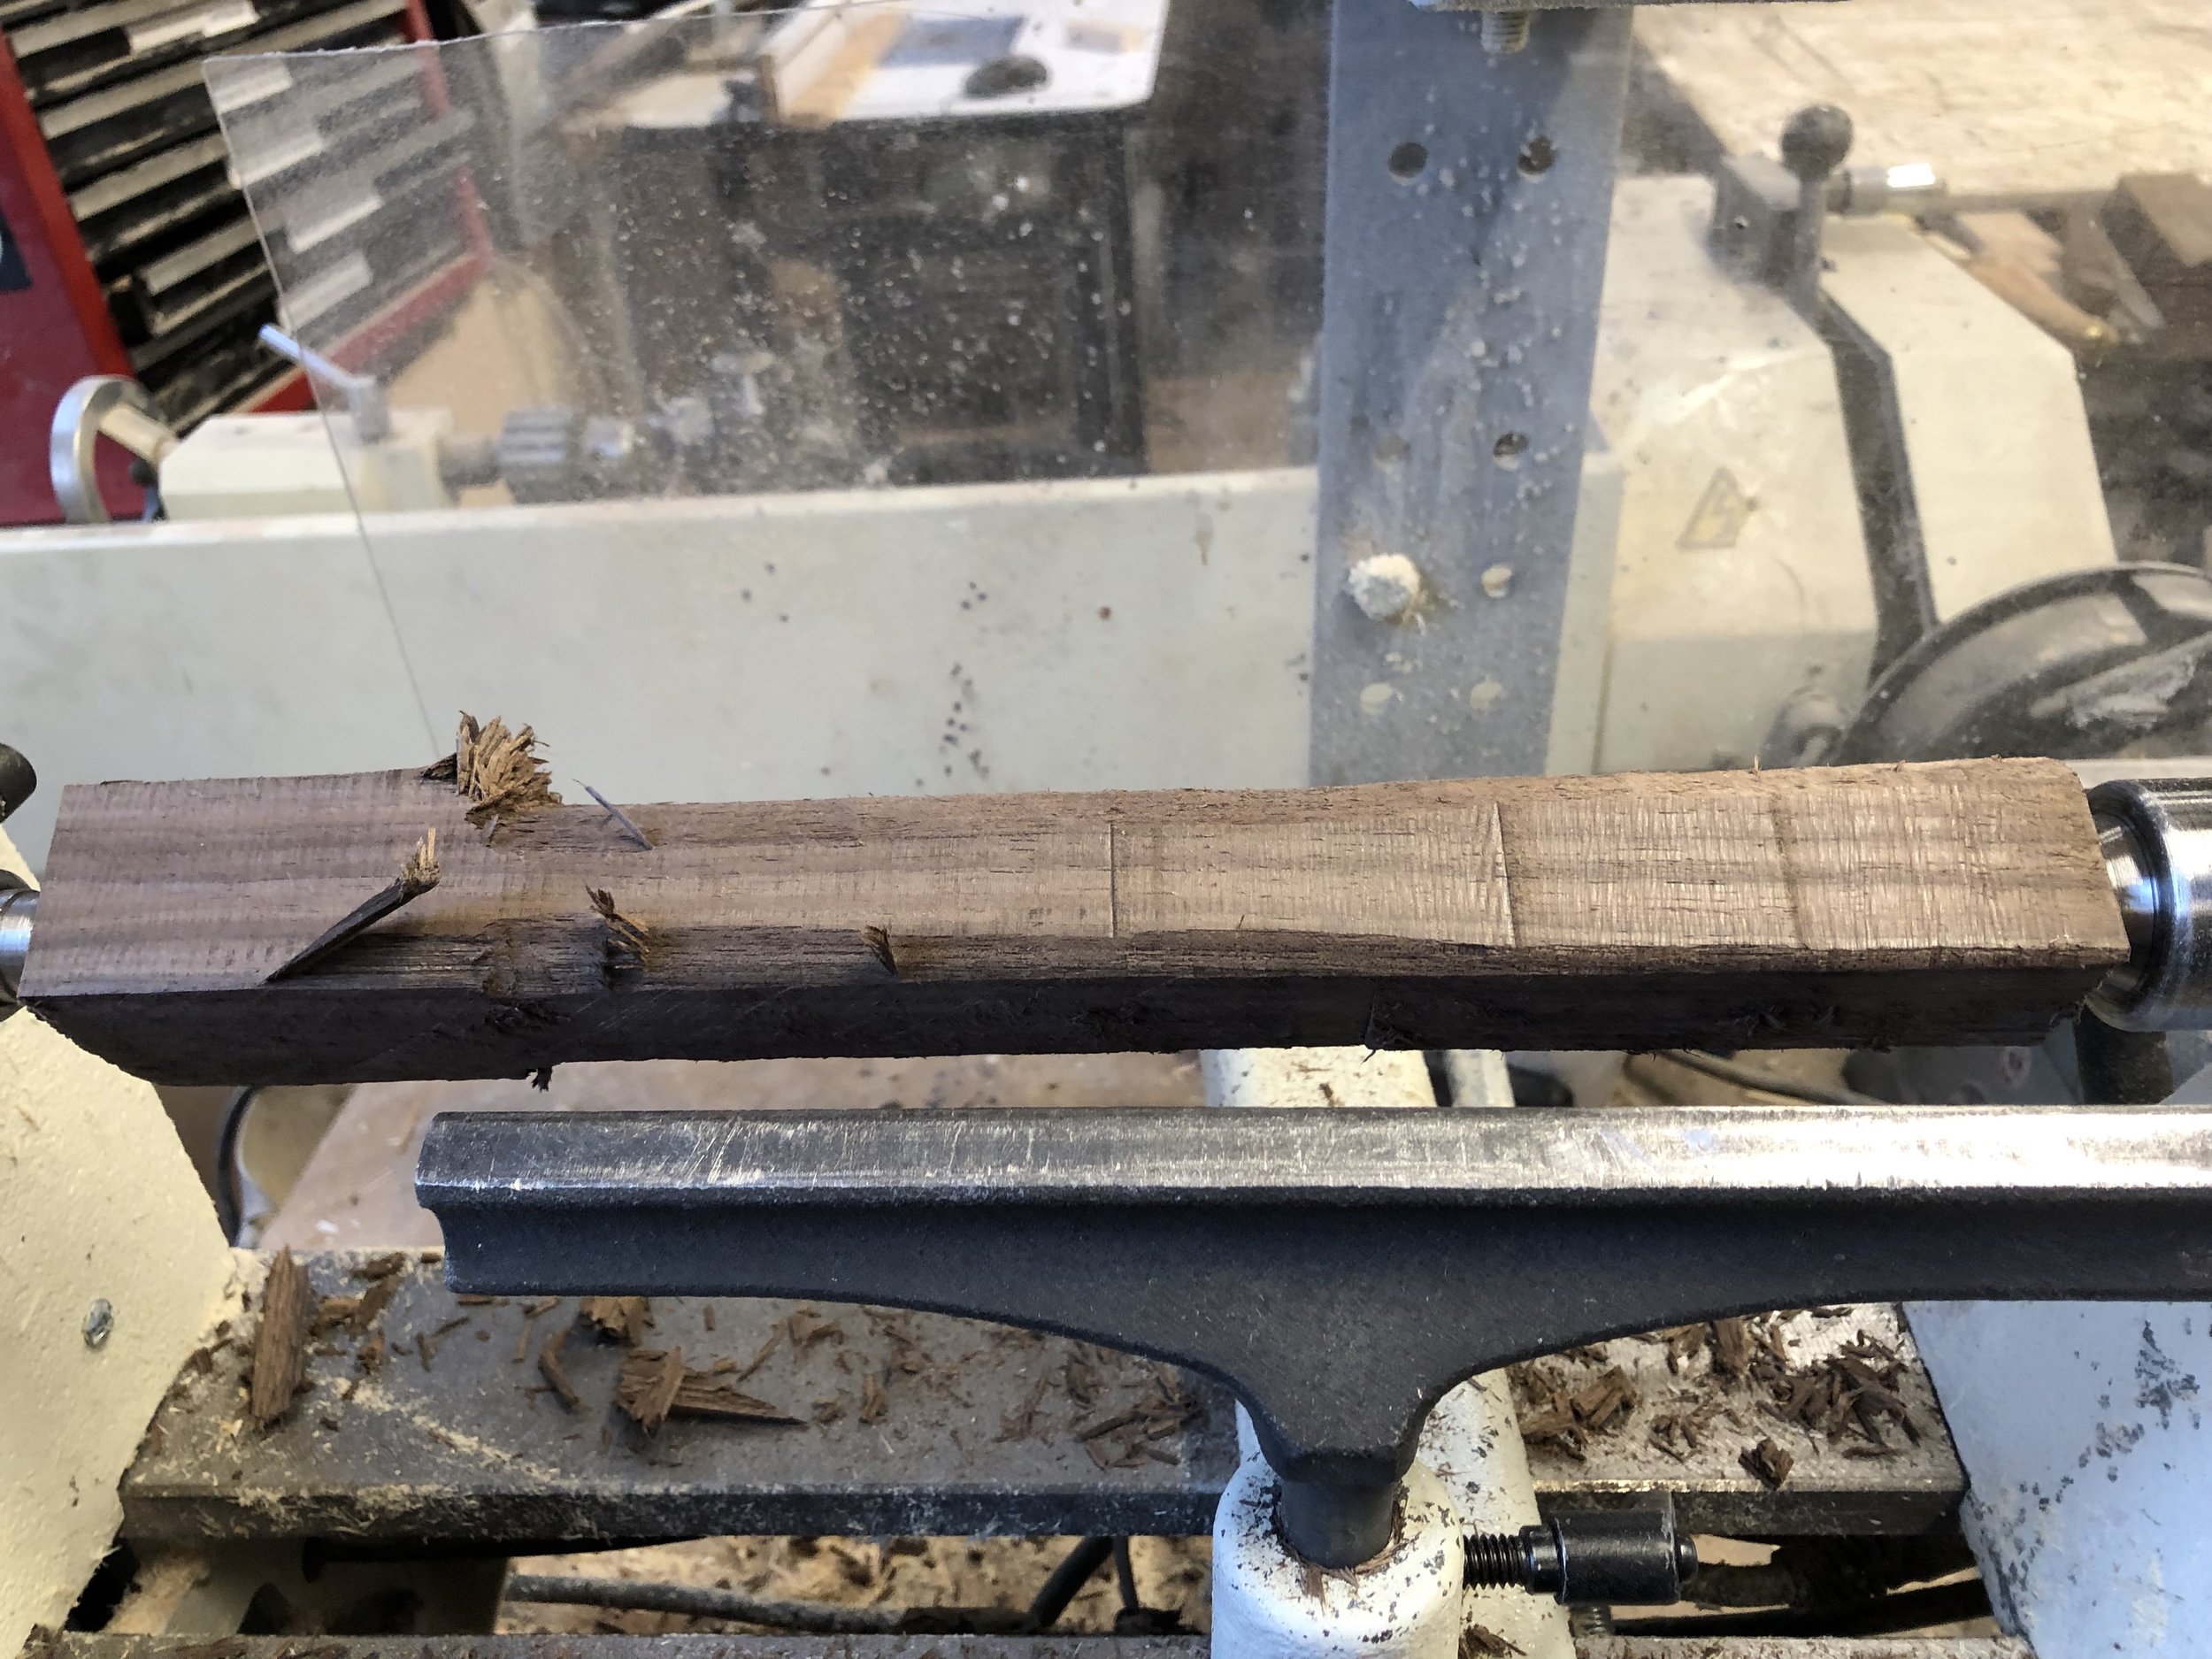
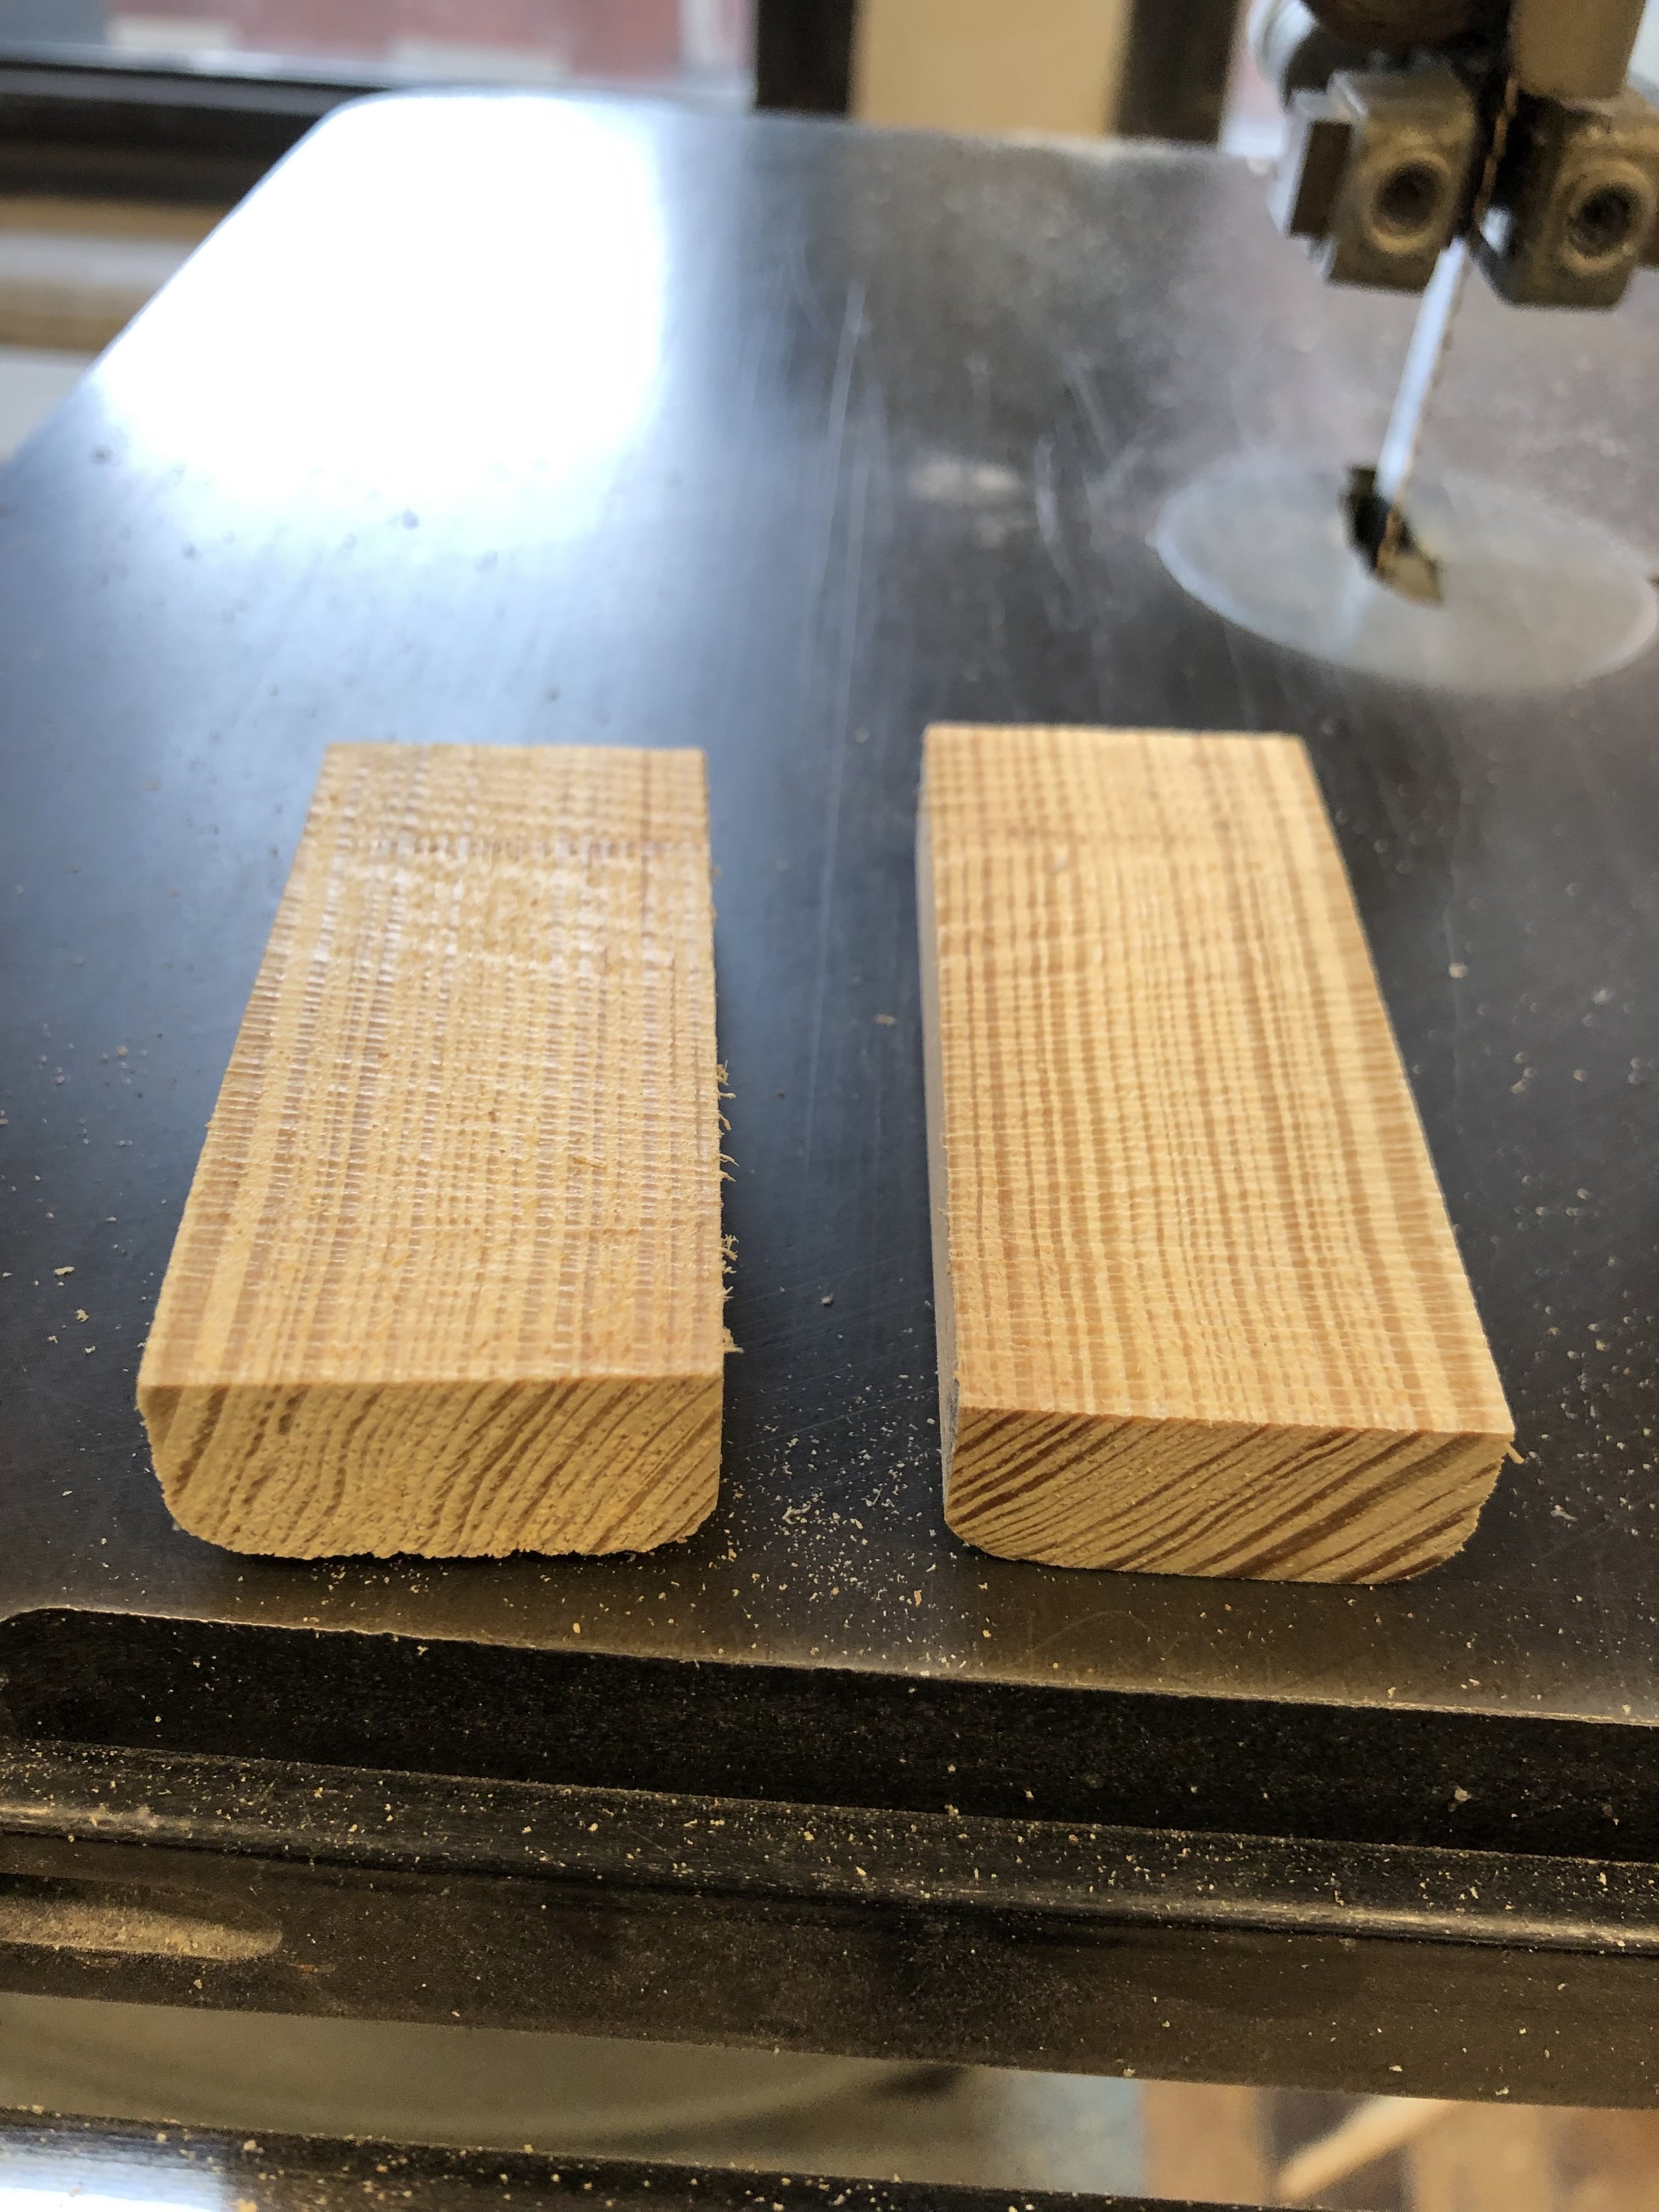
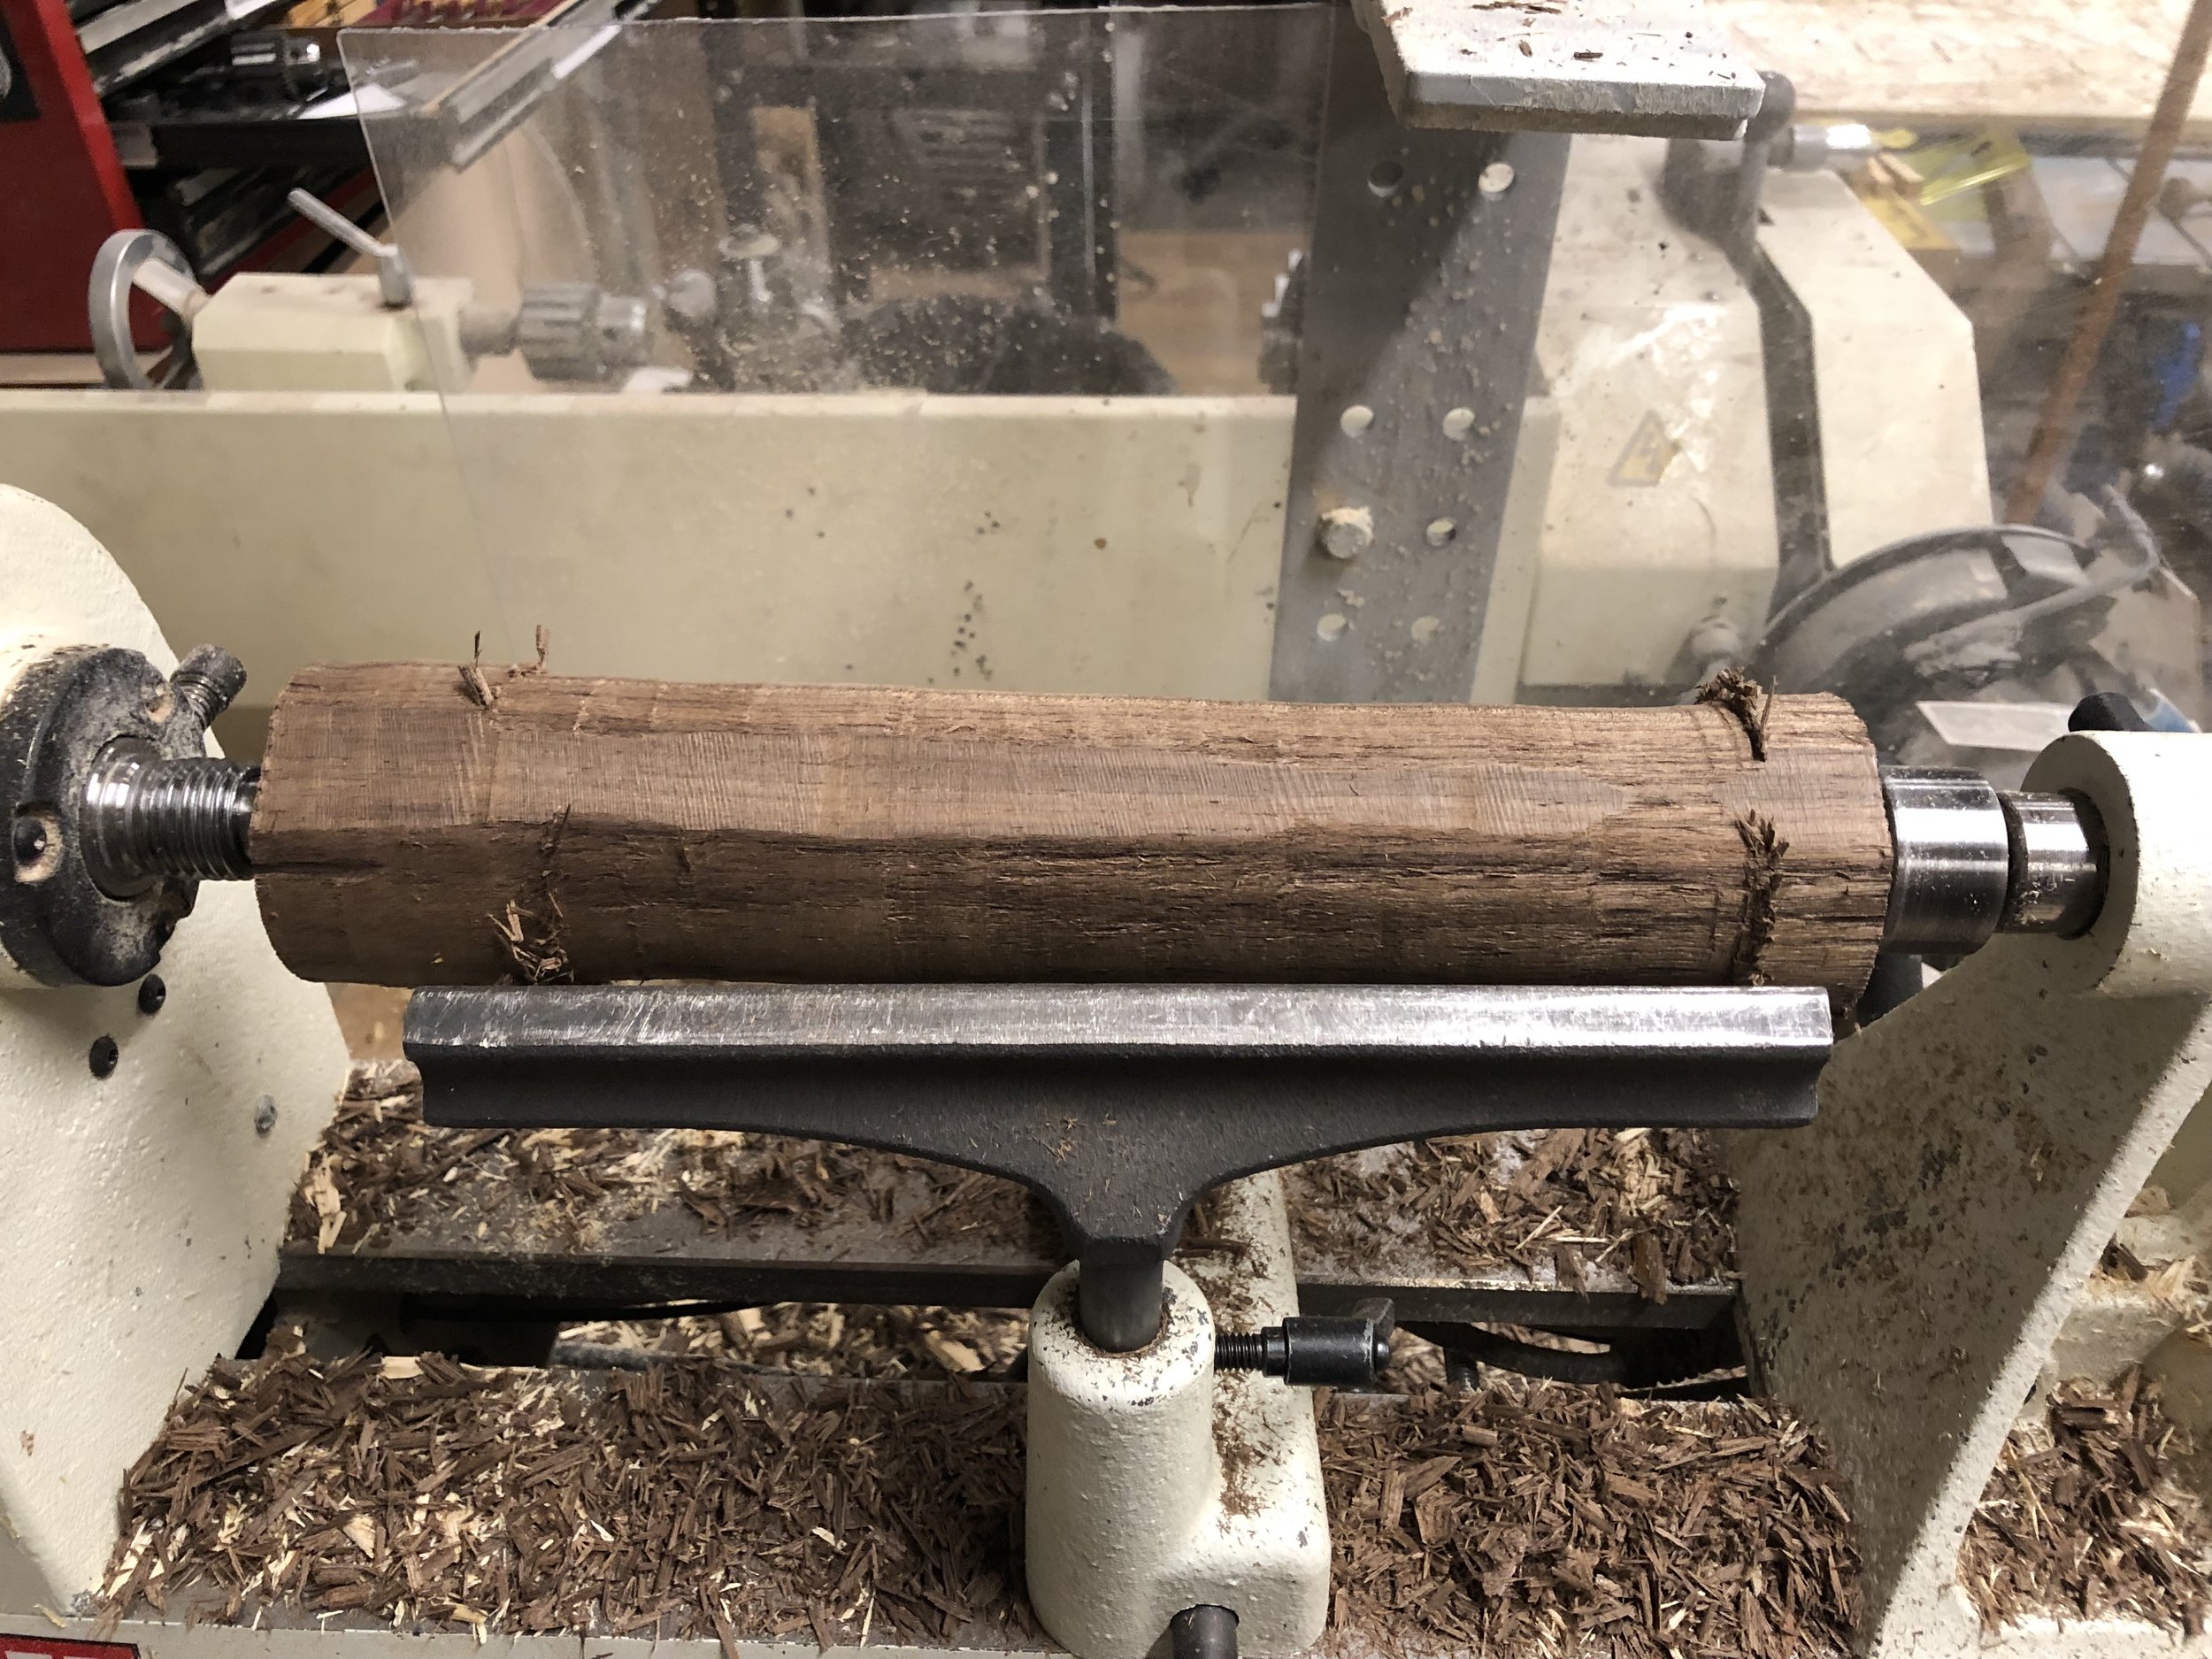
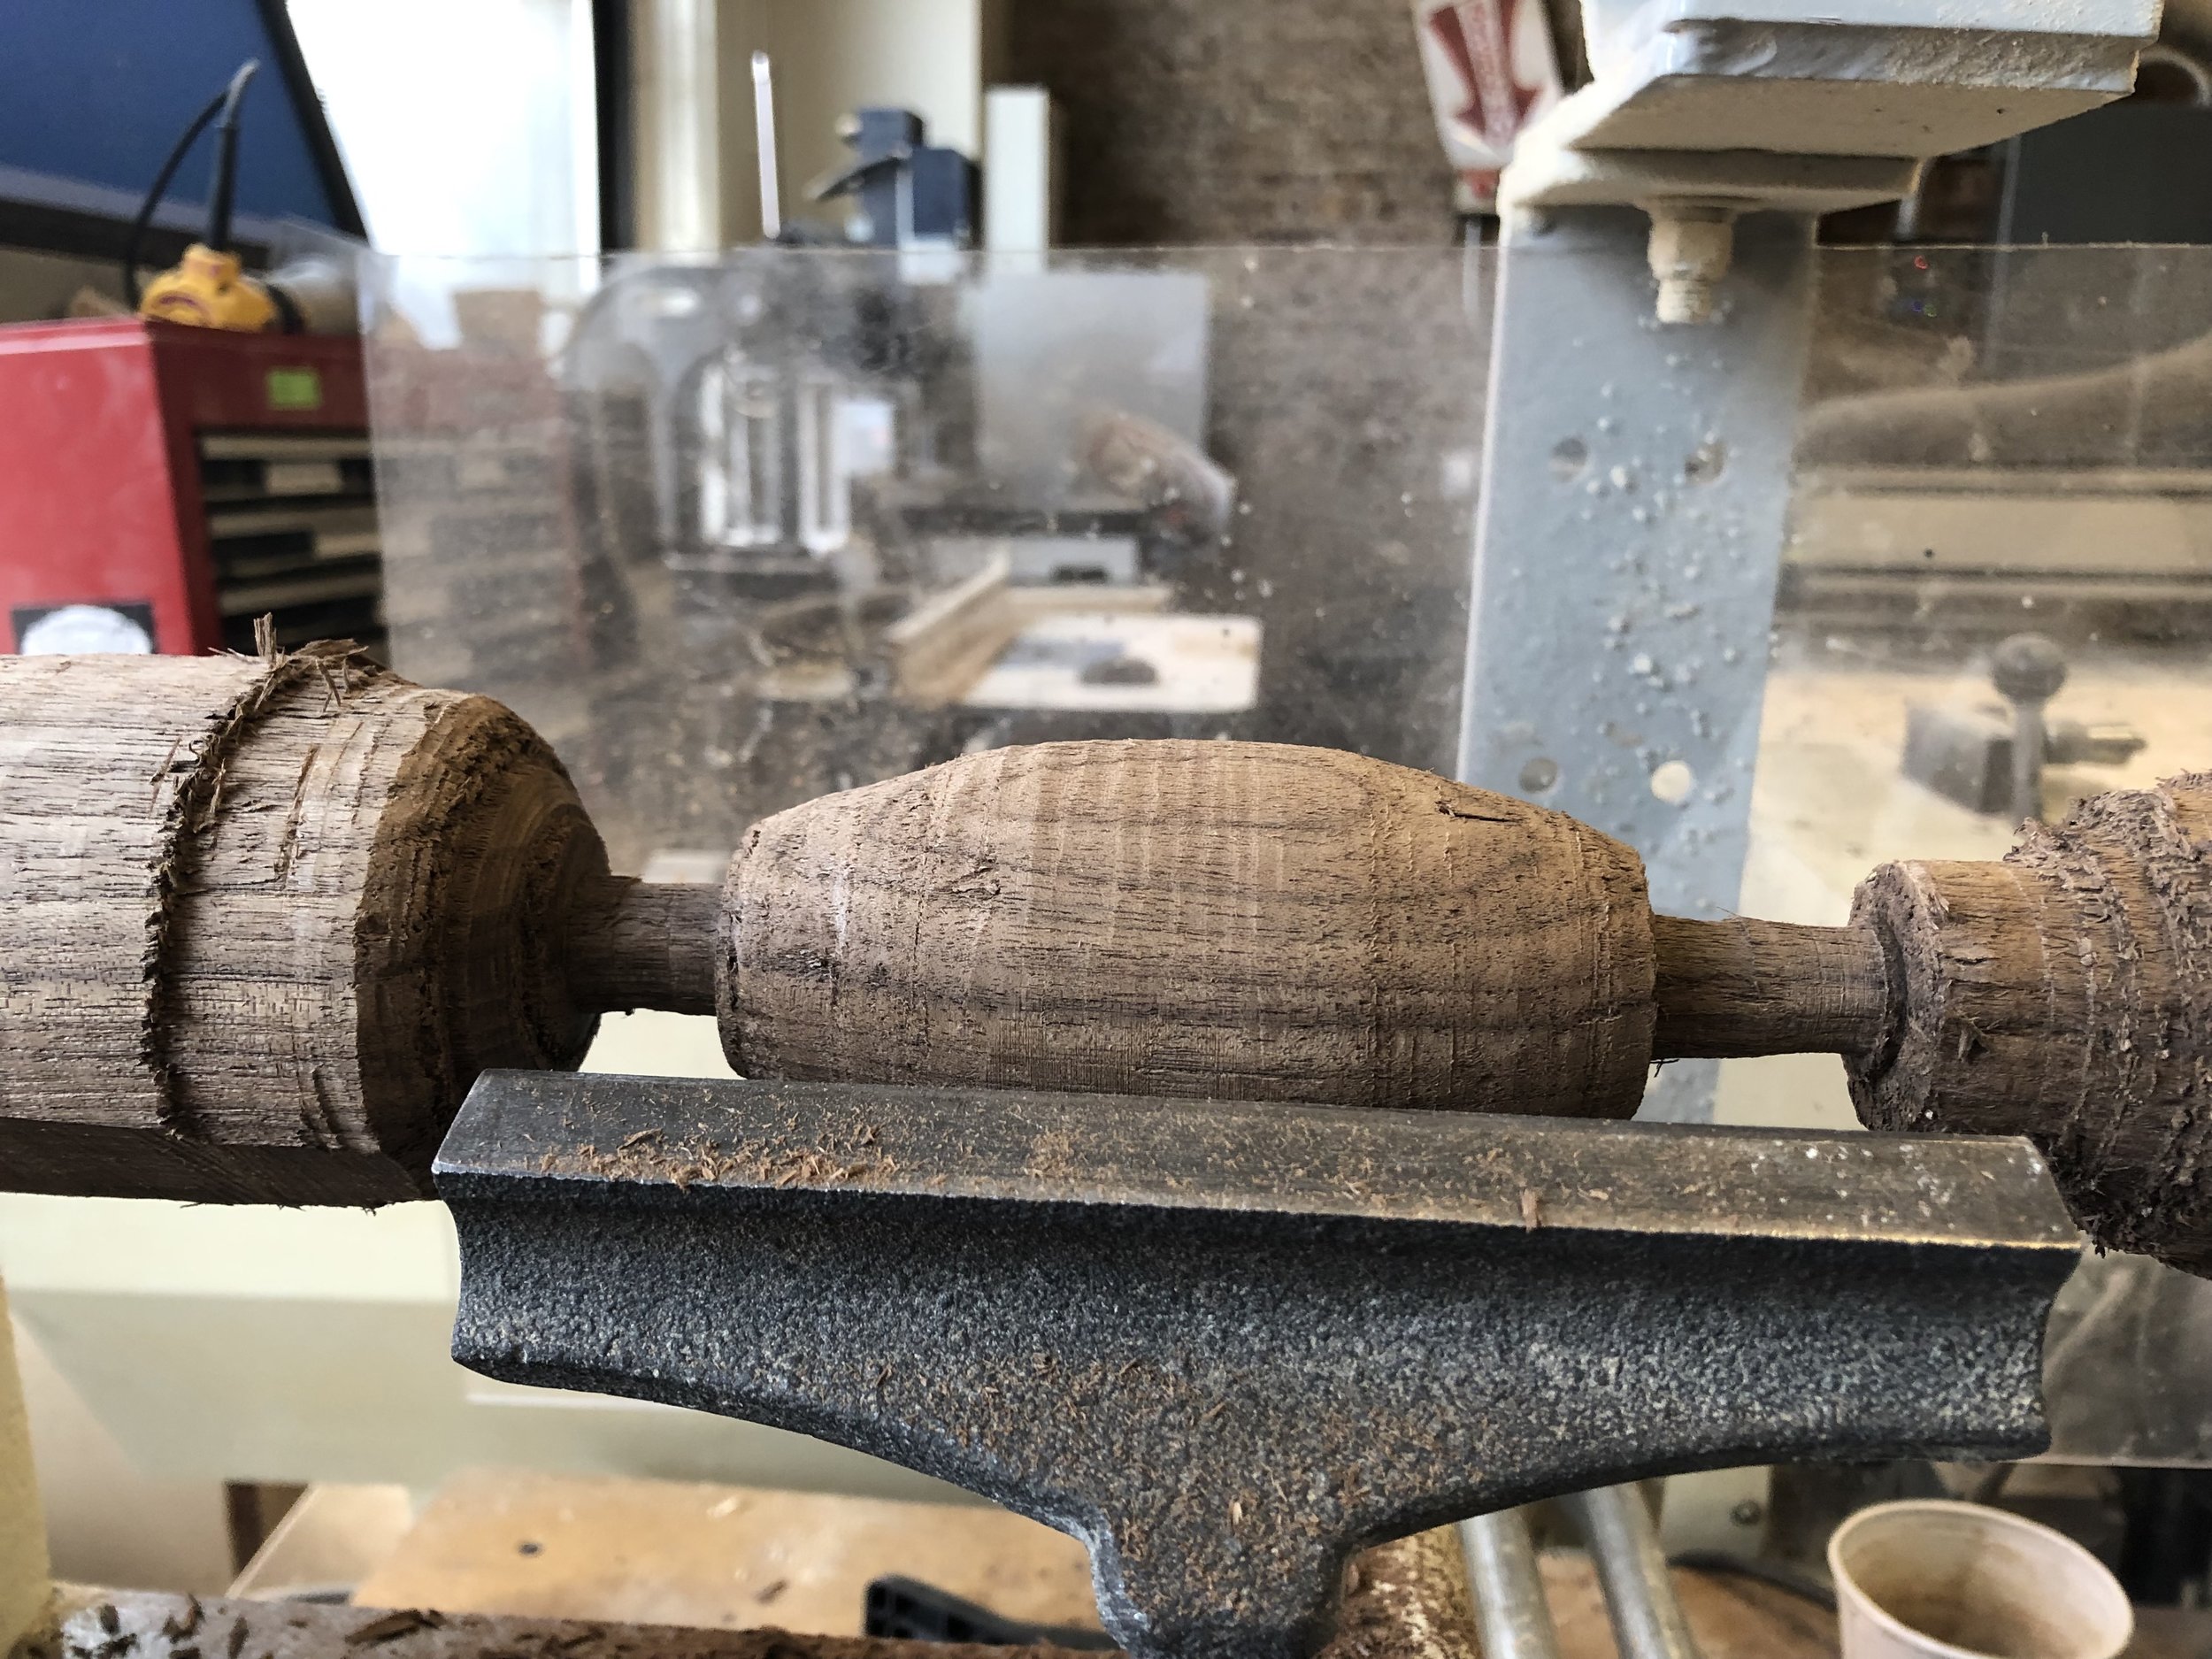
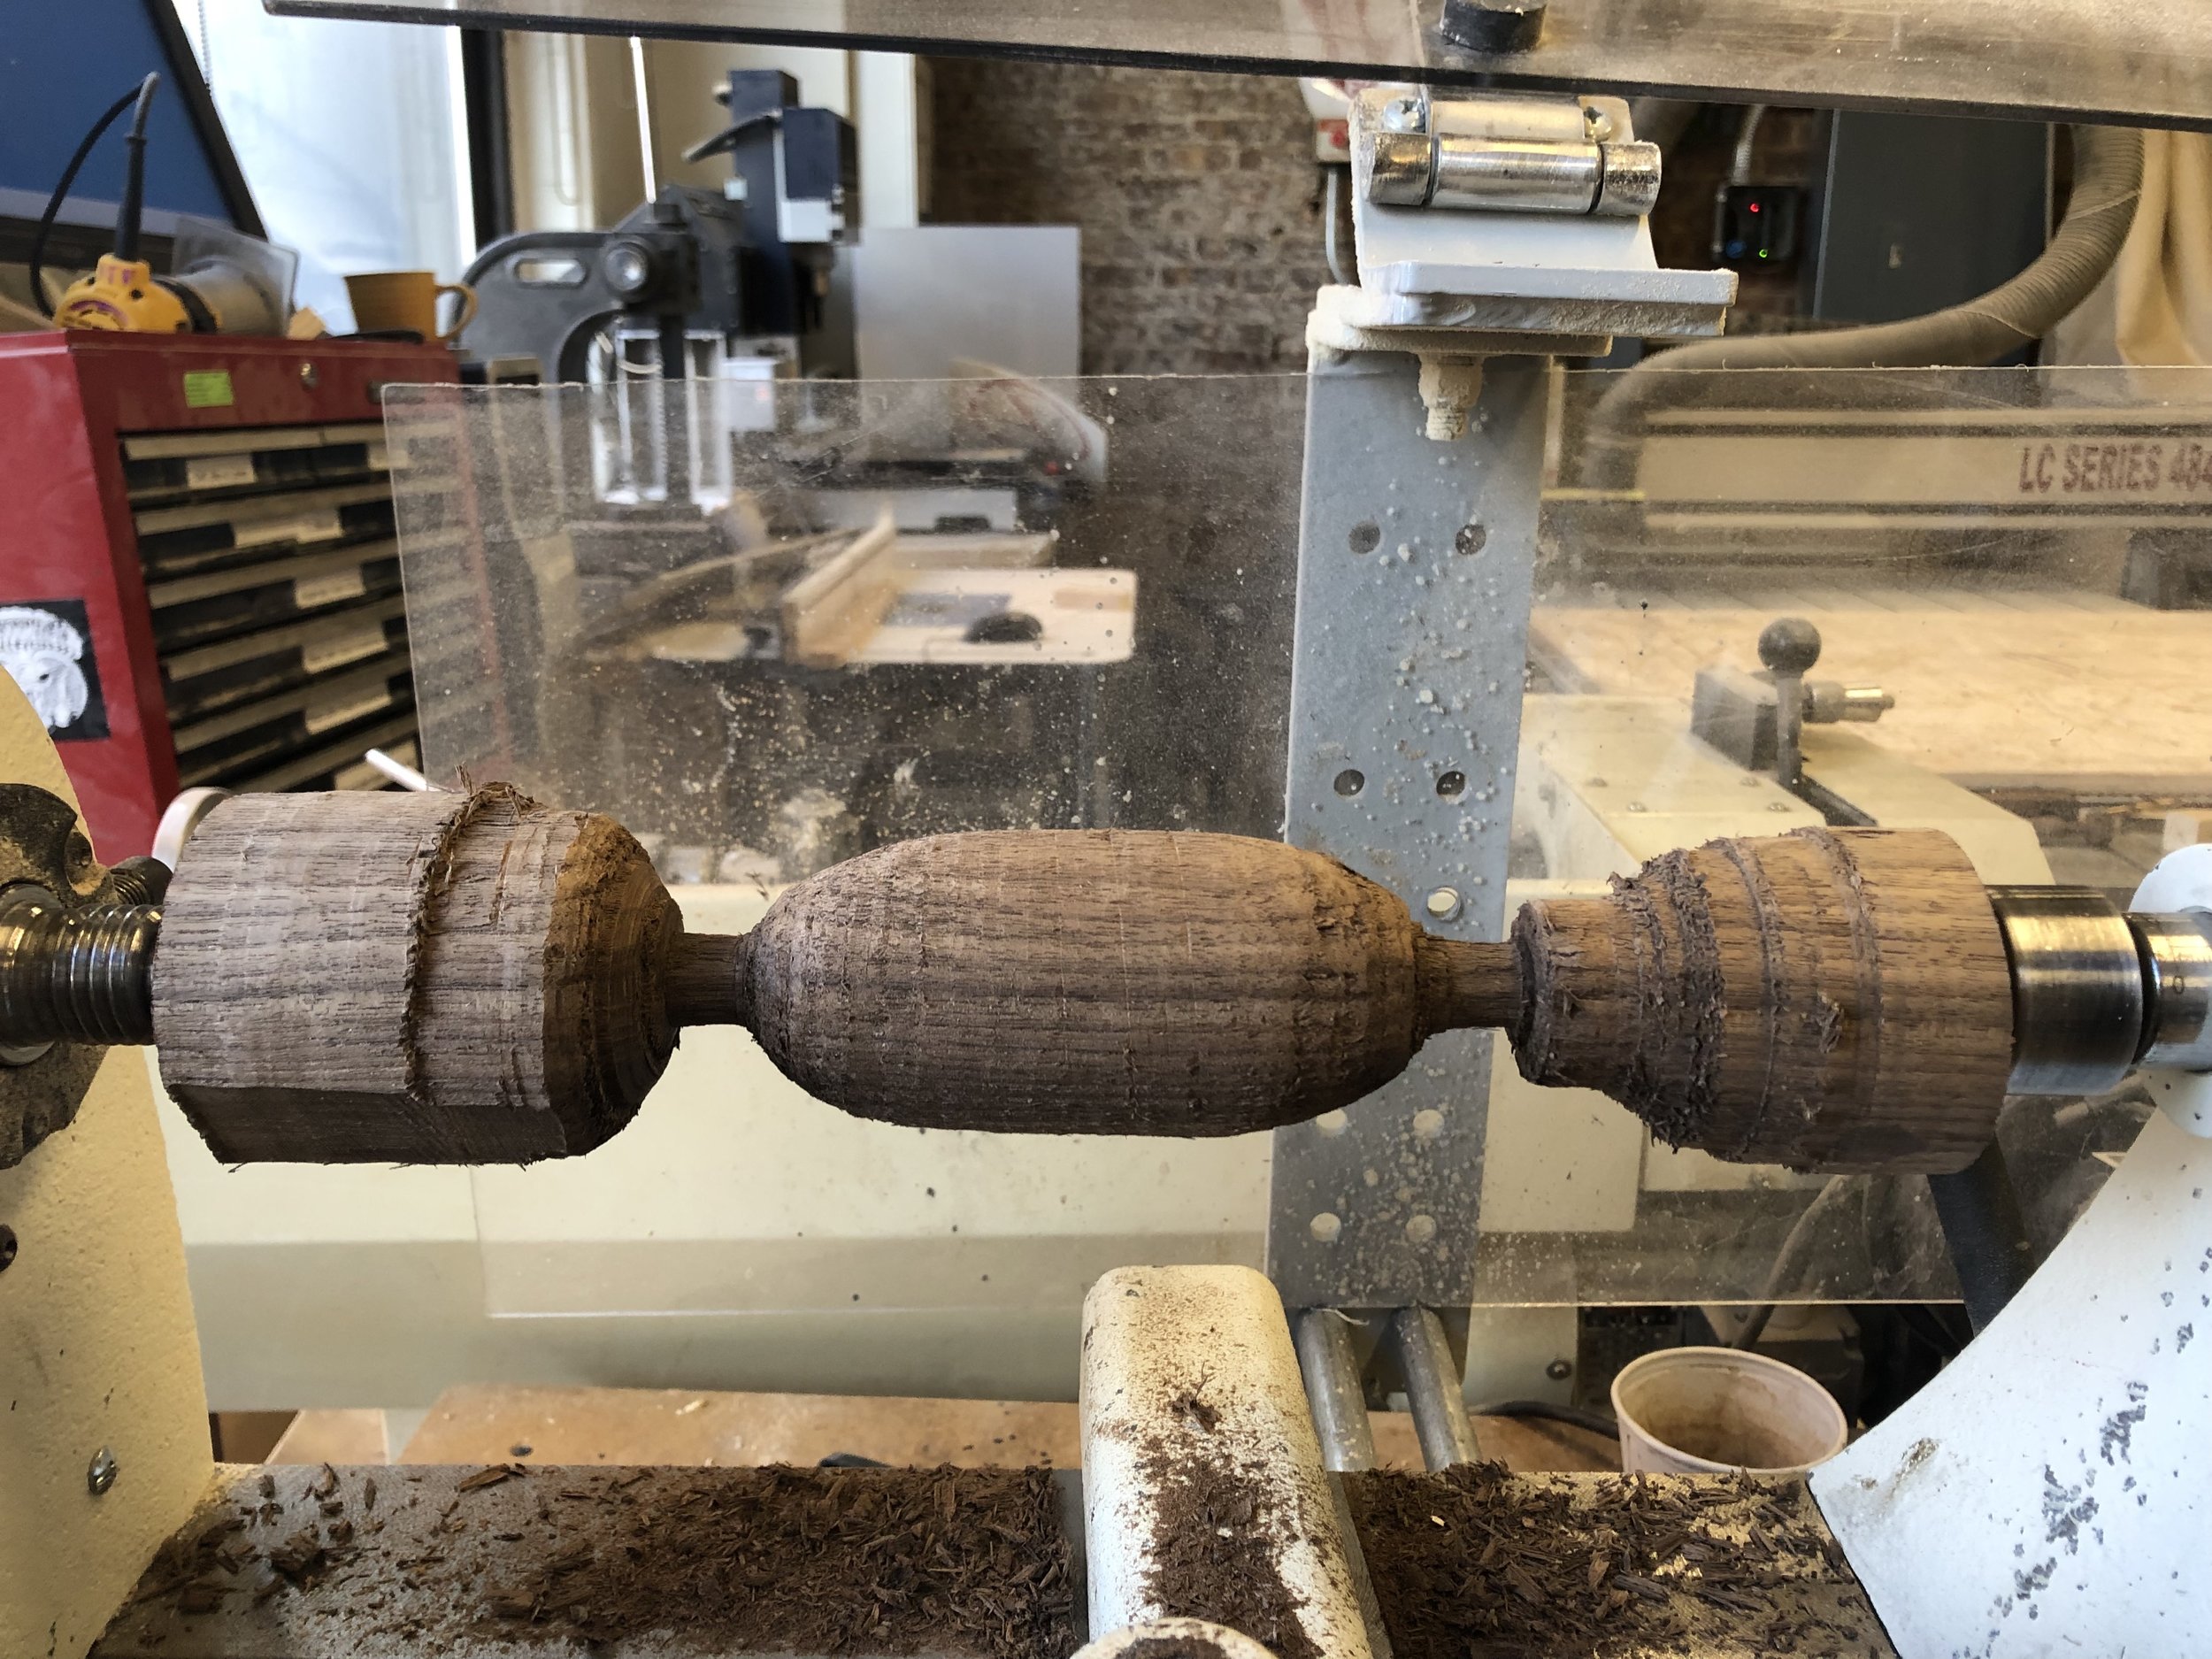
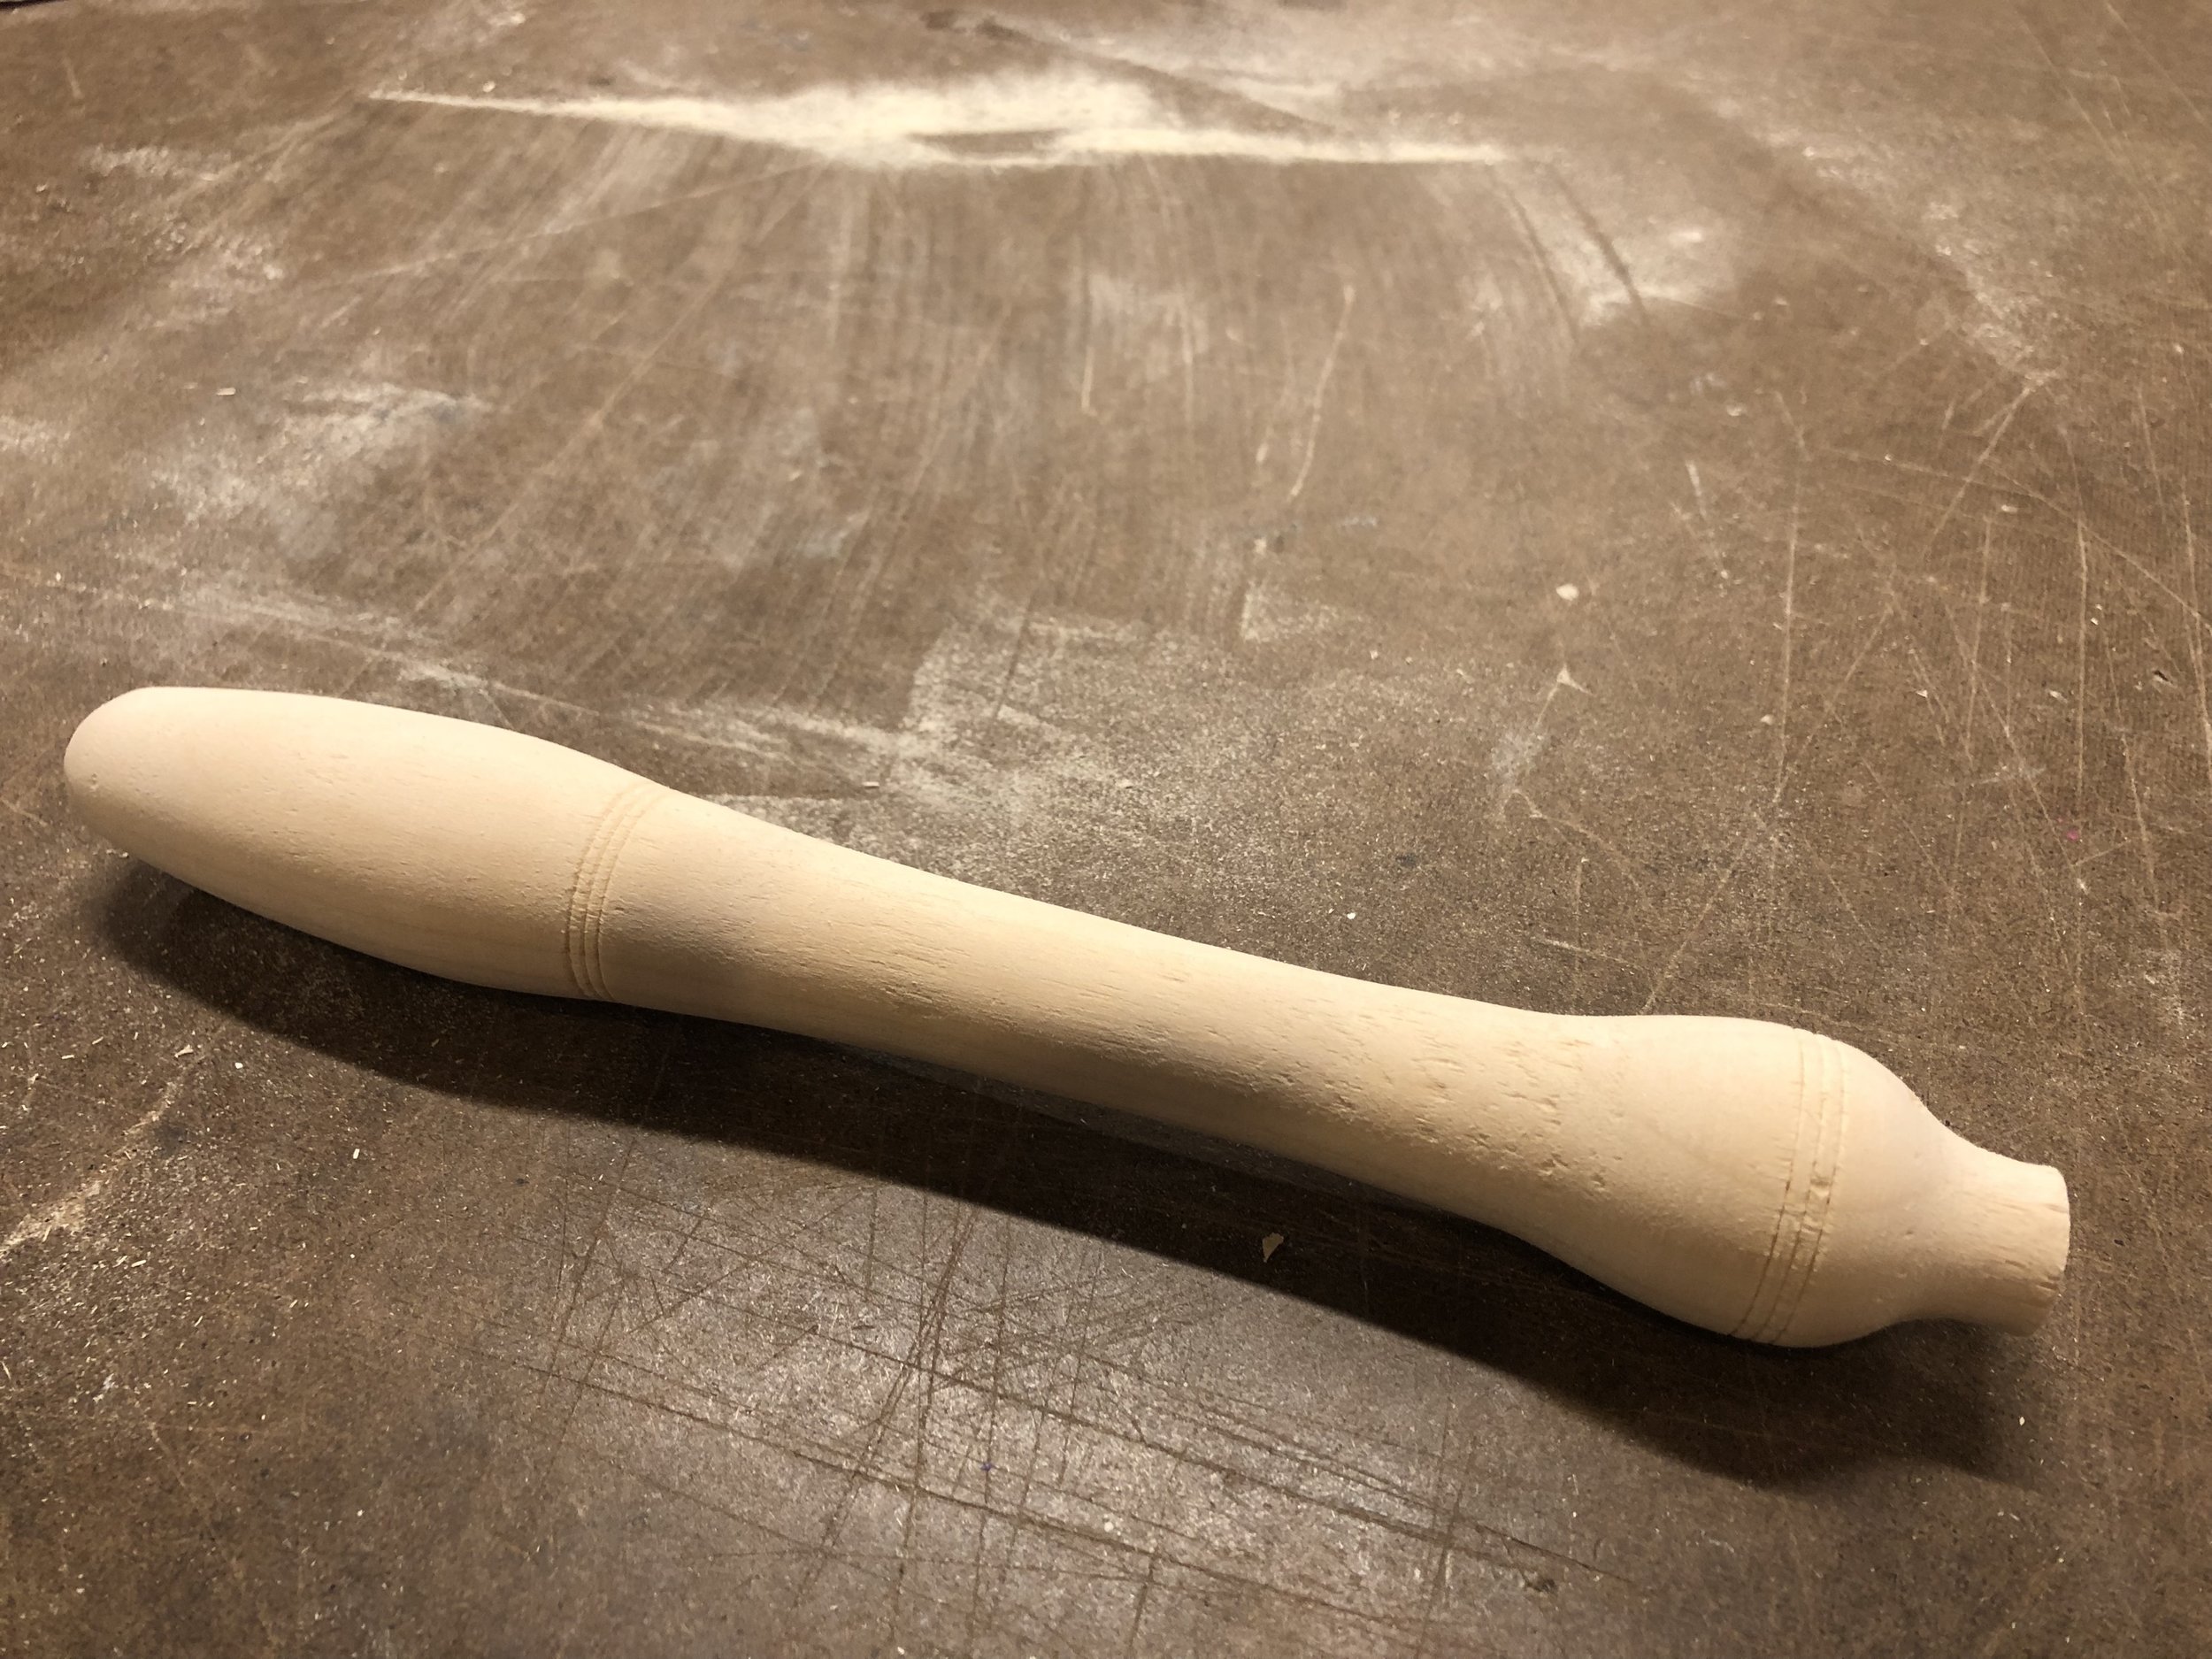
During class I kept playing with the top and wondered other woods would feel like. After class, I turned an additional two tops that evening — both made out of oak. These were more detailed and a bit unique in their own way. Oak was a bit more difficult to turn as it chips quite a bit, but I managed to get these two on the same piece at once. Again, turning the tips managed to be a challenge so I hand sanded them as well.

IMG_2763.jpg IMG_2765.jpg IMG_2762.jpg IMG_2766.jpg IMG_2764.jpg IMG_2767.jpg IMG_2768.jpg IMG_2770.jpg IMG_2769.jpg

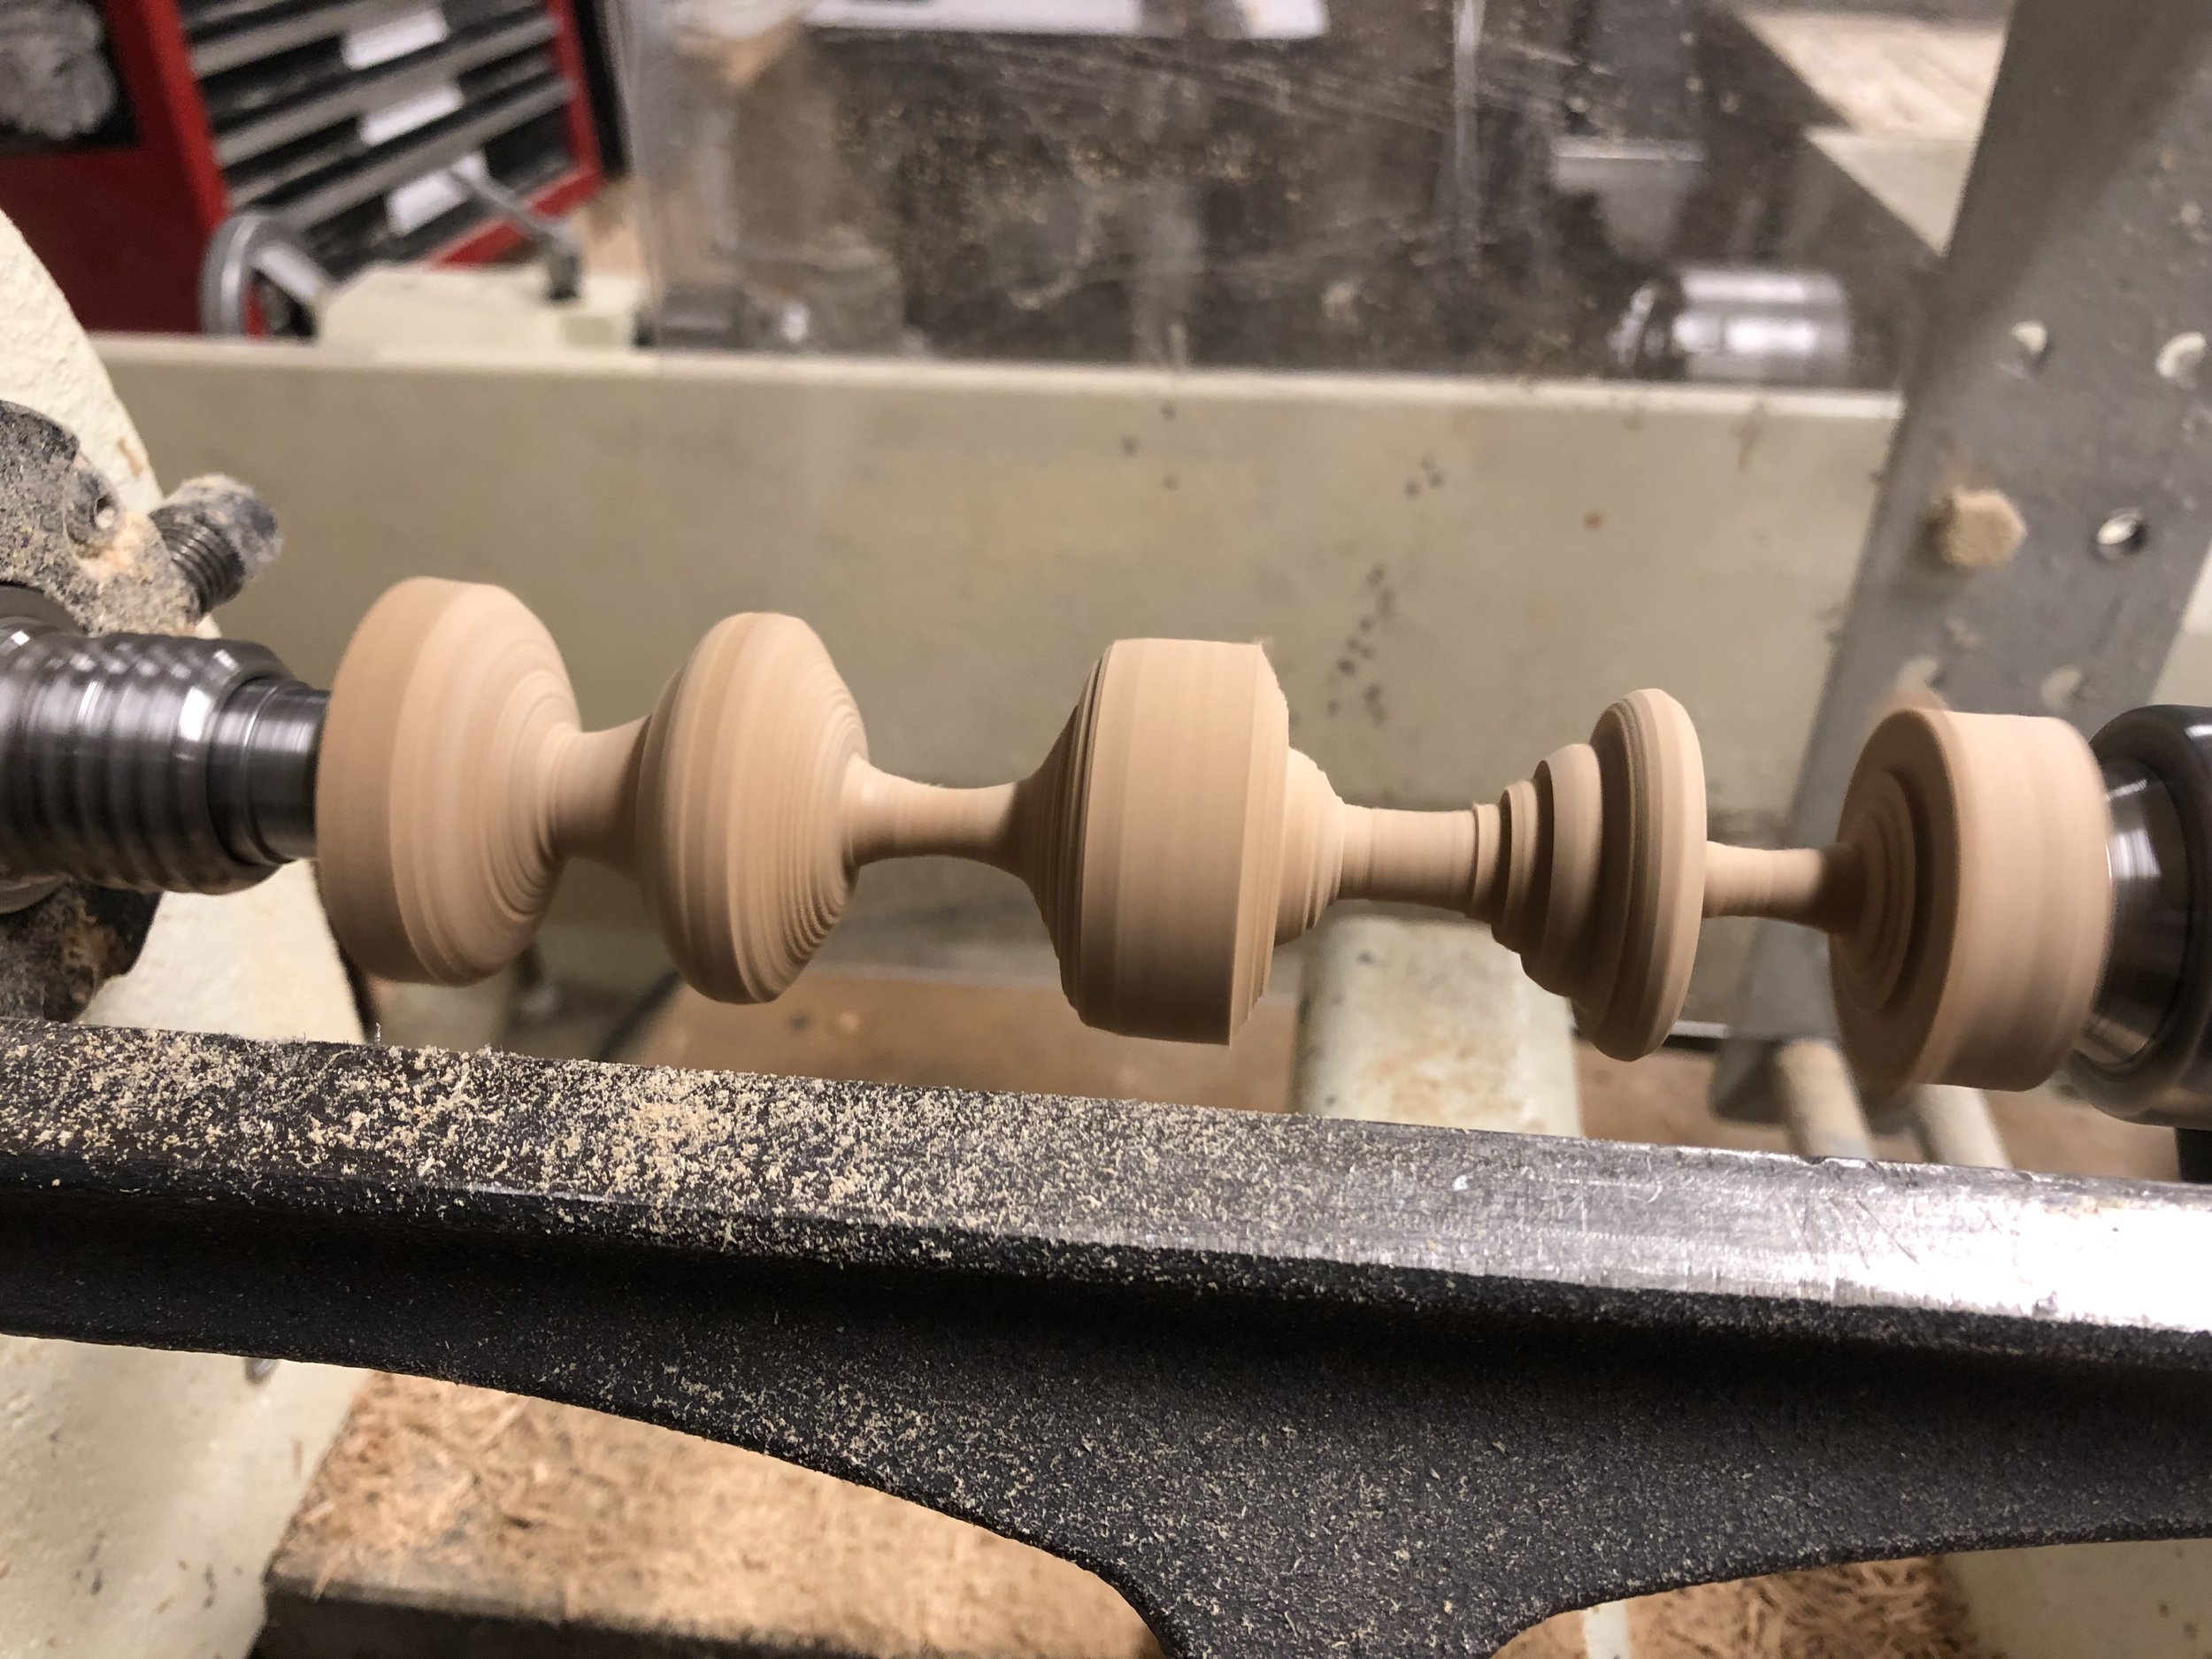
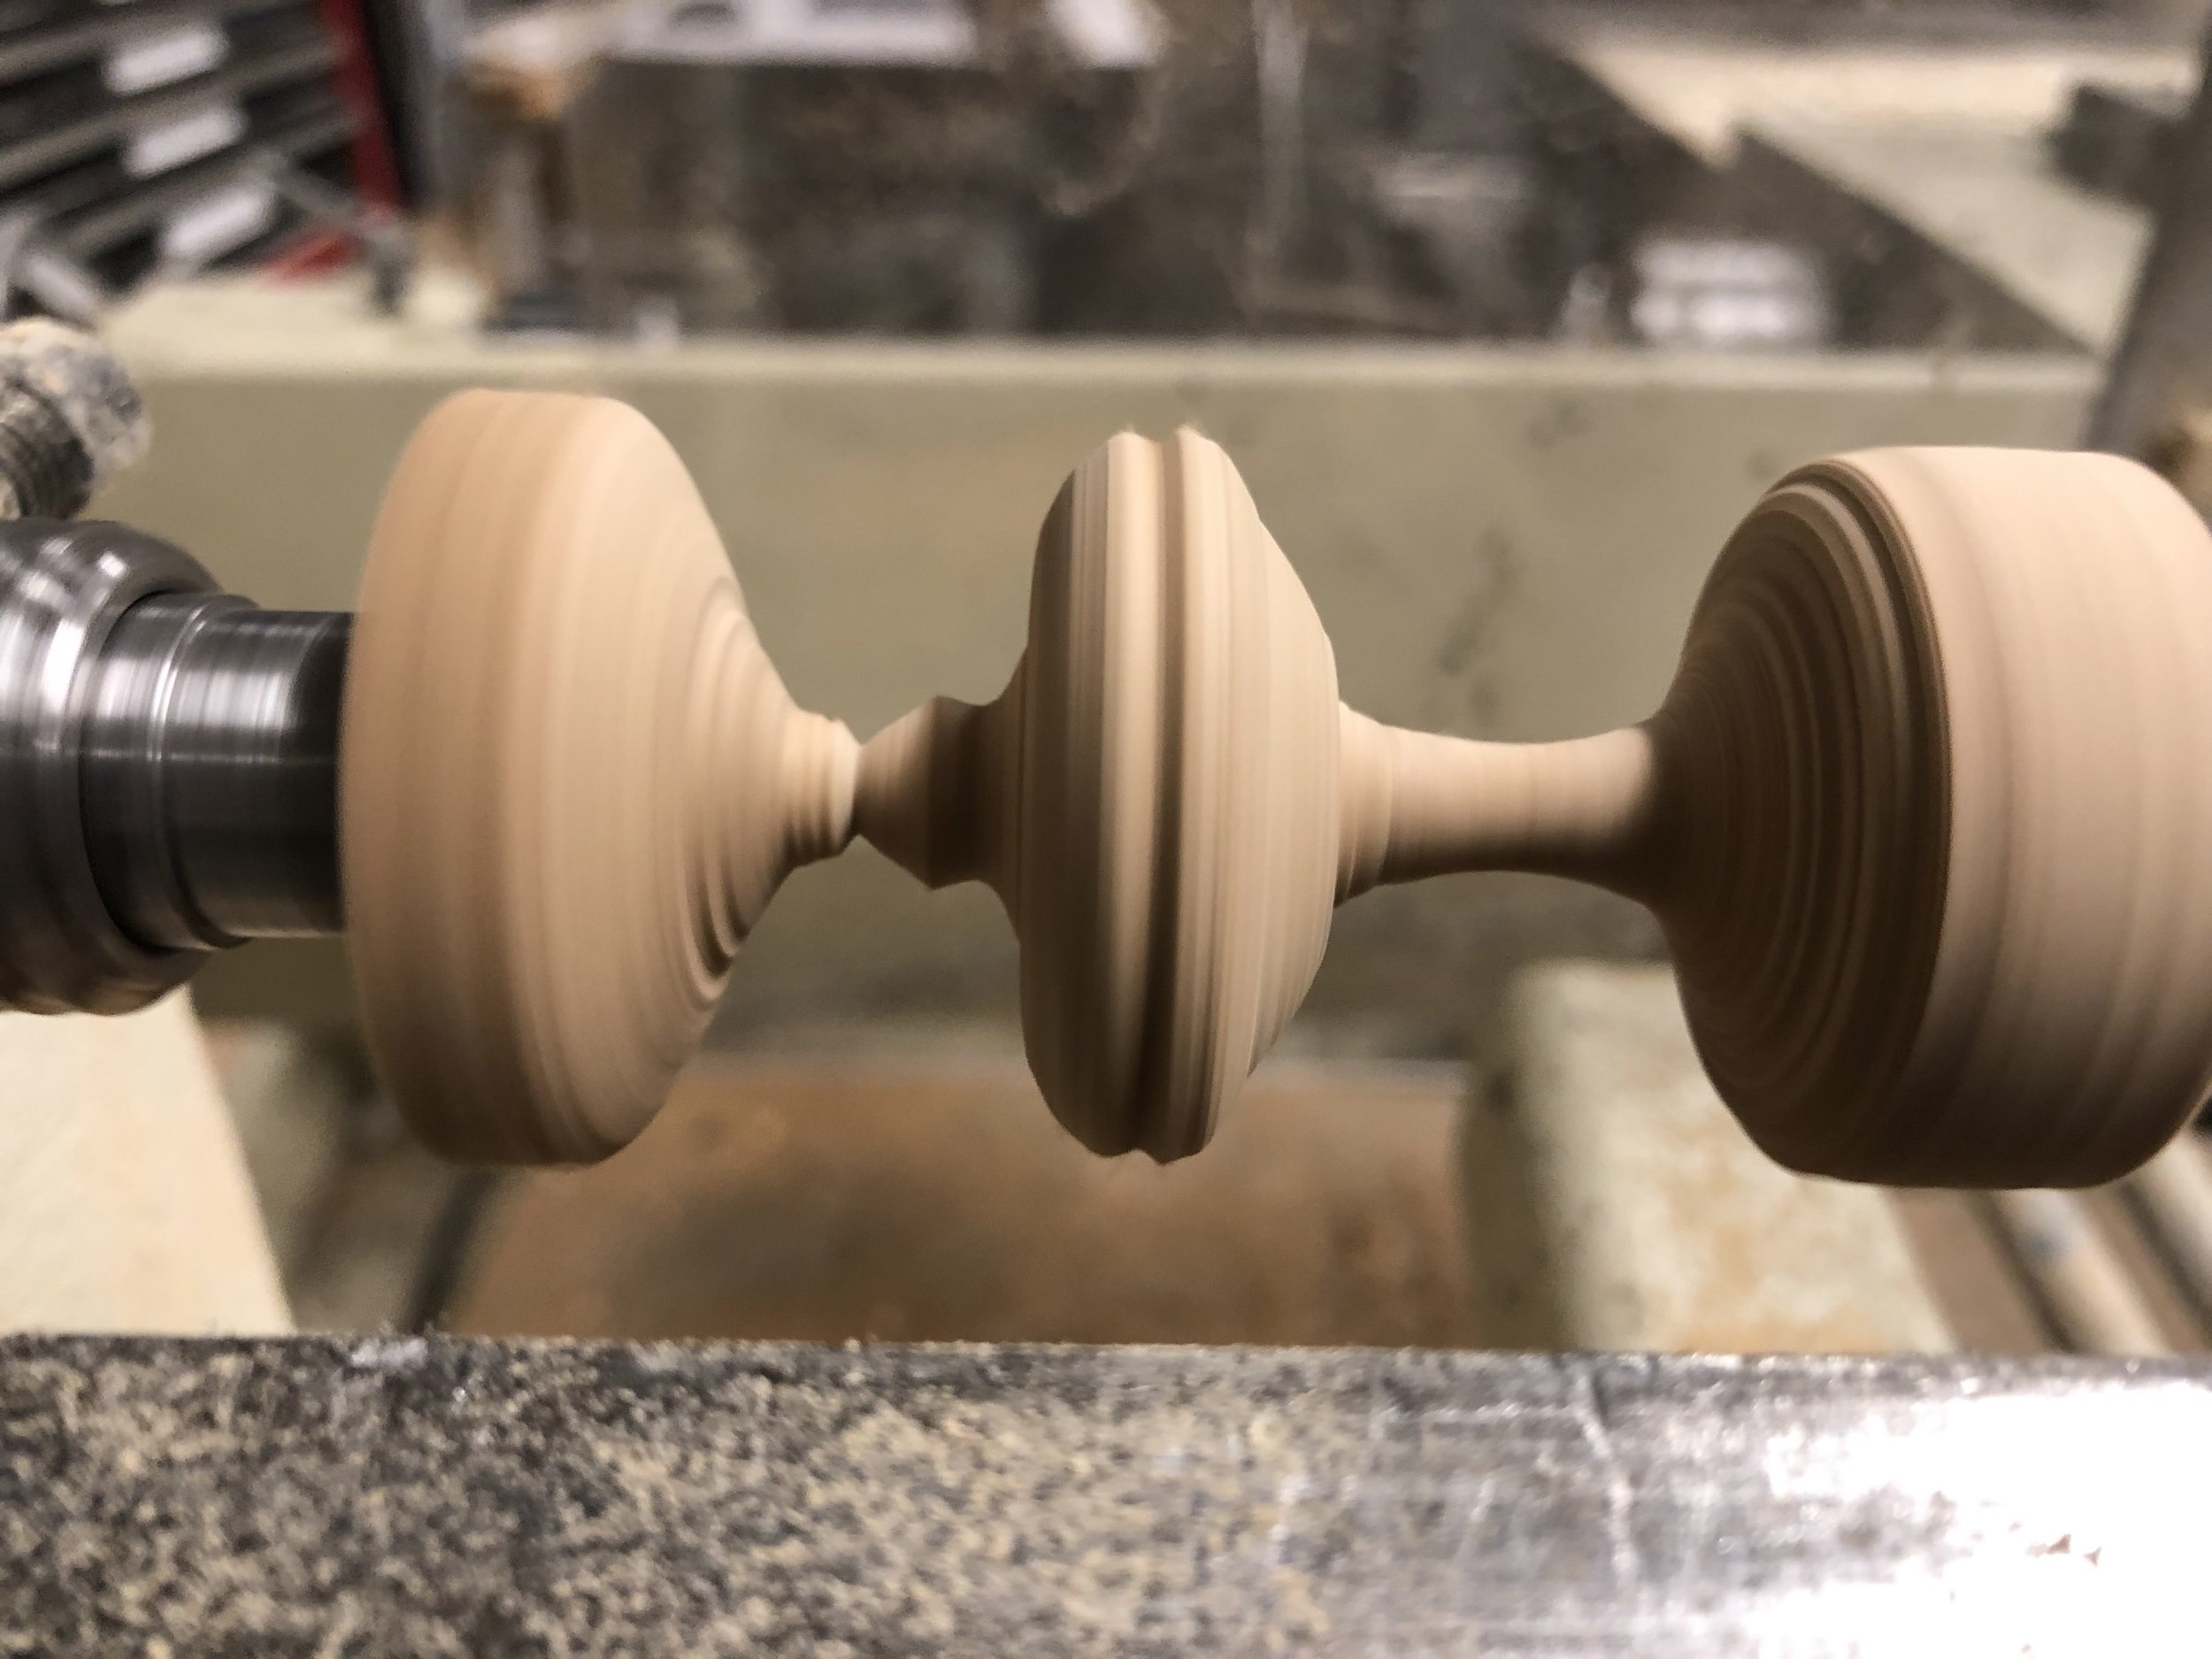
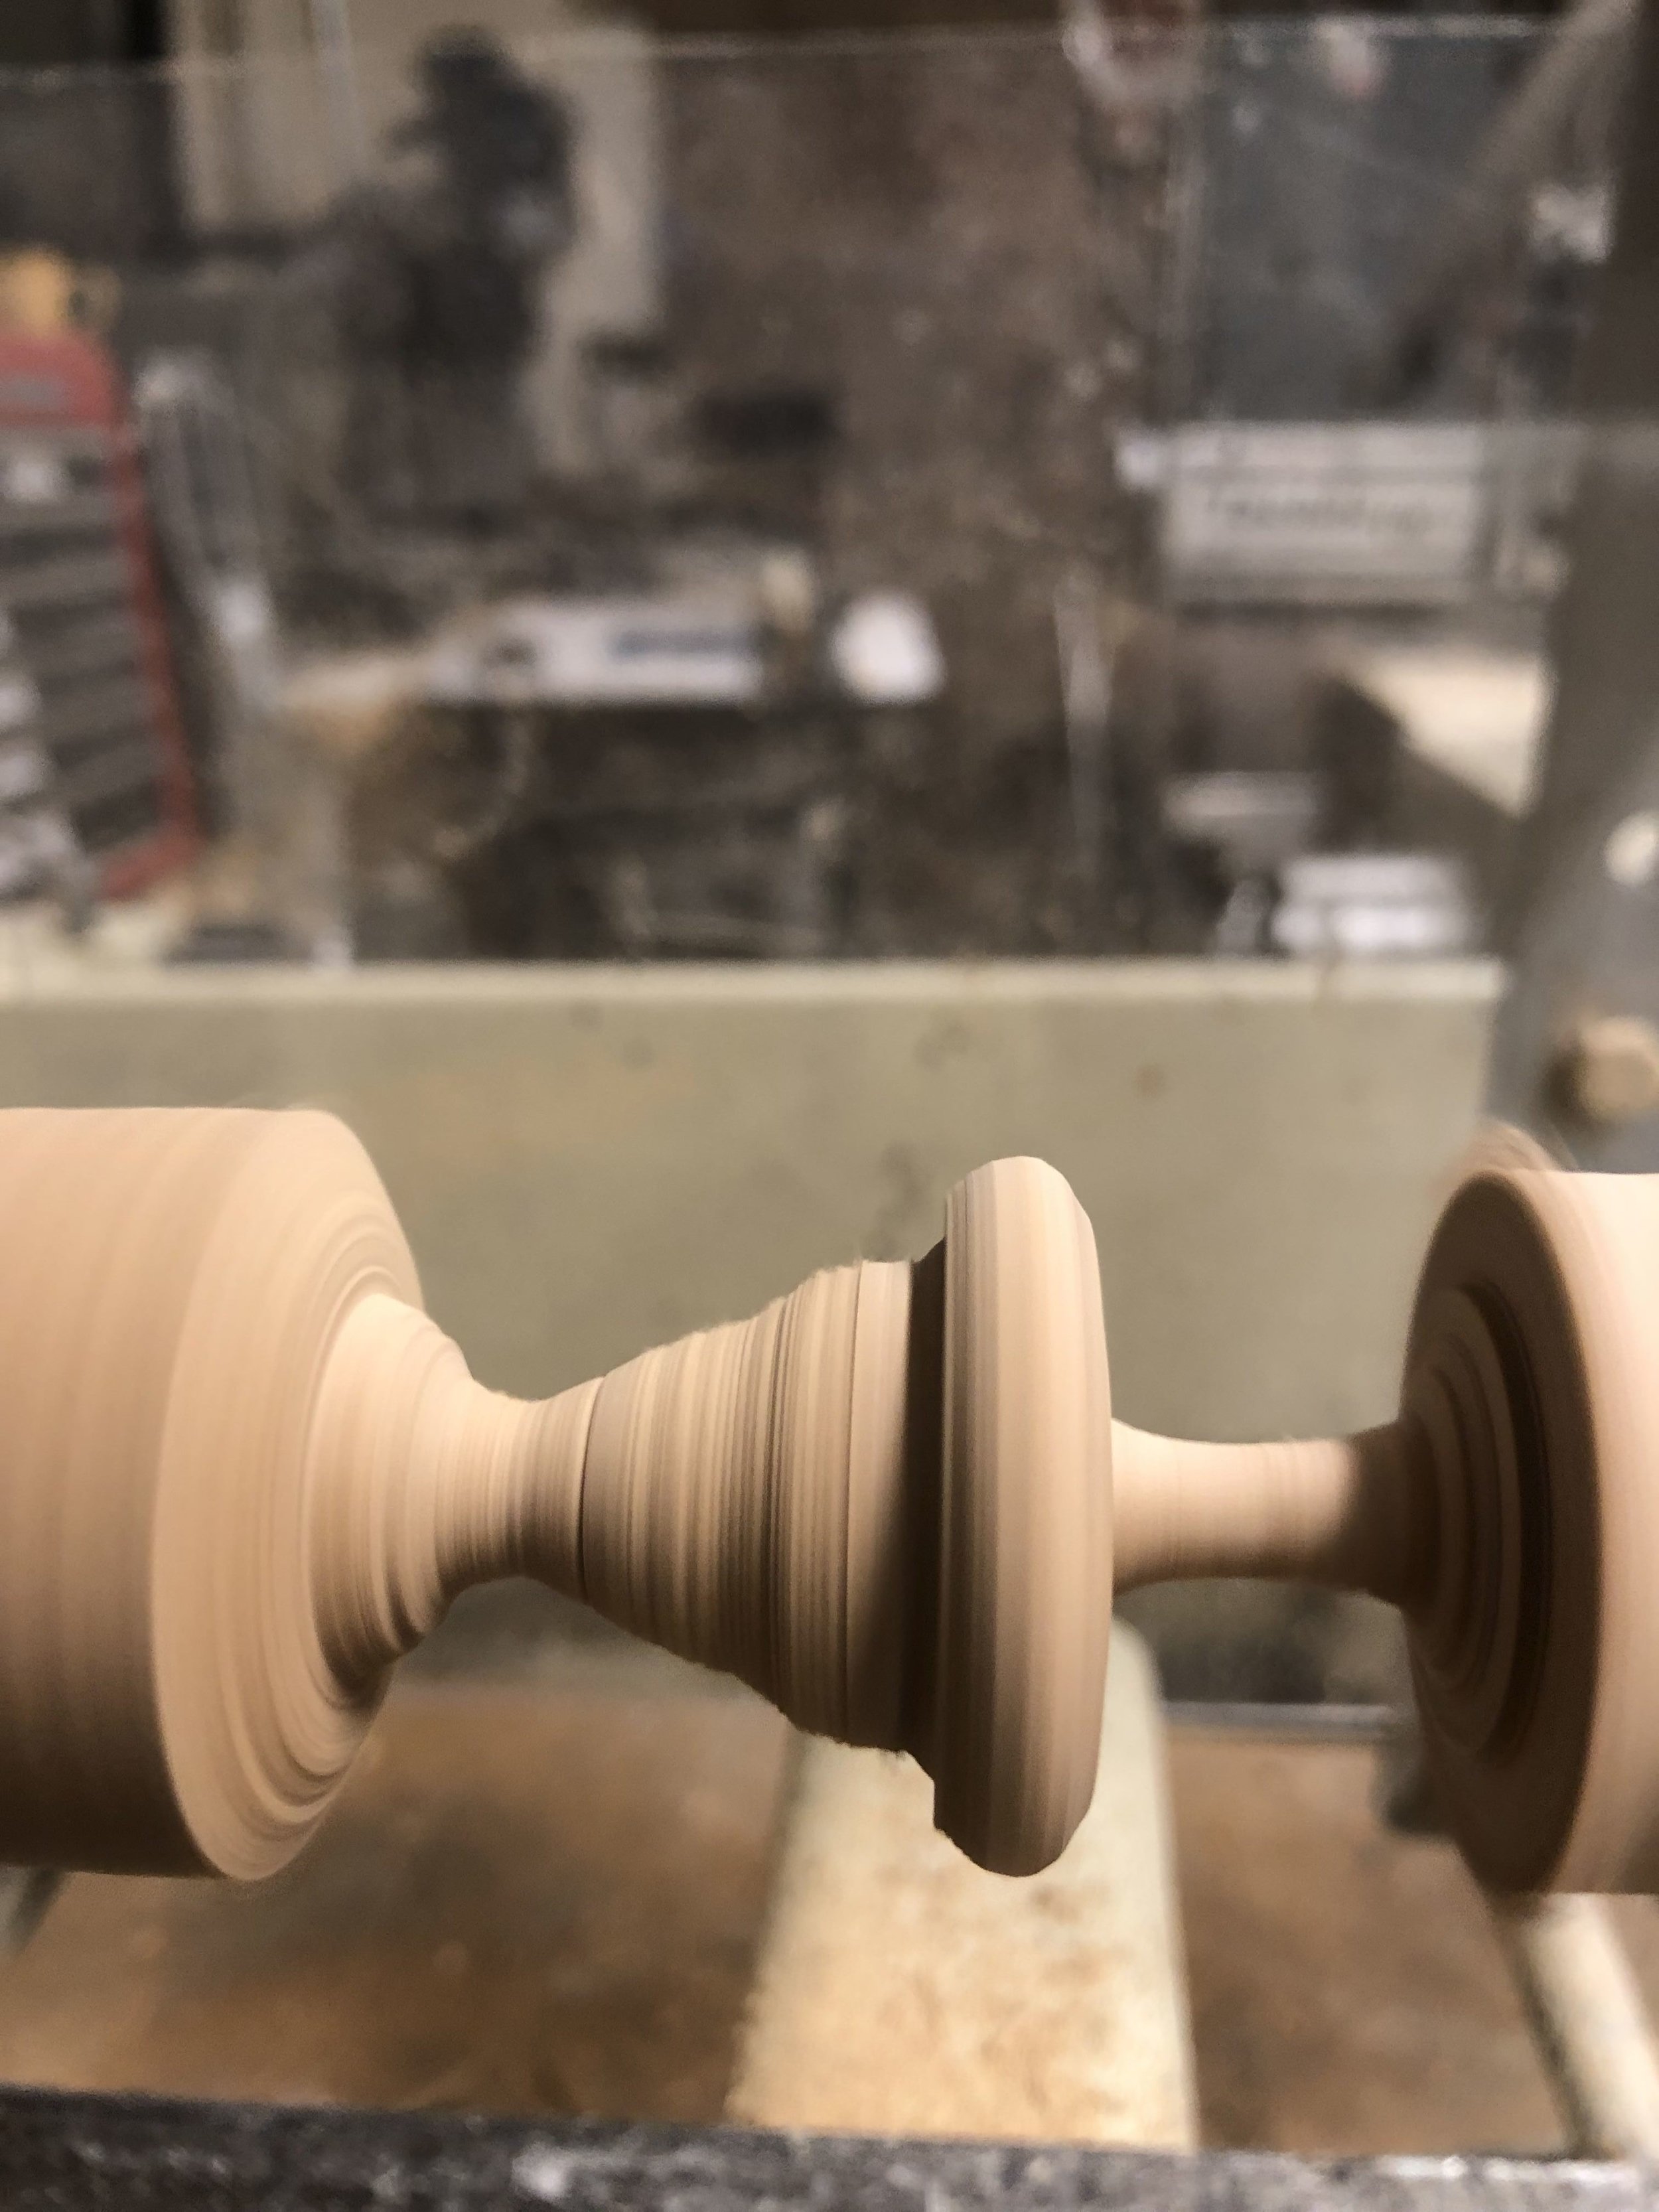
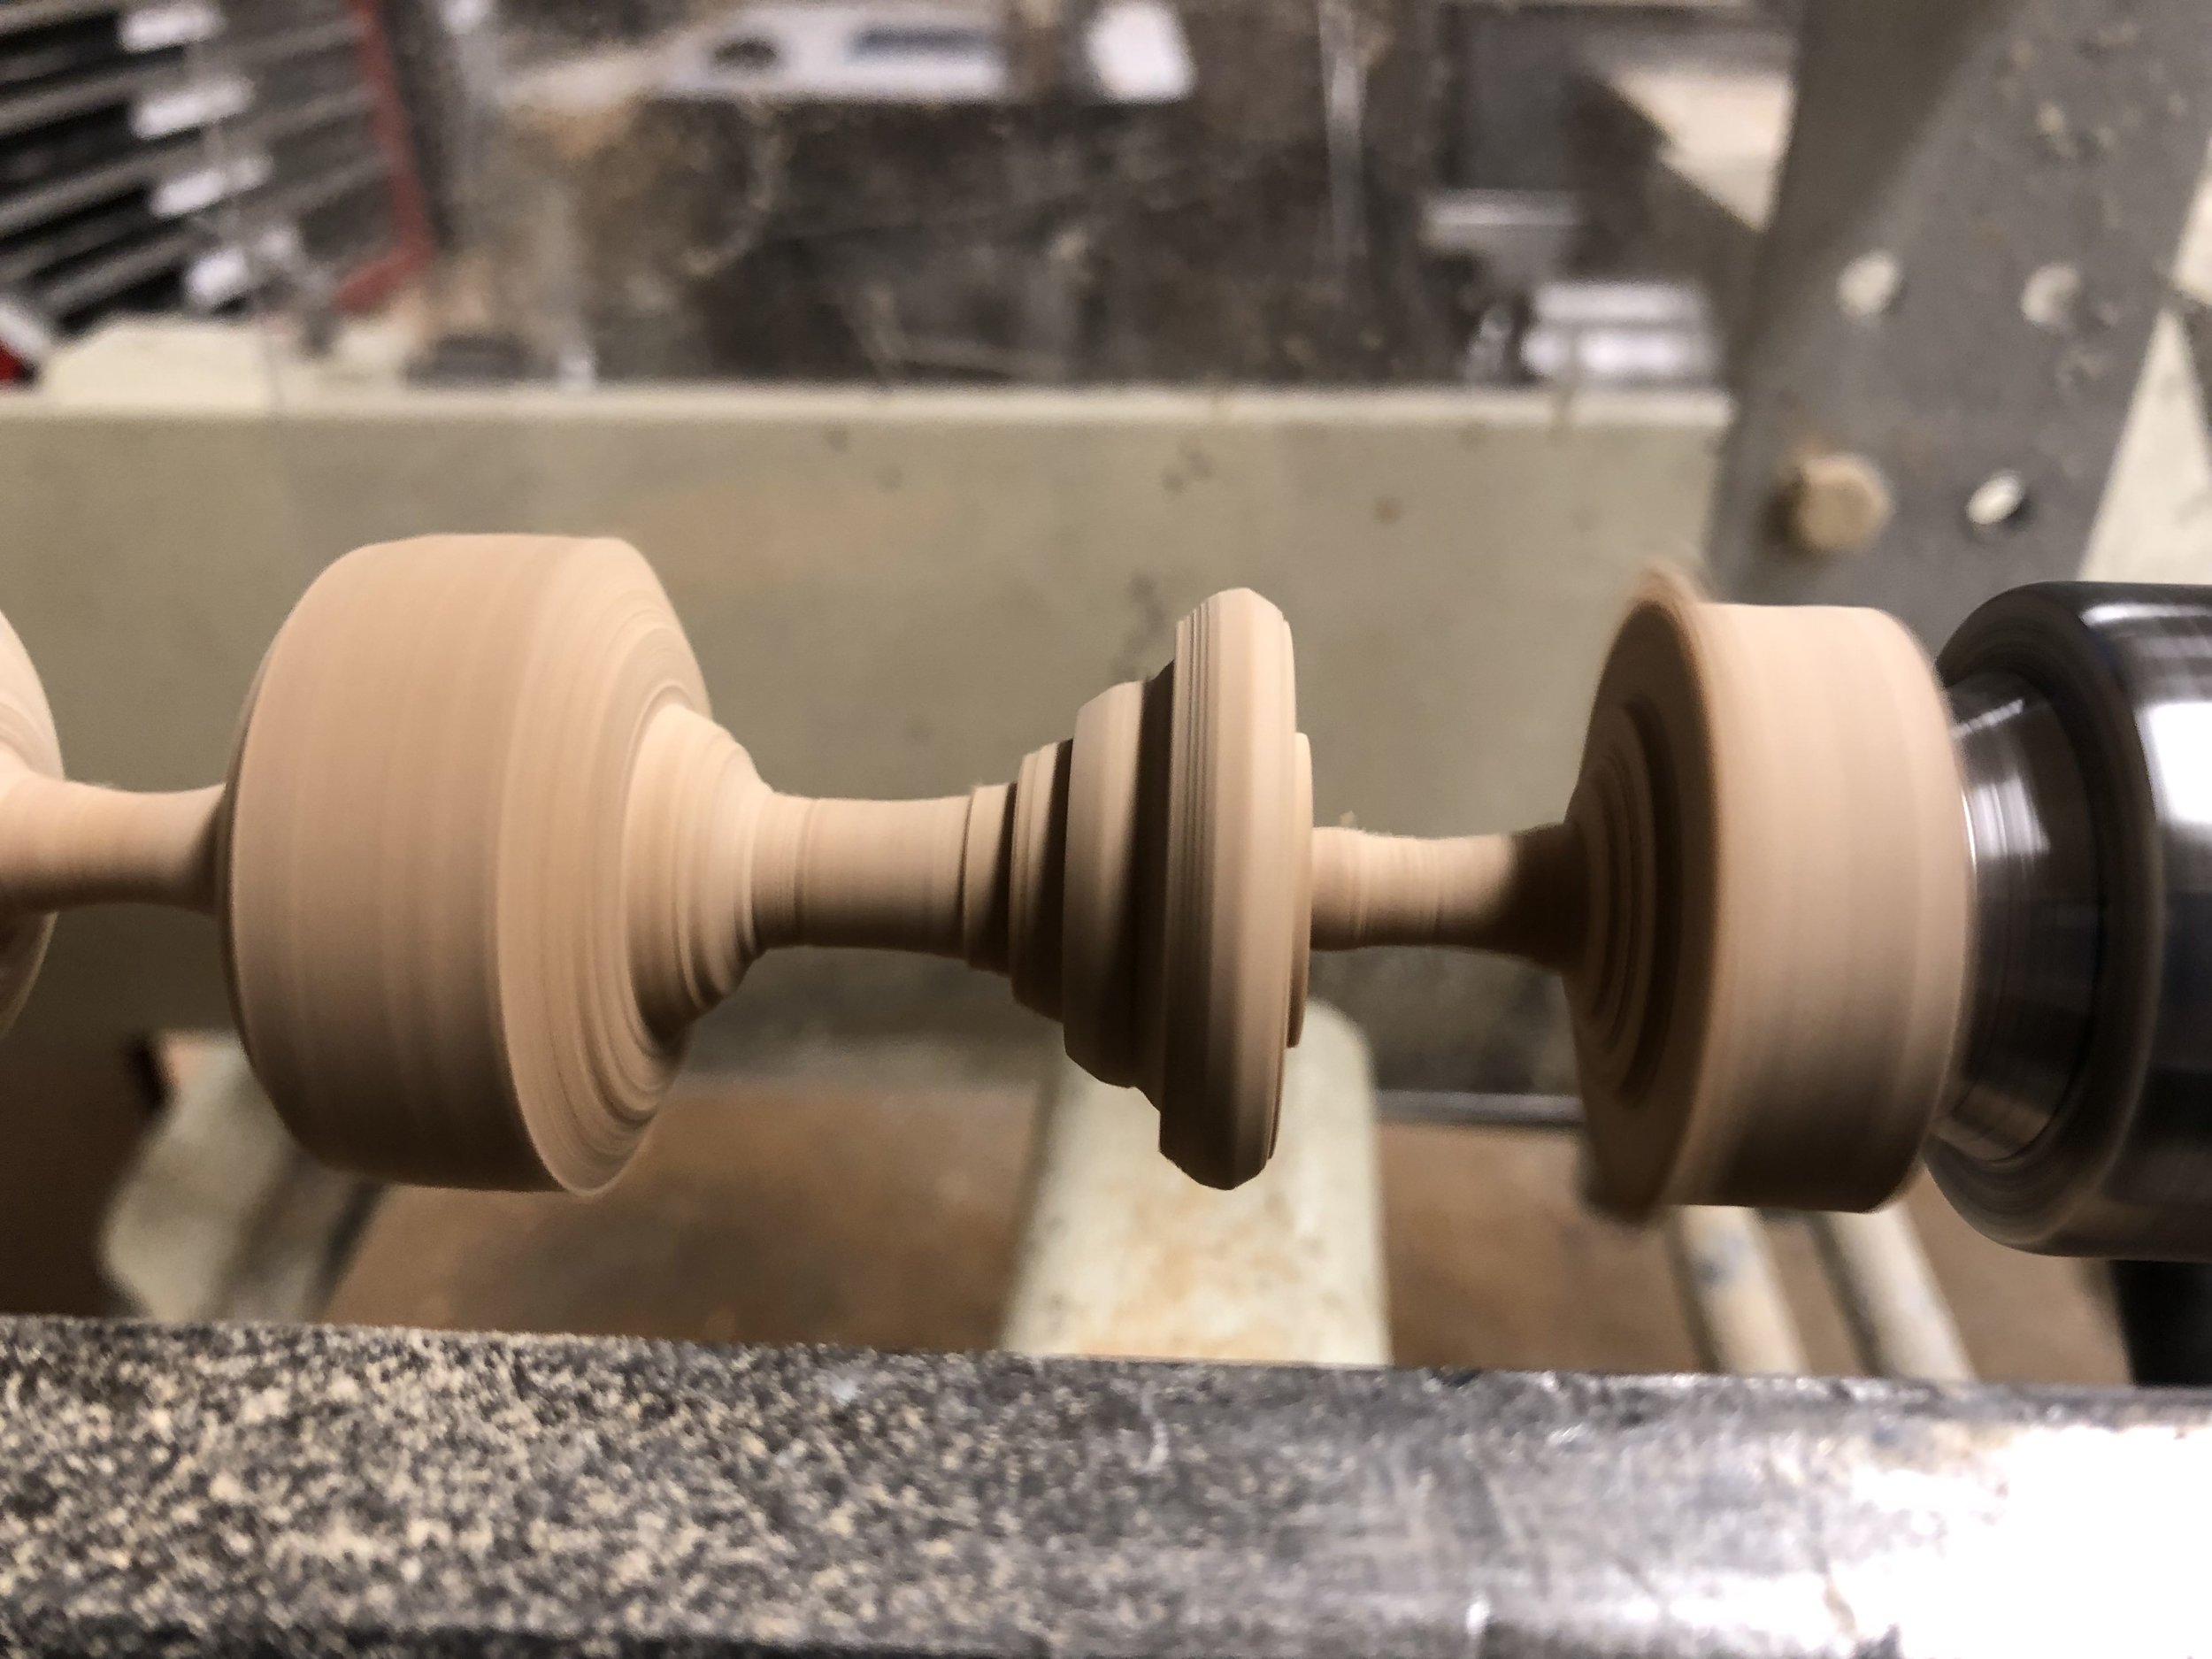
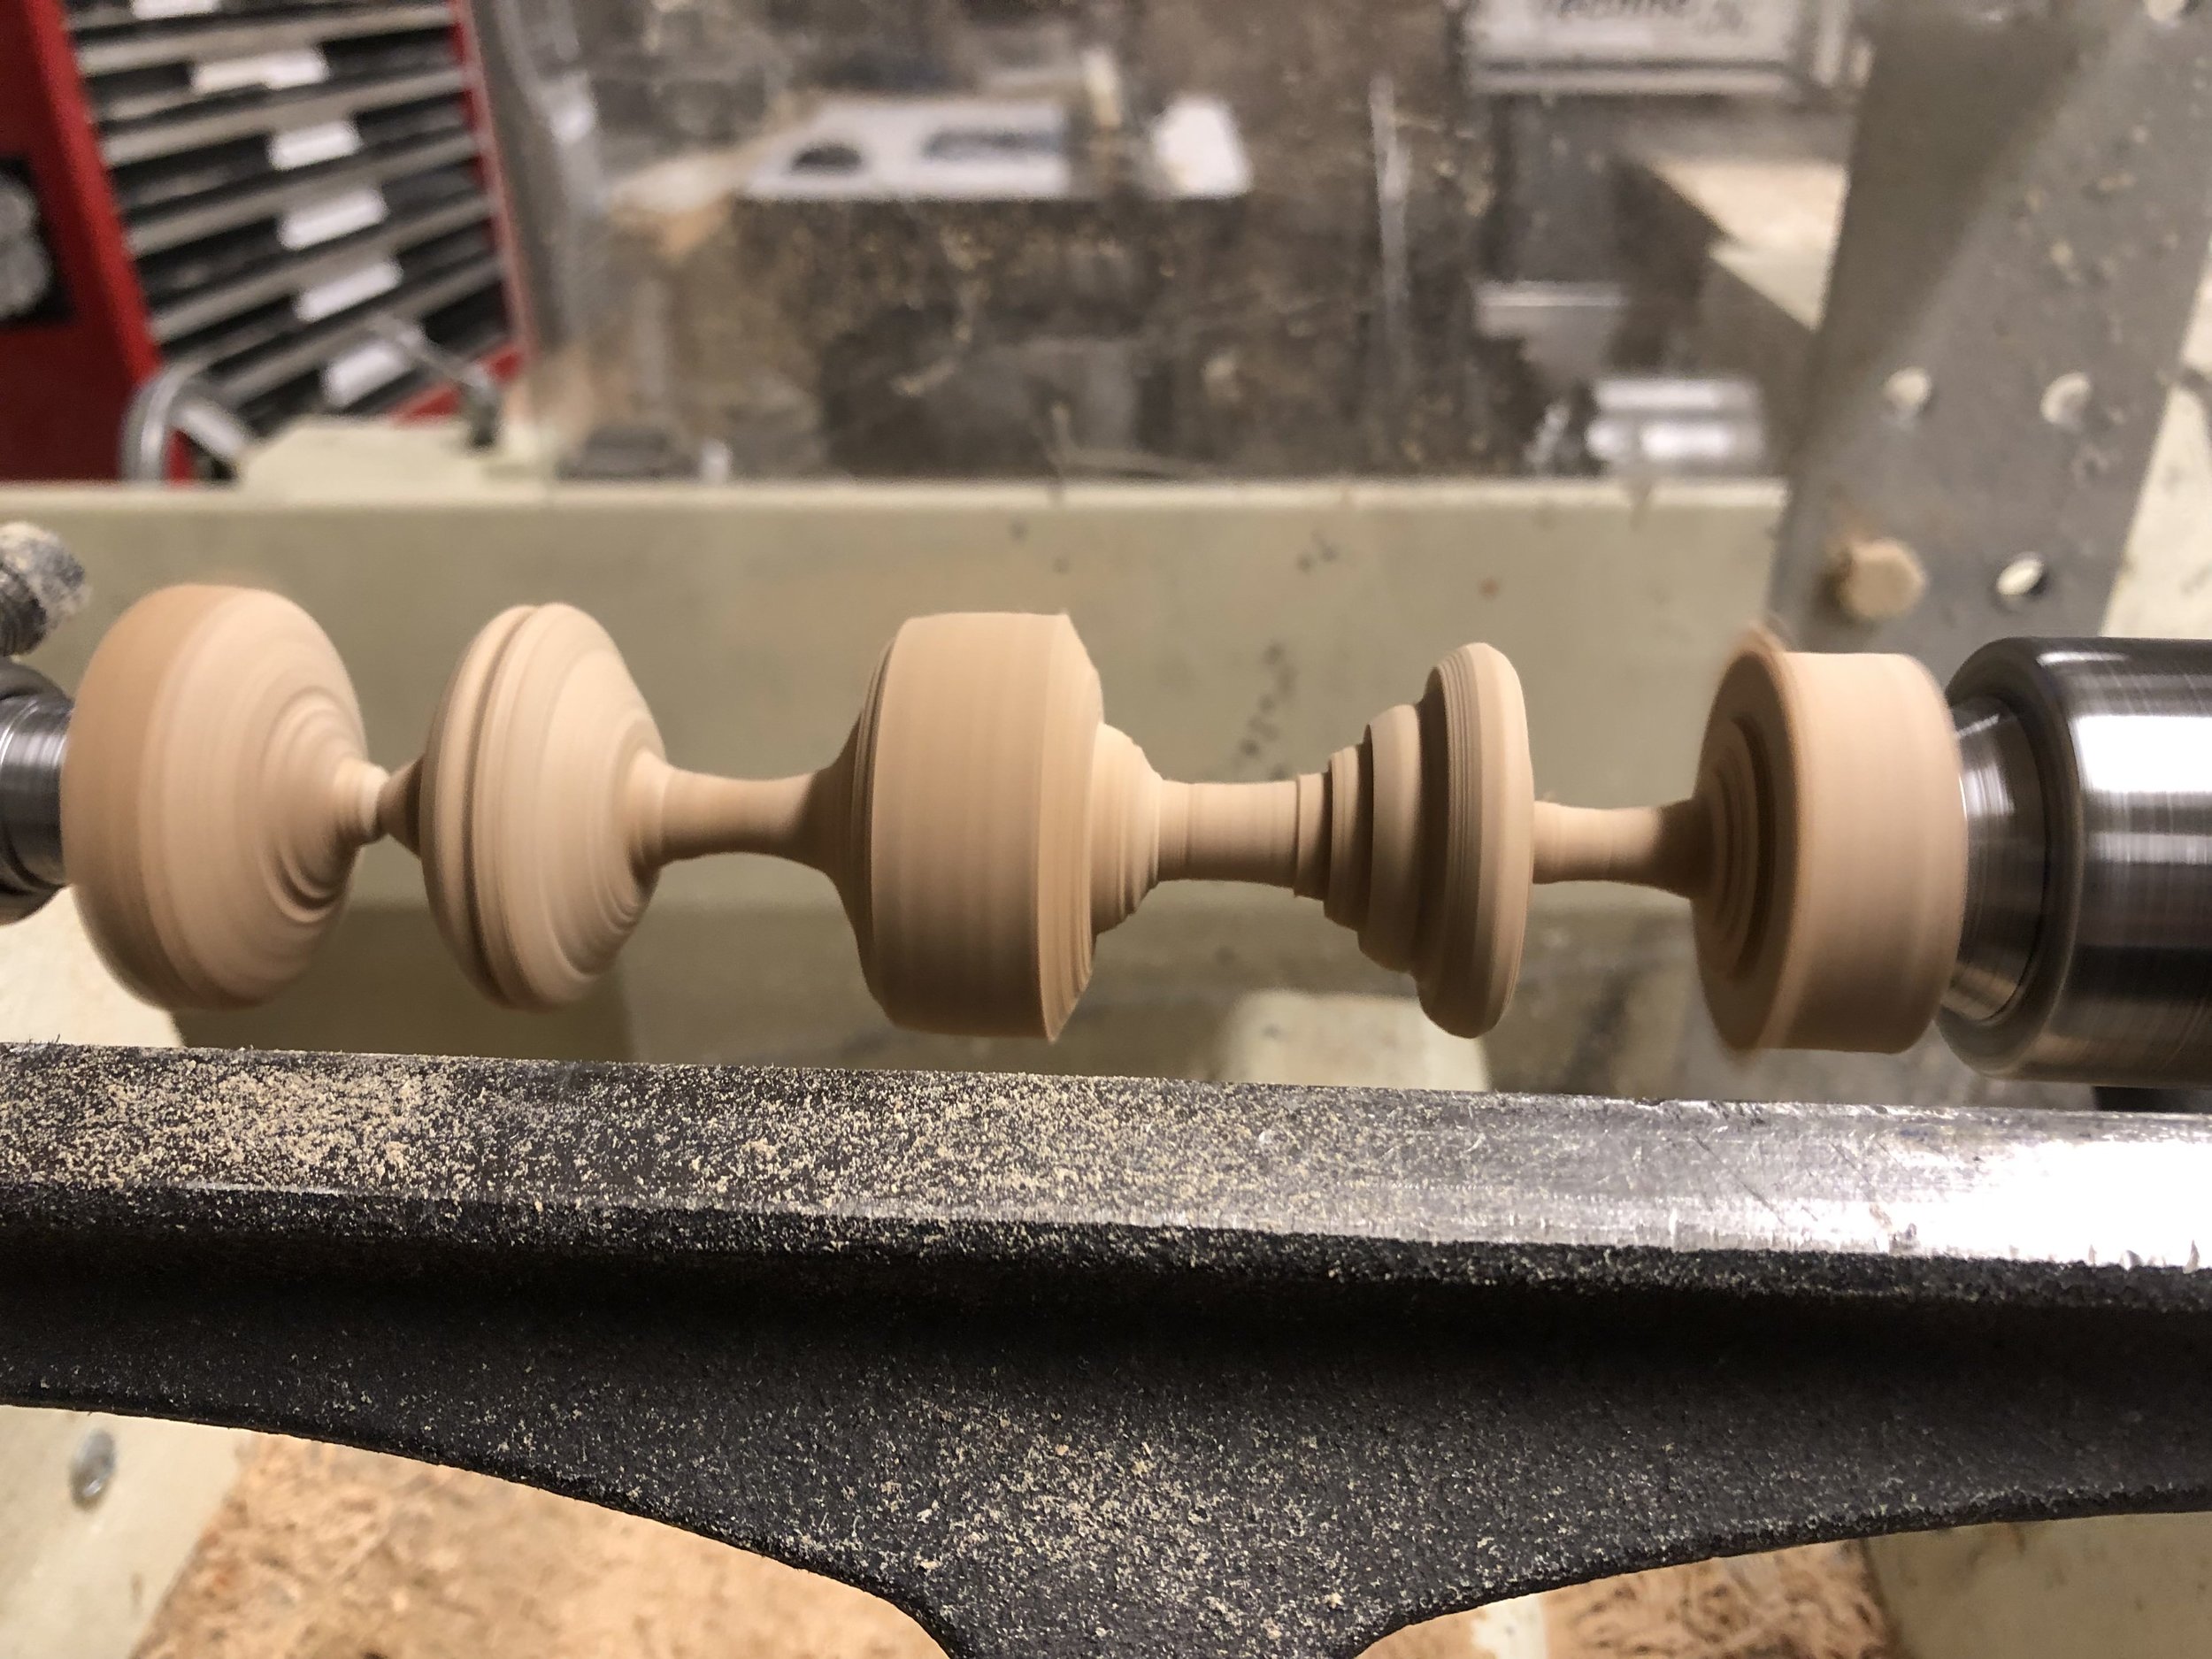
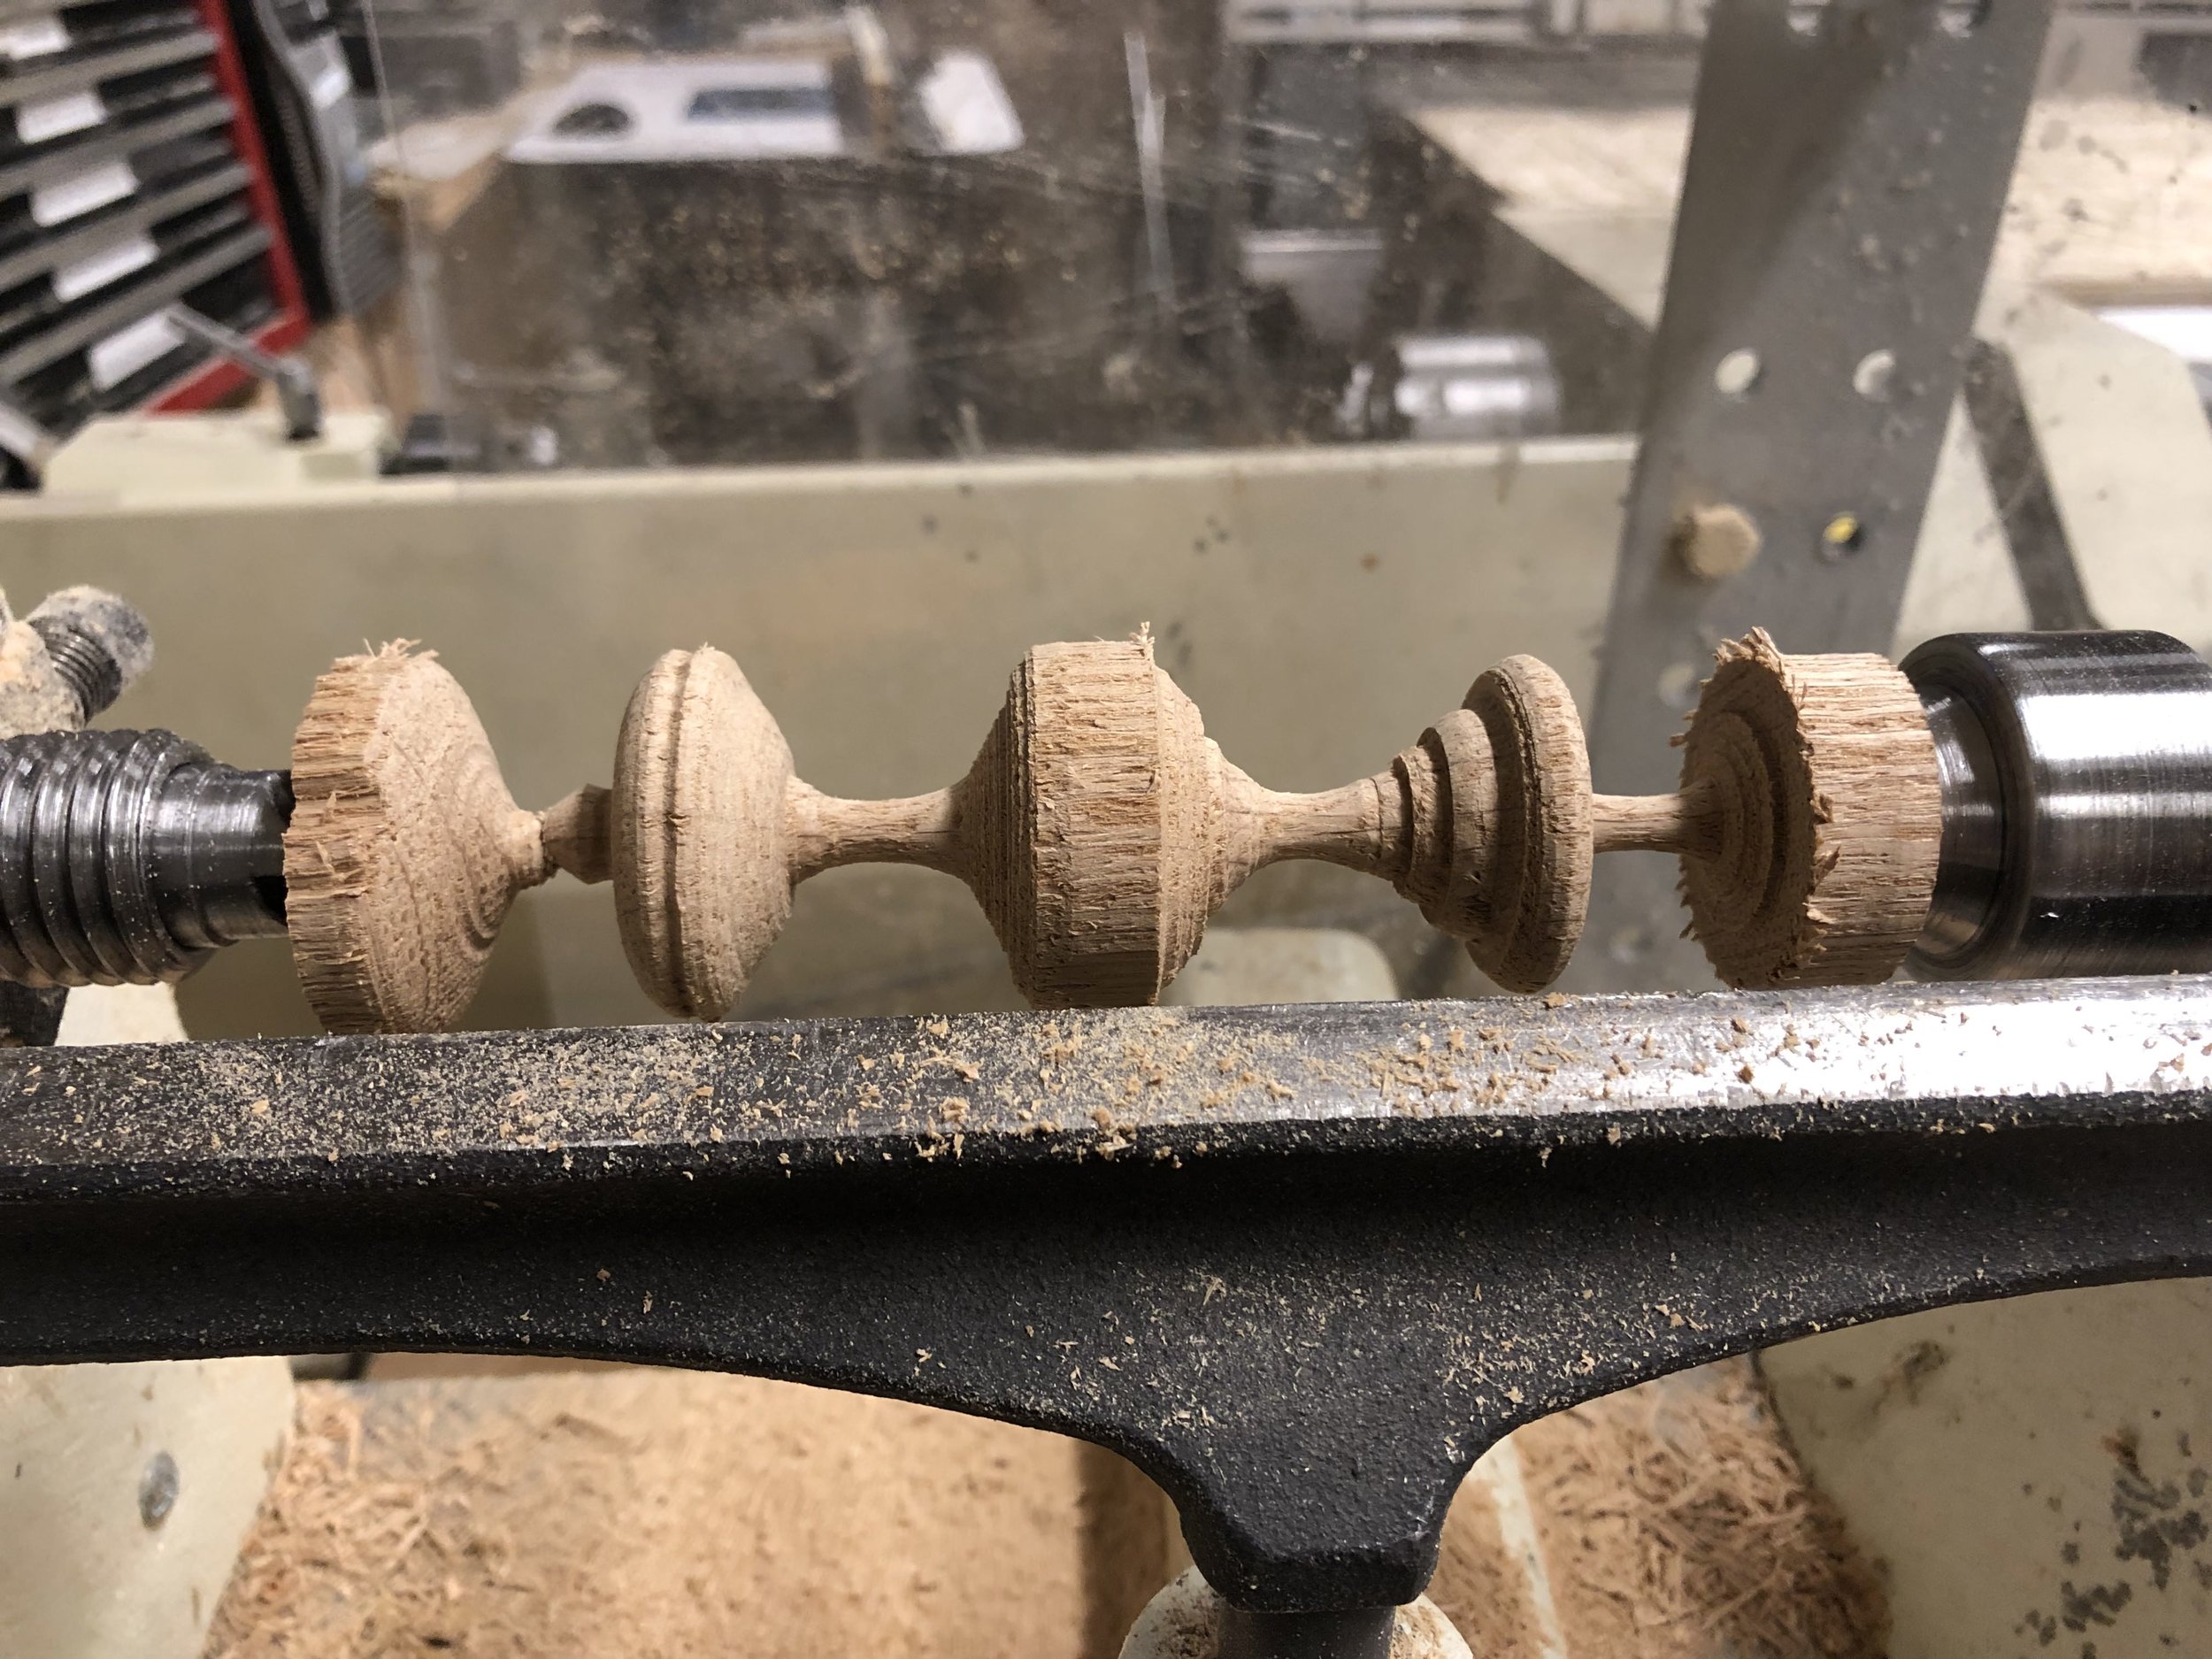
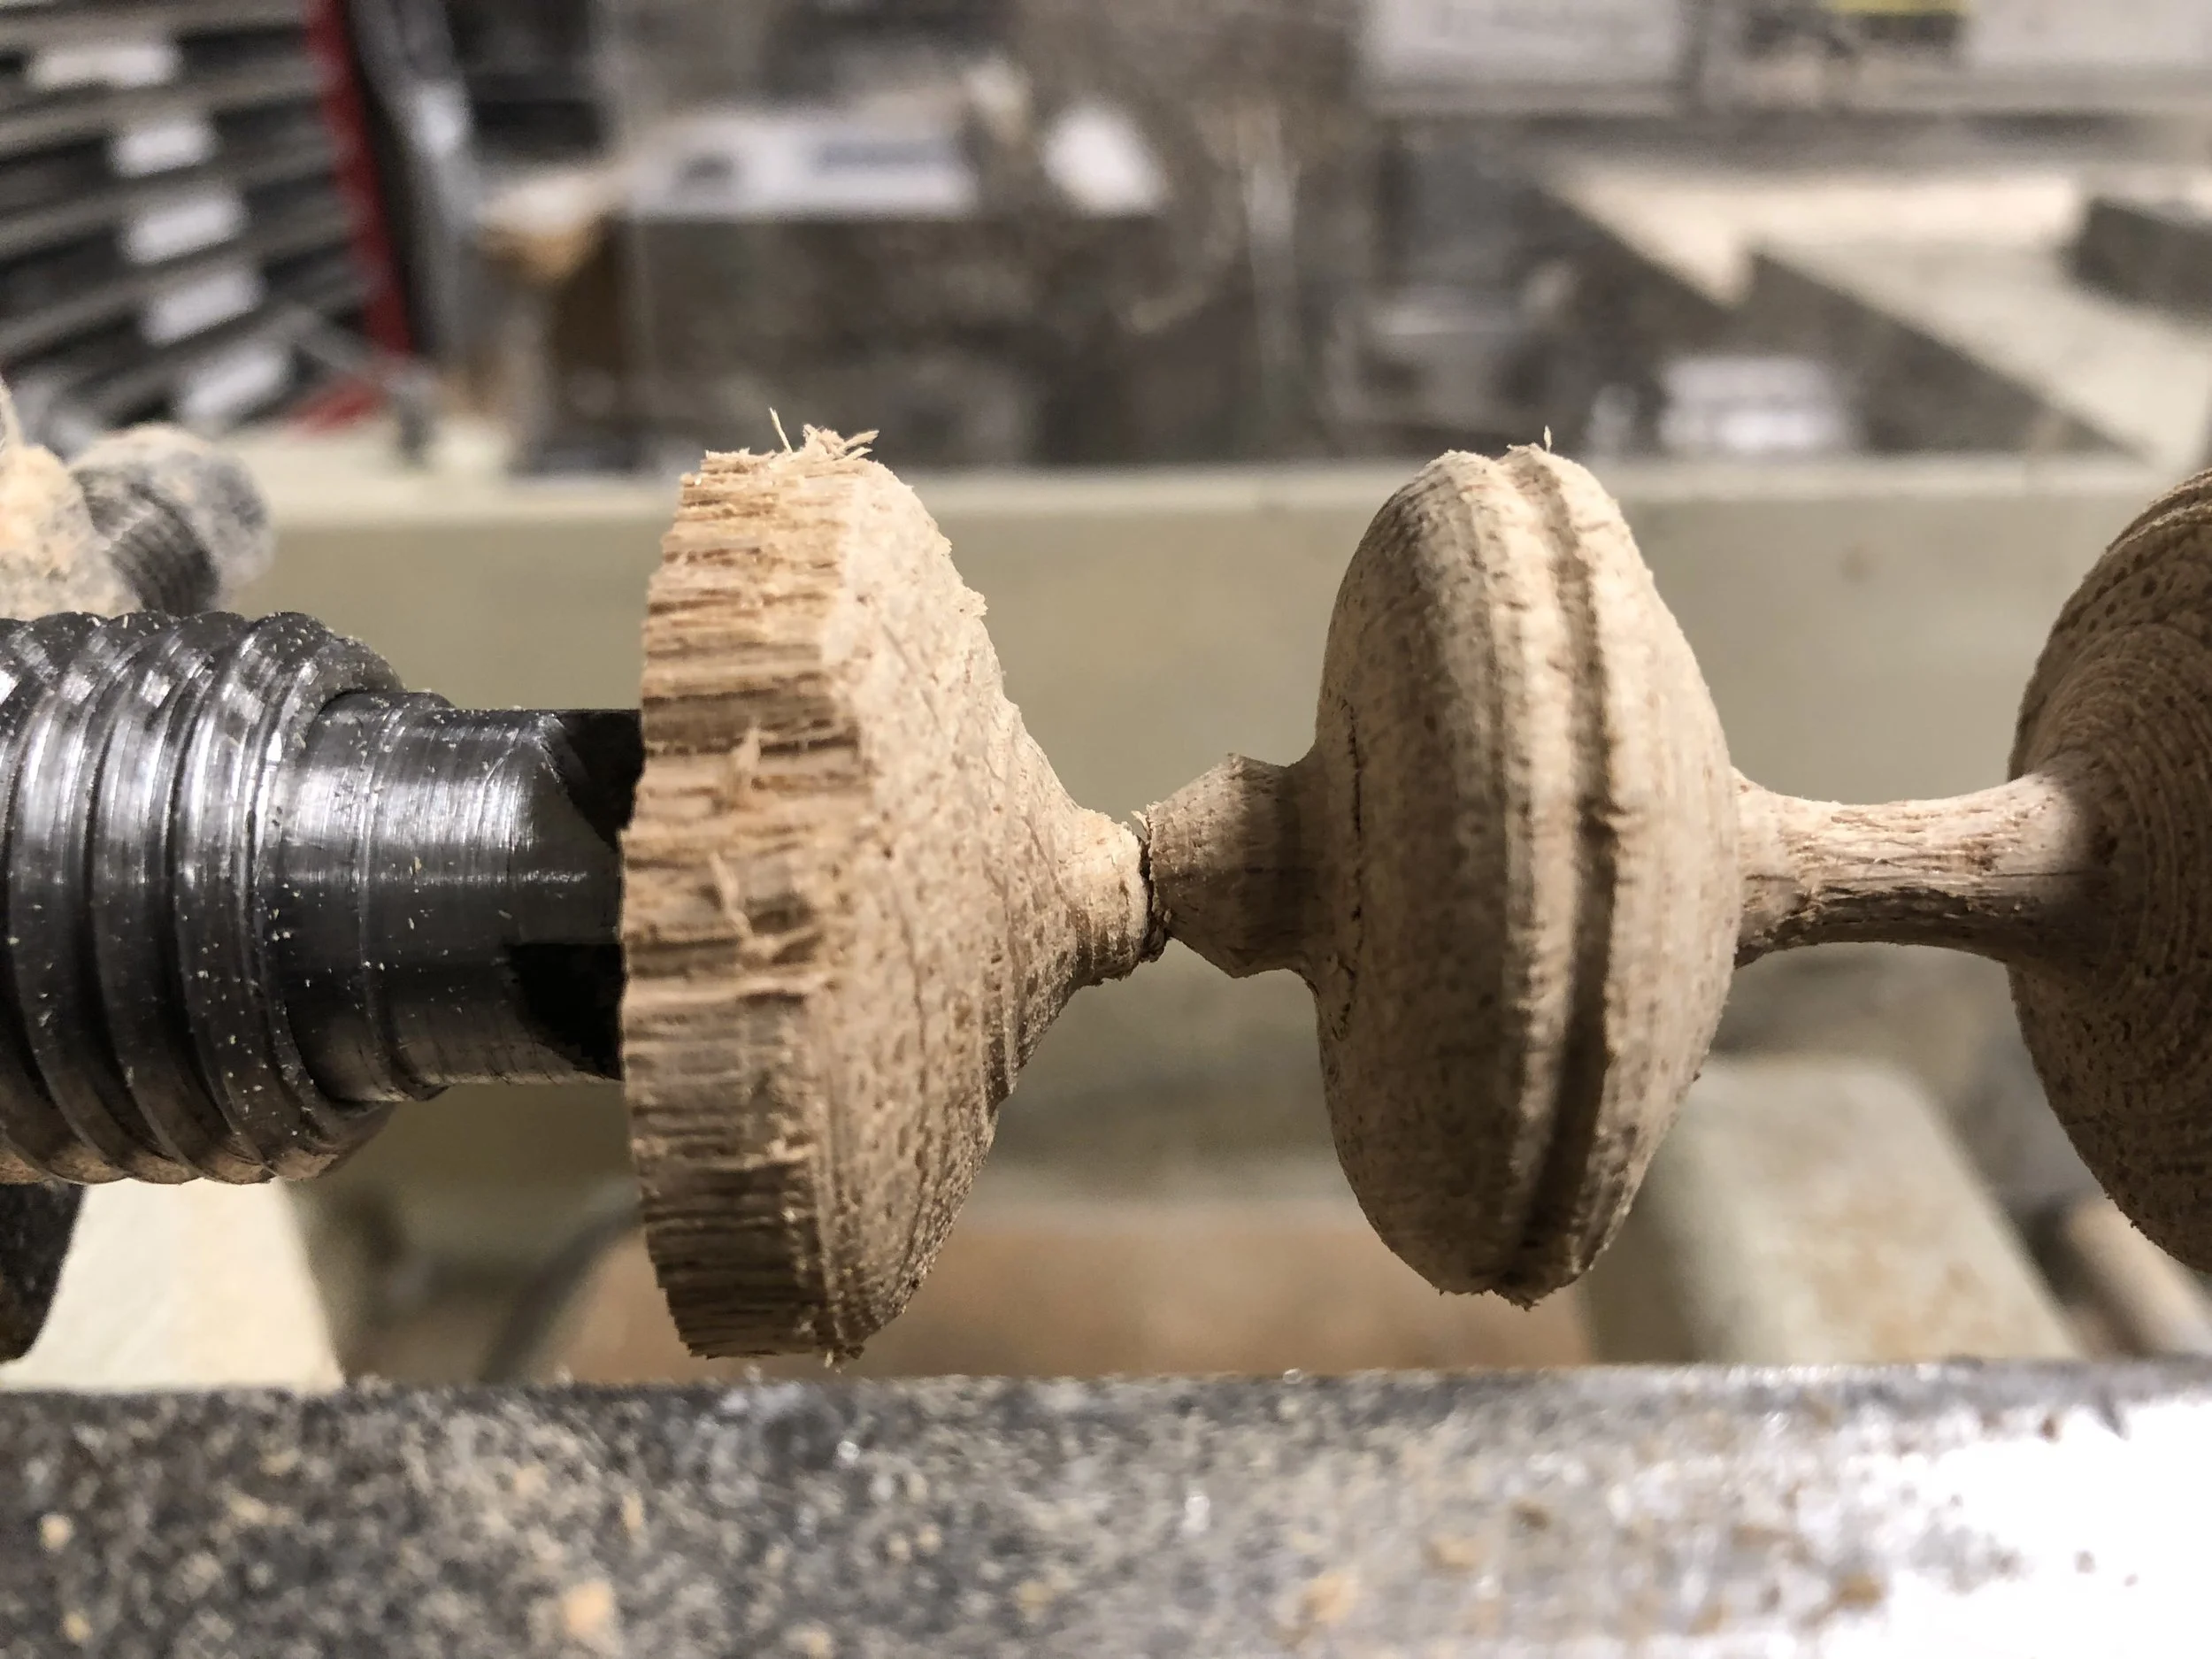
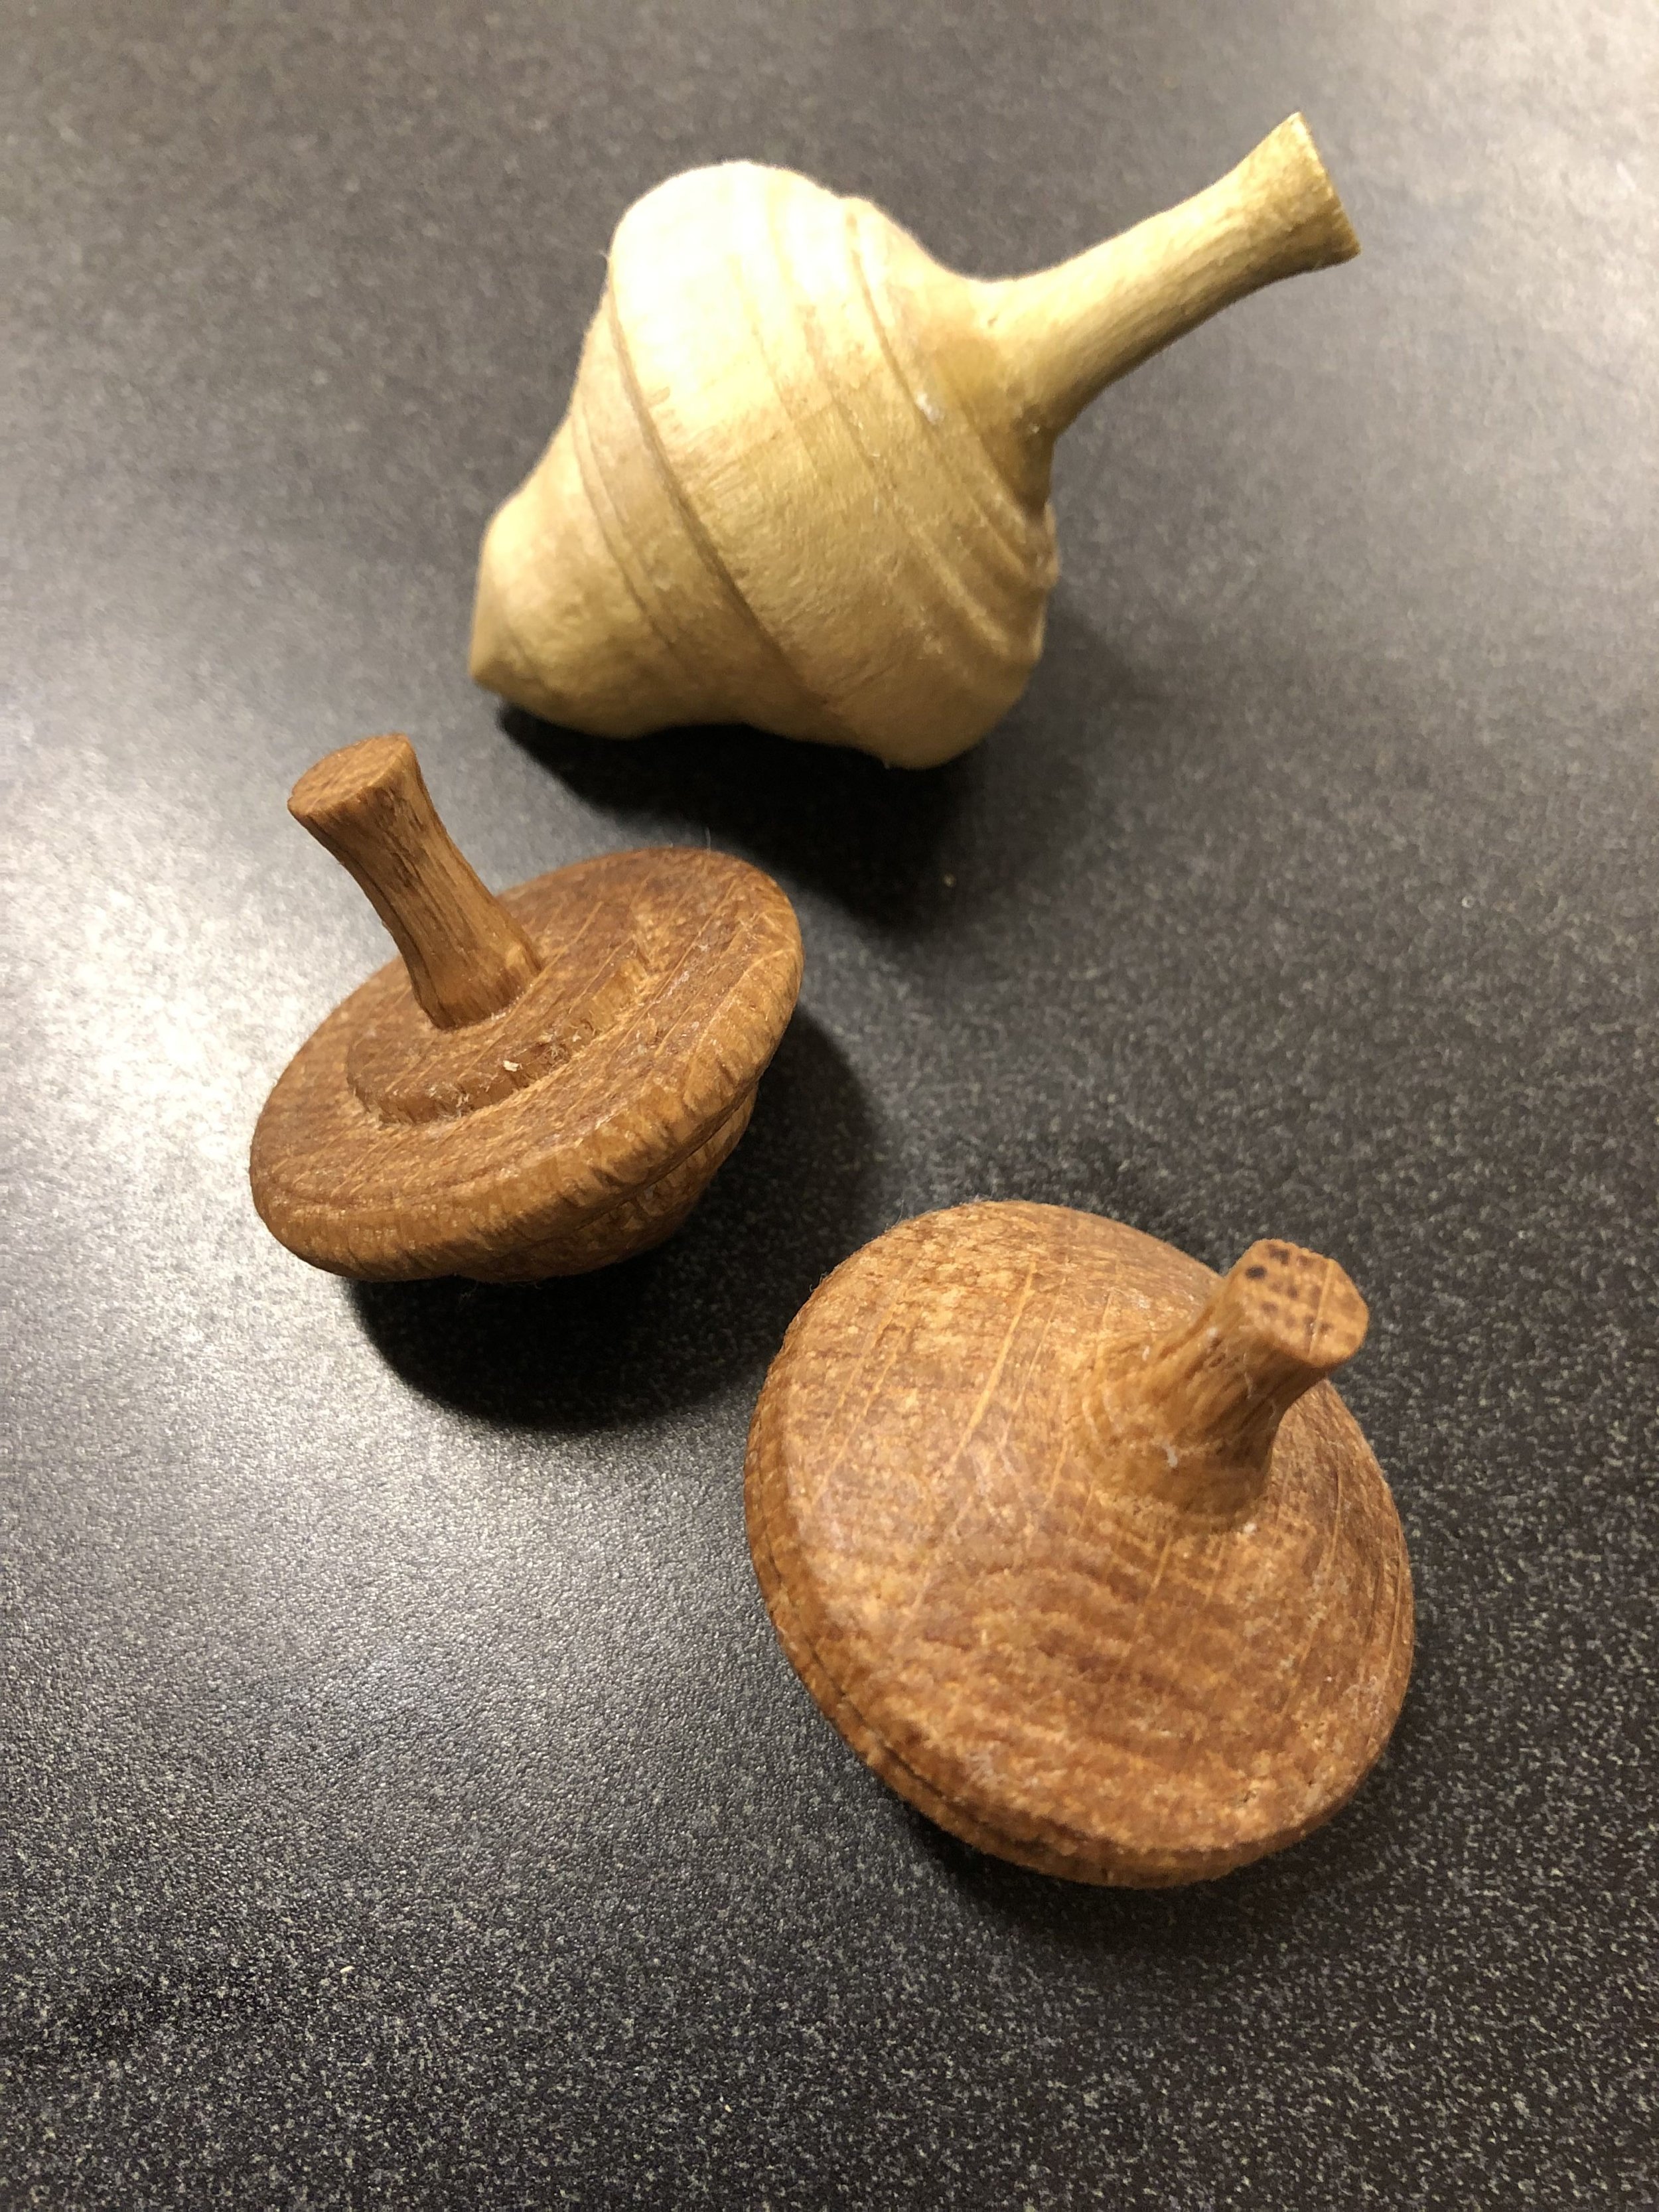
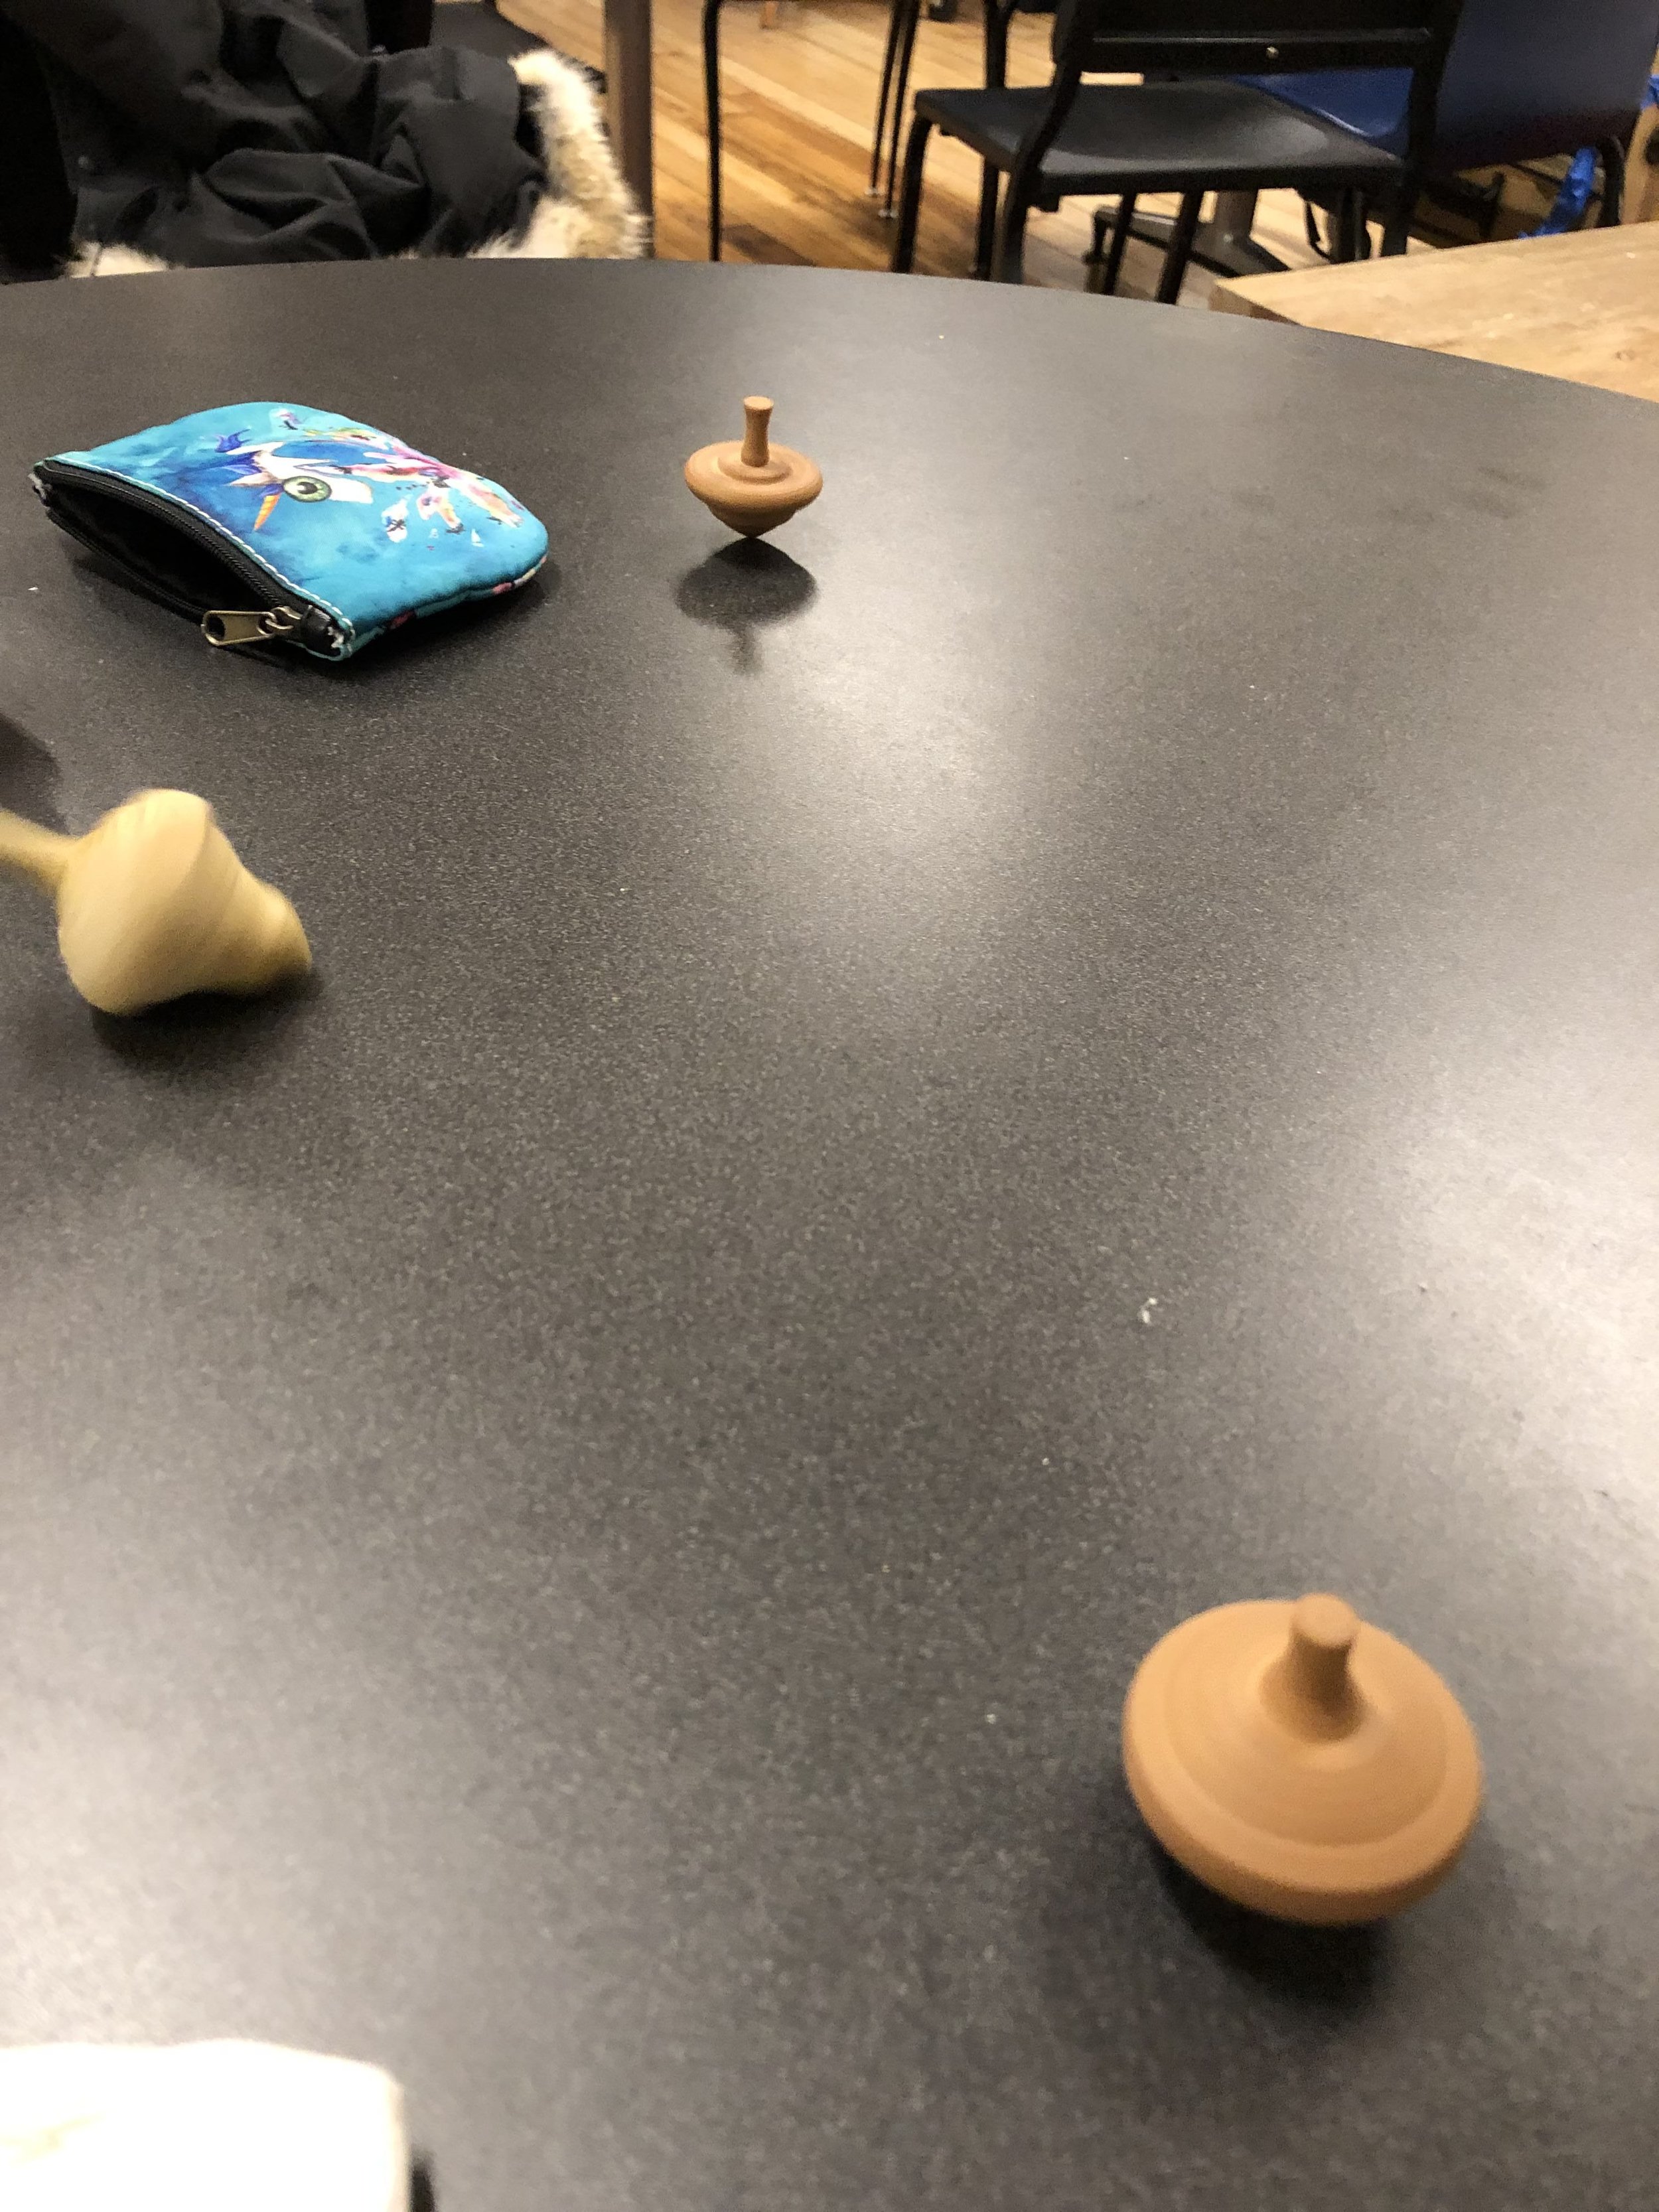
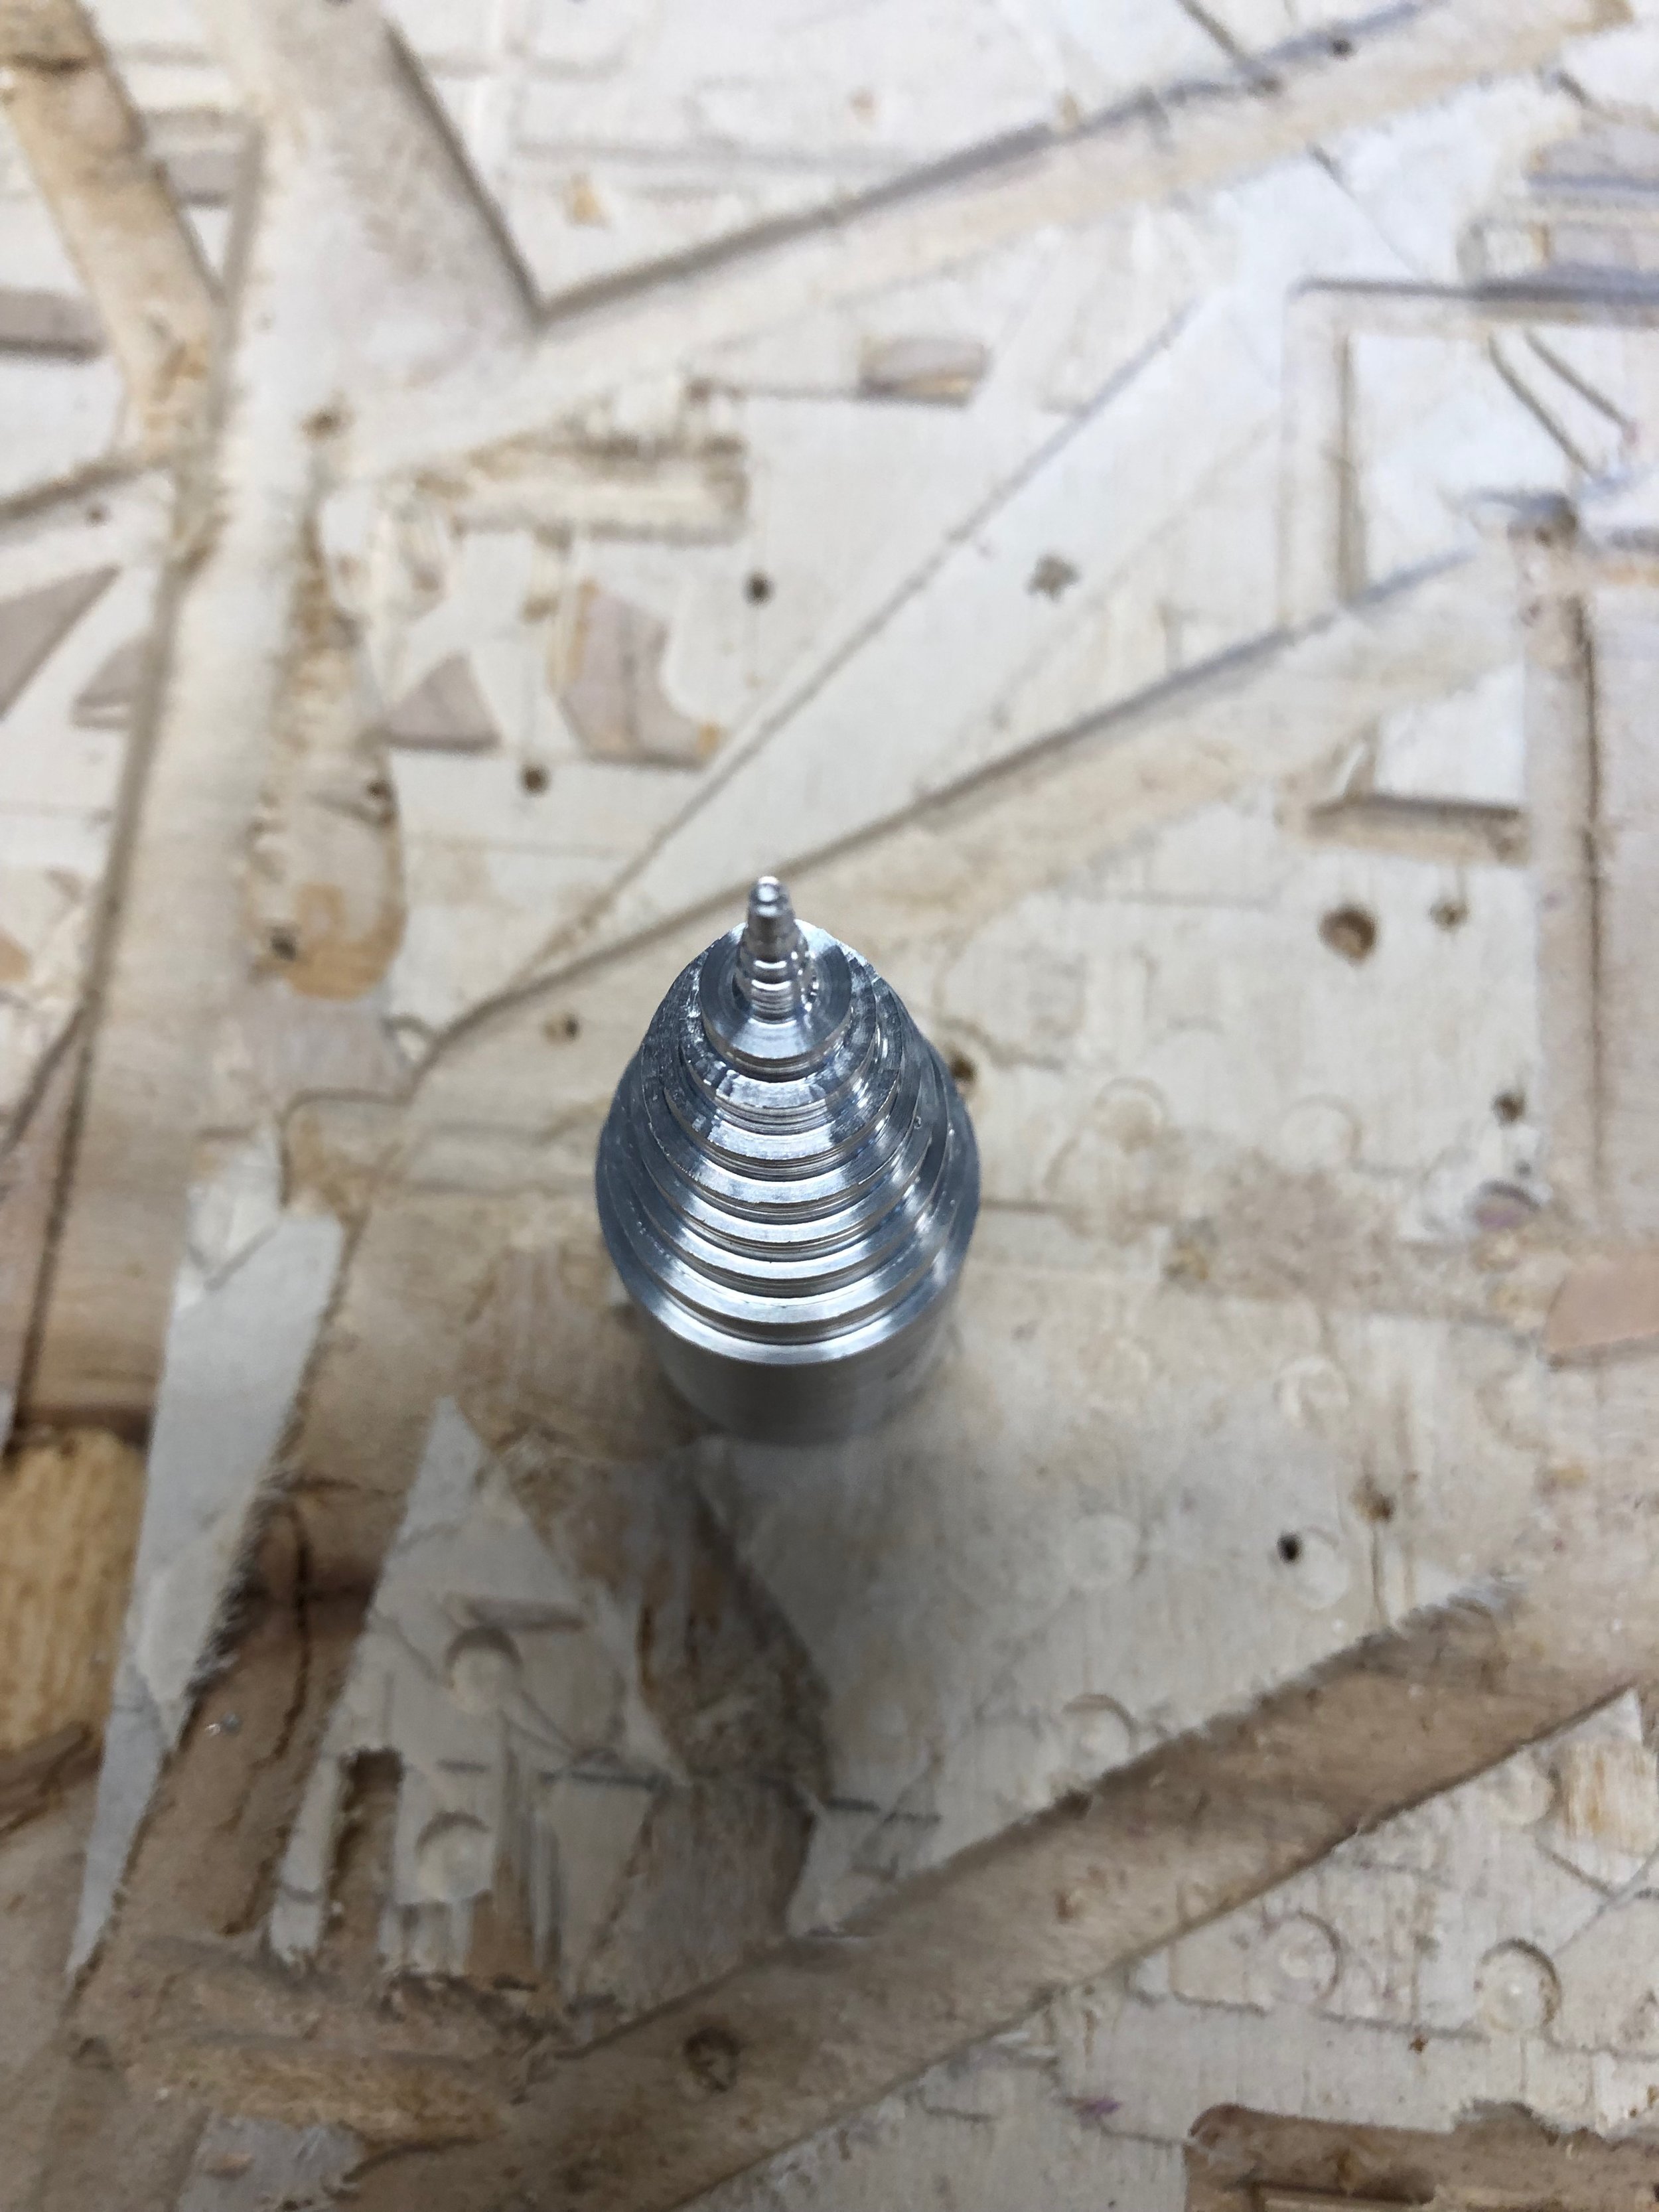
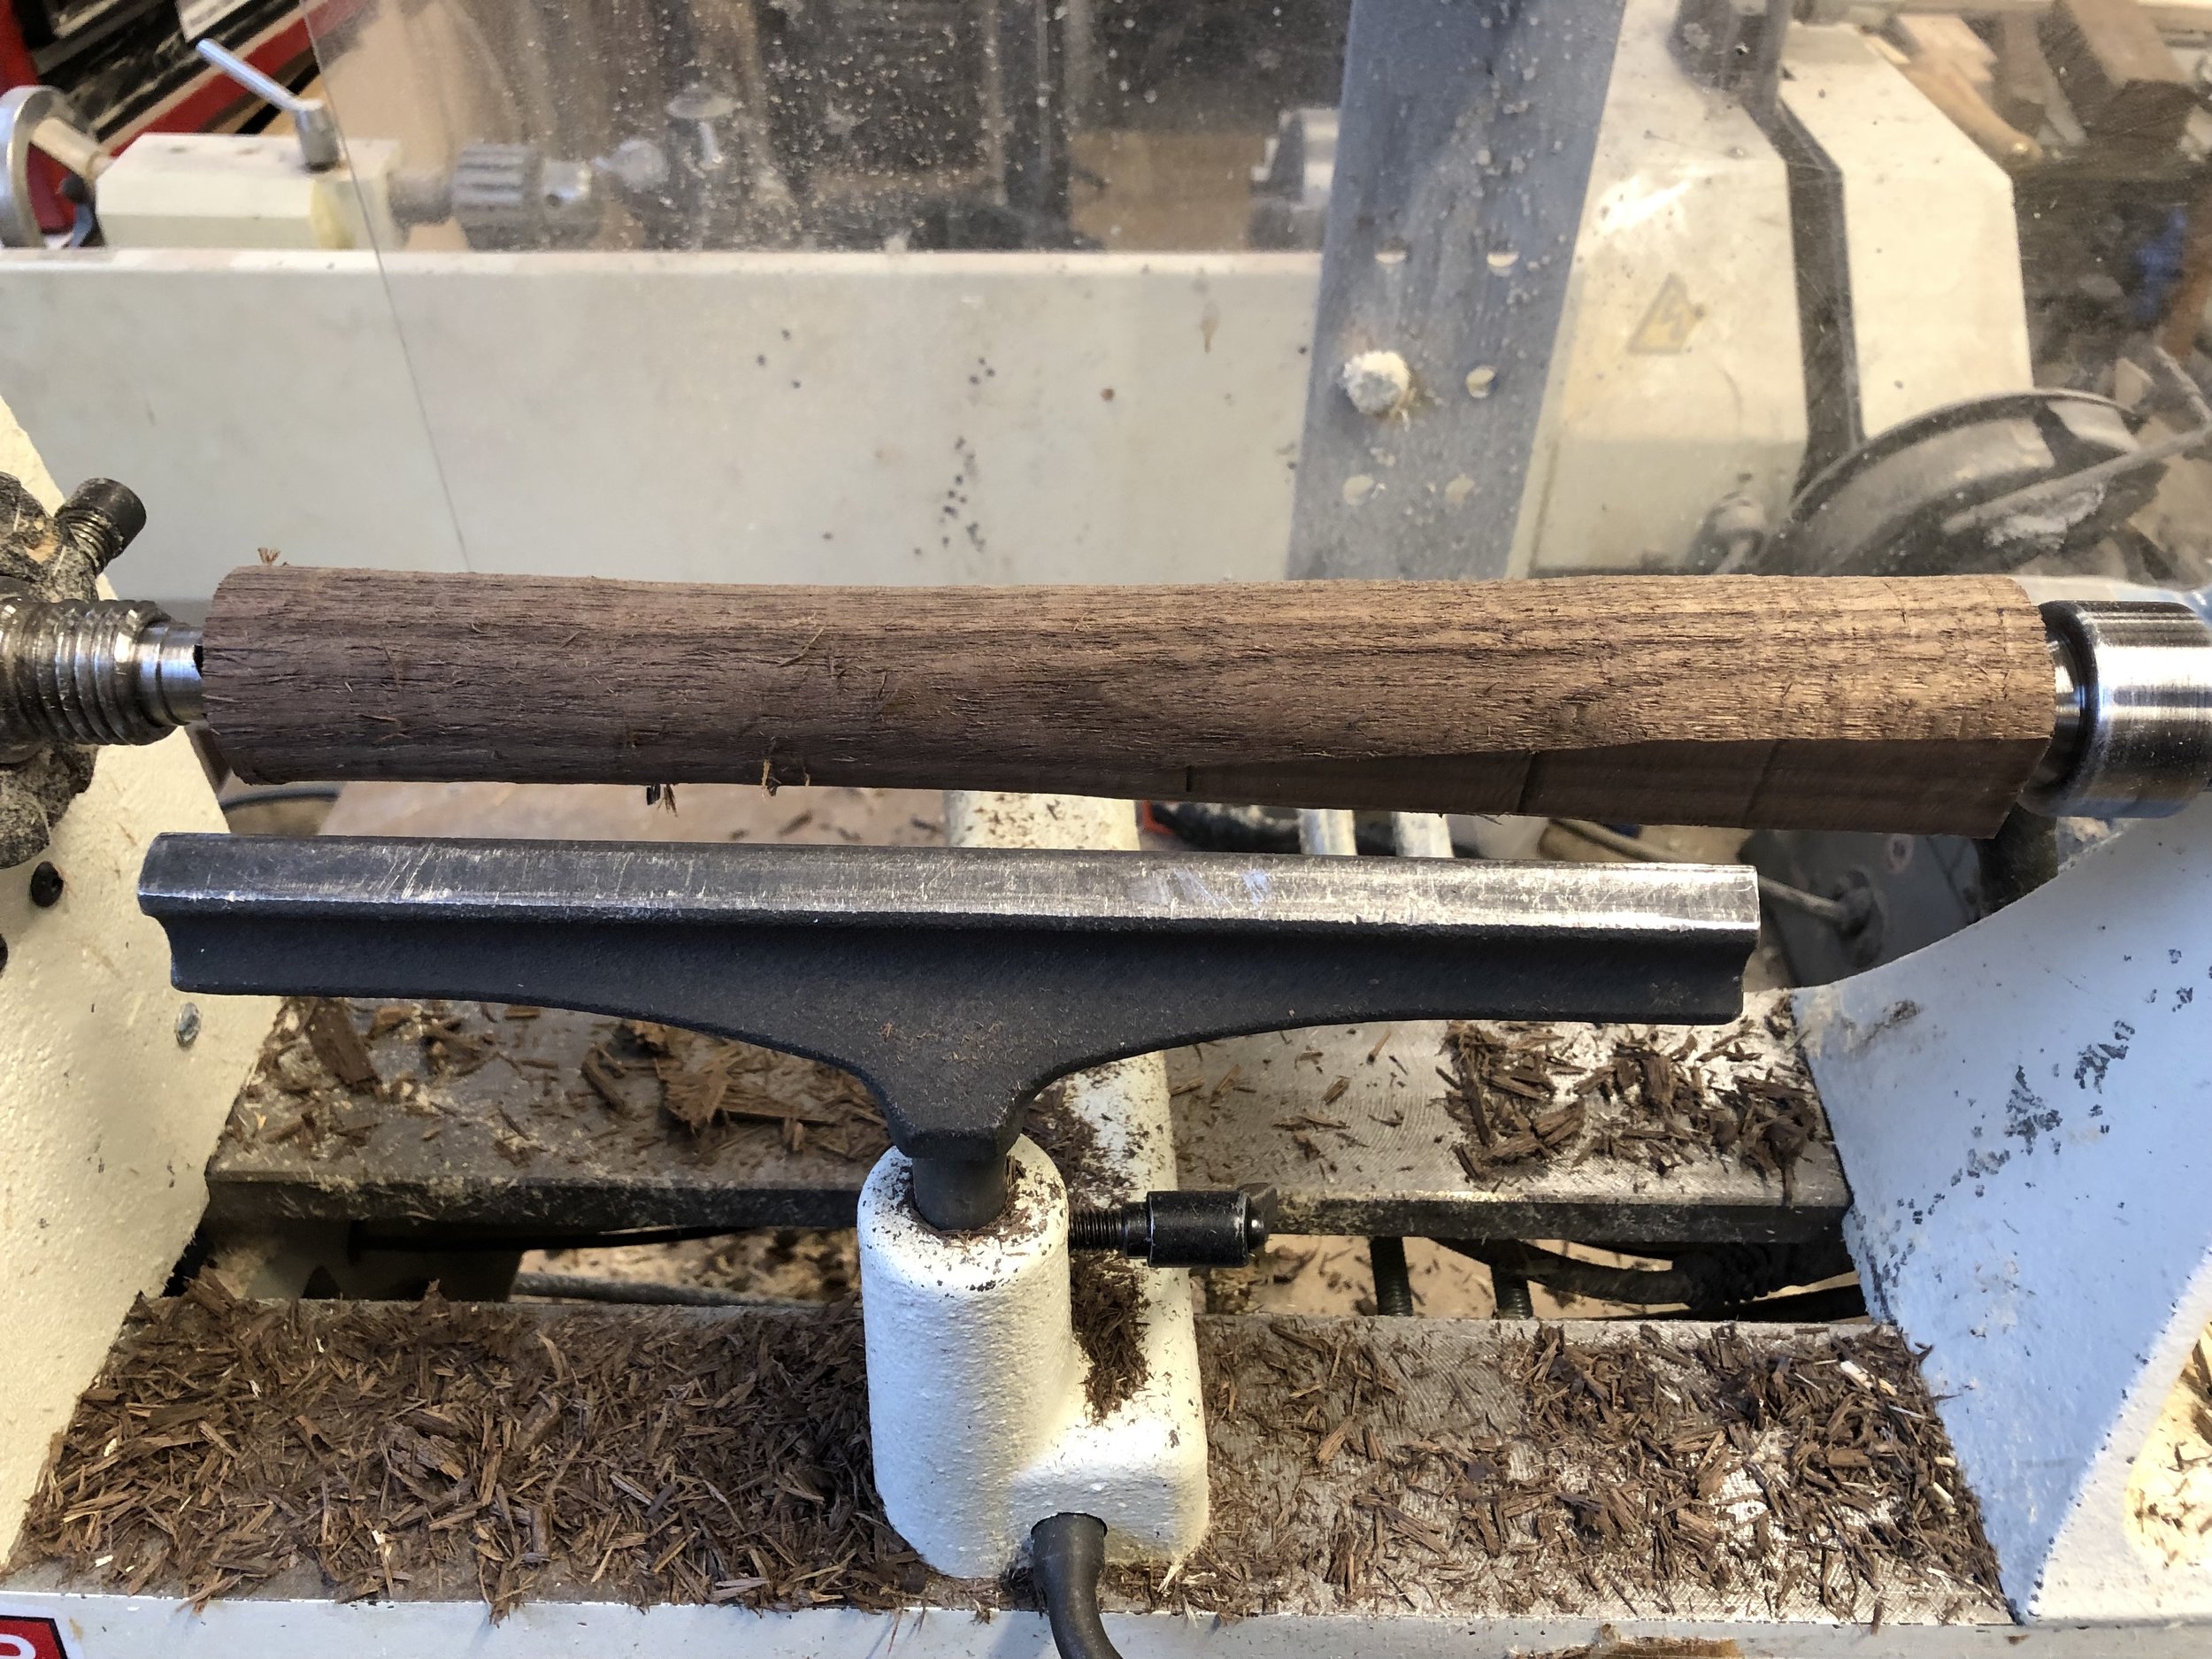
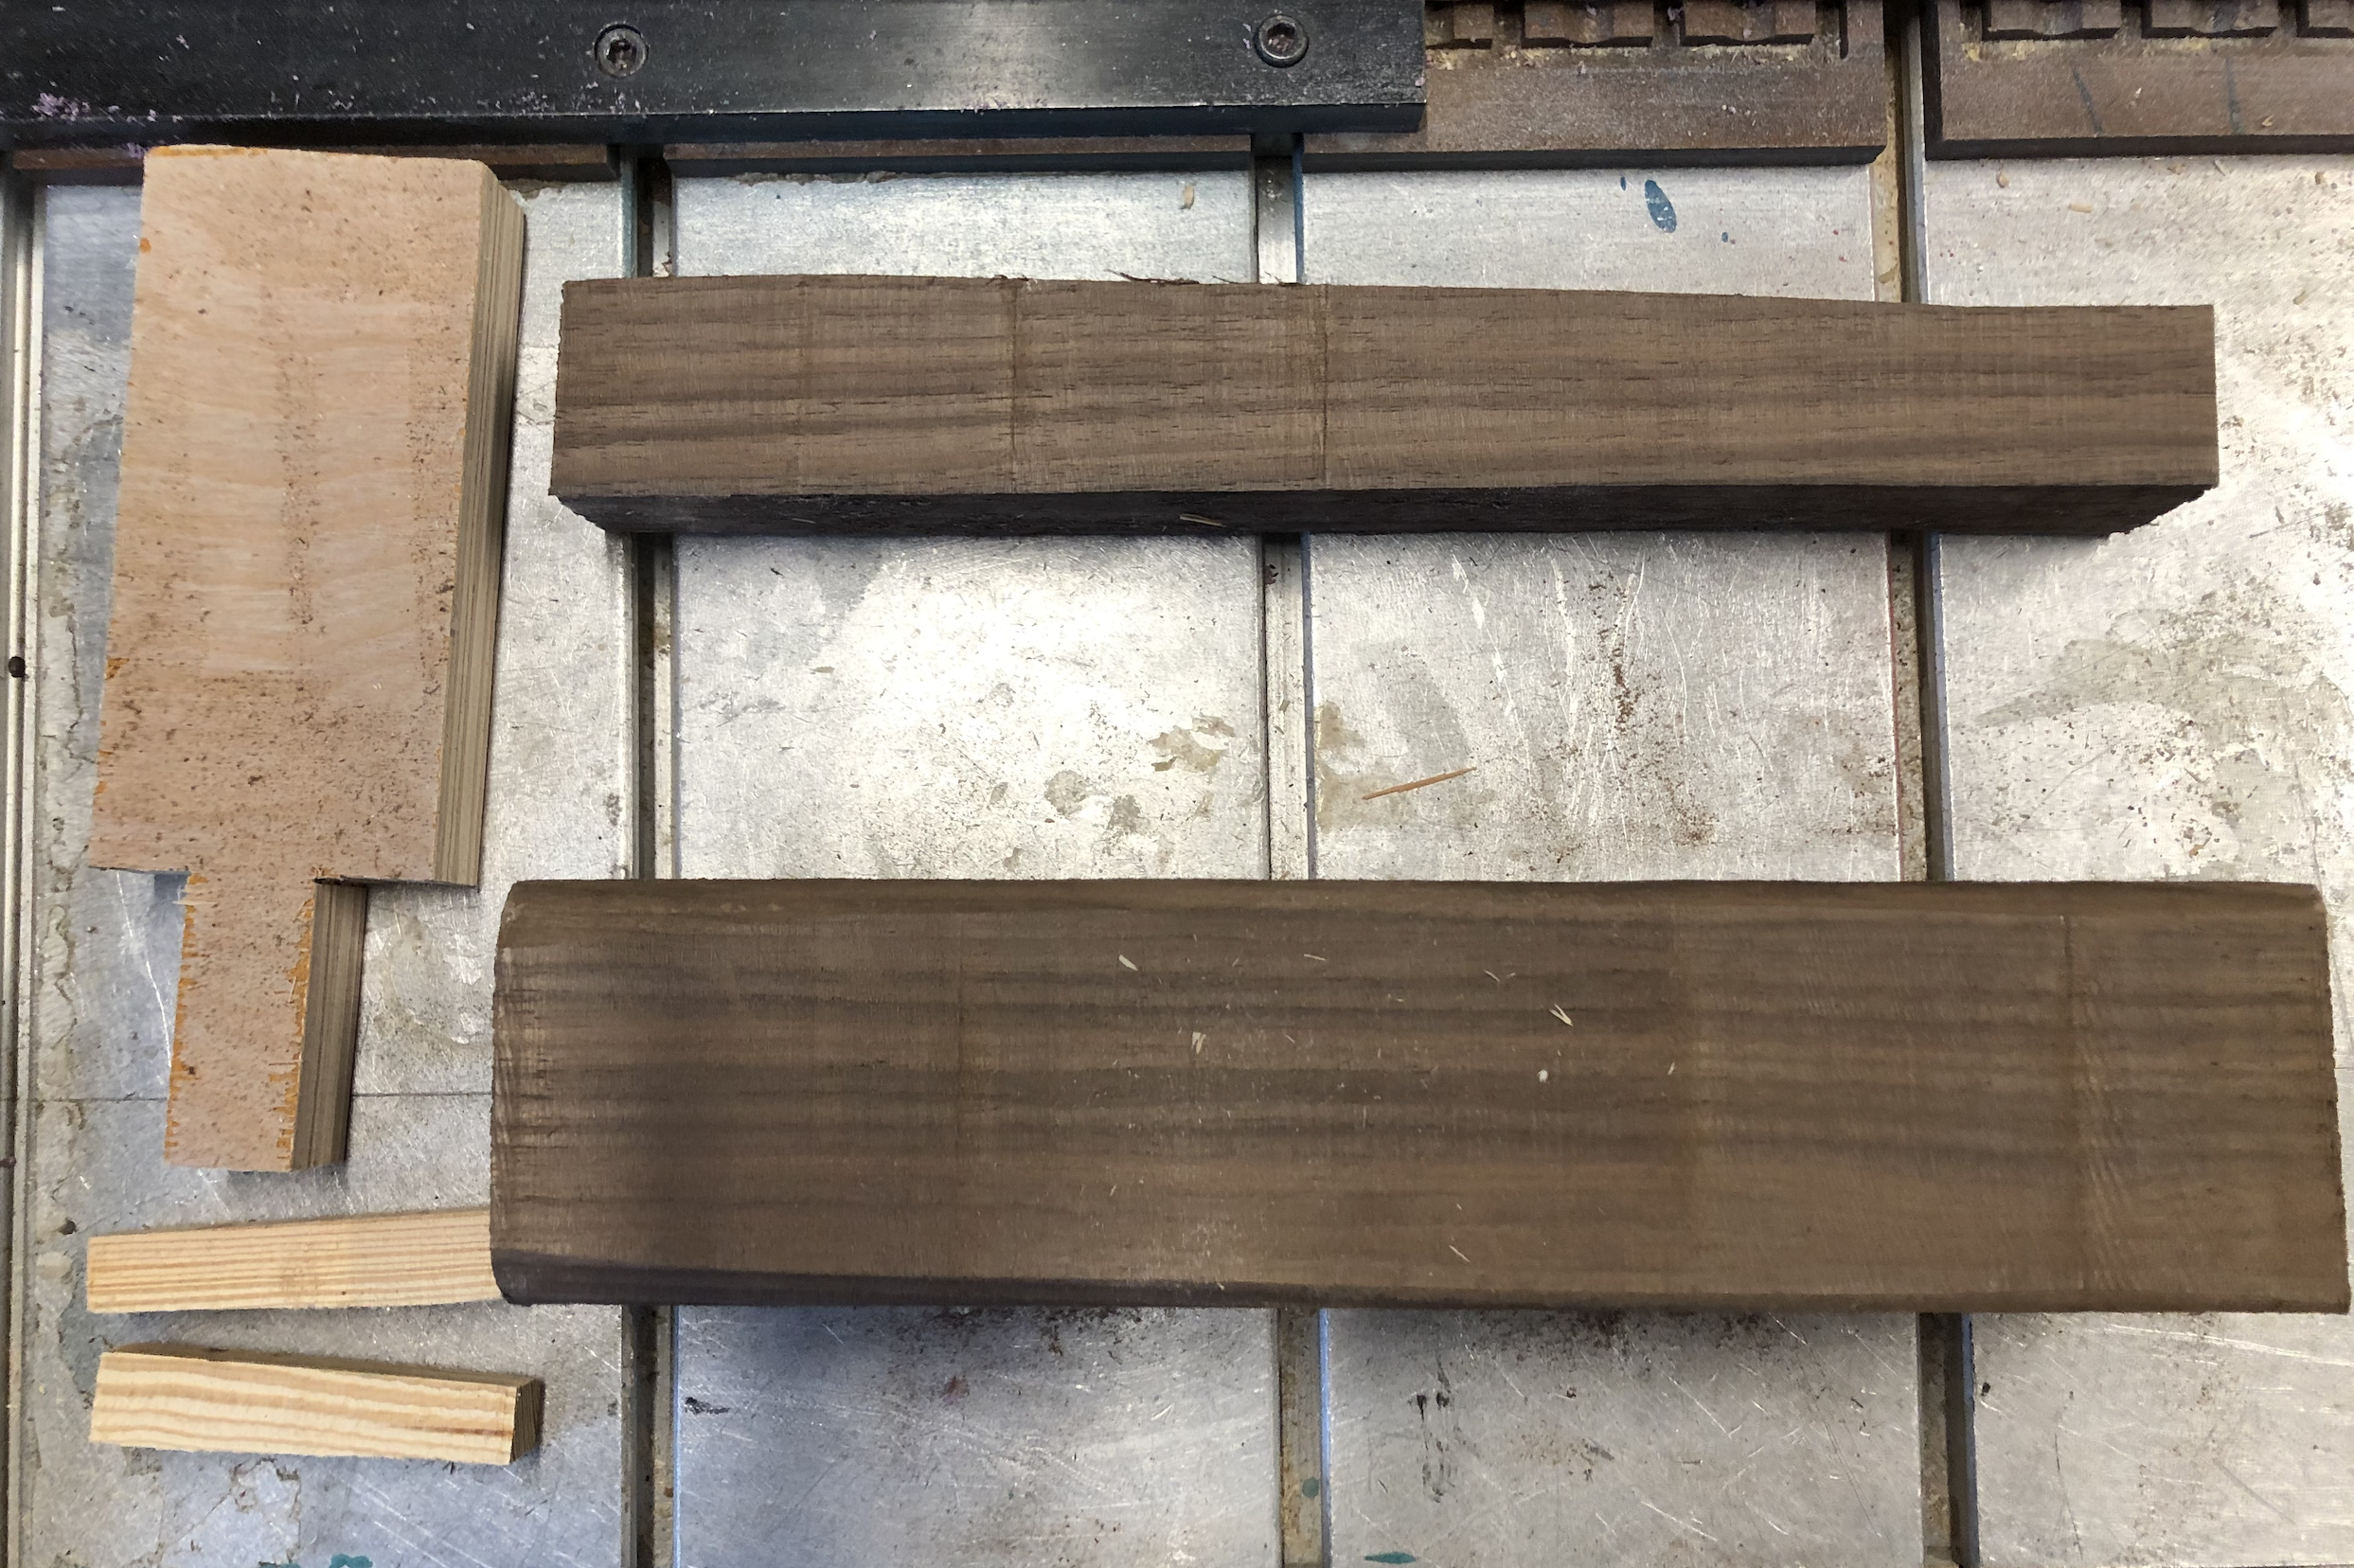
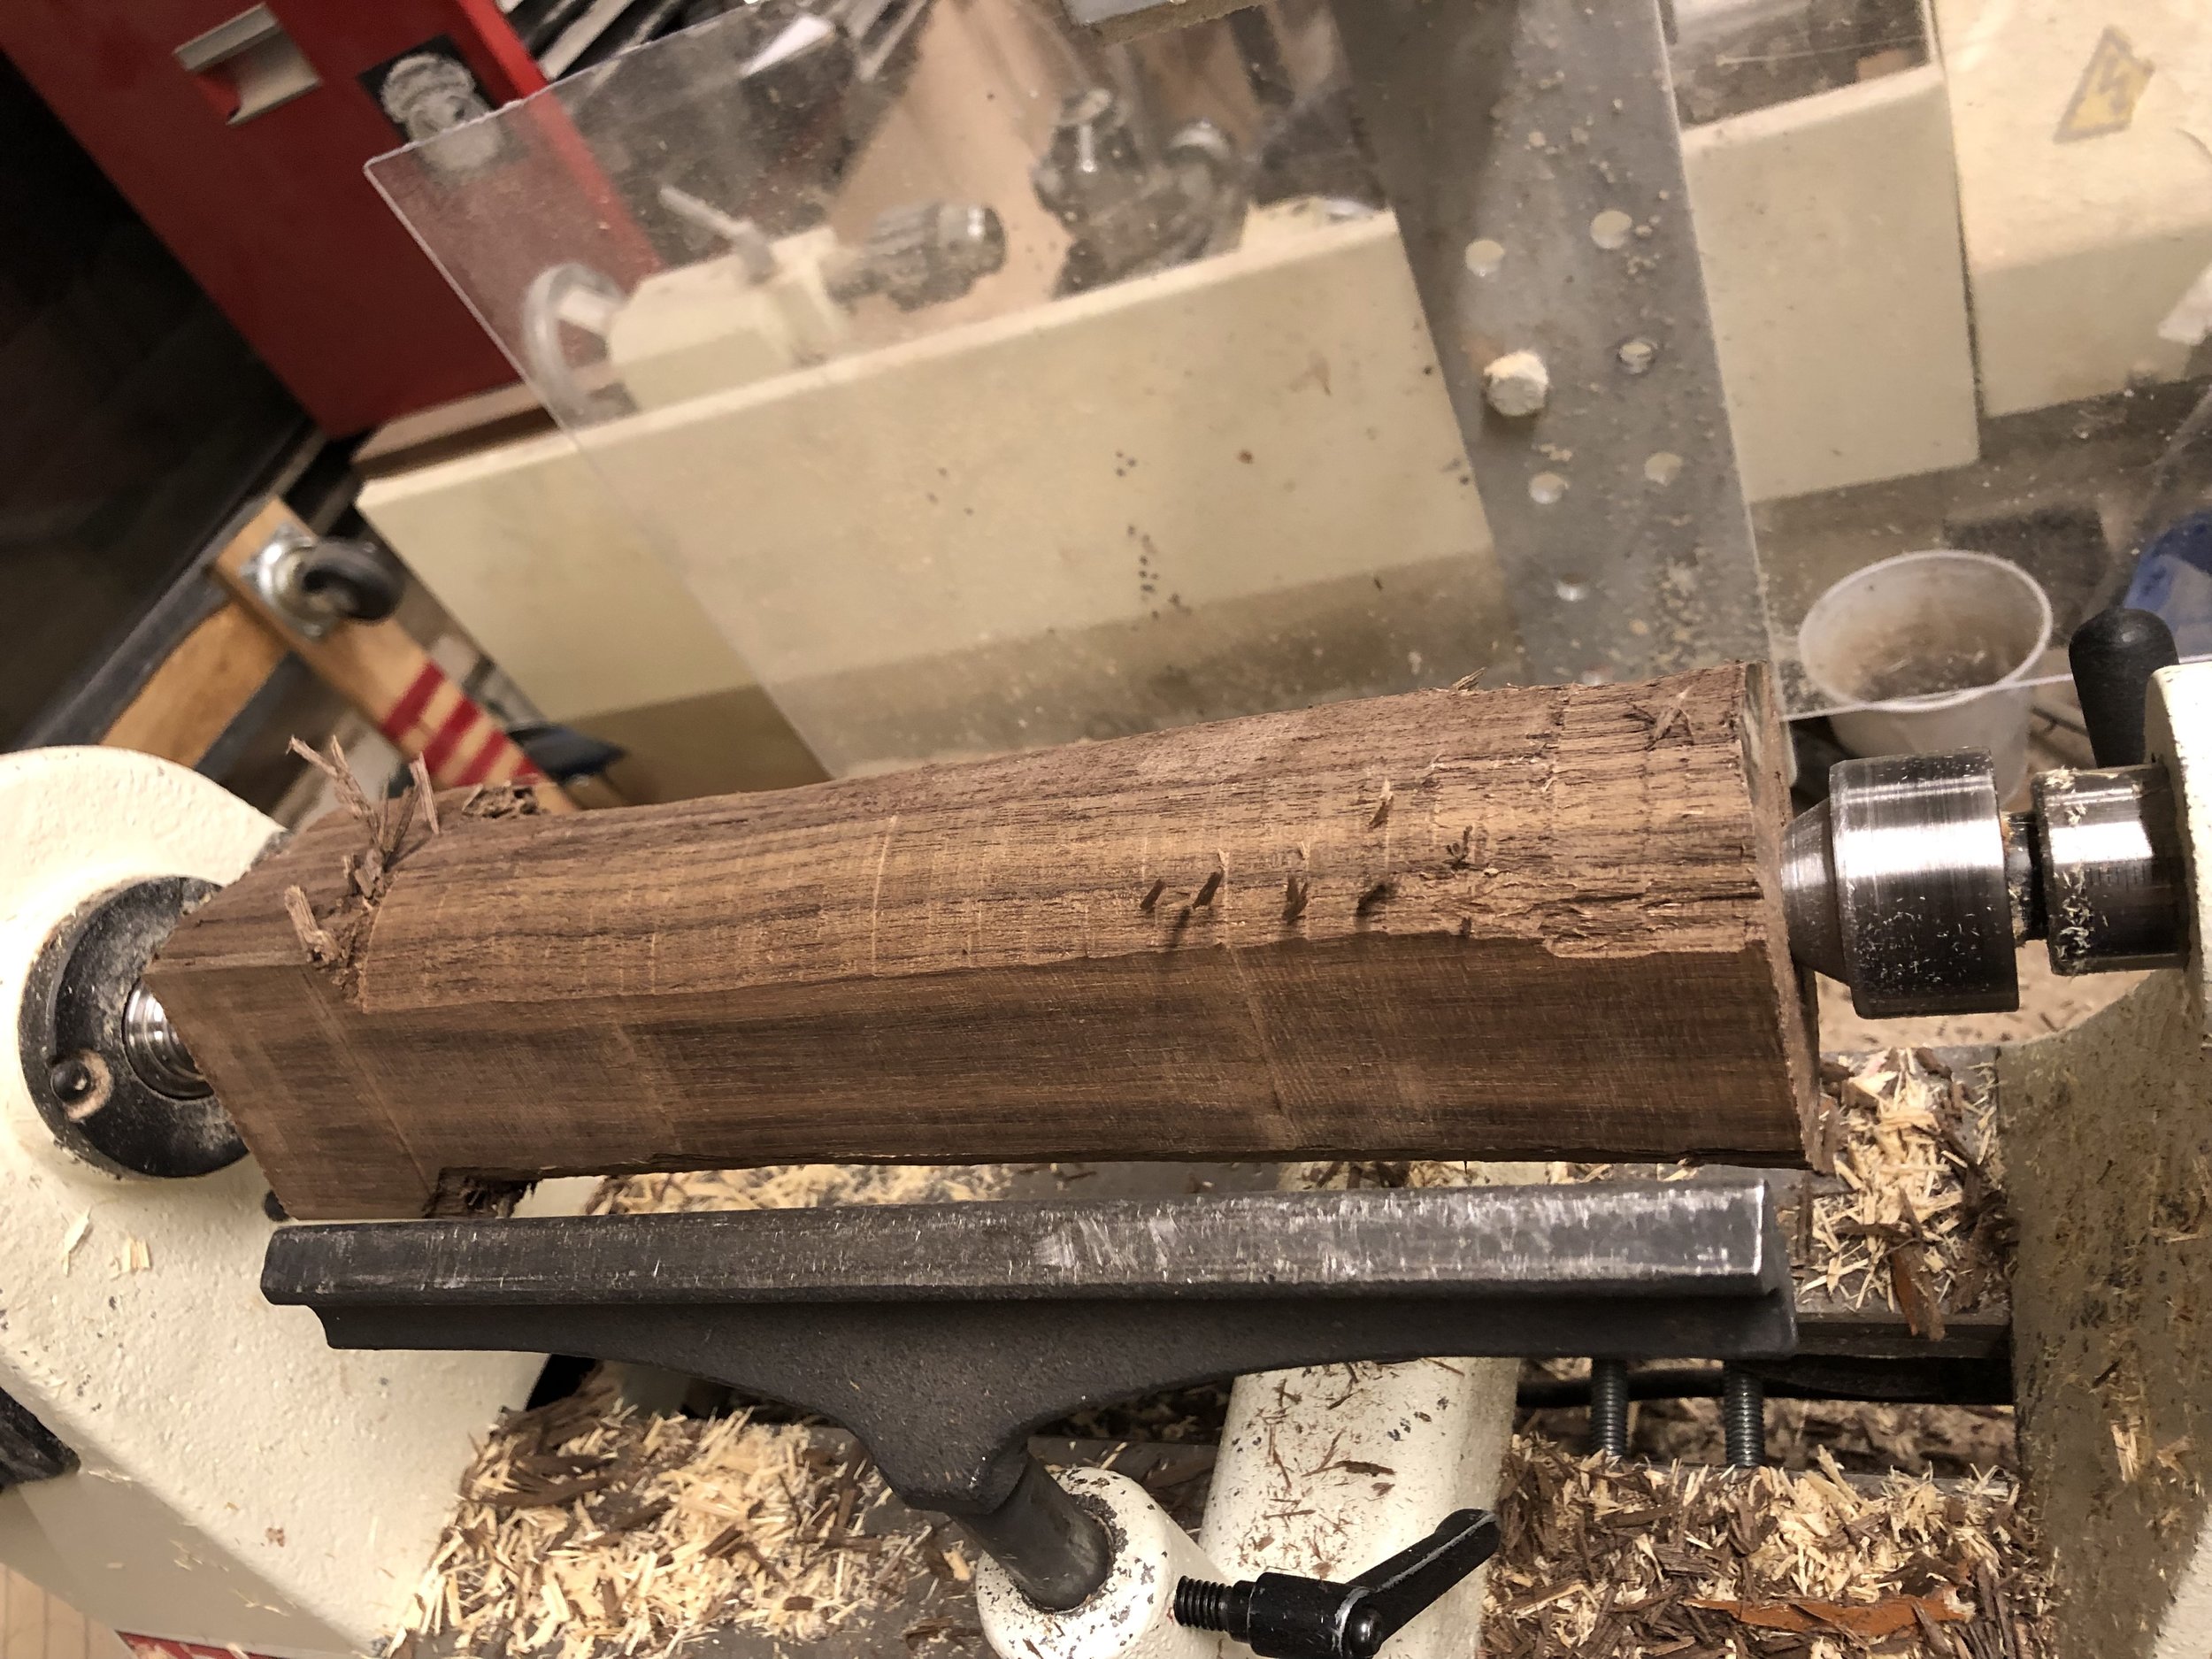
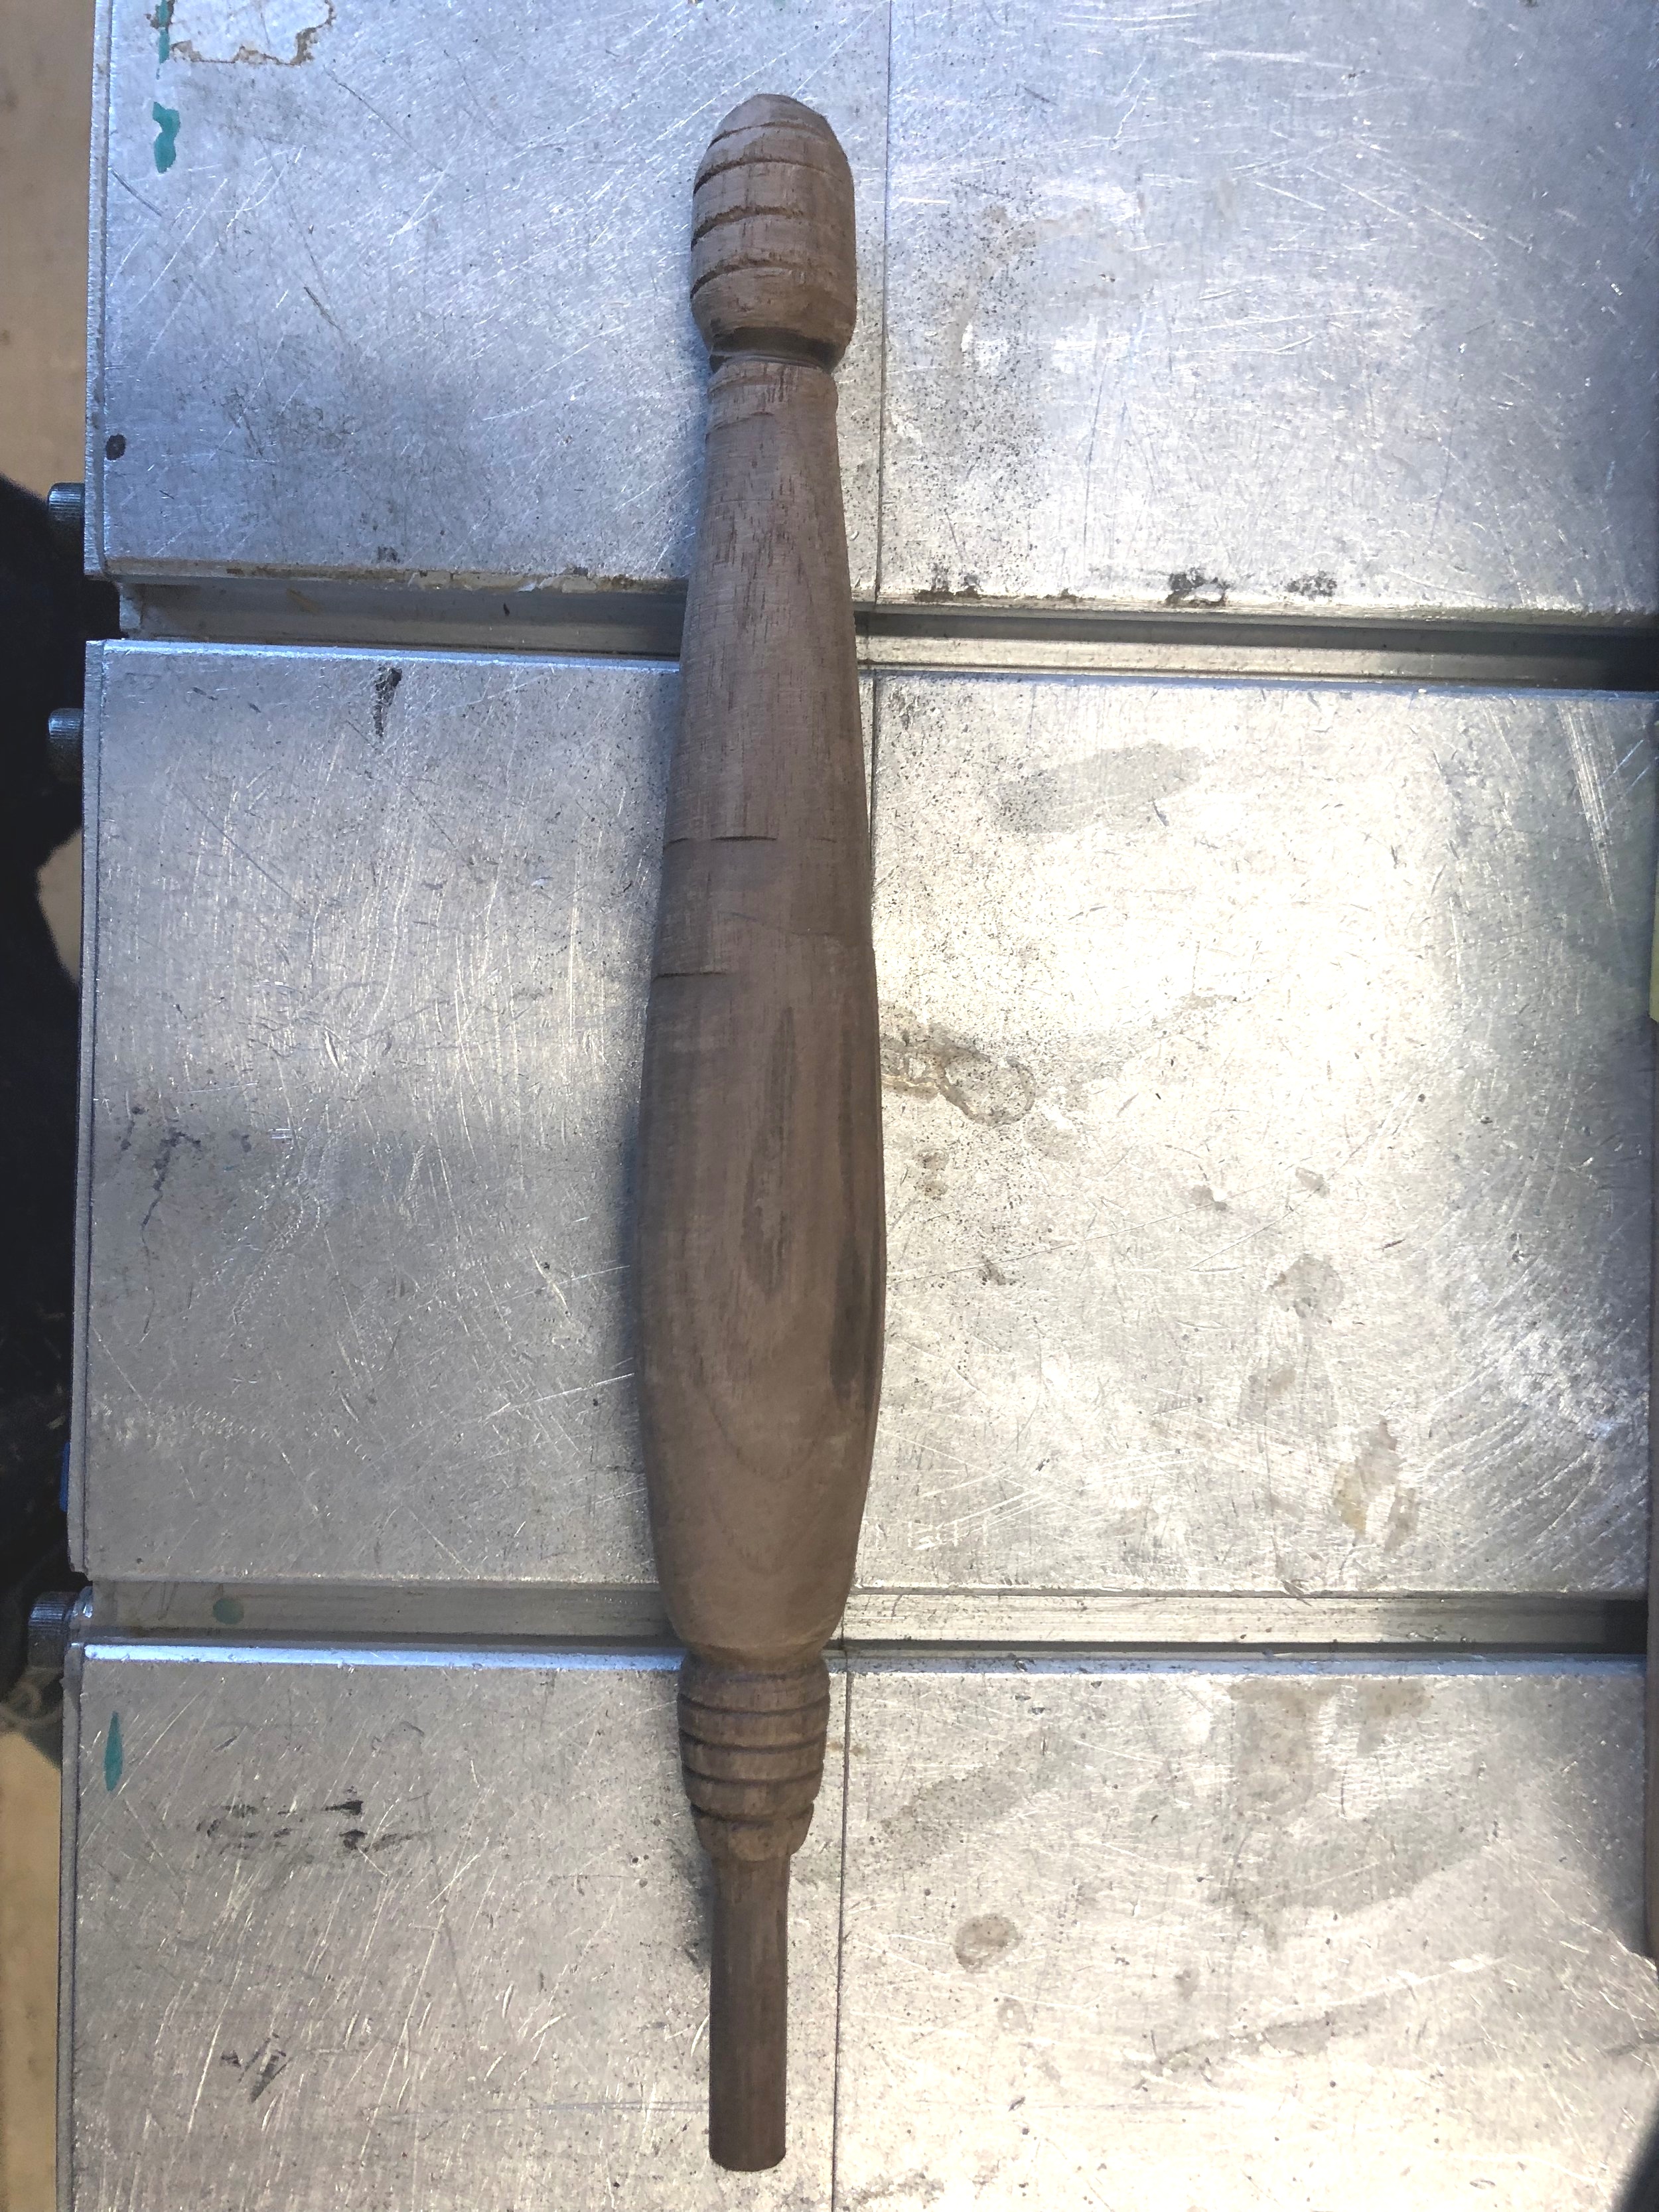
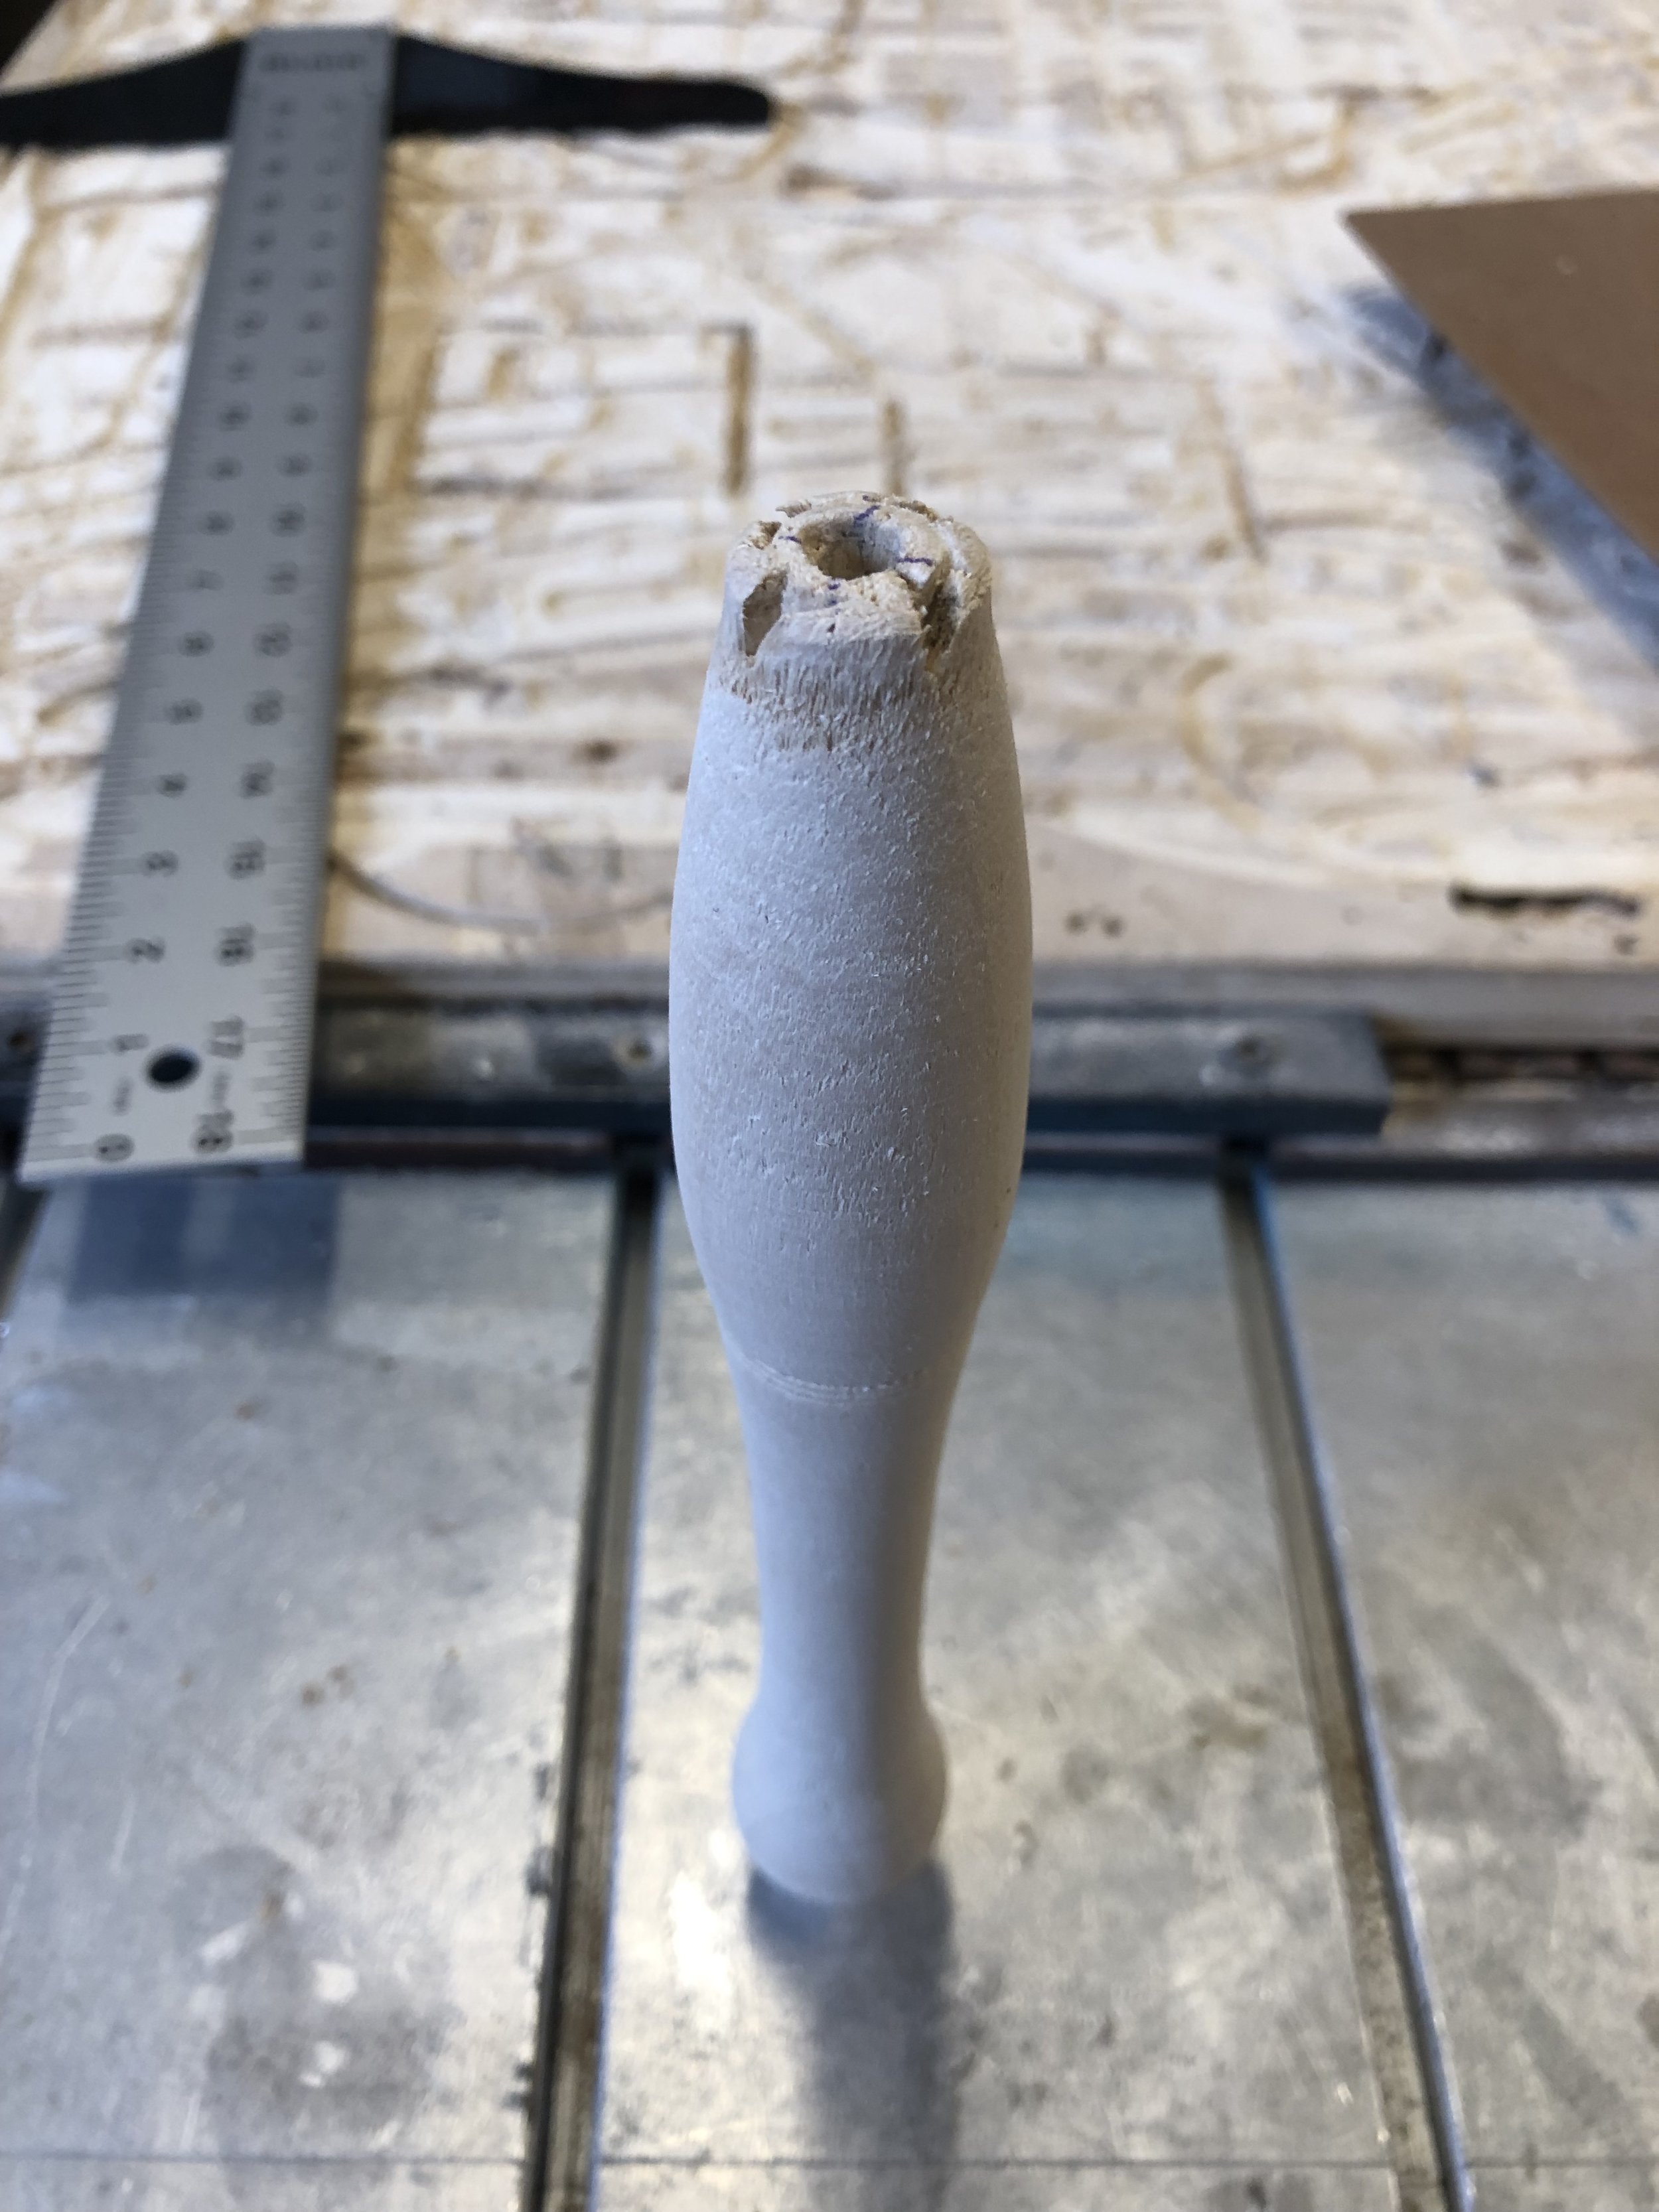
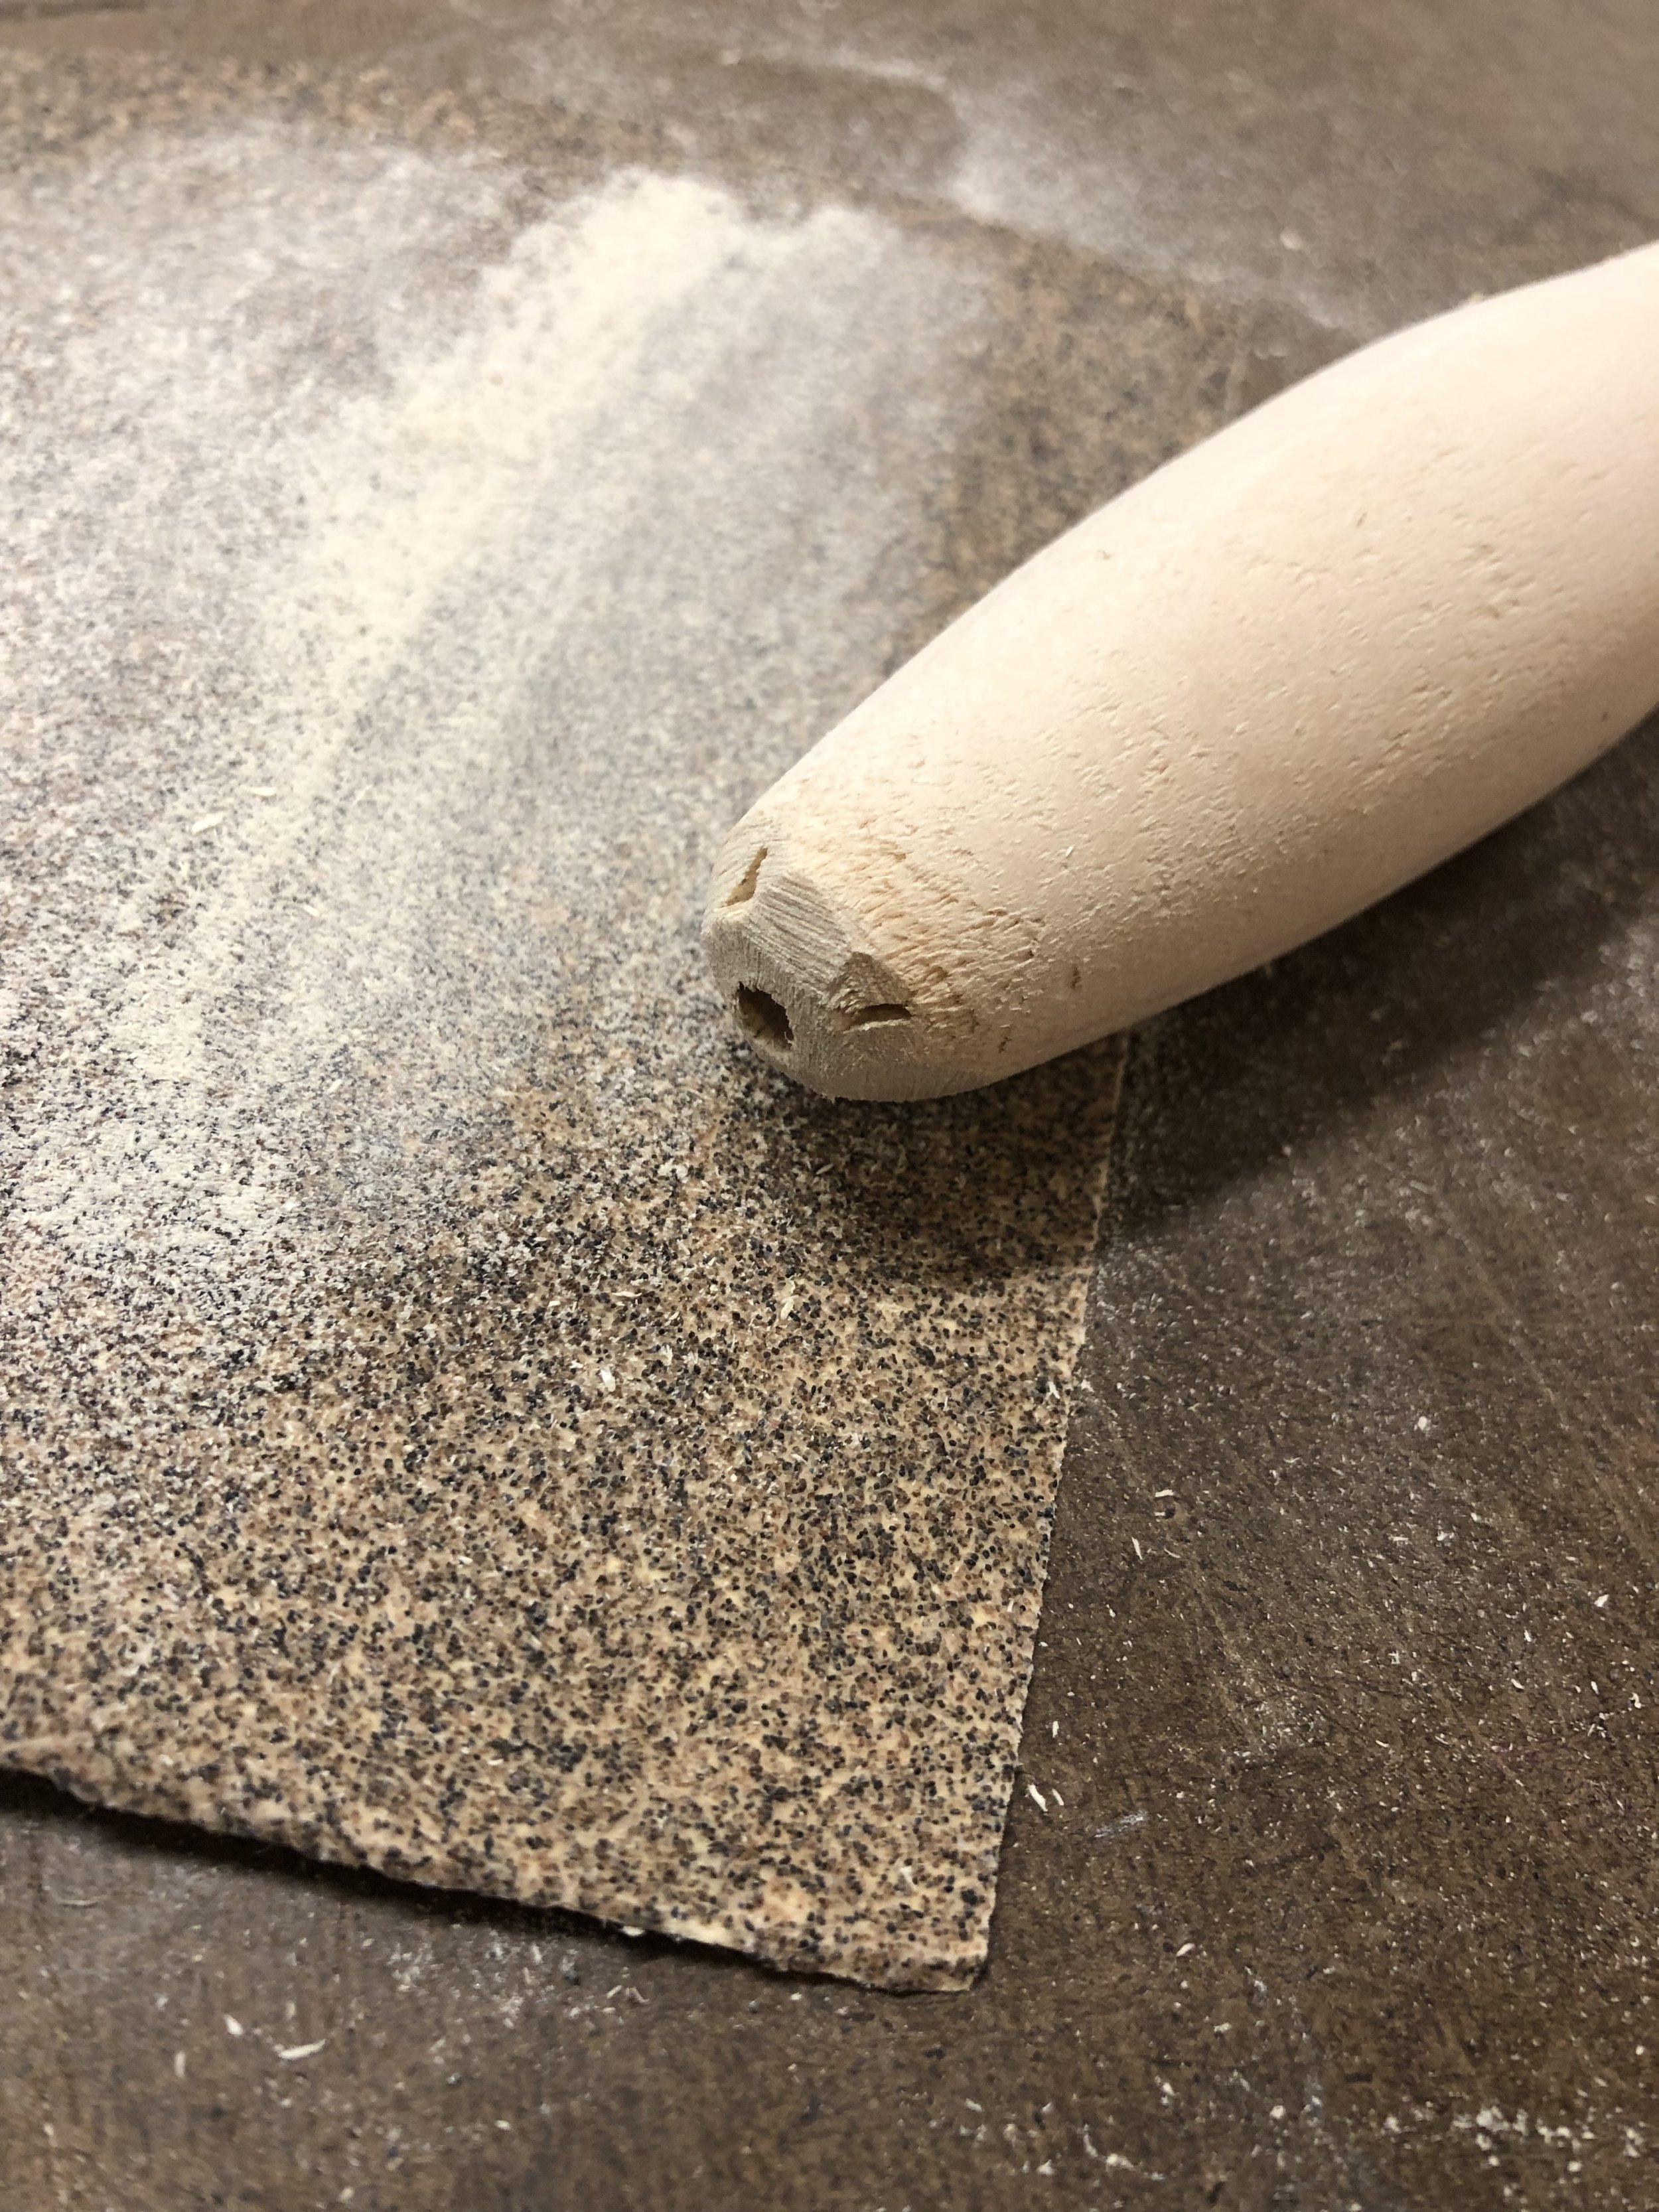
At this moment, I decided I wanted to do a series of tops for the final project. I had a bit of walnut still left from my mallet project and quickly spun up two tops — one larger and smaller than before. For good measure and practice, I also made another oak top. The tips are the vain of my existence at this point yet I use the sander with a gig and get some interesting results - there is no tip on the big walnut, a very pointy tip on the small walnut, and burned marks on the oak. A mix for sure, but each unique in their own way.

IMG_2849.jpg IMG_2852.jpg IMG_2853.jpg IMG_2855.jpg IMG_2854.jpg

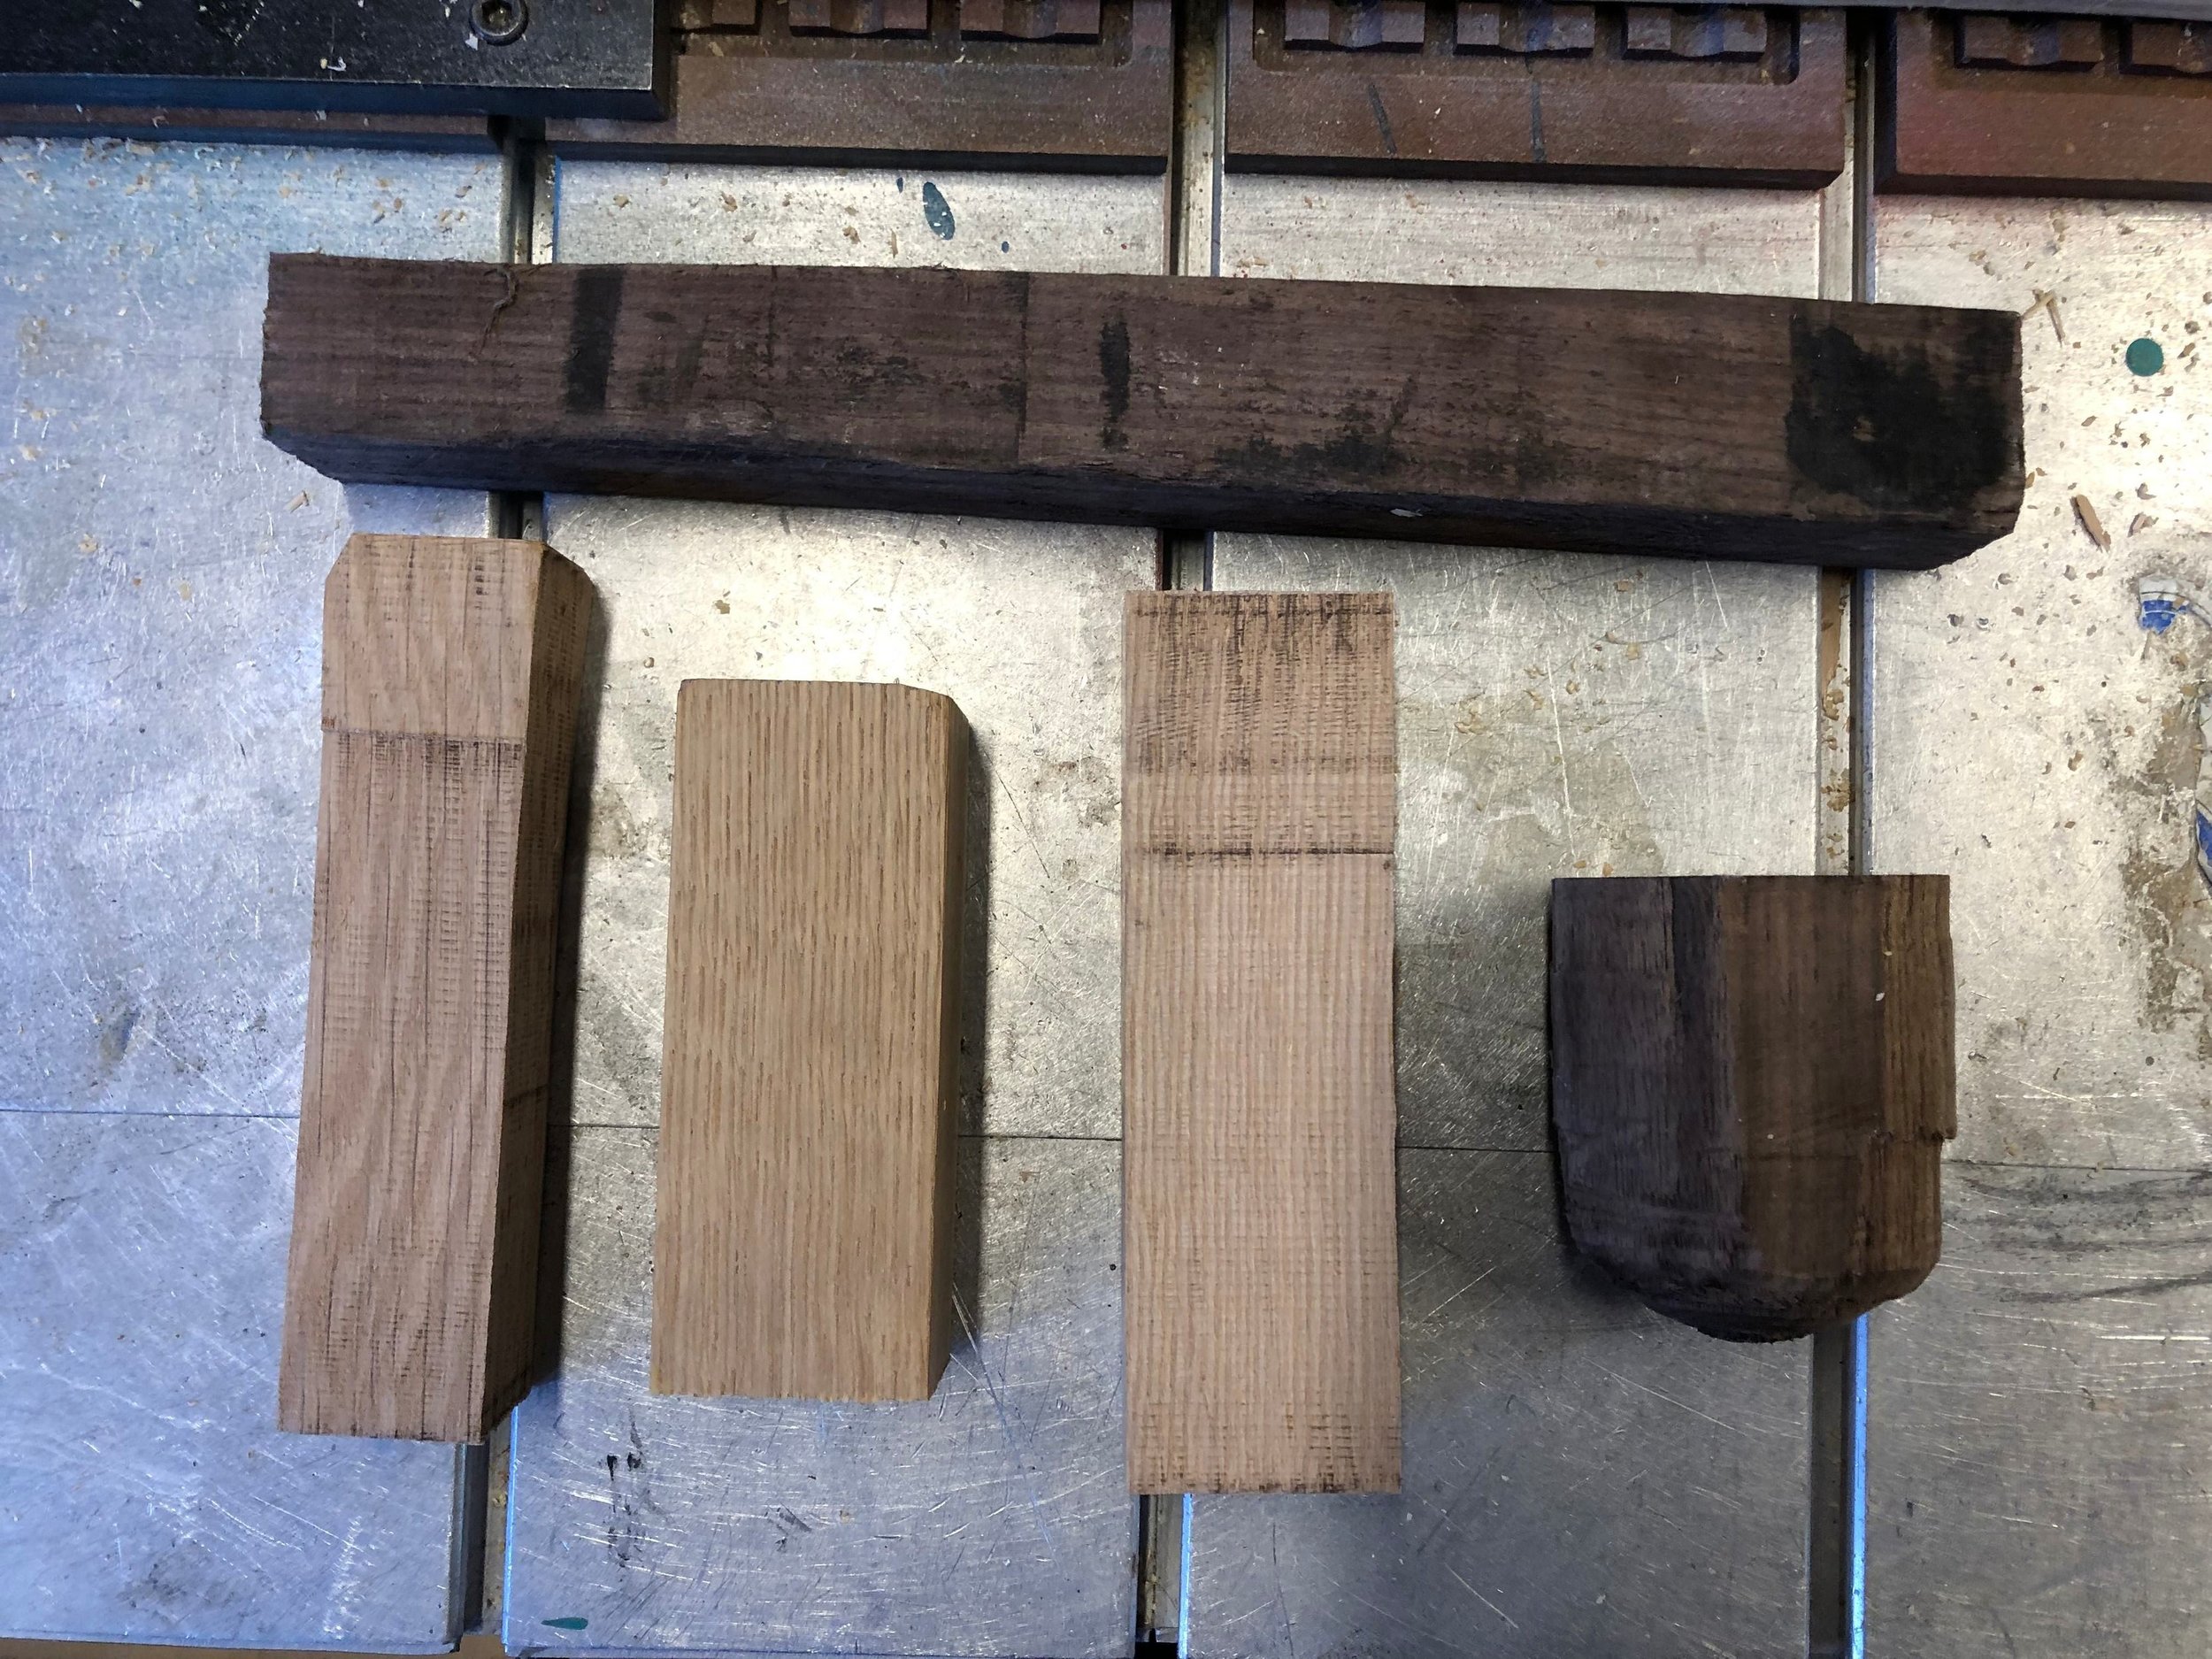
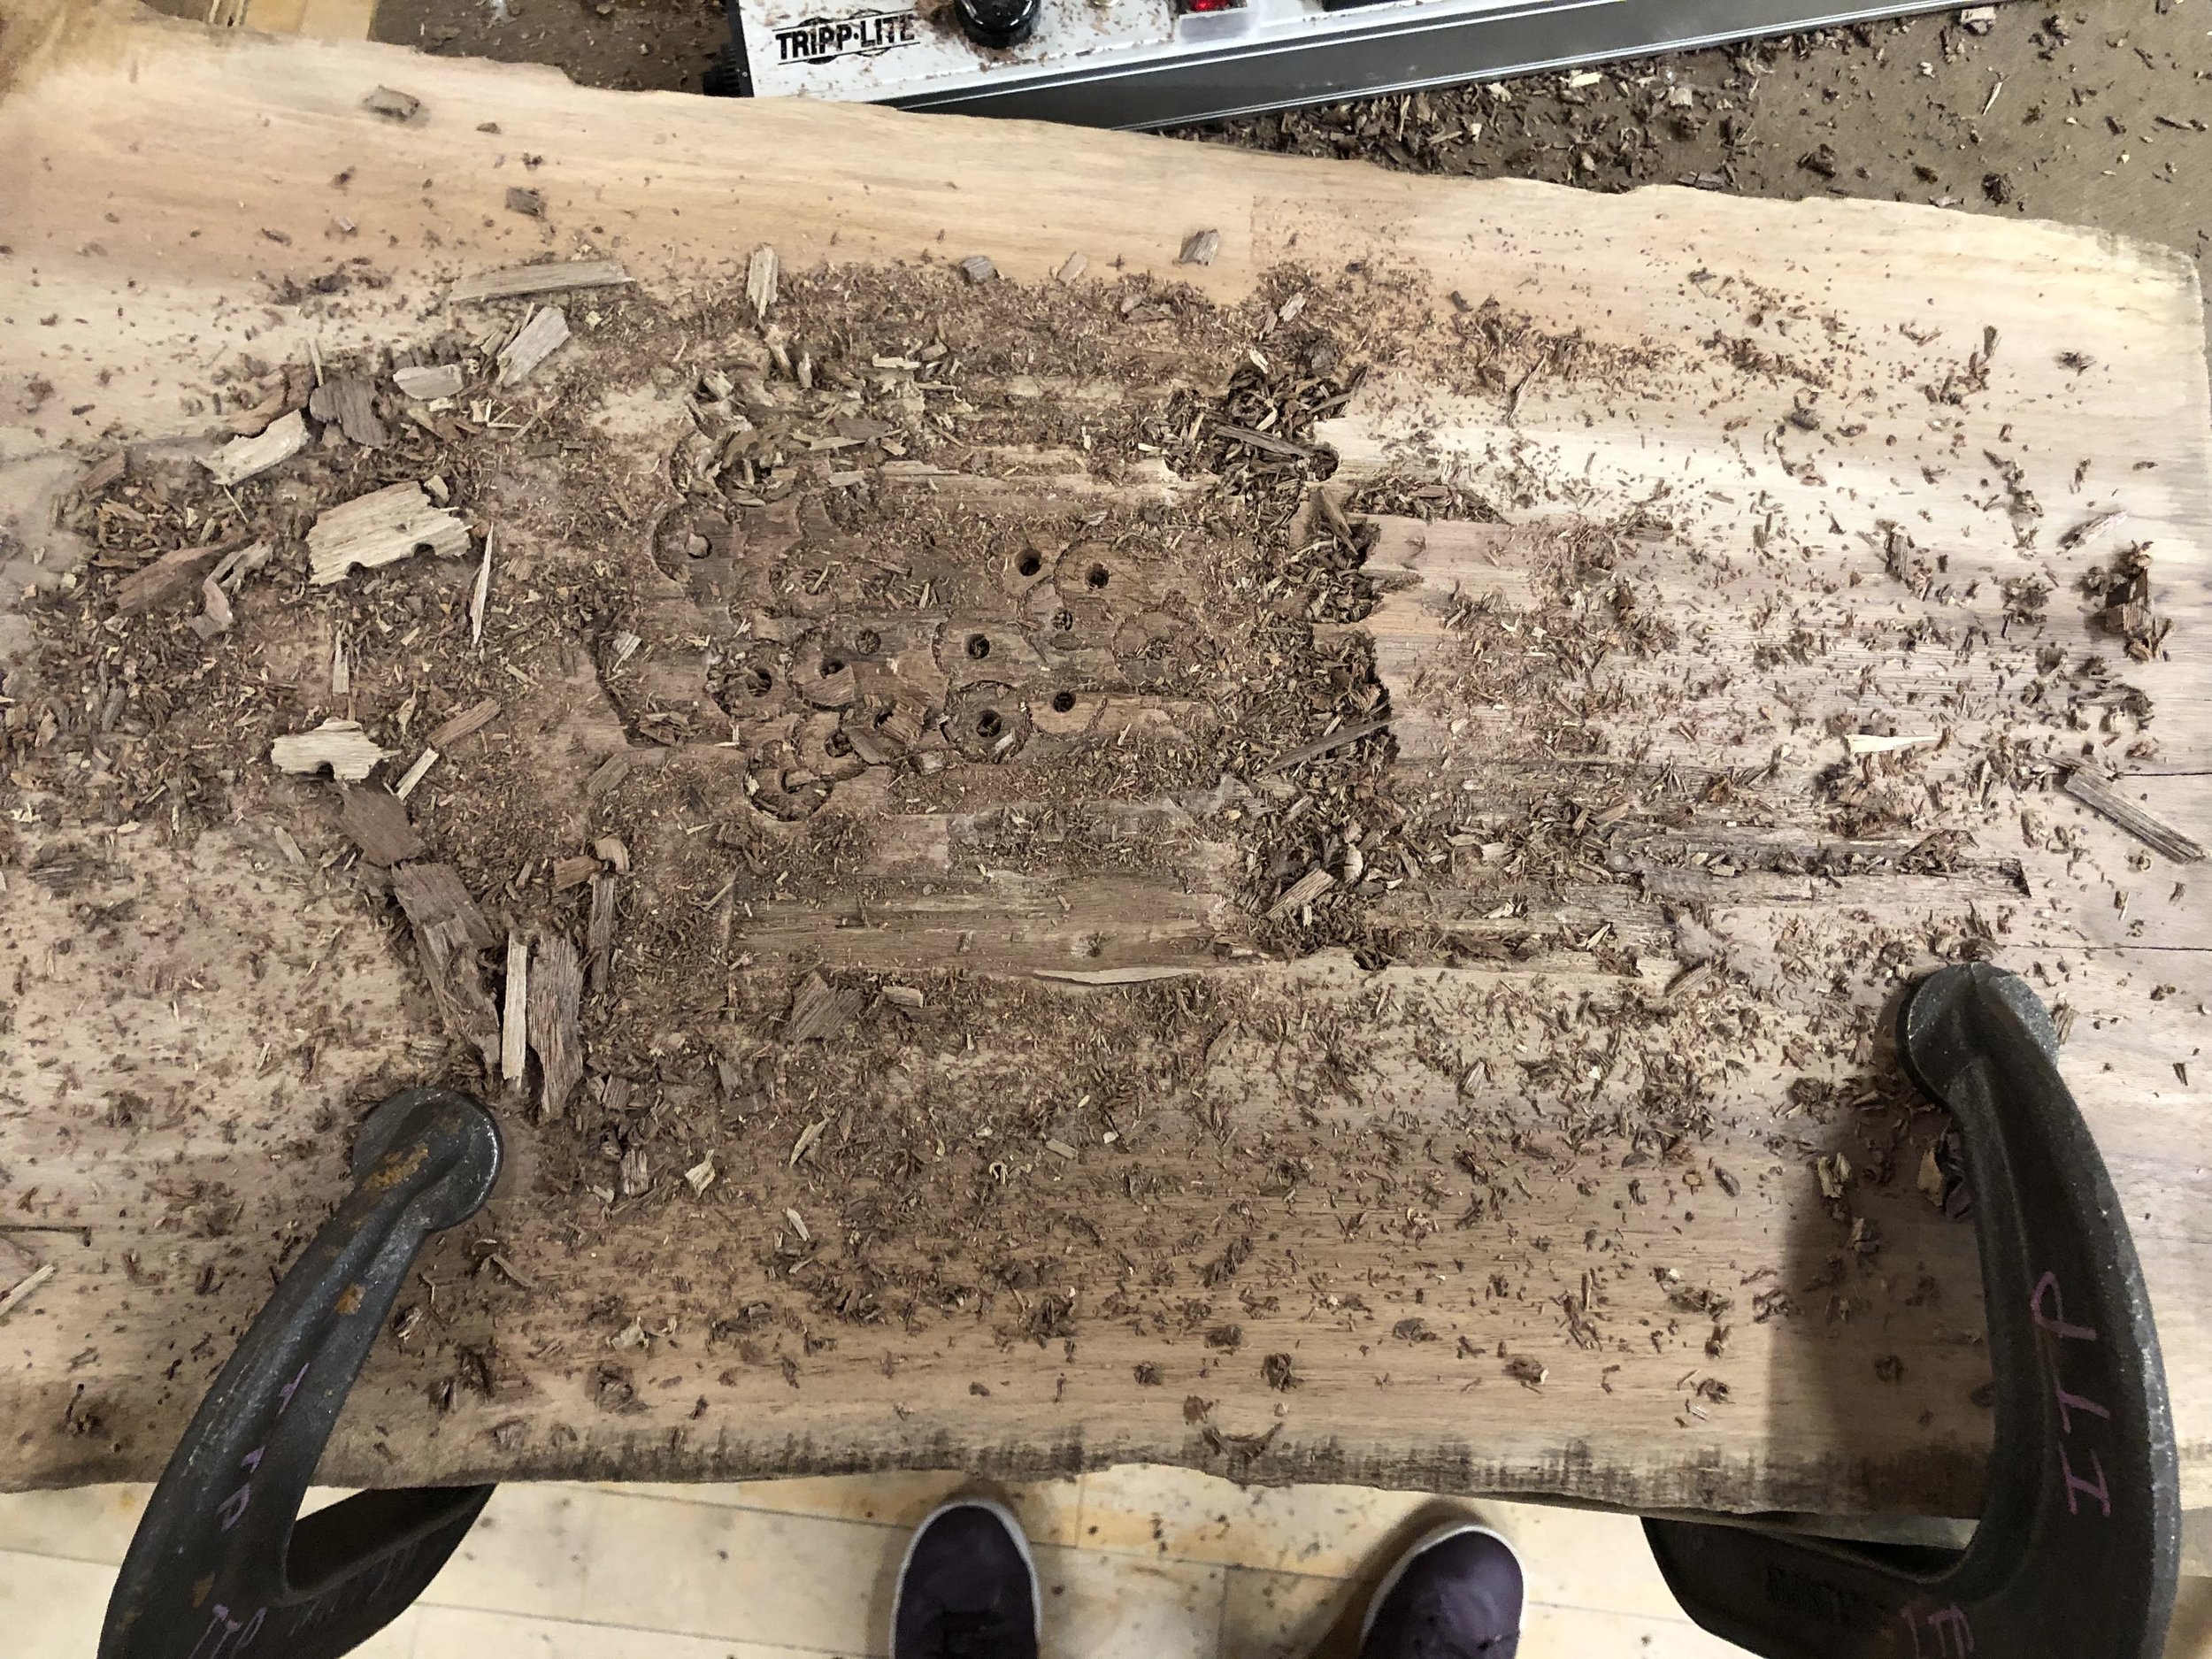
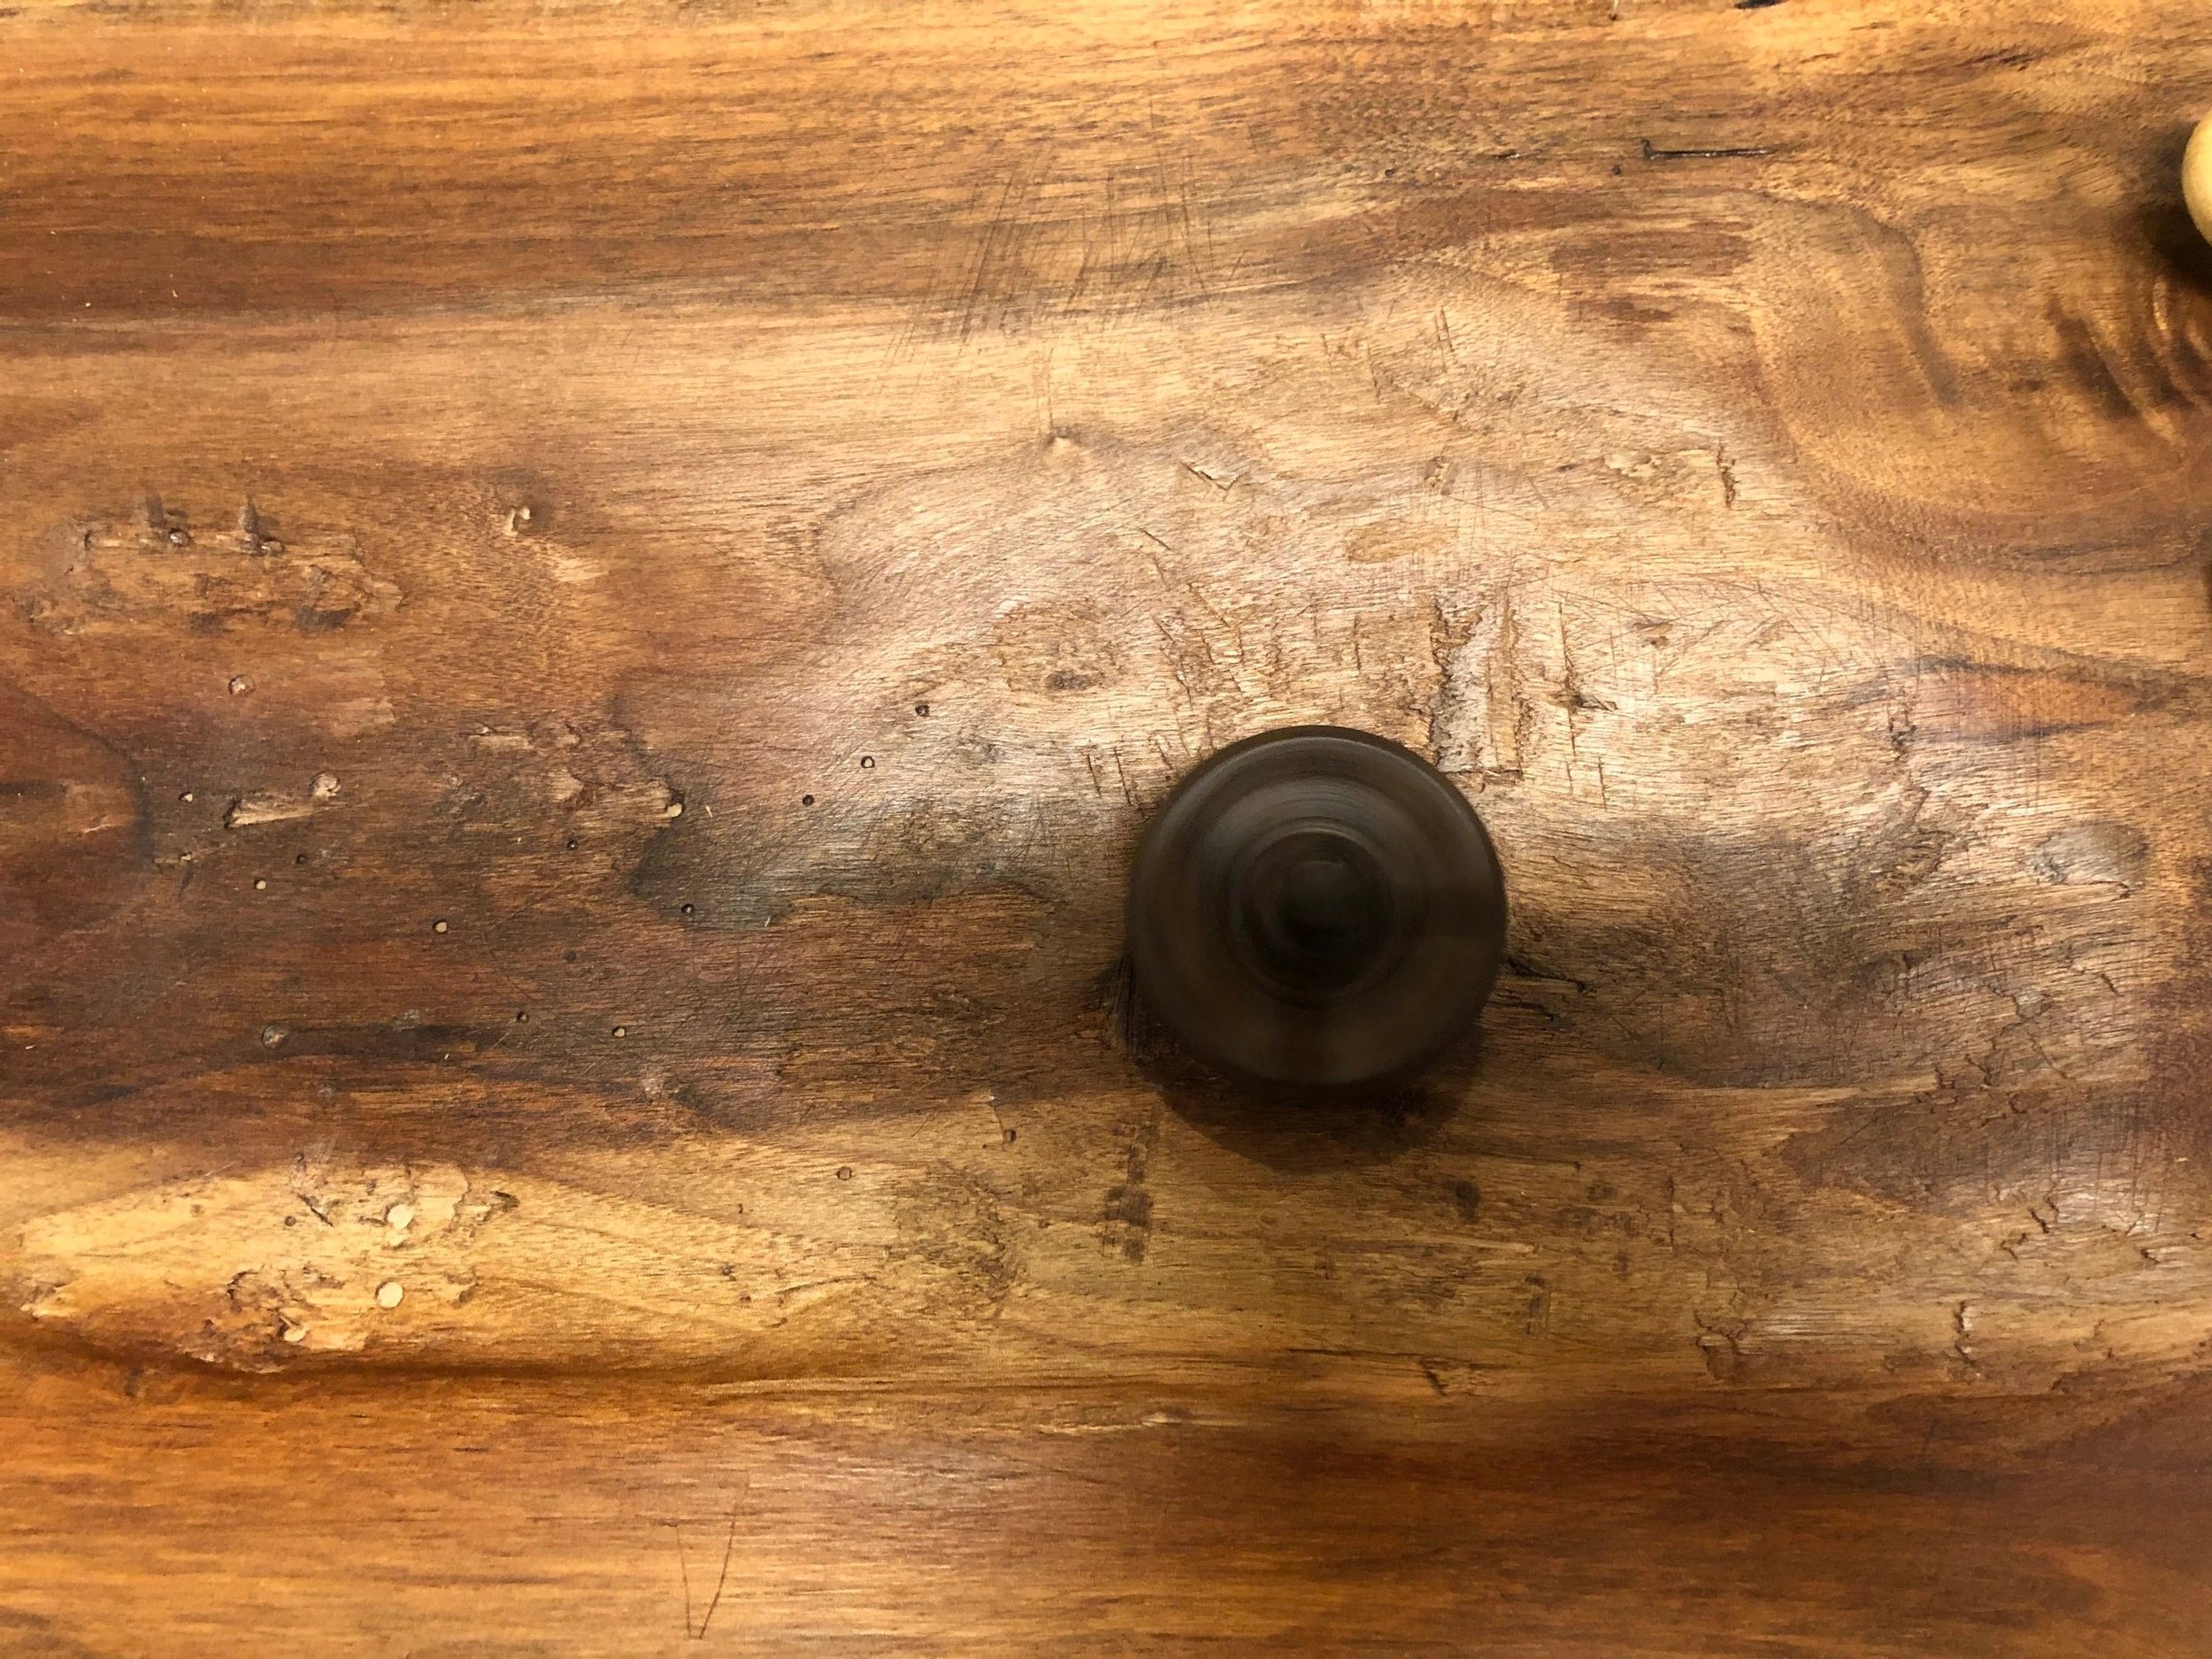
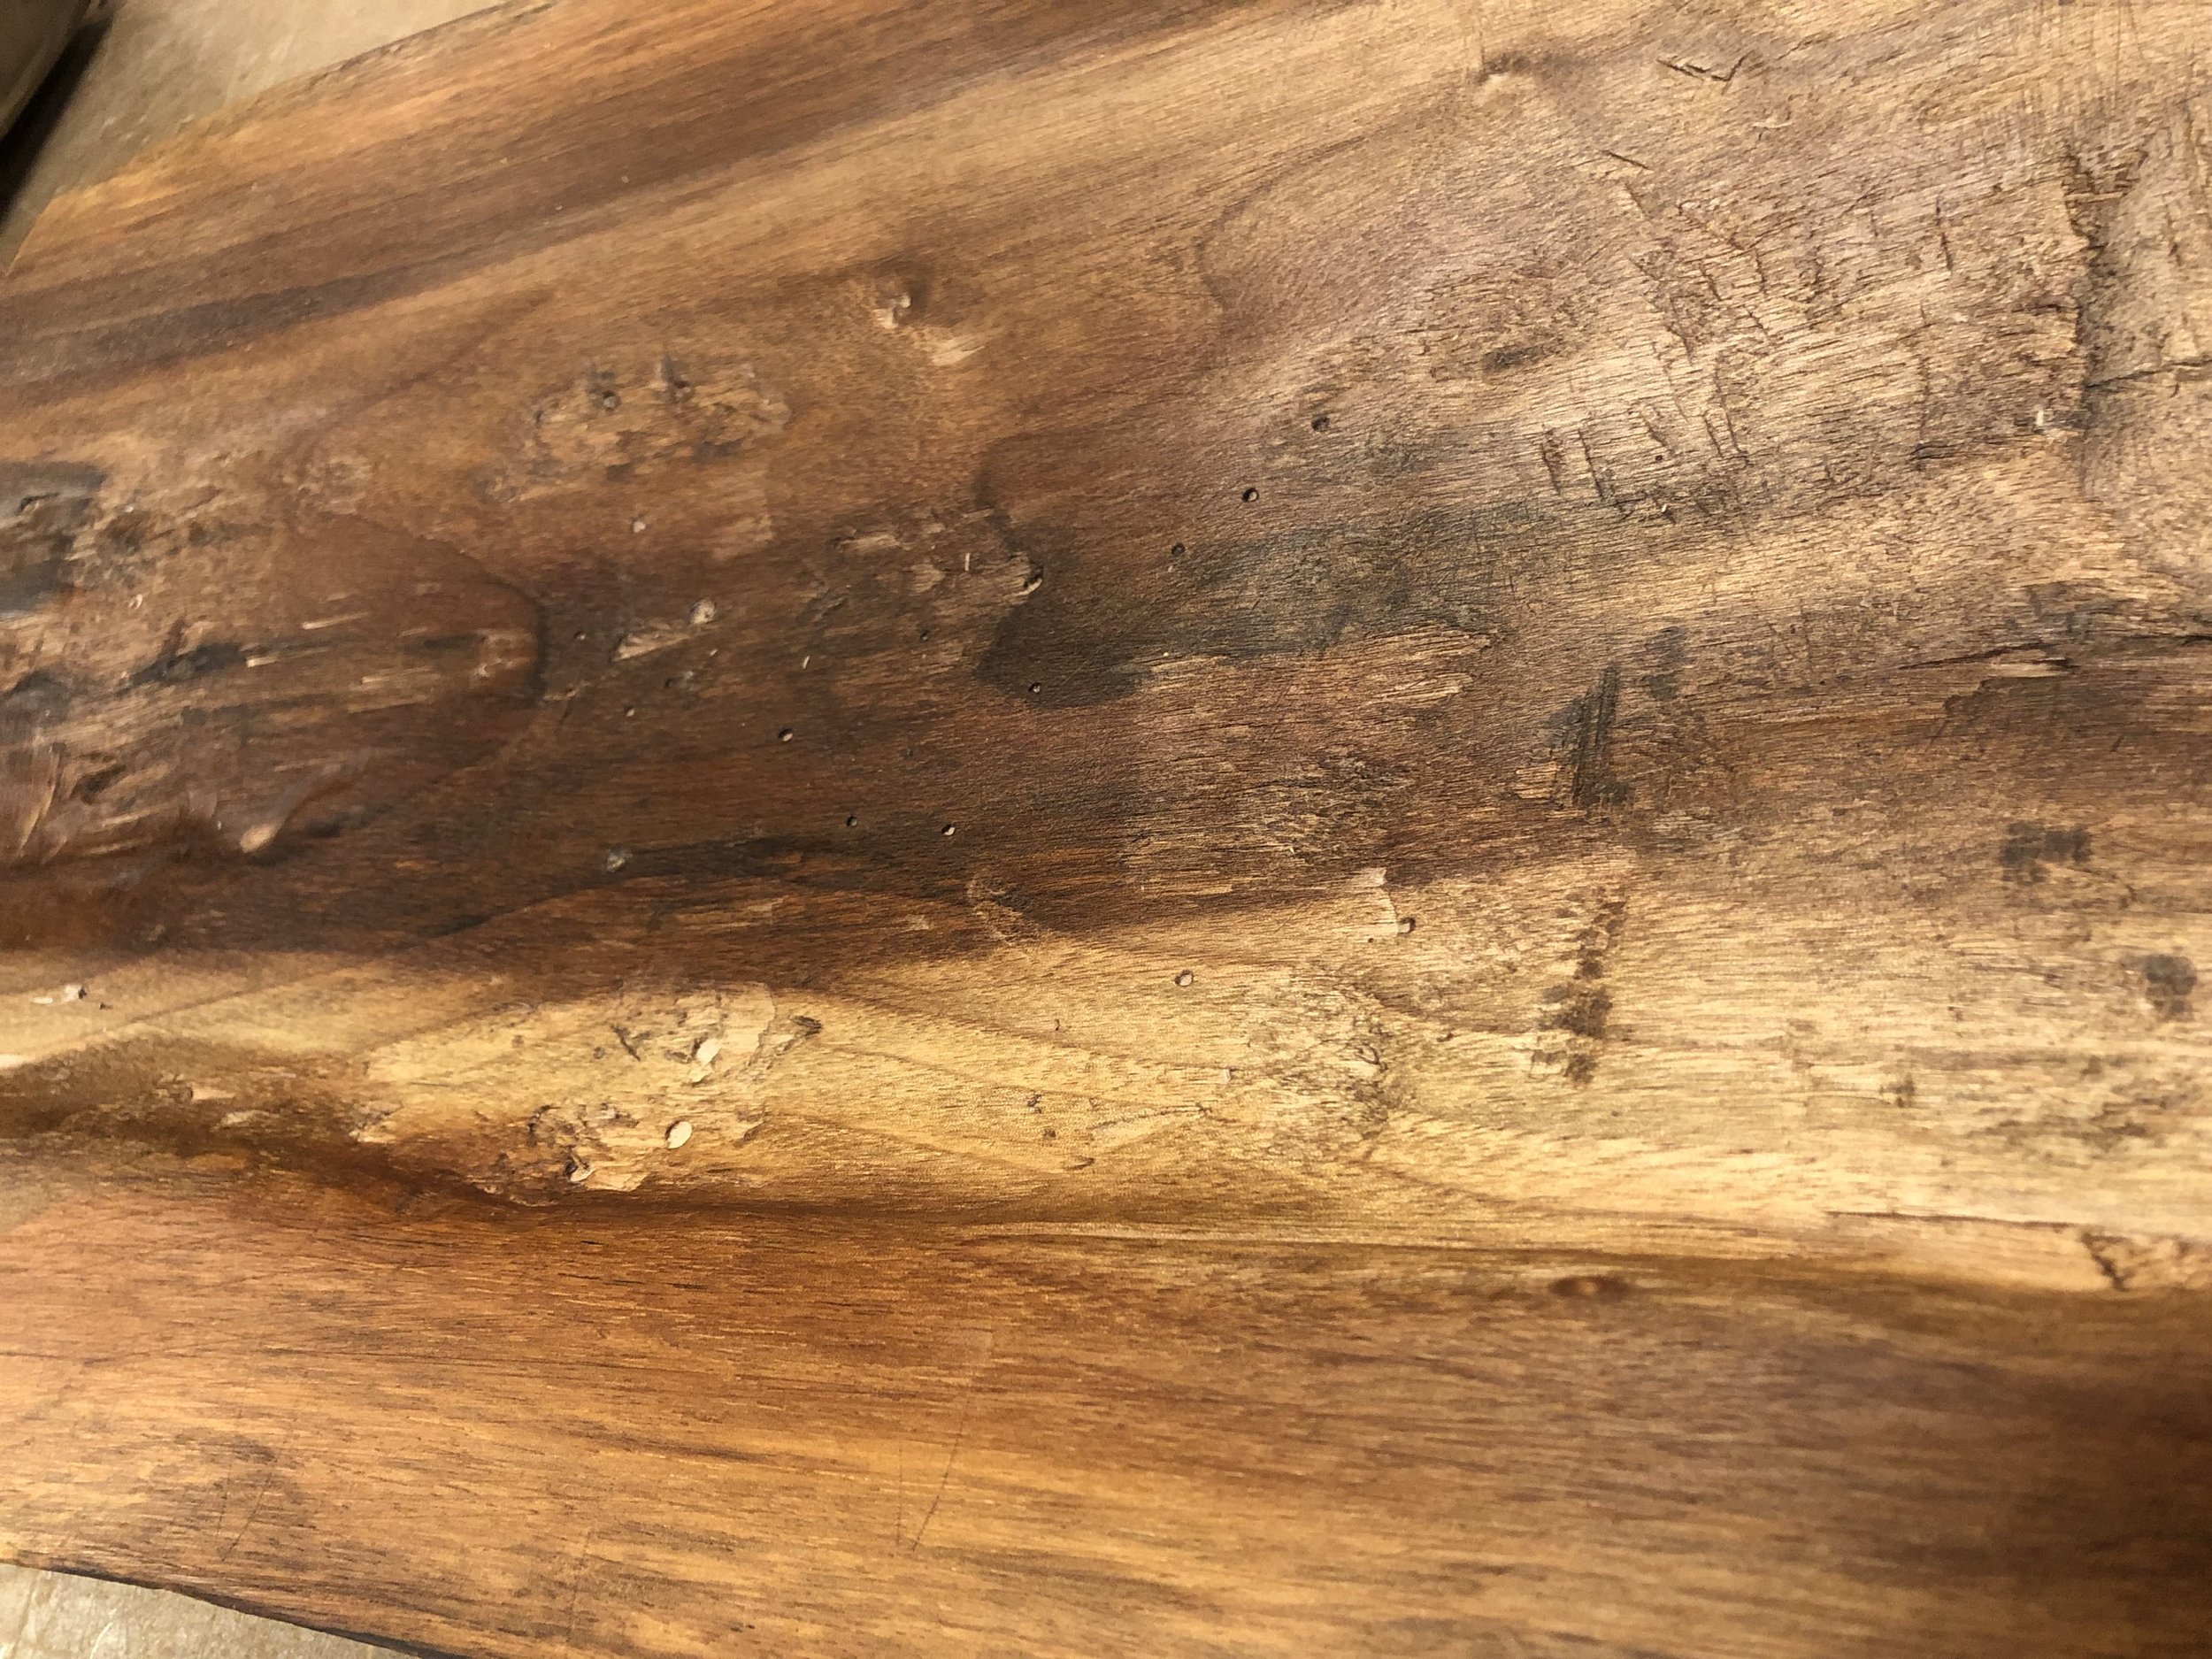
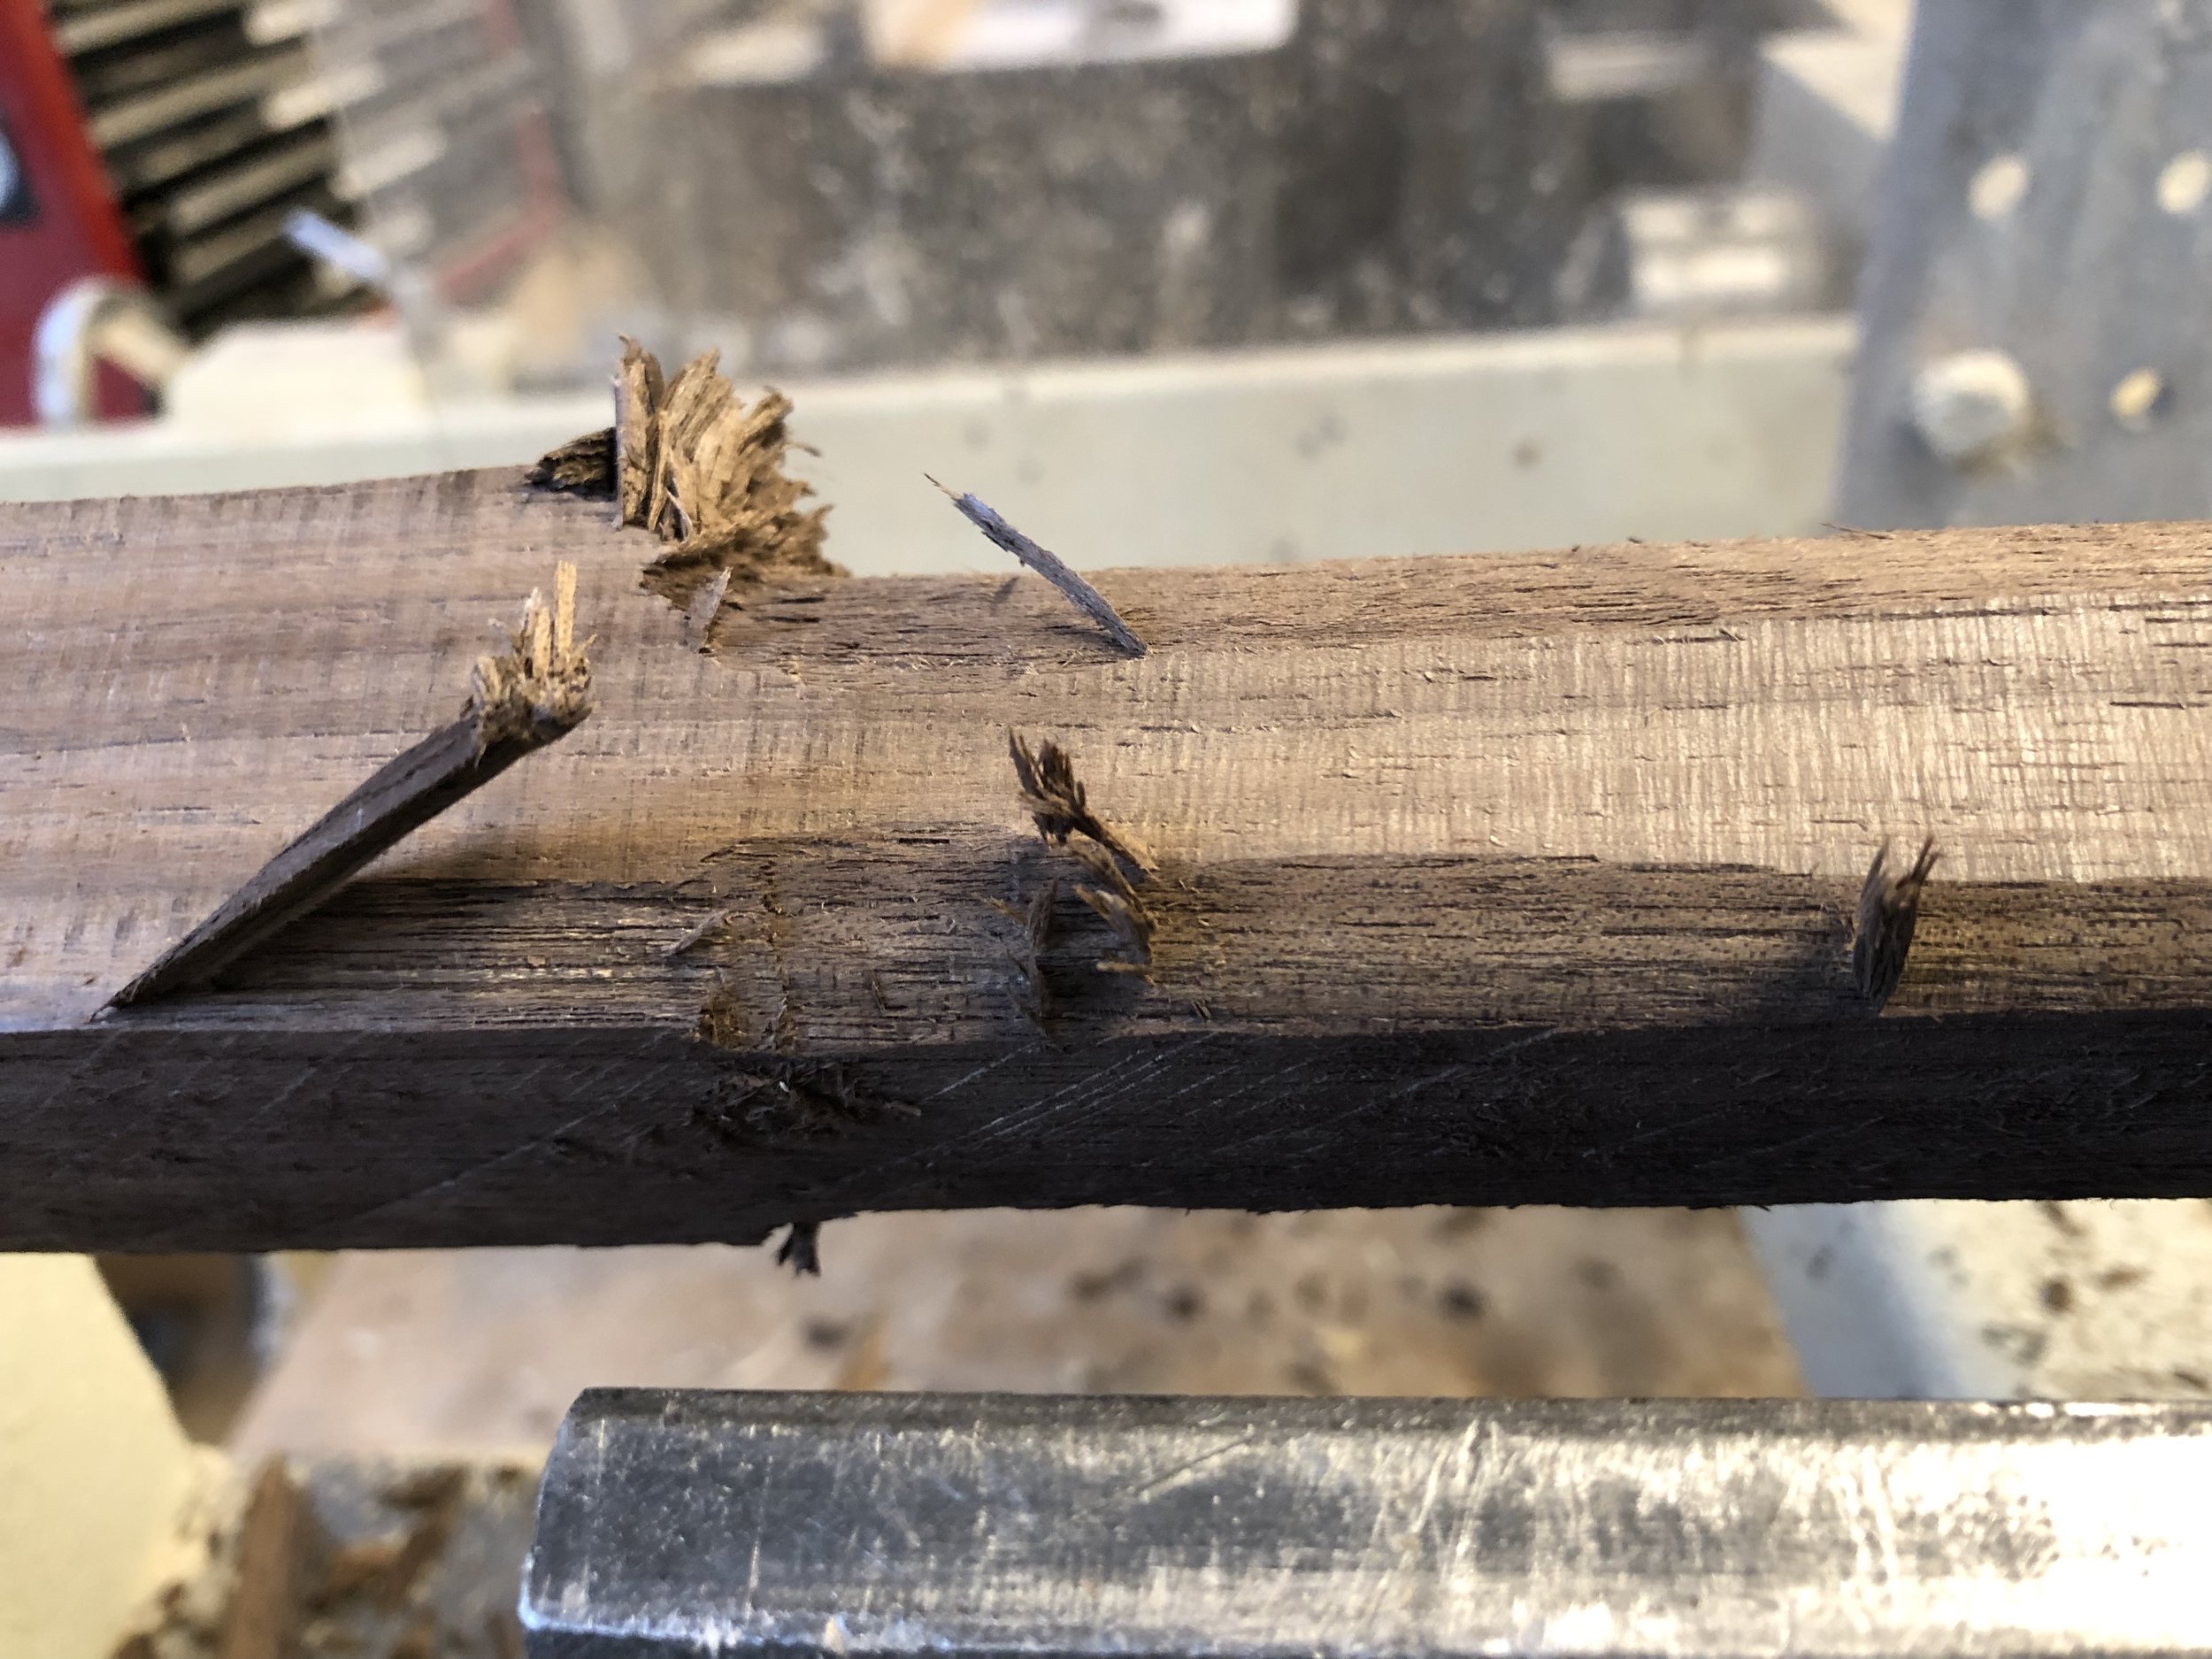
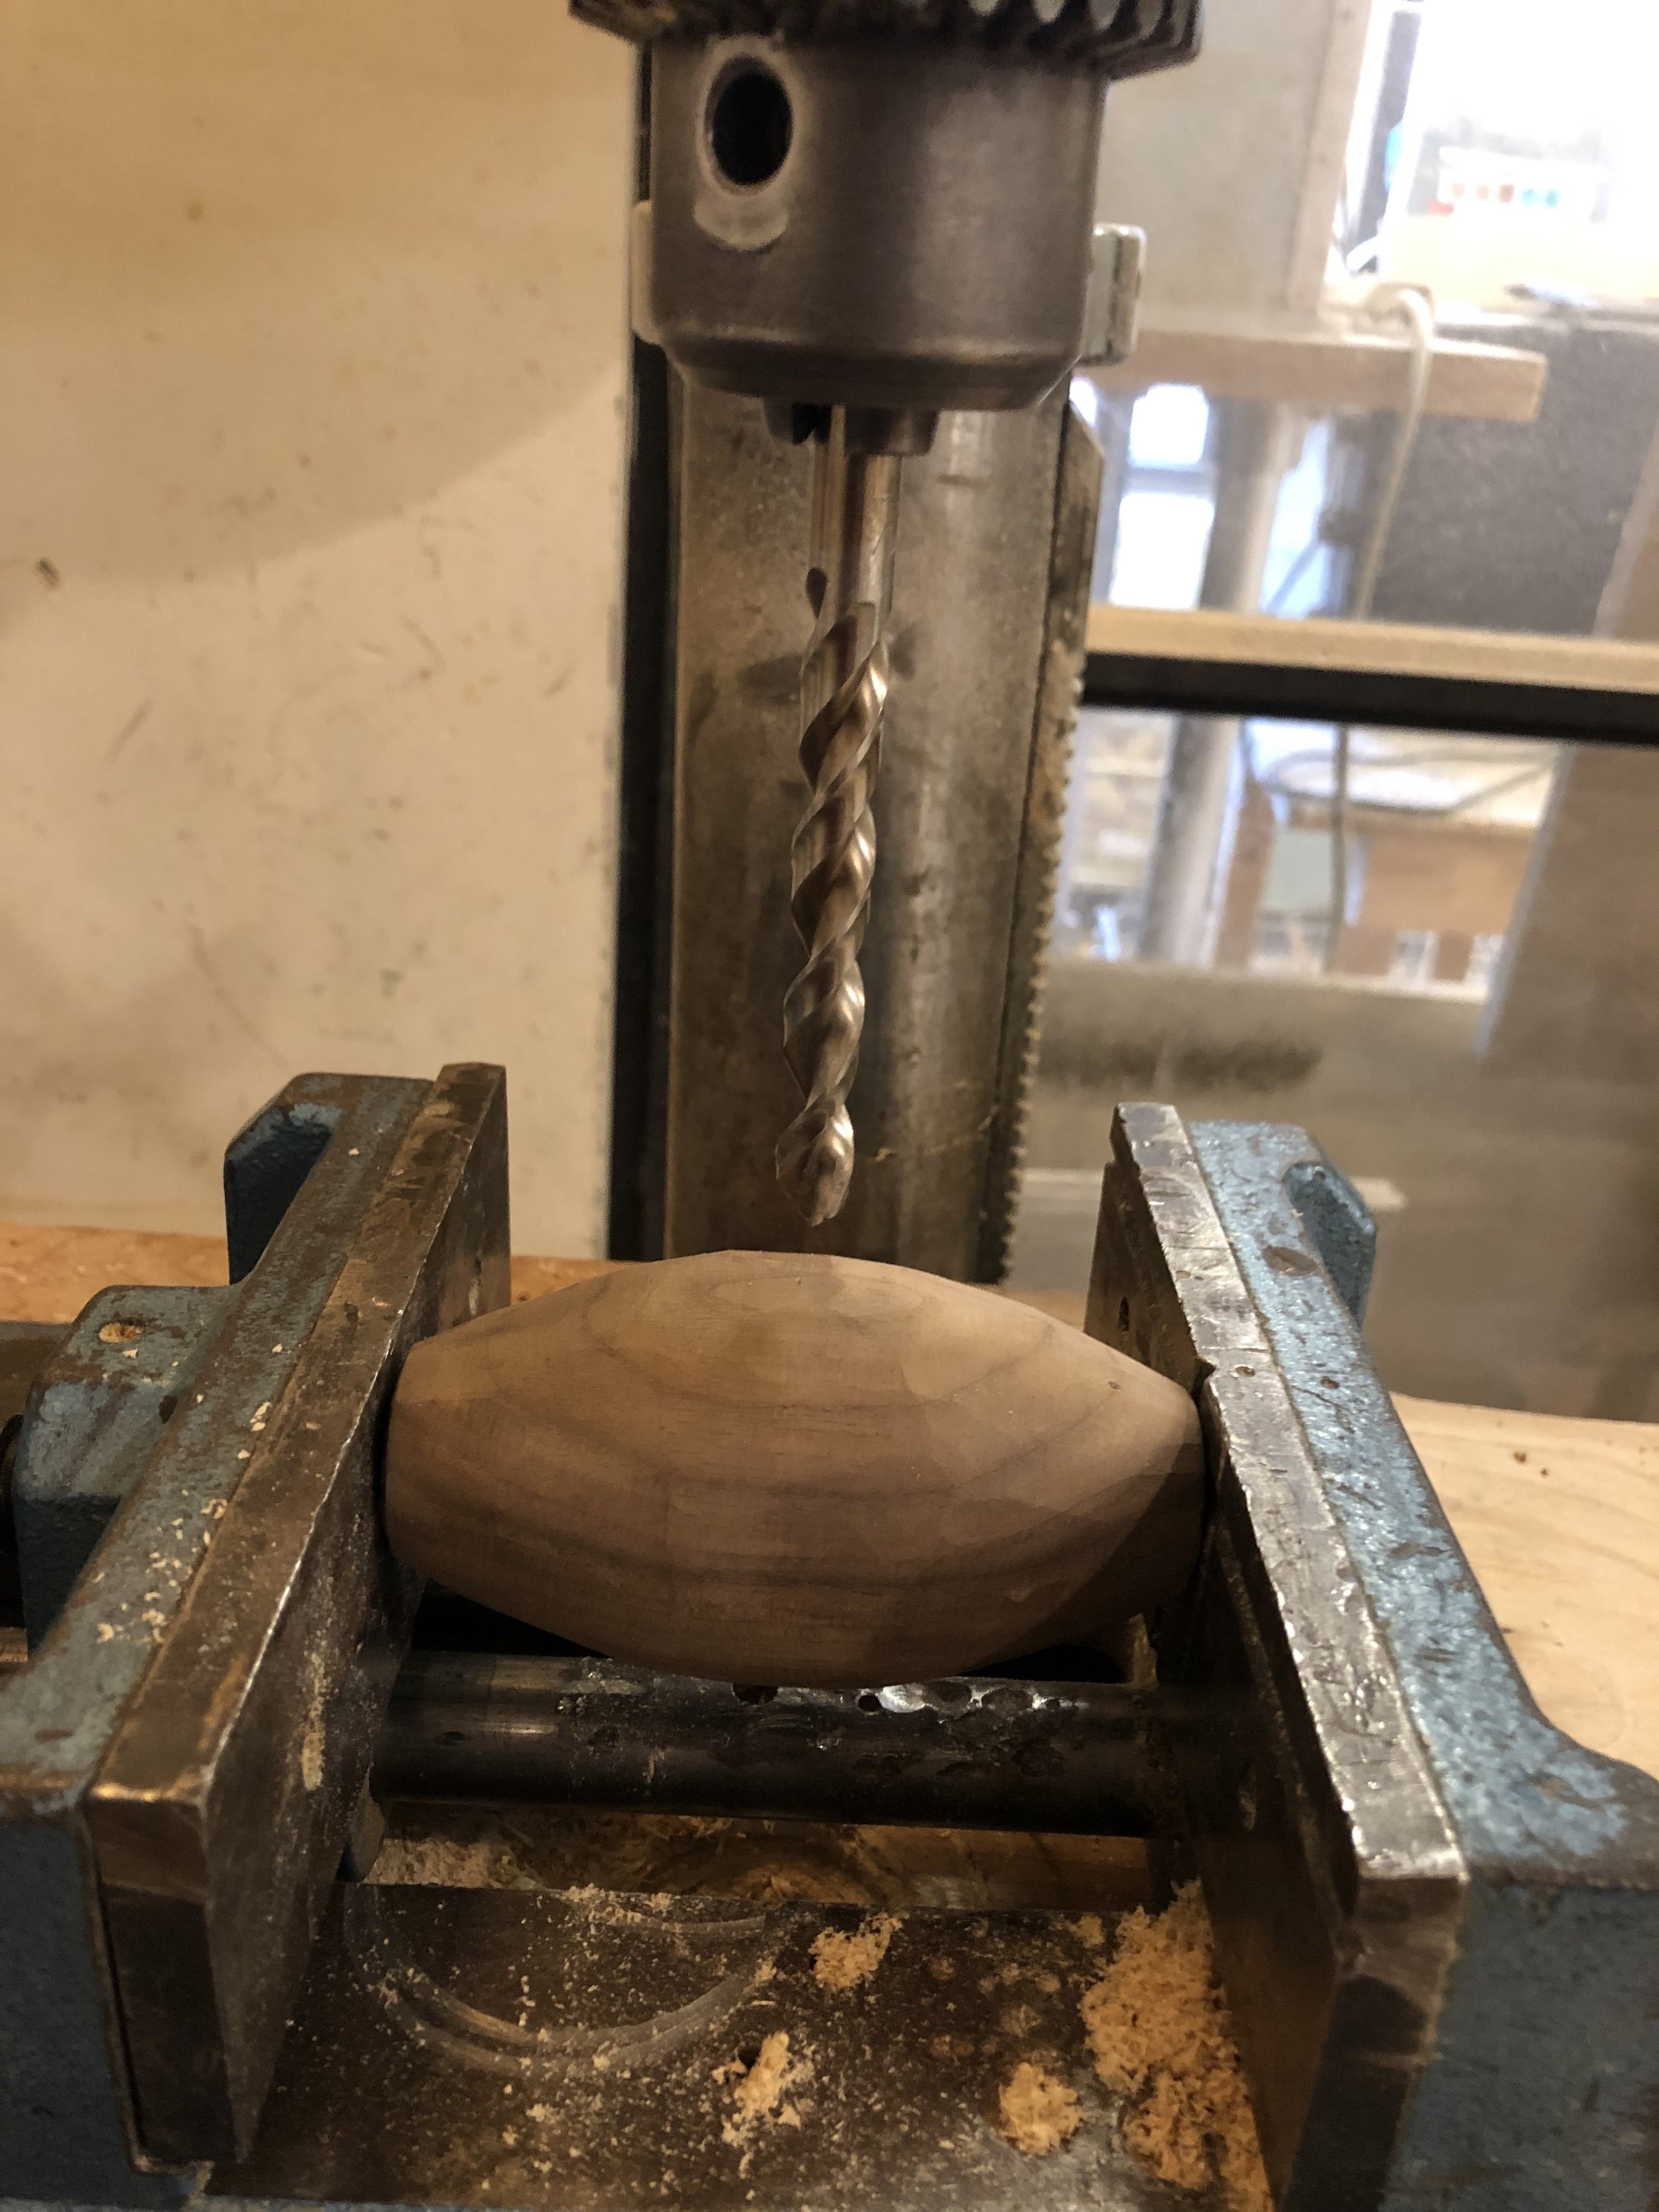
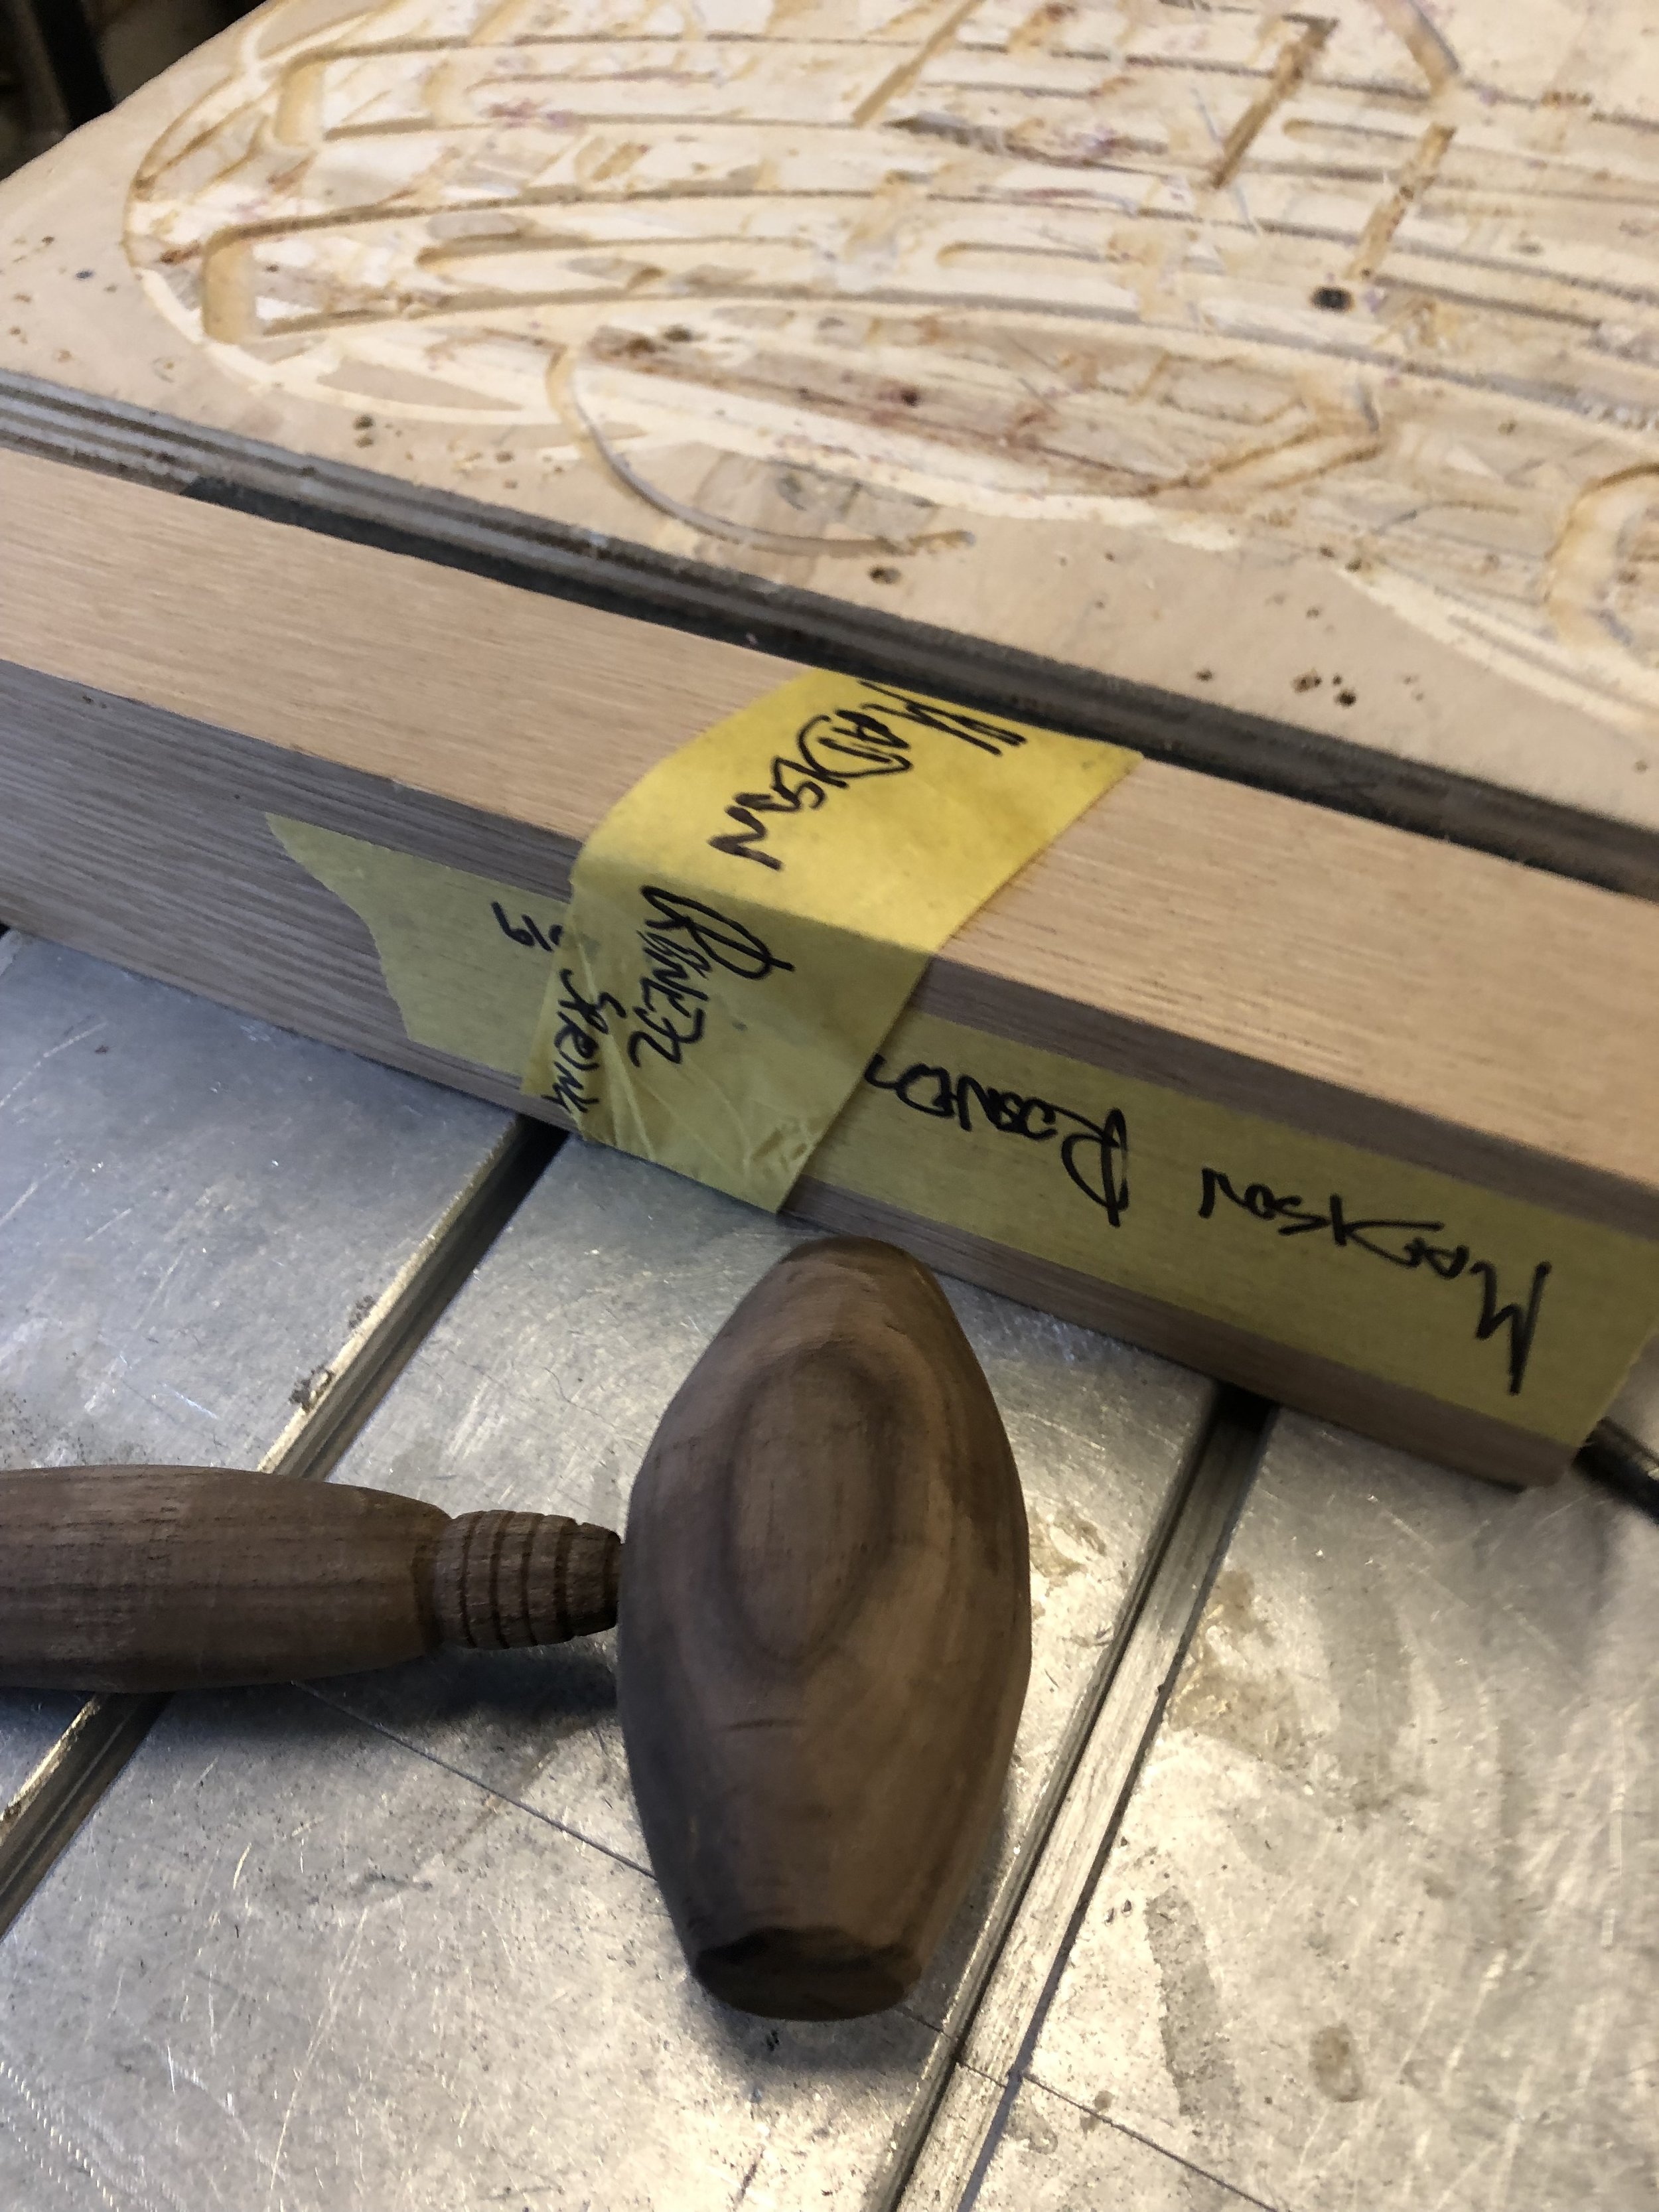
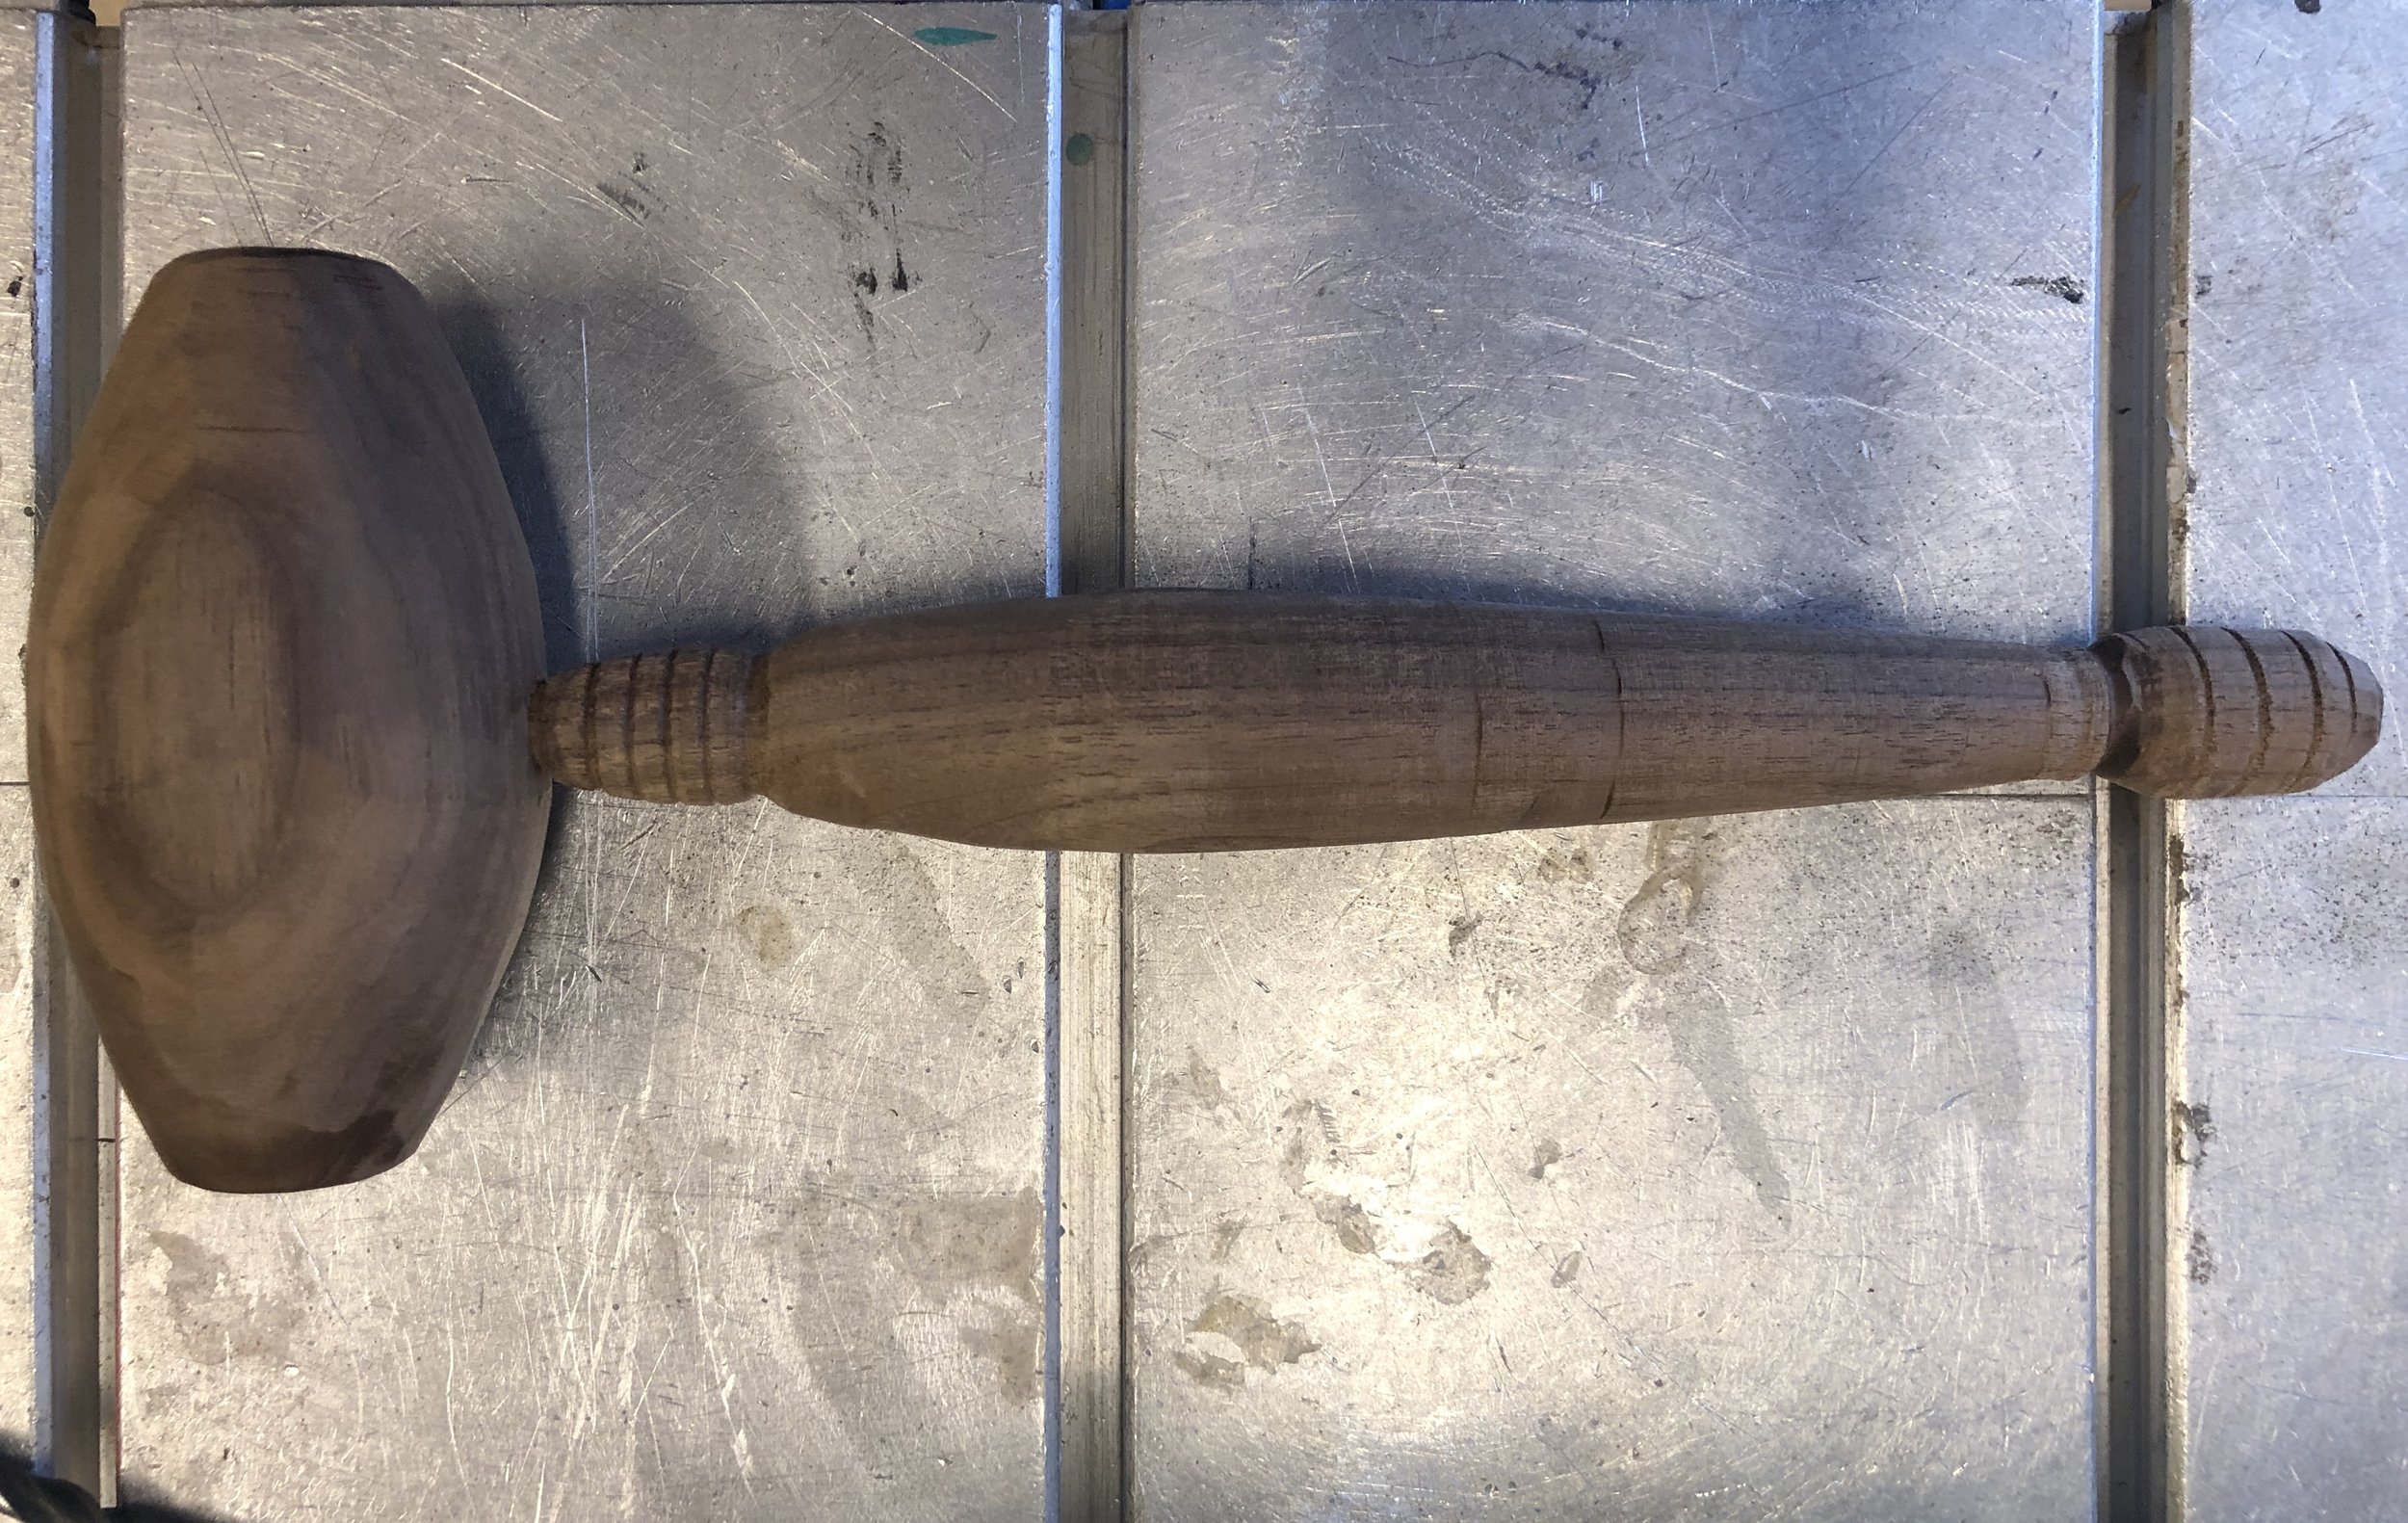
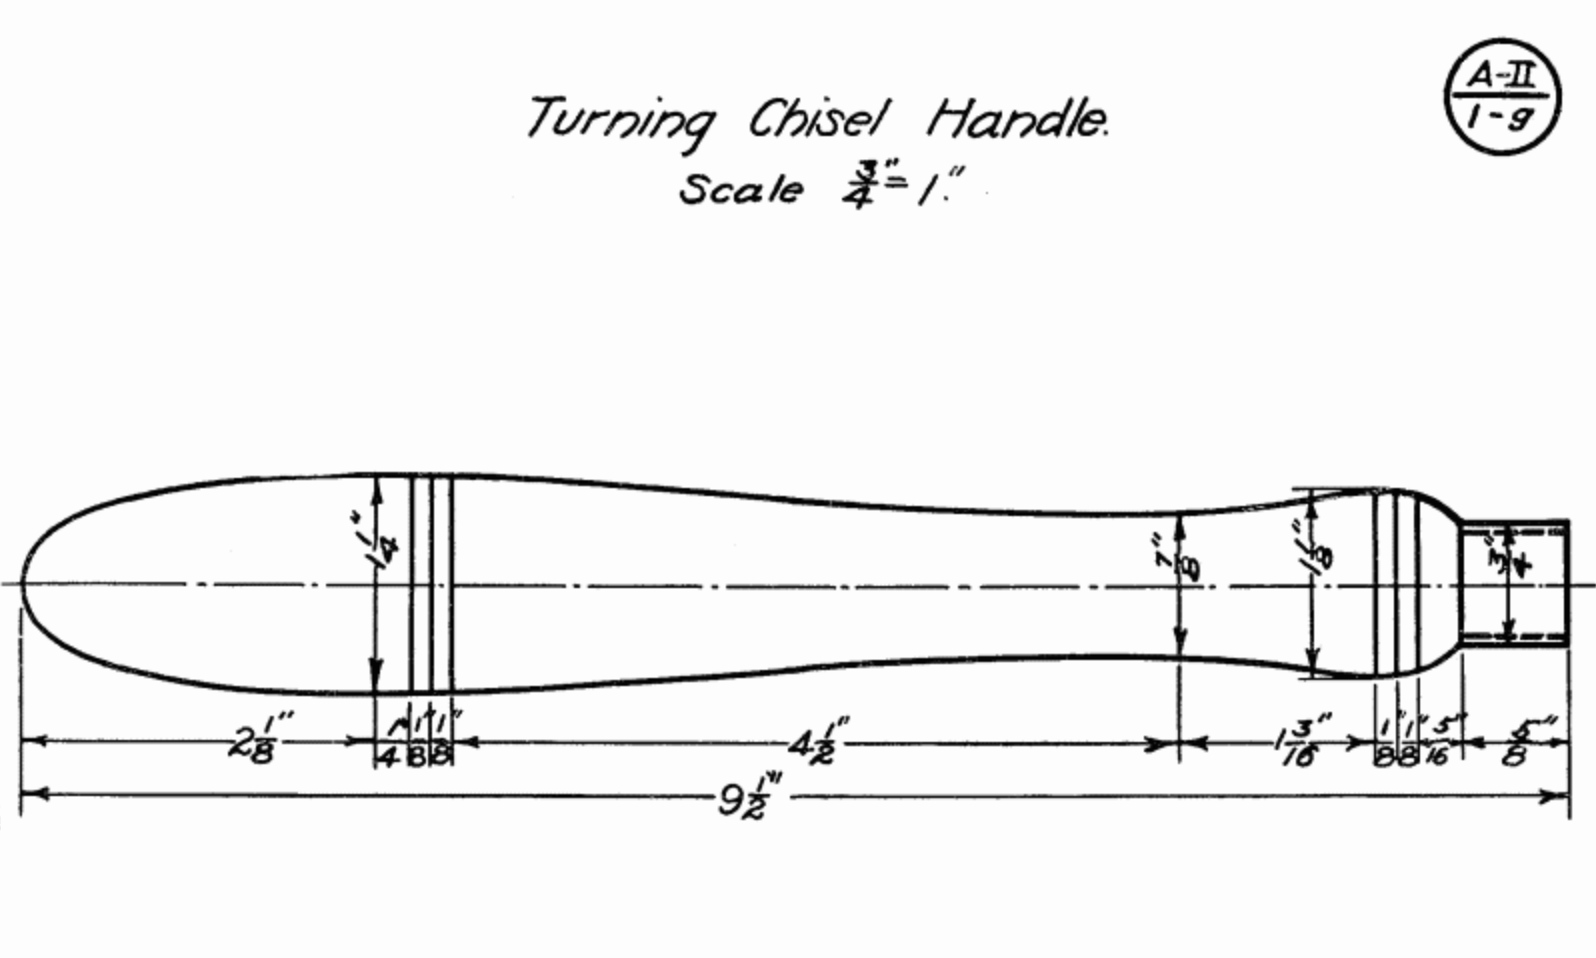
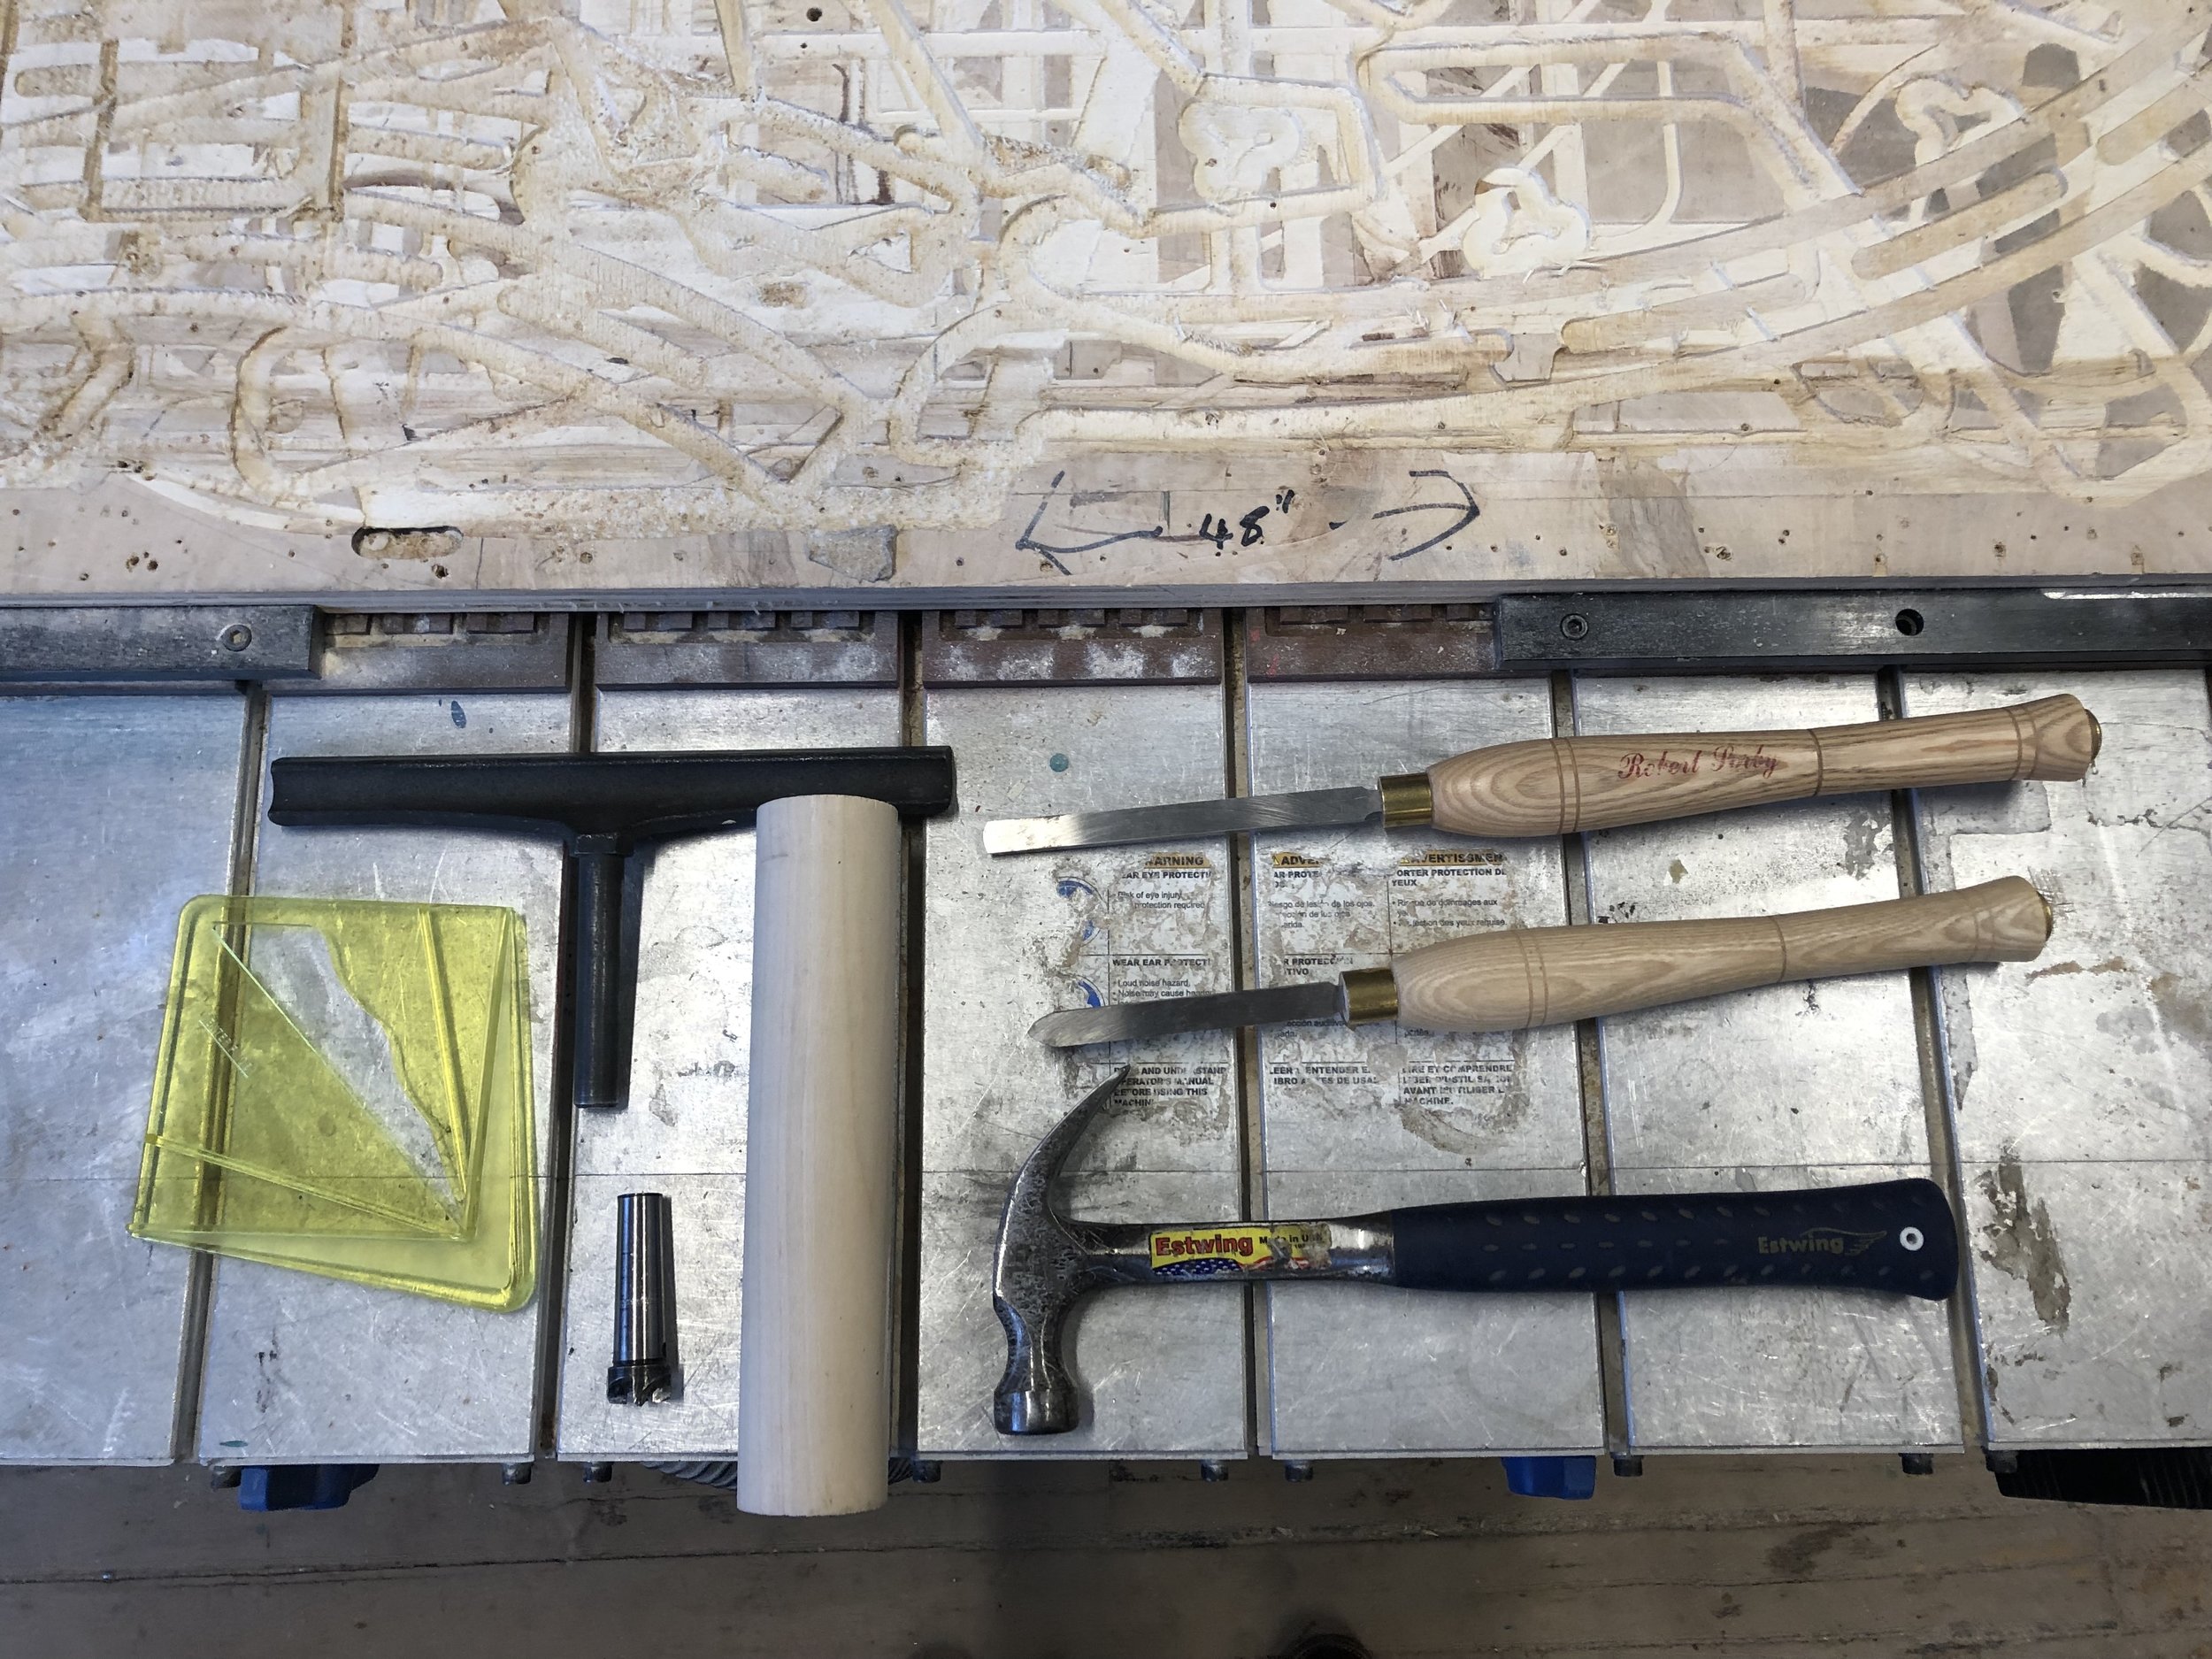
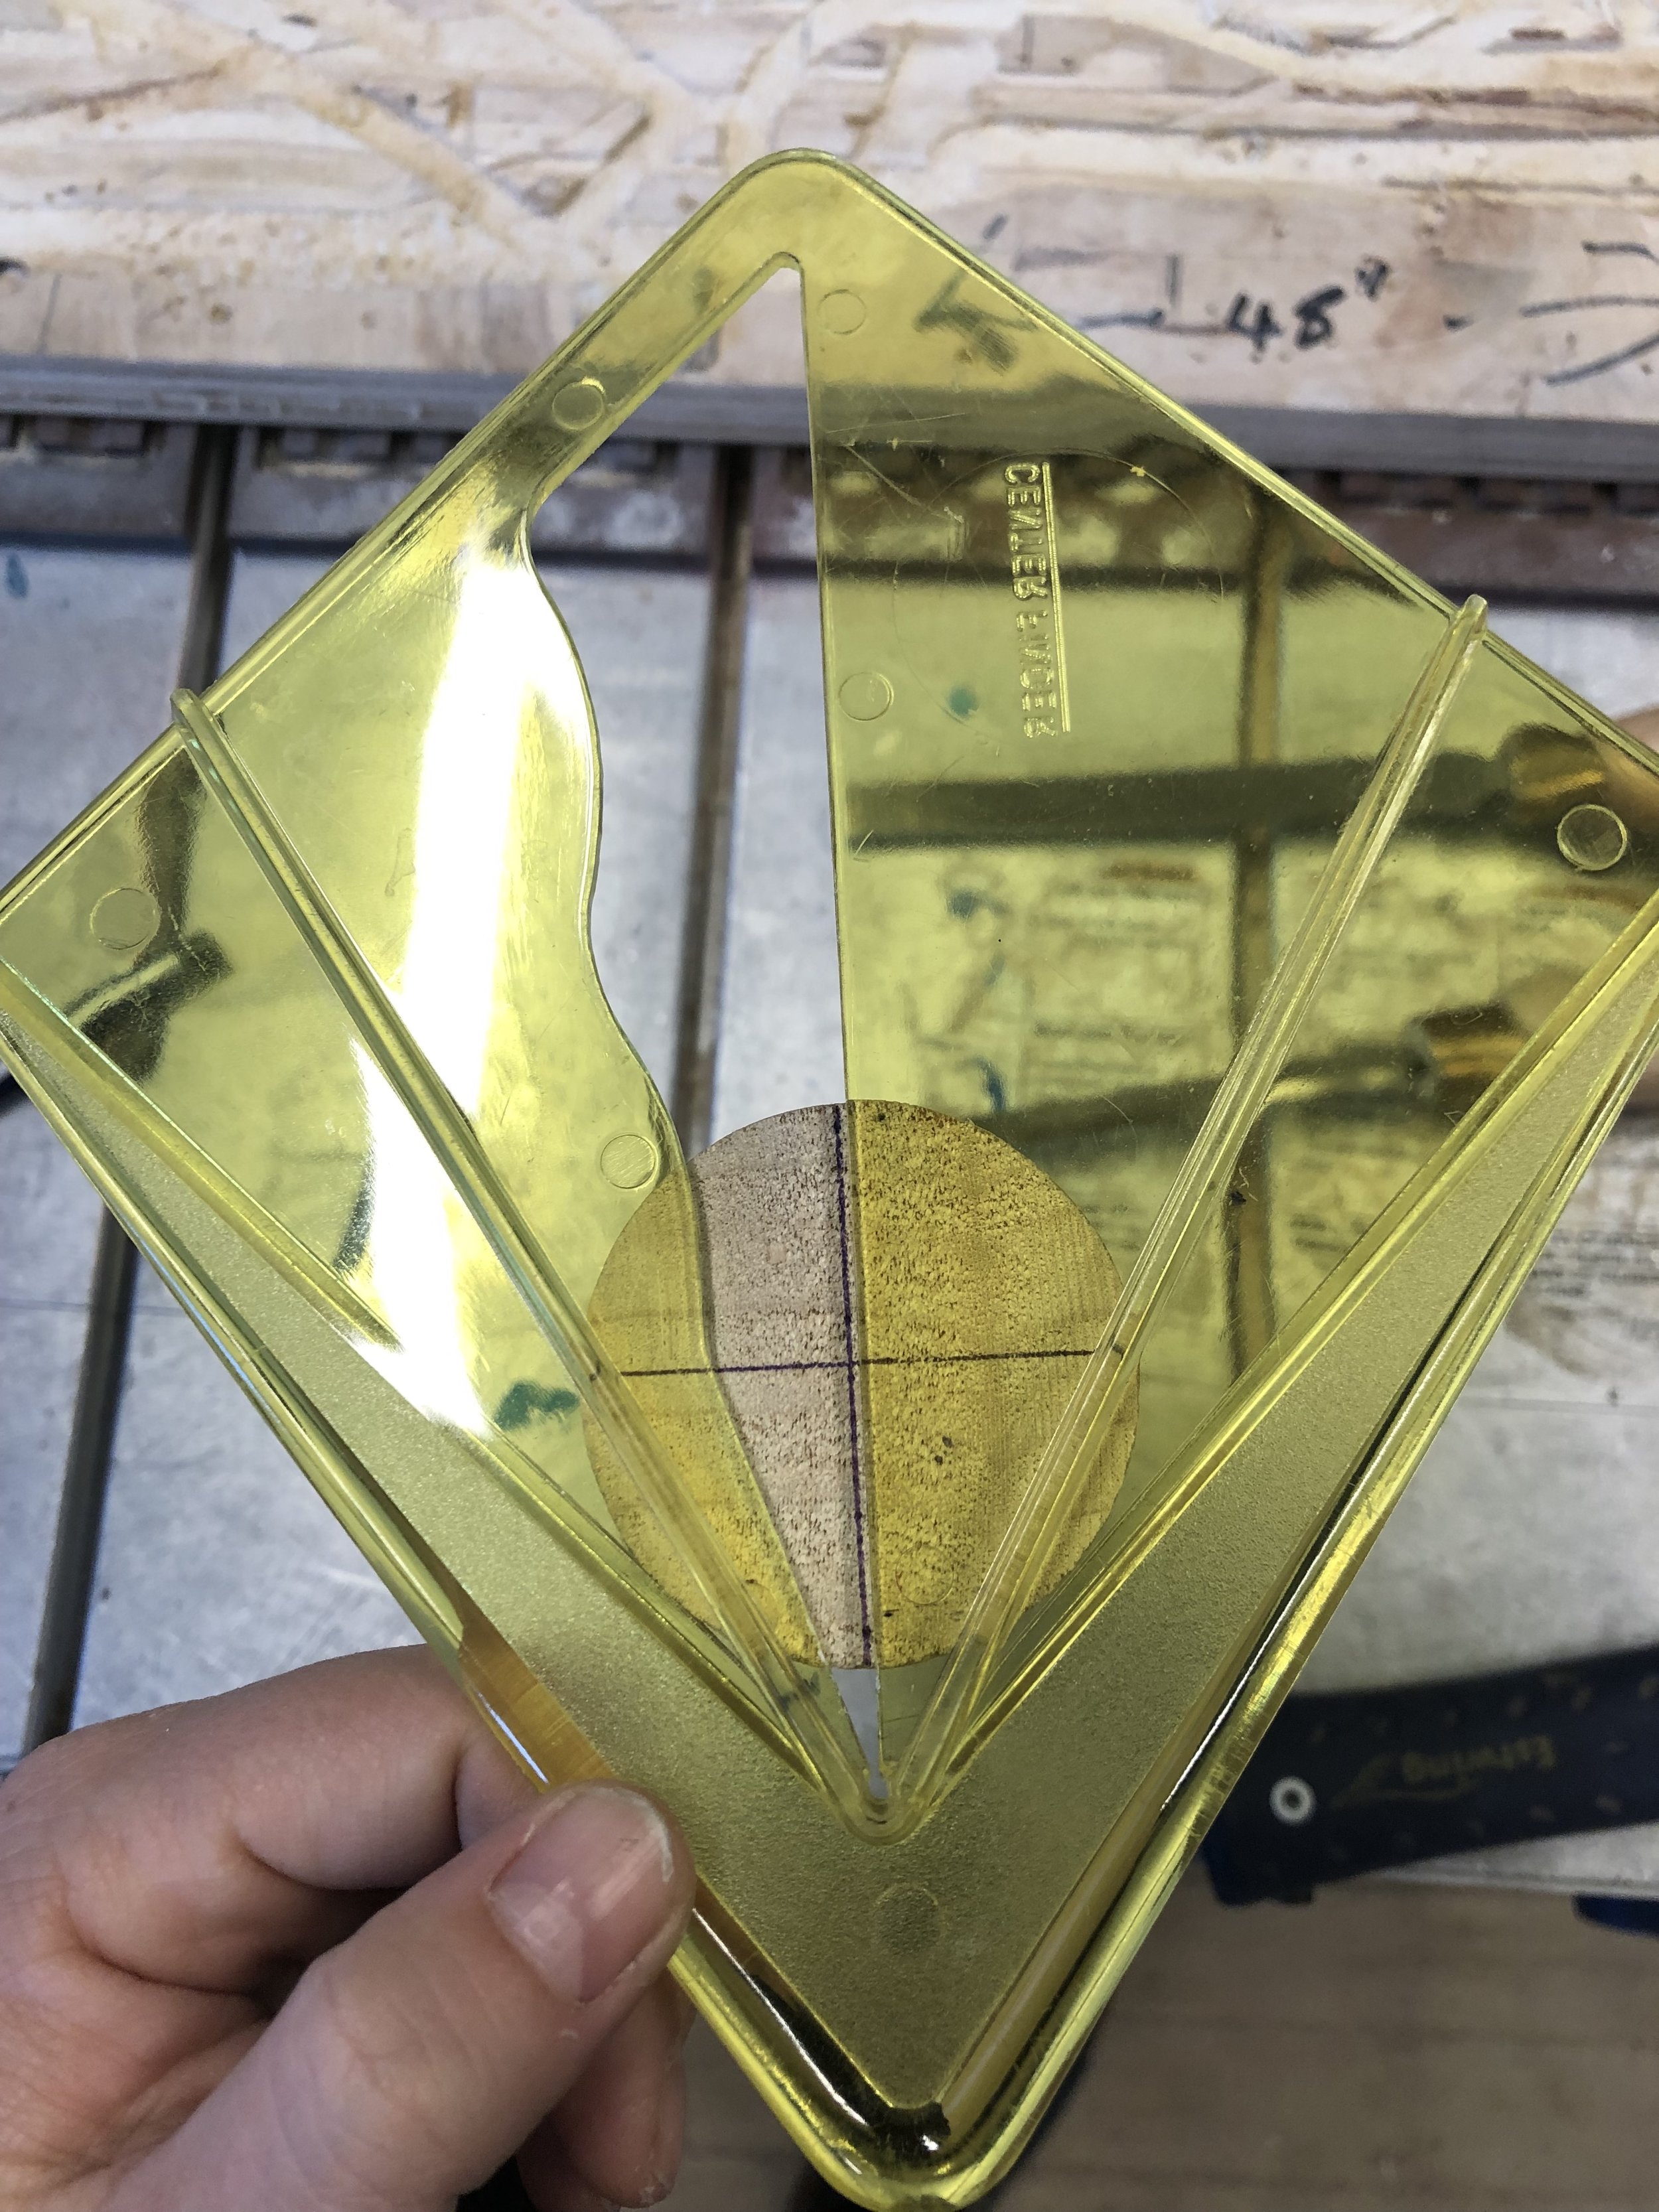
I initially wanted to use this beautiful piece of Norwegian Walnut I found at the Big Reuse in Brooklyn but realized that it would not work on the 4 Axis (because of size) and then didn’t want to entangle myself with the CNC while the other class was building out their finals. I asked John for advice and he suggested a mallet and chisel approach. I had some time so decided to play it out and see what came out of it. I’m just going to say this now. I have so so so much respect for wood workers. This was grueling, yet rewarding. I started out with the drill press drilling some holes to help with the process. This took its toll quickly and I was eager to begin. I decided to drill holders for all the tops at the side and made a presentation sign out of walnut and the laser cutter to display my work. I think I spent roughly 8 hours on this thing. But I love every bit of bump and groove that it has to offer. The chisels were dull and awful but I did it. I made it happen!!

IMG_2856.jpg IMG_2857.jpg 57422156435__3A4A1E68-EAC9-43BA-A6A1-1D72C18D20E0.JPG IMG_2858.jpg IMG_2917.jpg IMG_2918.jpg IMG_2920.jpg IMG_2921.jpg IMG_2923.jpg IMG_2924.jpg IMG_2925.jpg IMG_2926.jpg IMG_2927.jpg IMG_2928 copy.jpg

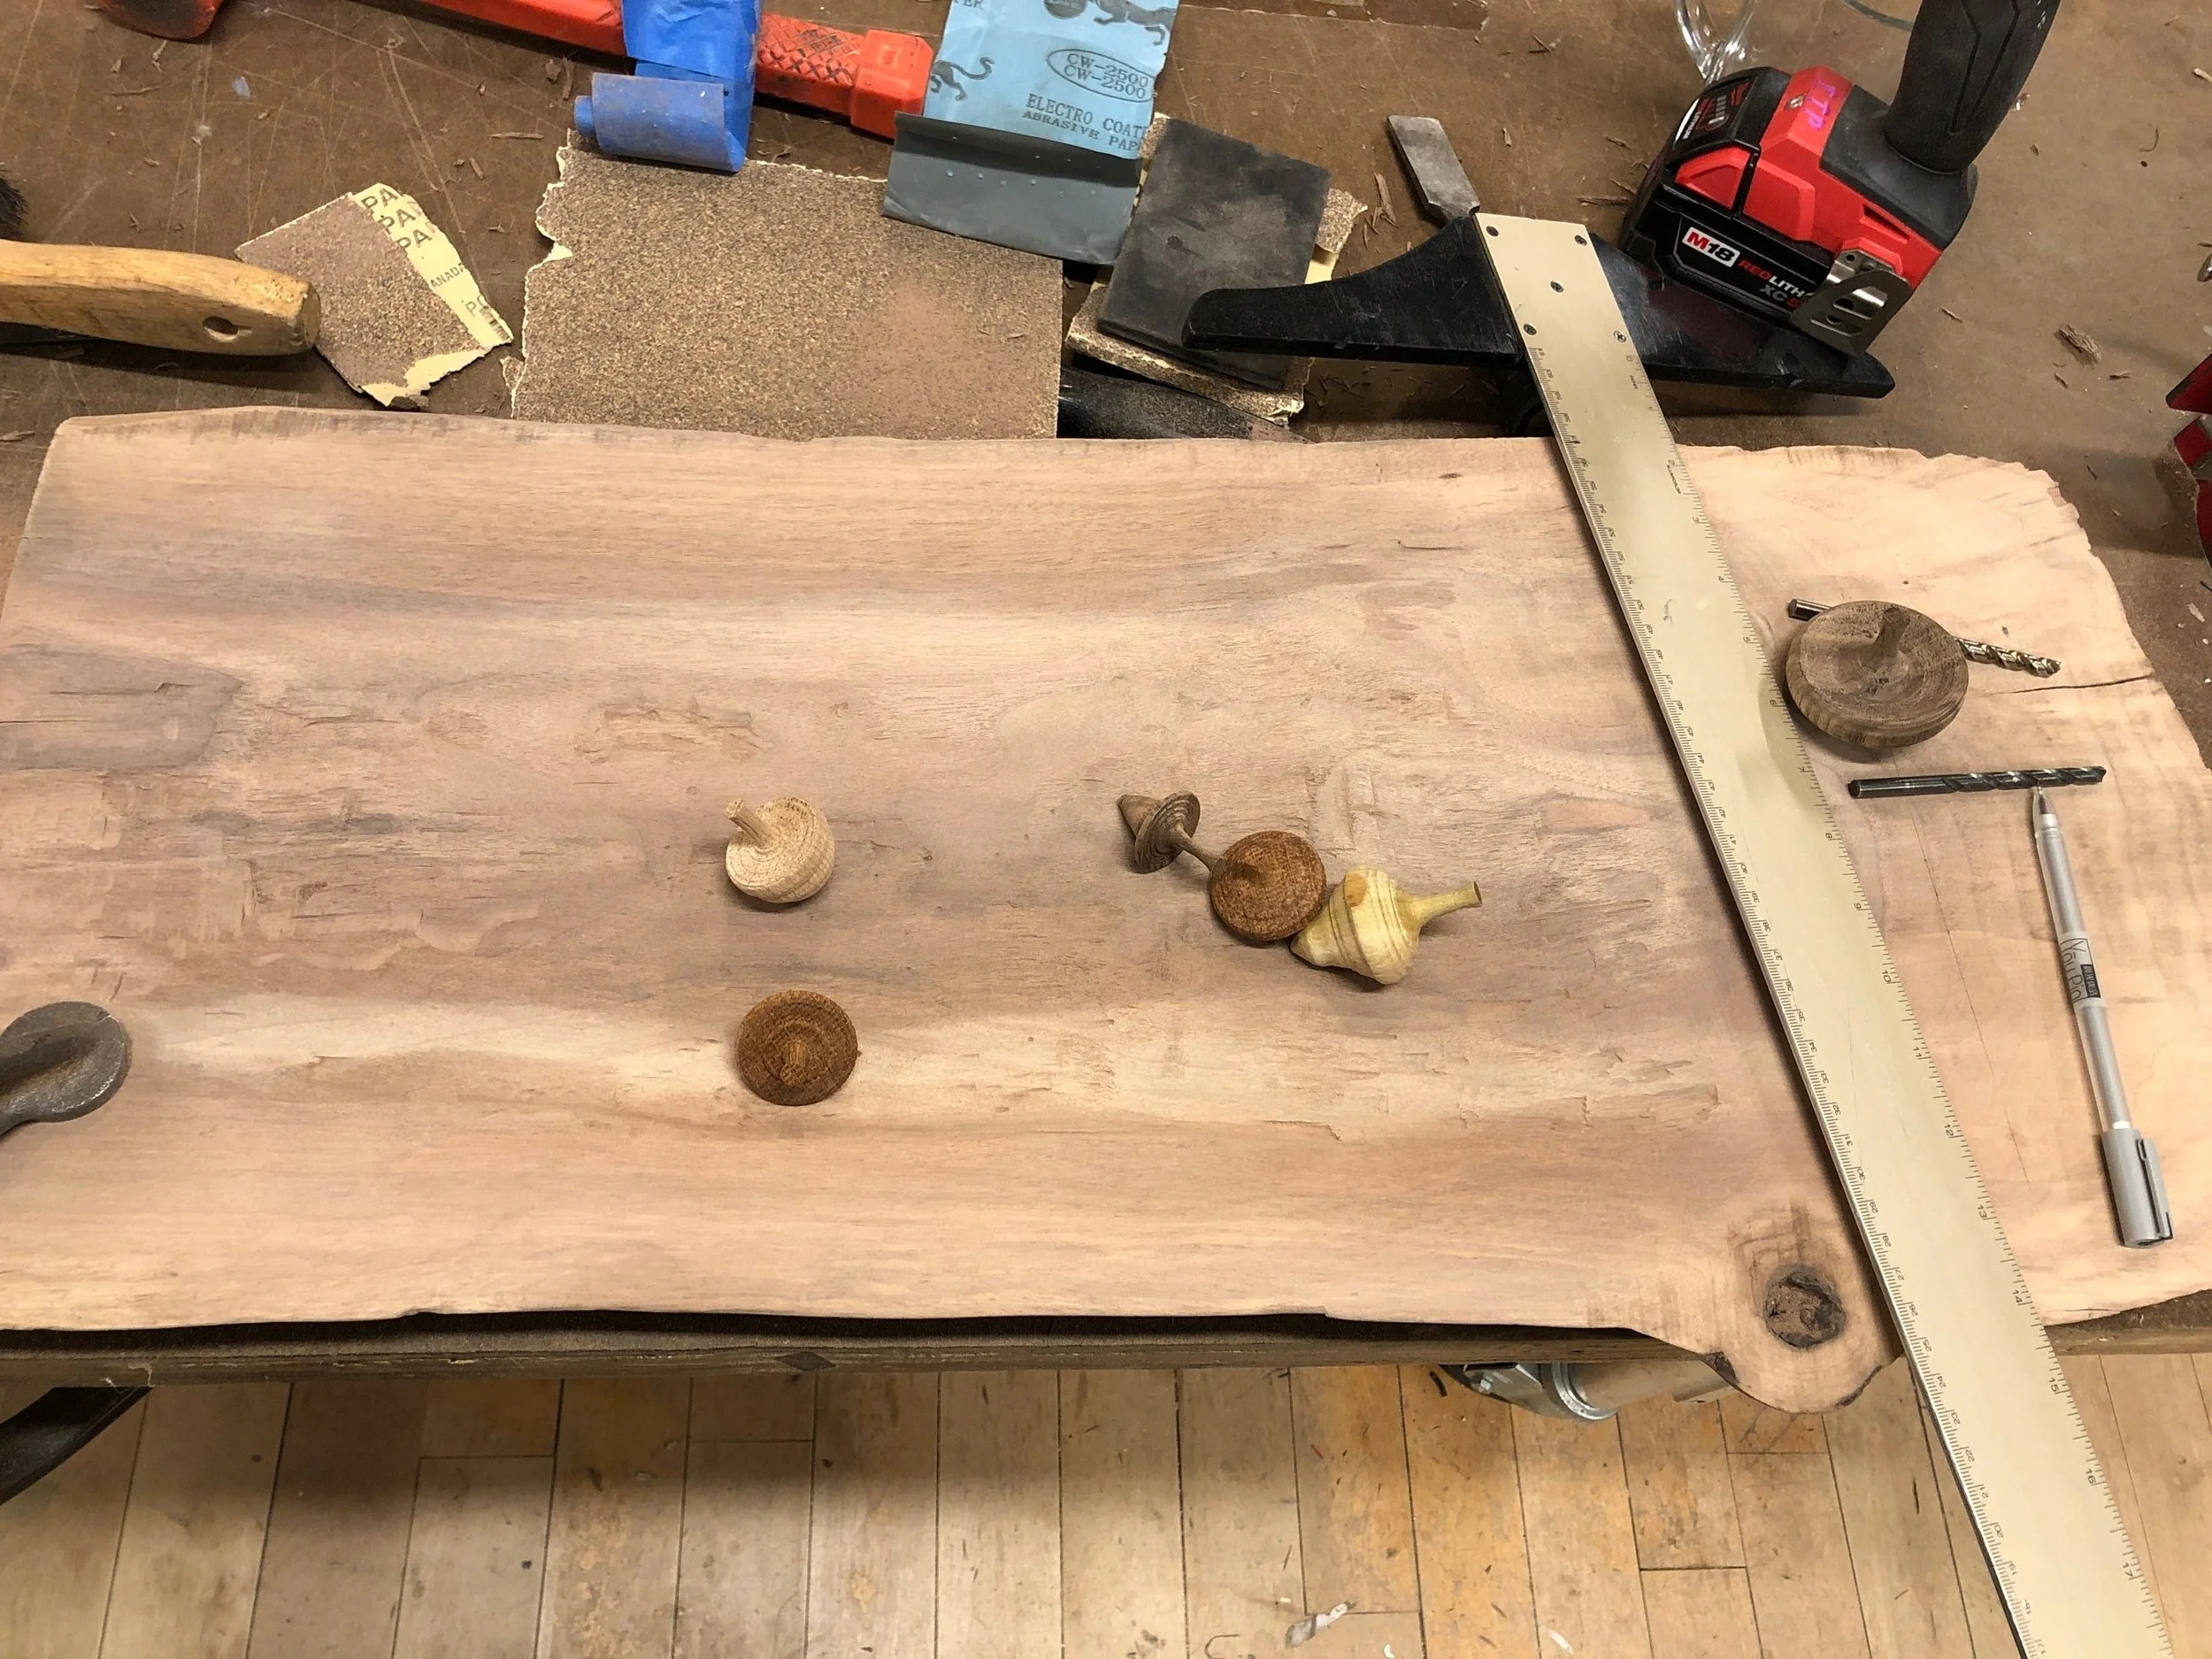
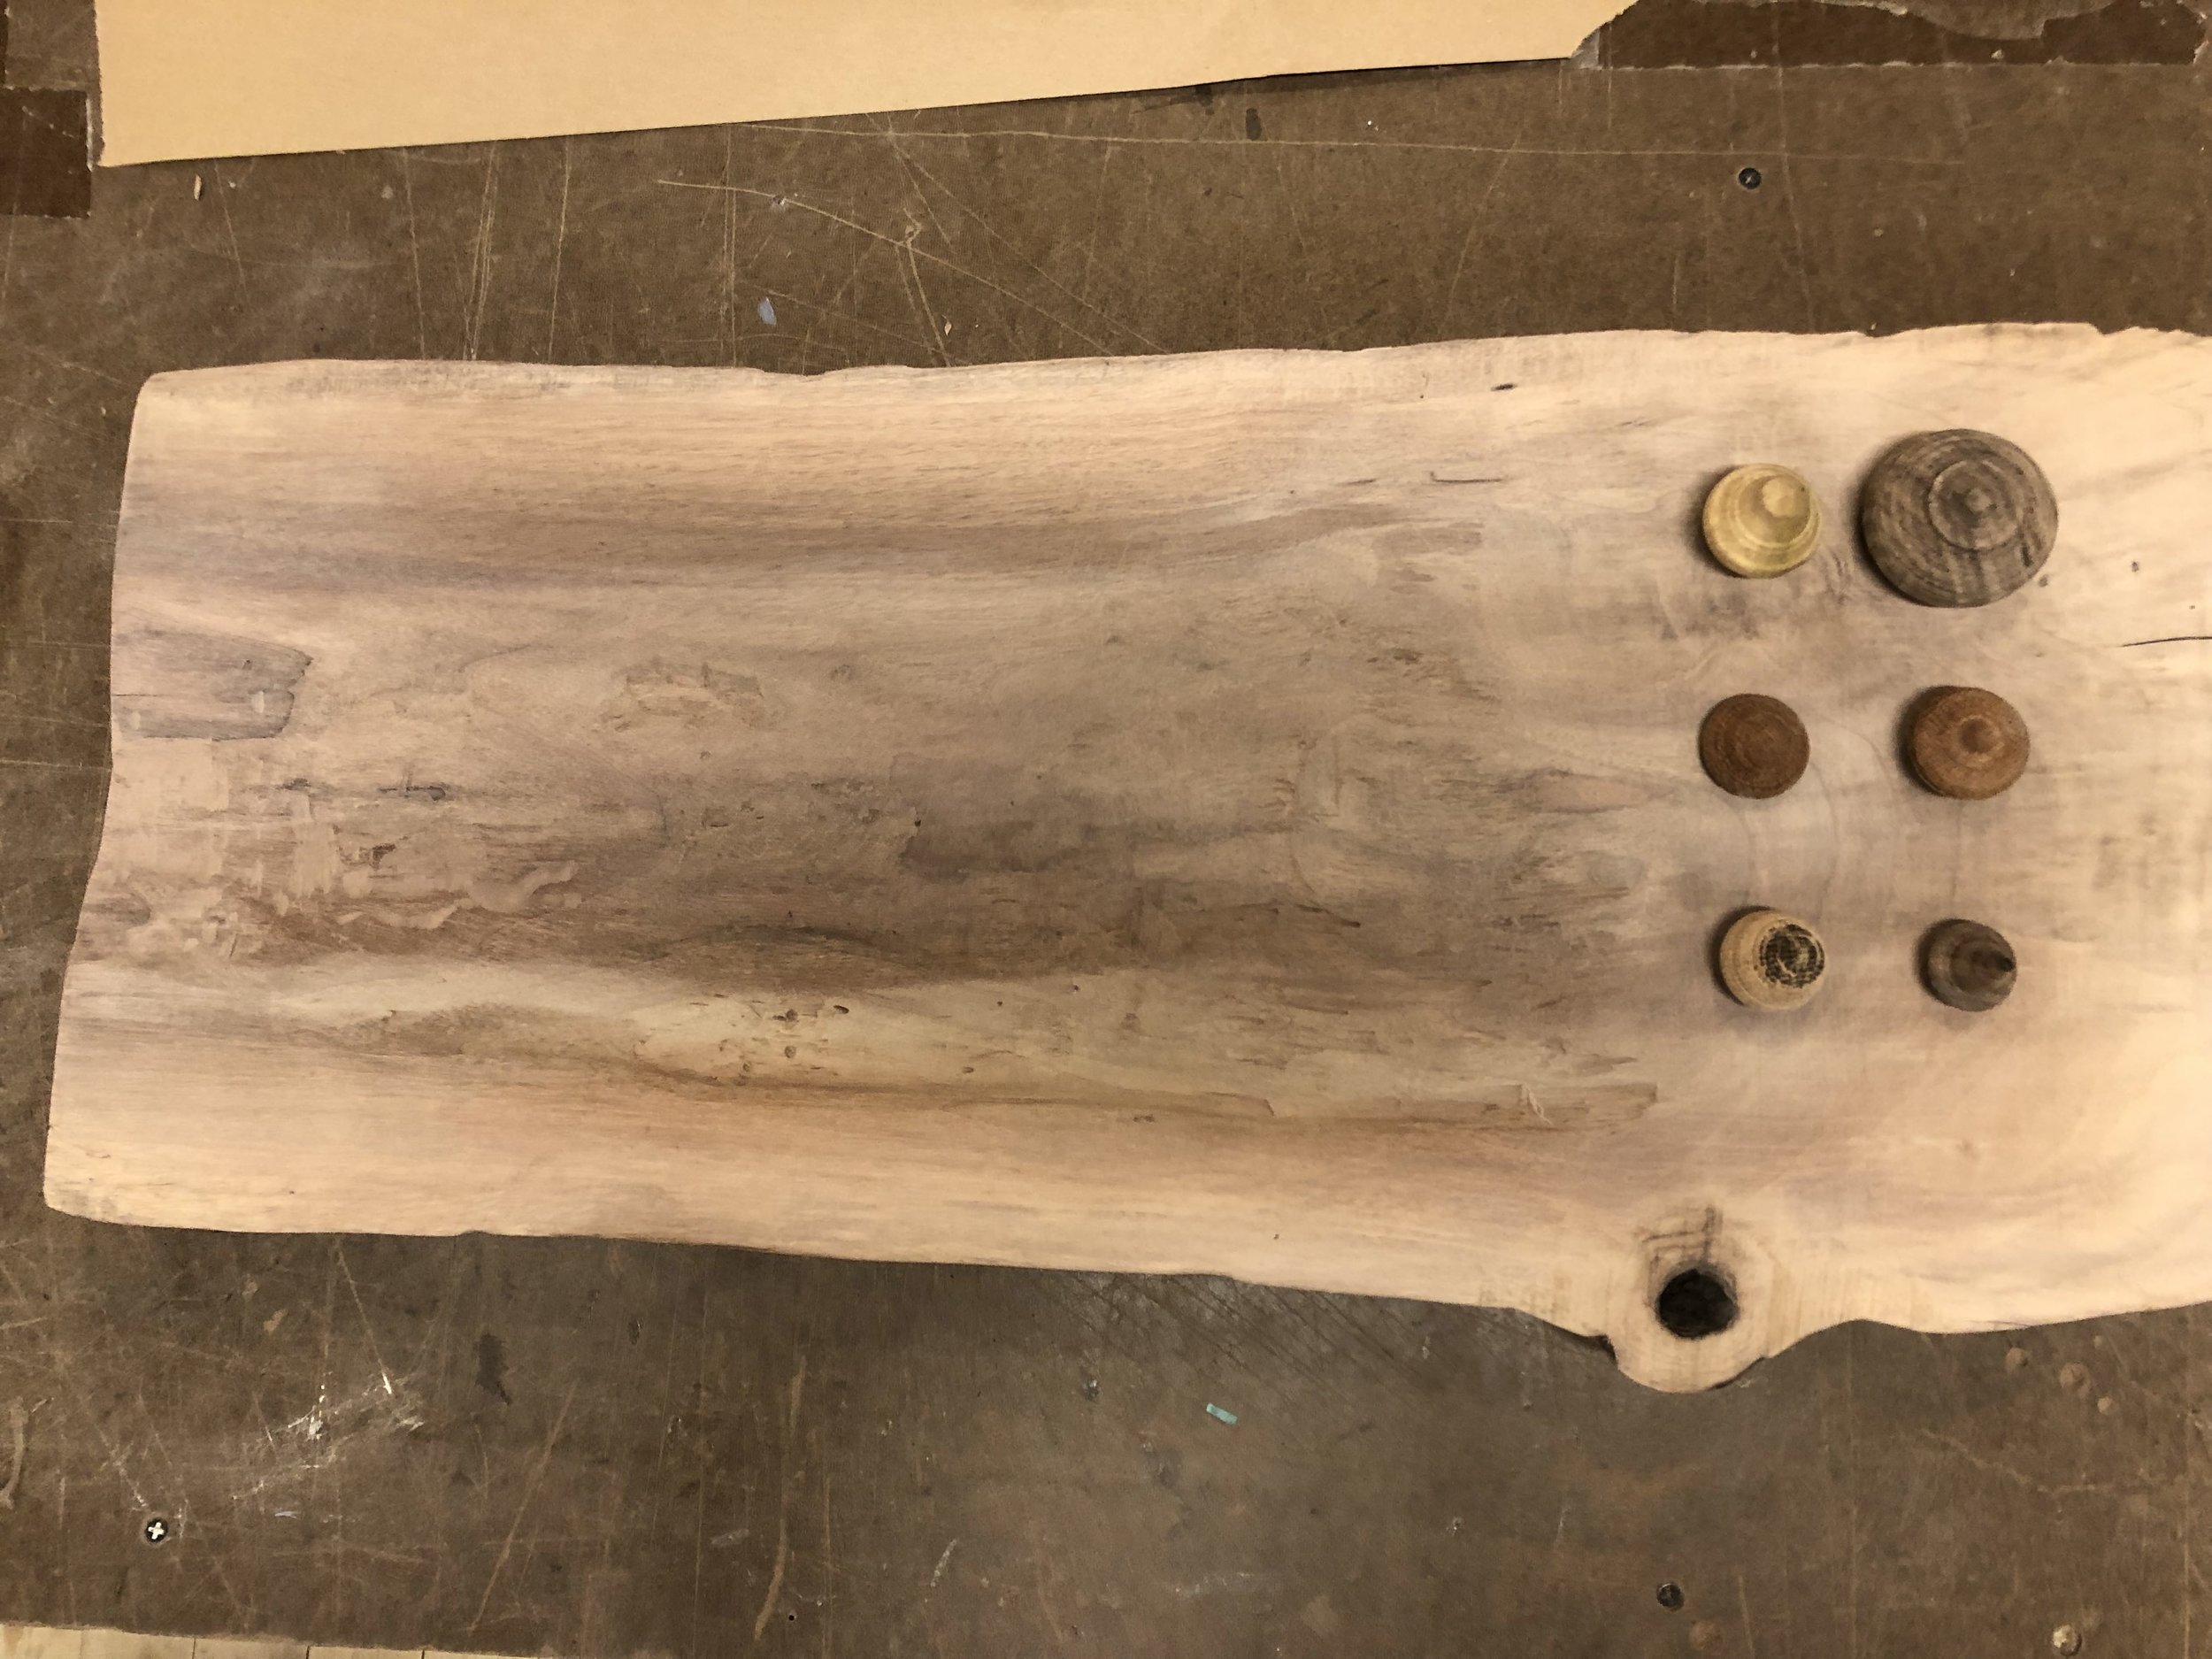
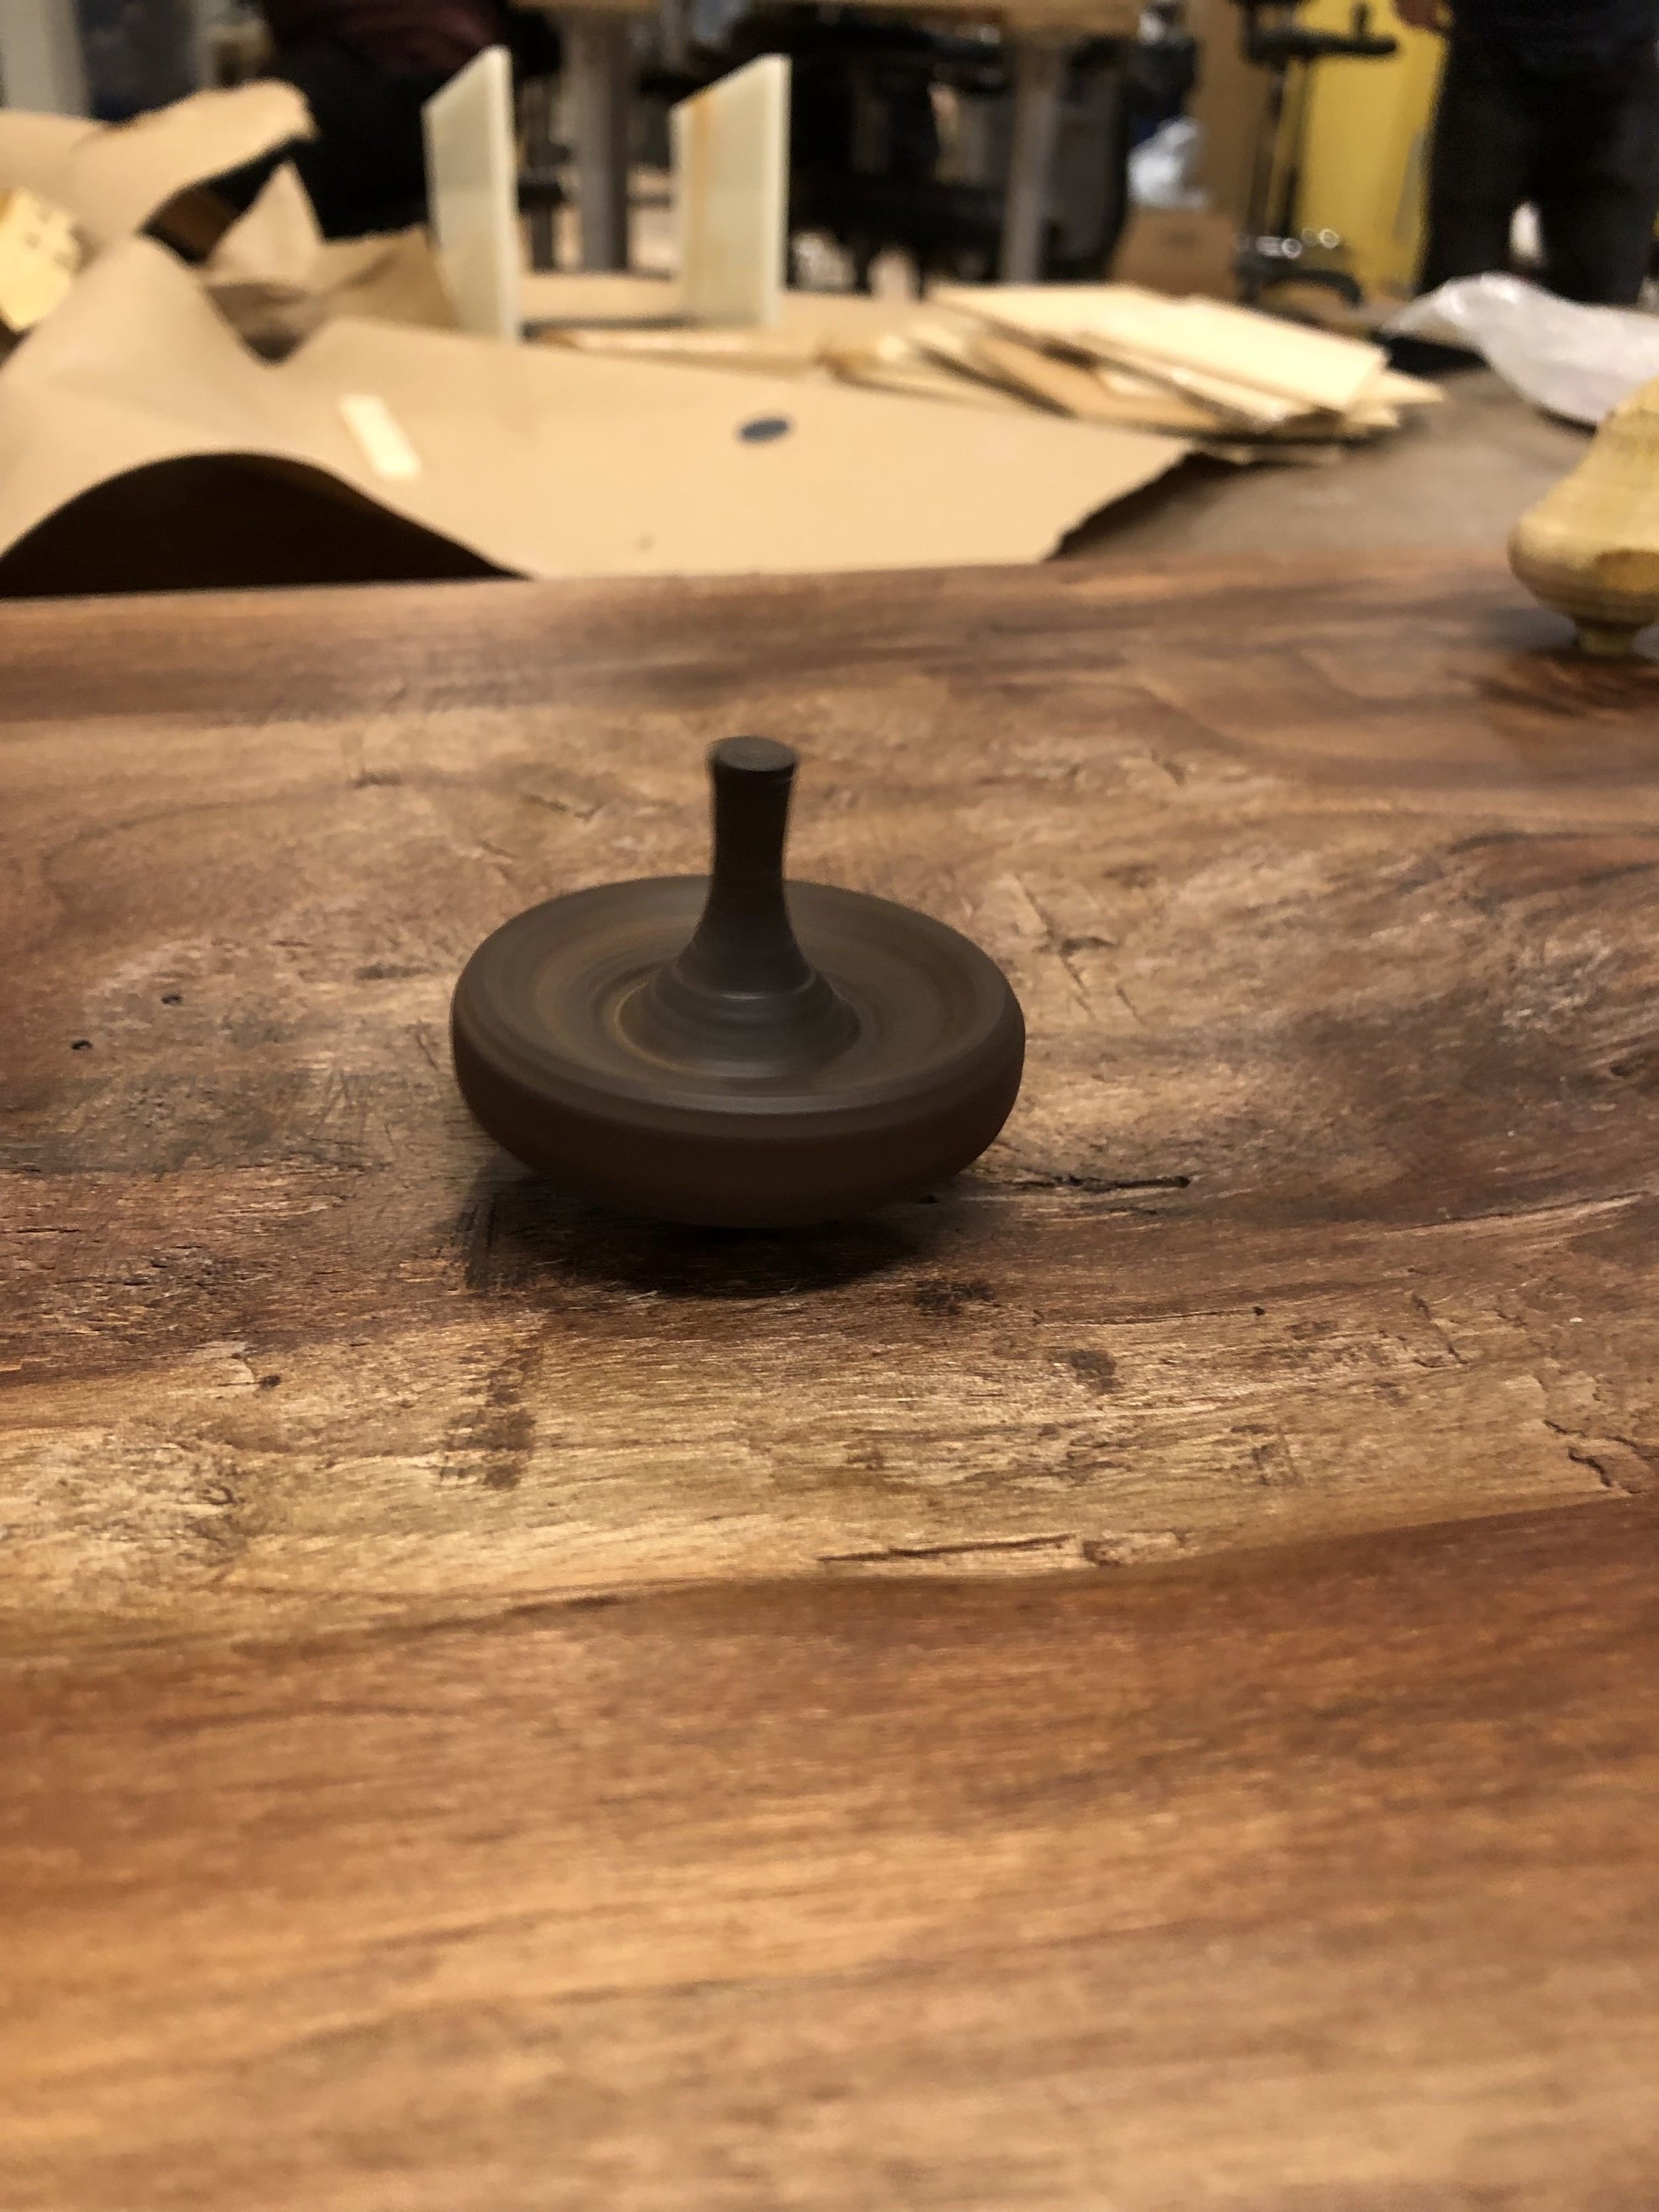
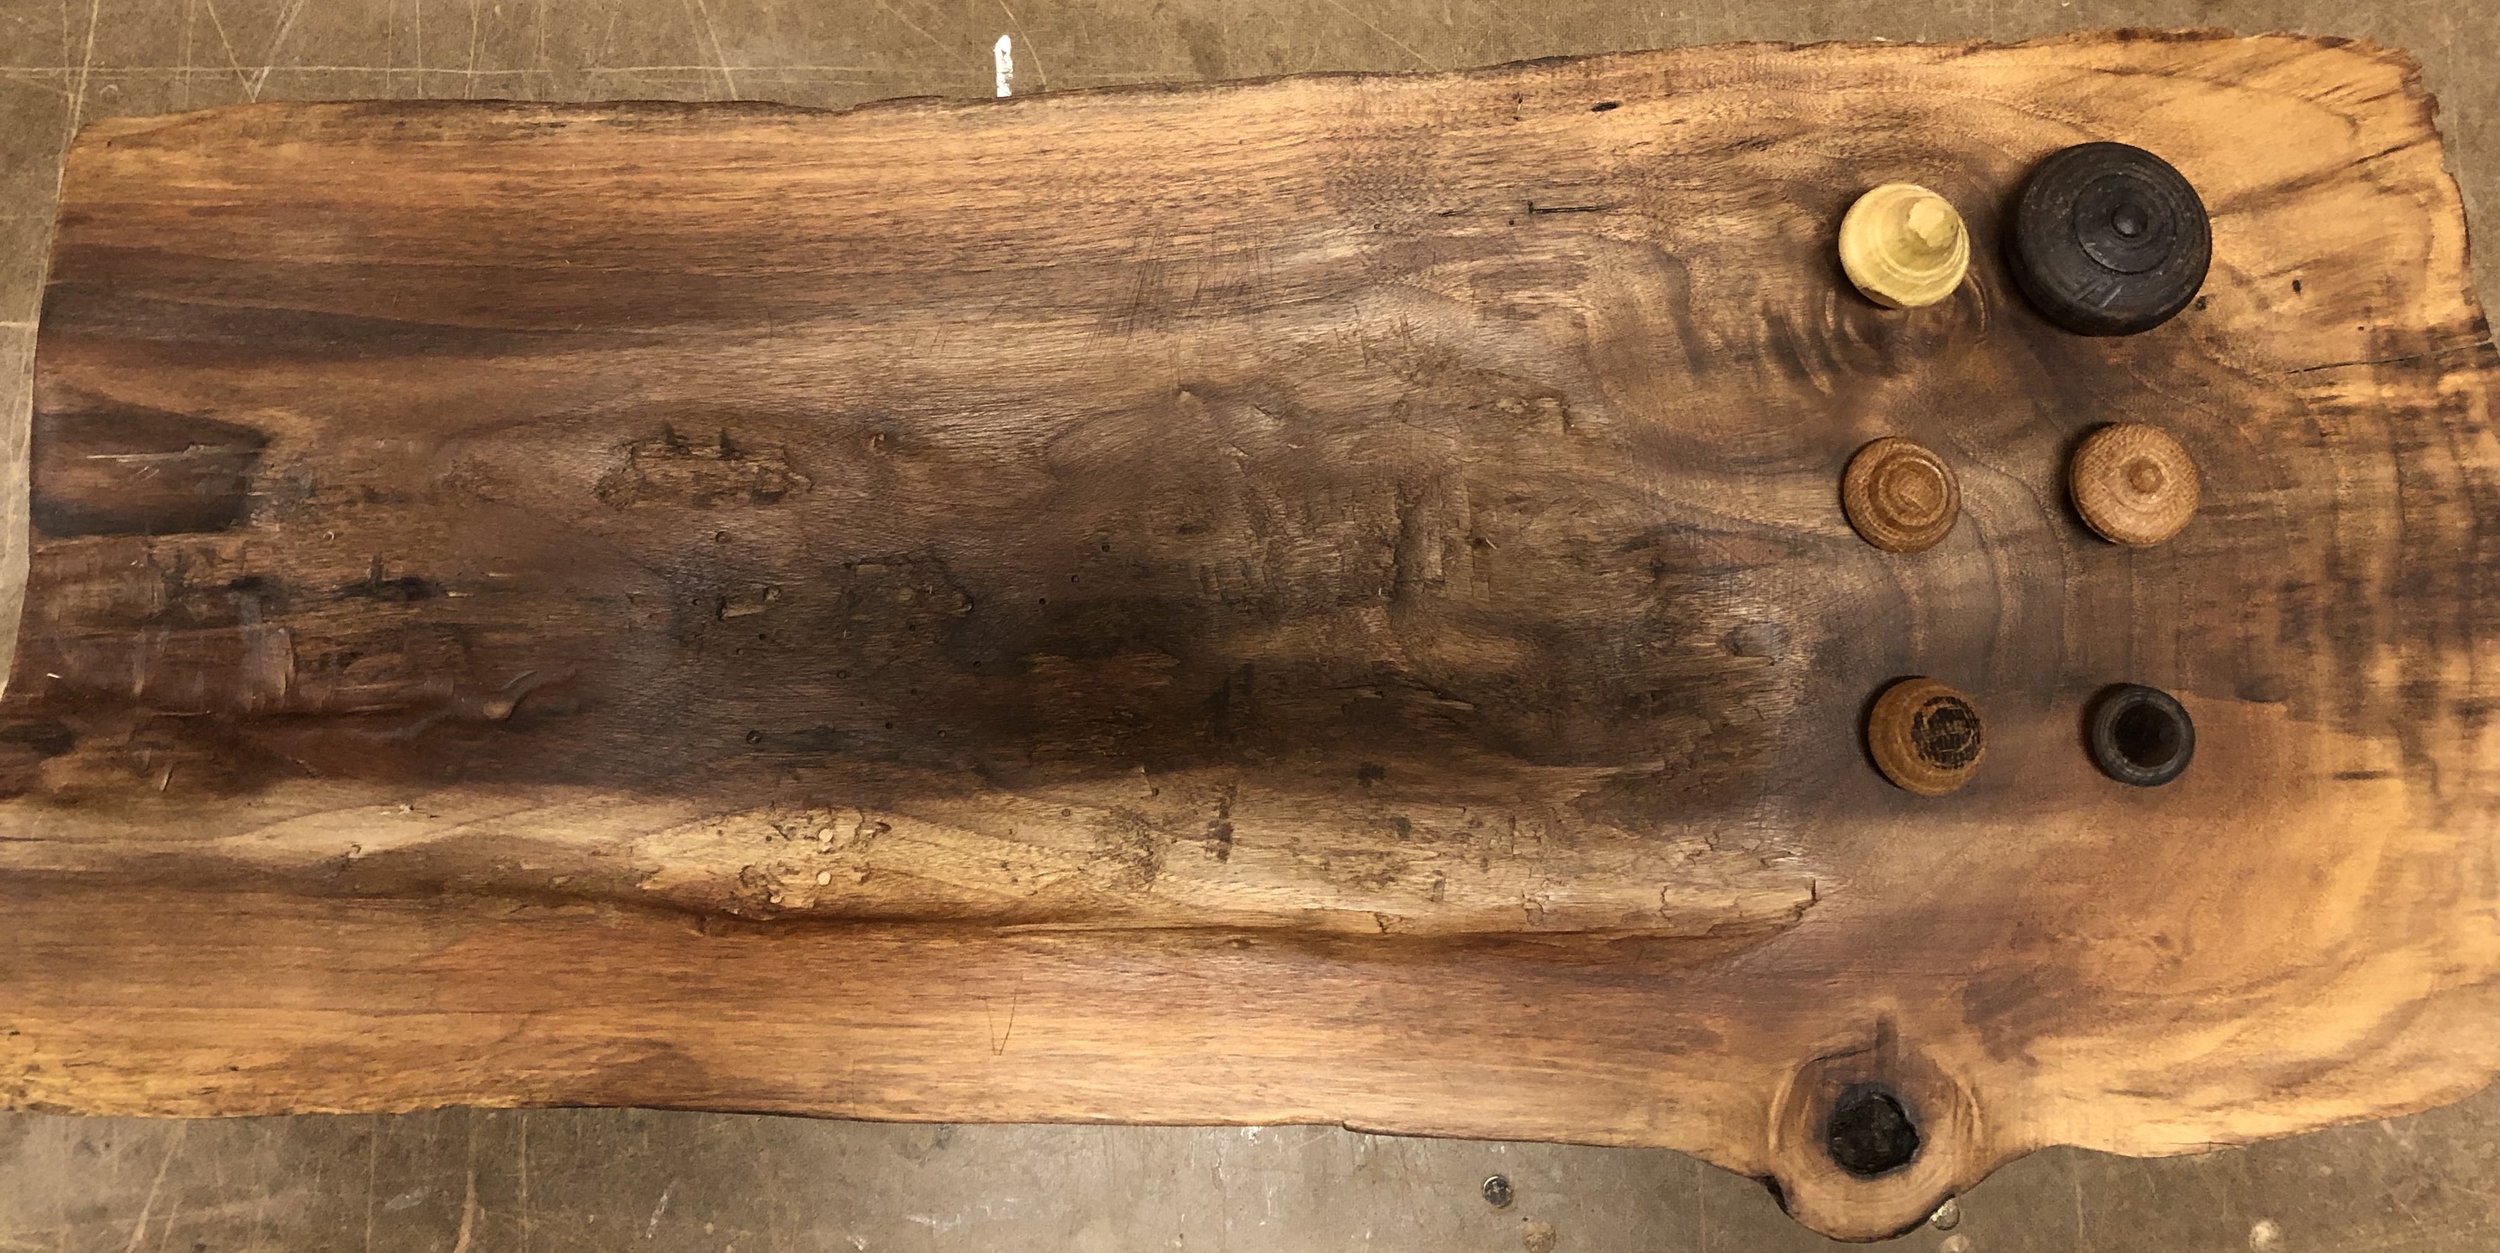
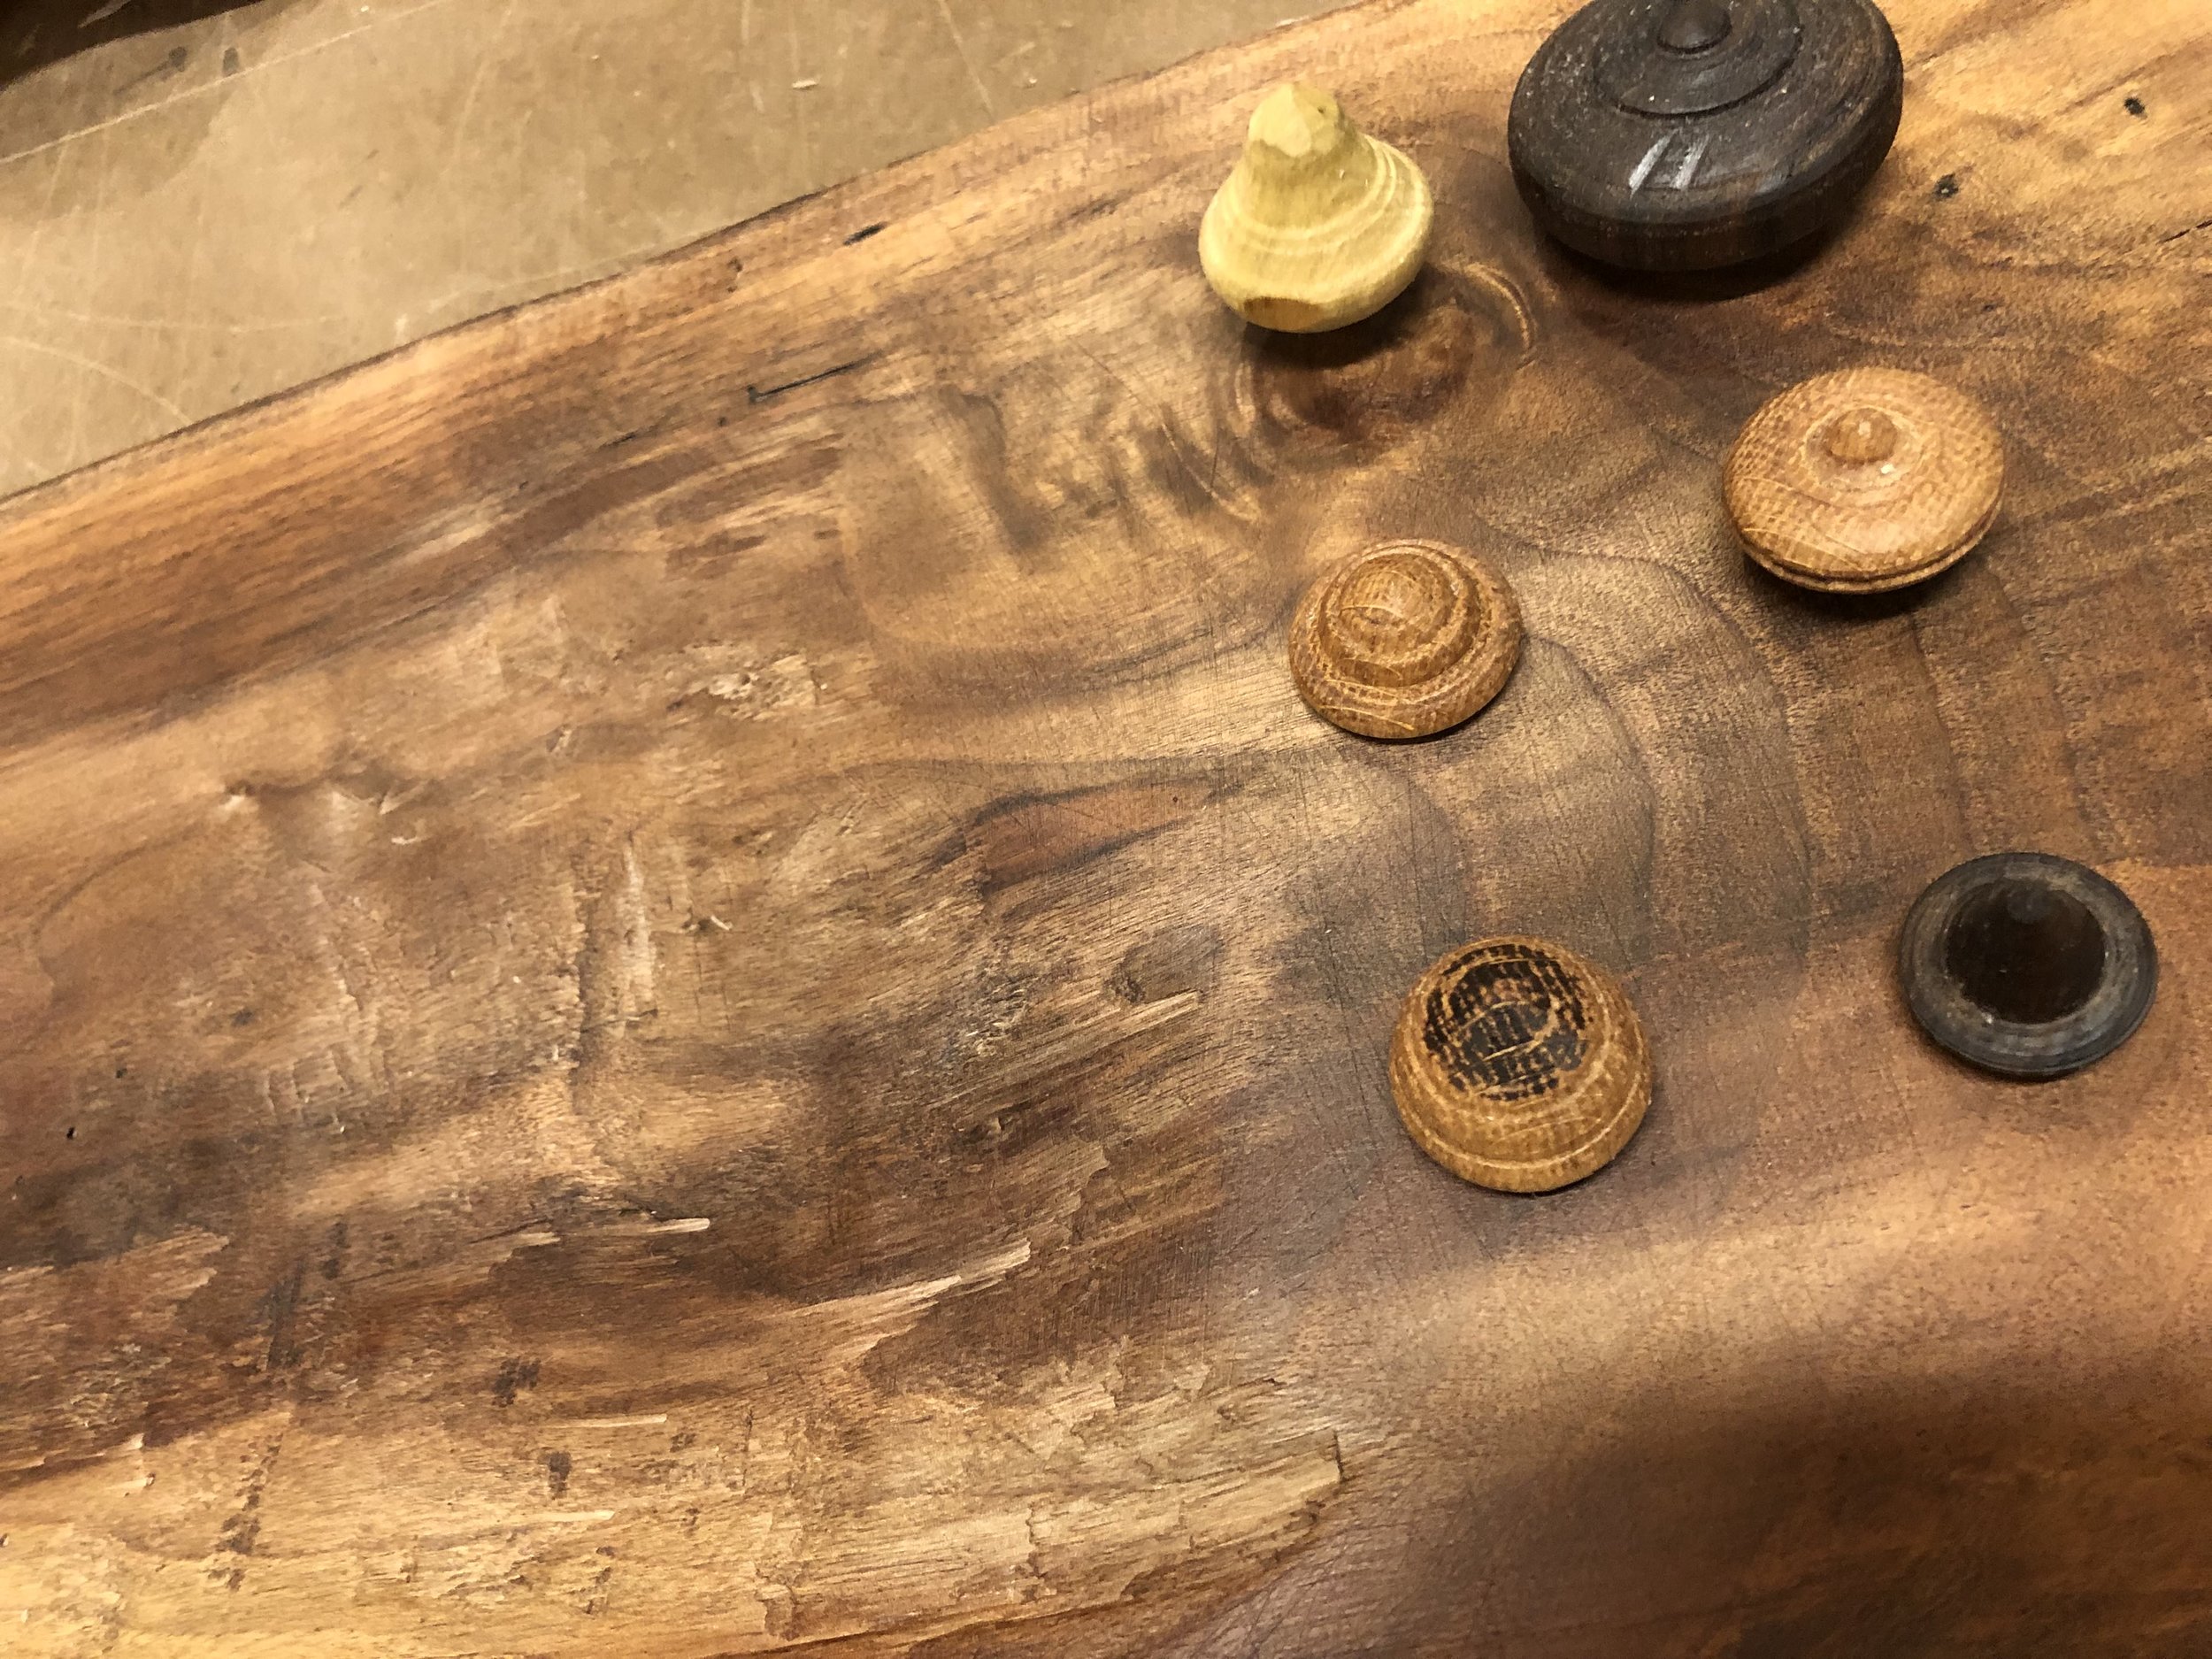
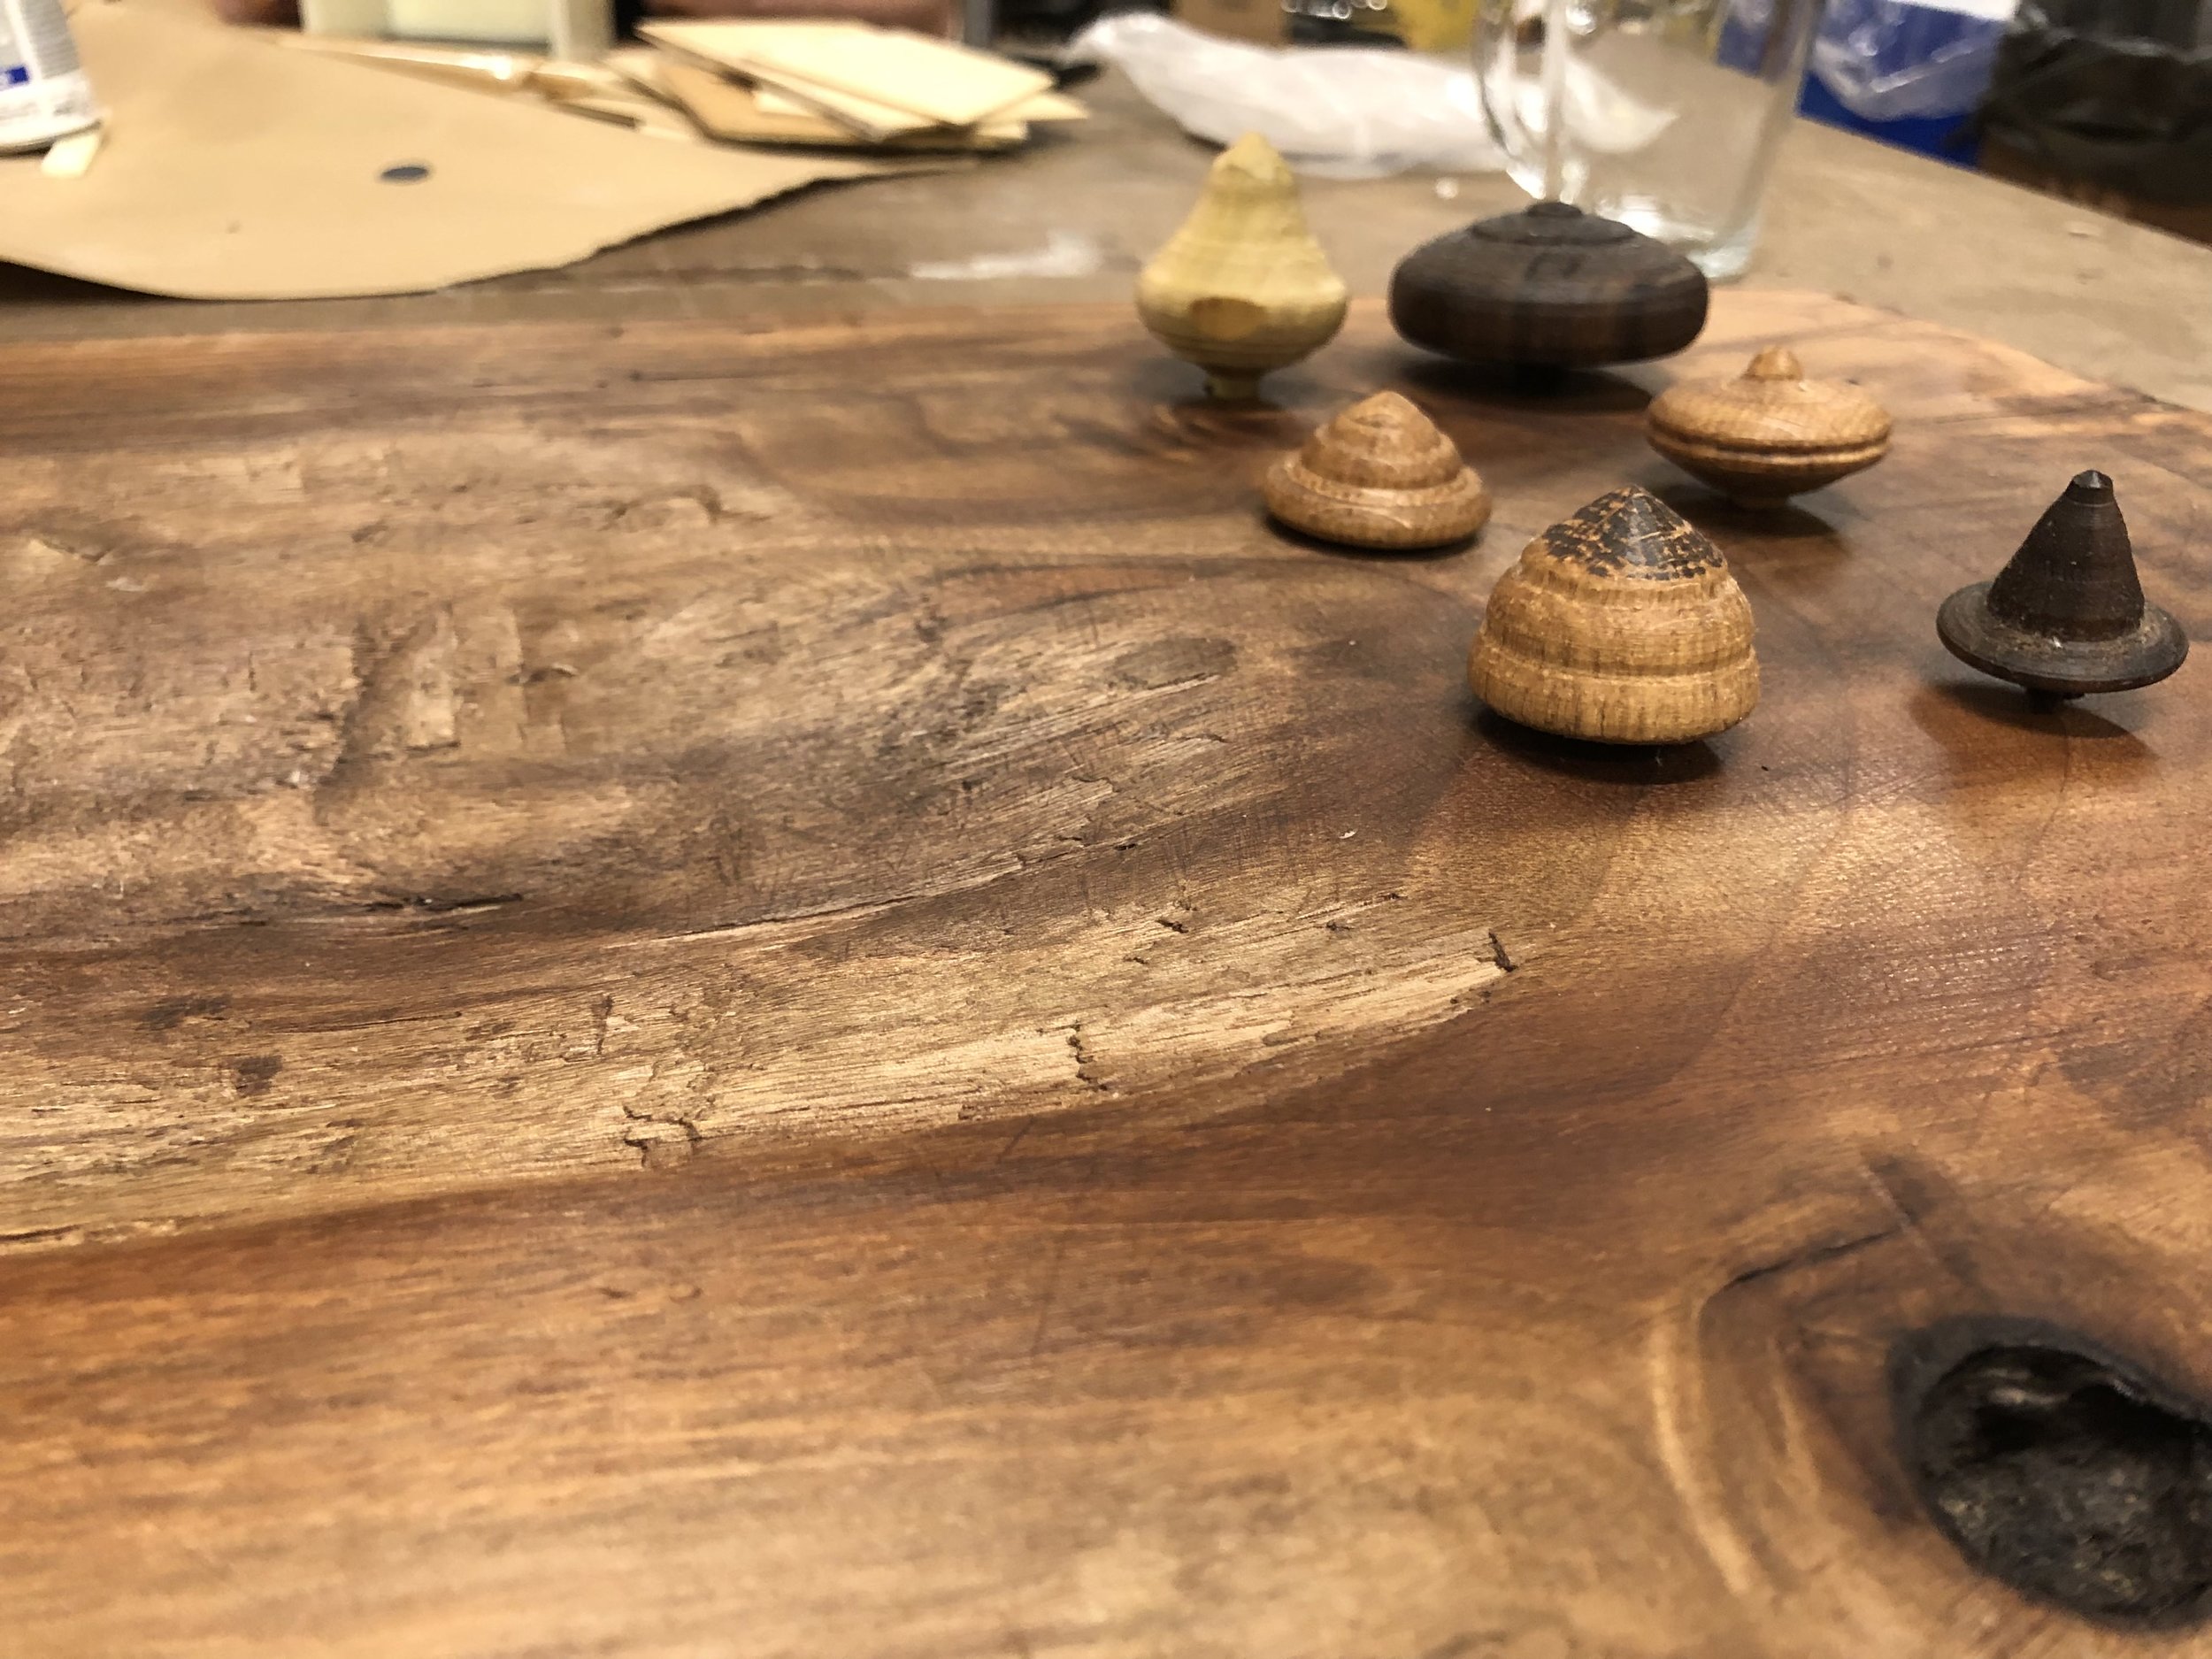
Next came finishing. I love the beeswax I got for the mallet, so just ended up using it on all tops and the board. I think it came out great and class feedback was positive. Because of the nature of imperfections in wood, that was in my favor with detailing out my process and creation. Someone even stated that the tops looked like acorns or other objects that could have easily fallen out of a tree, and some other classmates also commented on how it reminded them of a traditional tea table they grew up with in China. All and all, I’m proud of this one!

x.


Comment
Screen Shot 2019-02-27 at 10.19.36 AM.png

Week Four & Five | 4 Axis

March 15, 2019

For these weeks, I used Vectorworks to design this object to then cut on the 4-Axis mill. The machine was not in working order during the week in which this was due, and my schedule has not allowed for a dive into this machine since. I will however try to do this over the spring break — more images below on creation process.

Screen Shot 2019-02-27 at 10.19.24 AM.png Screen Shot 2019-02-27 at 10.19.36 AM.png Screen Shot 2019-02-27 at 10.20.03 AM.png Screen Shot 2019-02-27 at 10.20.29 AM.png Screen Shot 2019-02-27 at 10.20.41 AM.png Screen Shot 2019-02-27 at 10.44.17 AM.png Screen Shot 2019-02-27 at 10.44.53 AM.png Screen Shot 2019-02-27 at 10.45.12 AM.png
Comment
IMG_2733.jpeg

Week Three | Skill Builder: Metal Lathe

February 21, 2019

This week we used the metal lathe. I think the tool was a bit off when I used it as the there was a bit of metal that would not fully remove just off-center. Regardless of this, I found the metal lathe to be more relaxing than the wood lathe. I started off my project by attempting to smooth out the sides and prep them for a cleaner turn — I had some initial frustrations with the tool not fully smoothing out the bottom, but found a solution in the process (at least for one end). It tips a bit but definitely not bad for my first run!

IMG_2725.jpeg IMG_2728.jpeg IMG_2729.jpeg

I found that once I got a hang for the movement of the machine, all fell into place. Since we were limited to a ‘top-hat’ - like design I wanted to experiment with several steps and came out with the finalized design. I was aiming for NYC skyline — could easily be an interpretation of the Chrysler Building, but who really knows.

IMG_2731.jpeg IMG_2730.jpeg IMG_2732.jpeg

I’m looking forward to experimenting more with the metal lathe in the future with different metals and additional tools.

x.


Comment
IMG_2691 copy.jpg

Week Two | Turning a Mallet

February 14, 2019

This week, we were assigned a project to turn a mallet on the lathe. This process involves several steps and separate turned pieces in order for it to come together into a finished product.

On Monday (2/11), I started out my journey of finding wood by heading up to the Bronx to go to Rosenzweig Lumber & Plywood Corp to see what my options were. I learned quickly after visiting the office that they only sold 8 foot long pieces and didn’t have any scrap wood or smaller pieces. When the puzzled look appeared on my face the kind woman at the desk mentioned that there was a carpentry shop next door and they could potentially cut the wood for me. I hadn’t seen any shops adjacent to the building, but trusted her guidance and entered the unmarked door next to the shop. Here in this warehouse was about a 20,000 square foot shop with every power tool possible to design any furniture piece anyone could ever conceptualize.

I quickly found a gentle shop worker by the name of Jorge and asked if he had any scraps around that I could buy off of him. First, he gave me a piece of pine, then some small oak planks, a large plank of poplar, and finally a huge chunk of walnut that looked as if it came from a beam or something — the piece was well-aged and had a rust stain on the side. I ended up walking away with all four pieces for $15. I asked Jorge for a card and found out a bit more about the company, Propylæa, which appears to and now have a contact for future projects that has some amazing talent and pieces to work with.

Next, I carried my newly pieces back to the train and was kindly offered a bag by a passer-by in the station. I got back to school and began to shape the handle. I cut about 1.5” x 3” X 10” off of the chunk on the band saw and cut that piece in half and was left with three pieces to work with. I next prepared the lathe and a smaller piece of walnut and began to shape it on the lathe. Right away, I could tell that this piece was going to turn well and was easy to round within just a few minutes. Next, I intuitively shaped a handle and got a gorgeous grain pattern to emerge in the process. I knew I was going to polish the wood with a bees wax and went wit a bit of a honey handle theme on the handle to begin with.

IMG_2654 copy.jpg IMG_2656 copy.jpg IMG_2657 copy.jpg IMG_2658 copy.jpg IMG_2660 copy.jpg IMG_2659 copy.jpg IMG_2661 copy.jpg IMG_2662 copy.jpg

After the handle was shaped, I took a look in the scrap bin to create a jig to use to mount the drill to get properly angled pins for when the head was turned. I found a few different pieces of plywood and got them prepped for the lathe. Every time I tried to turn, the piece would break. I tried again with another piece of pine, and still was not right. Alas, after several attempts, I had something I could use and used the drill press to drill appropriately sized holes in the the new ‘tool’ I made for myself. For the pins, I wanted to make them on the lathe as well - I also prepped with some pine I found in the scrap bin and failed to make that piece turn without breaking. I learned in that process that soft woods are really not the best for narrow works — at least with the chisels that I was using to shape them.

IMG_2652 copy.jpg IMG_2653 copy.jpg Screen Shot 2019-02-14 at 9.16.43 AM.png IMG_2651 copy.jpg IMG_2650 copy.jpg IMG_2683 copy.jpg

Post this prep work — that now looking back could easily be a wasted hour — I mounted and rounded the larger piece of walnut that would be used for the head of the mallet. I only had time to turn roughly to an almost perfect rounded dowel and then ran out of time and had to clean up for class. I purchased a tin of Vans Daddy Beeswax for Kitchens & Furniture on Amazon and had that delivered the next day so that I would have it in time to build and finish the mallet on Wednesday.

IMG_2663 copy.jpg IMG_2664 copy.jpg IMG_2665 copy.jpg

On Wednesday morning (2/13) , I returned to the shop and re-mounted the walnut to shape the head of the hammer. I had a pretty good experience bringing the piece down to almost symmetric and got to the shaping of the edges to match the handle with the bee-theme. In the process of shaping, the wood snapped and I lost the control on the piece to make it the way I envisioned. I decided to change directions, and took the head off the lathe, cut it down, and took it to the sander. I found that using the sander was another opportunity to shape in a different way and saw a hand-cut like pattern begin to appear and just went with it. I tried re-shape the handle the same way, but realized quickly that it wasn’t going to work the same way due to the physics of the piece and didn’t want to completely destroy what I created.

IMG_2677 copy.jpg IMG_2678 copy.jpg IMG_2681 copy.jpg IMG_2679 copy.jpg IMG_2682 copy.jpg IMG_2685 copy.jpg

Since my idea around drilling the holes for the handle and pins from the lathe was no more, I moved onward to the drill press and placed the holes. I also created pins out of some oak and remaining walnut pieces. I glued all together and polished the mallet with the beeswax and let it dry. I applied another coat and voila, I made a mallet!

IMG_2684 copy 2.jpg IMG_2687 copy.jpg IMG_2689 copy.jpg IMG_2691 copy.jpg

I really enjoyed this project — regardless of the ups and downs, this was my second piece ever on the lathe, and I thoroughly enjoyed the journey of how this all came together.

x.


Comment
finished product, wooden spindle shaped using chisels and the wooden lathe.

finished product, wooden spindle shaped using chisels and the wooden lathe.

Week One | Skill Builder: Spindle Turning

February 07, 2019

This week we learned about the wood lathe and saw some pretty cool ways to use it to create rounded pieces of wood that can be used for a number of things. Our assignment was to use the wood lathe and create a spindle via the provided blueprint and shape the piece to be a well-formed and nice handle.

I followed the demonstrated steps to prep the piece of wood, machine, and workspace and got my turning started. I started out with marking the center of the piece but will say that getting the drive center attached took a few tries, but once I got that in place, it was pretty smooth sailing (in a way).

Screen Shot 2019-02-07 at 10.07.07 AM.png IMG_2582.jpg IMG_2579.jpg IMG_2584.jpg IMG_2585.jpg

I before I began with the lathe, I sharpened the chisels on the sharpener and then mounted the material between the drive center and the live center on the lathe and then secured and tightened both locks on the tail stock. I set the tool rest in place and turned on the machine. The first step was to get the material evenly round. It was a bit choppy at first, but I started very slowly and got comfortable with the process. I’ve been told by numerous people that the lathe is meditative and brings you into a zone. I found that to be kind-of true after about 30 minutes or so. Since this was my first time using the machine on my own, I went with feel first and ended up realizing that I have a different grip than what was suggested and found my comfort via trial and error mostly.

Once I shaped the material into a fairly evenly round piece, I marked my lines and used the parting tool to begin my shaping. When enough material was removed, I would use the parting tool to keep the notches in place. Once I had the shape the way I wanted it, i grabbed some sand paper and sanded it down to a smooth finish.

IMG_2586.jpg IMG_2589.jpg IMG_2590.jpg IMG_2592.jpg IMG_2594.jpg

In my ‘zen’ I didn’t think about leaving space for the nose shaper and ended up having a rough nose with the tooth marks. I removed the material from the drive center and began to hand sand and shape the end to be smooth and not include the remnants of the drive center. I found this process to be lengthy yet full of learning of how different sand papers do different jobs. I used a courser paper to shape and remove the edges, and then a finer paper to smooth it out.

IMG_2596.jpg IMG_2597.jpg IMG_2598.jpg IMG_2599.jpg IMG_2601.jpg IMG_2602.jpg IMG_2604.jpg

At the end of the day, I got to play, learn, and develop some skills that will take me to the next marker in this journey. Looking forward to the next shaping project and seeing what comes of it!

x.

Comment

Donec sed odio dui.

Vestibulum id ligula porta felis euismod semper. Maecenas faucibus mollis interdum. Cum sociis natoque penatibus et magnis dis parturient montes, nascetur ridiculus mus.

Aenean eu leo quam. Pellentesque ornare sem lacinia quam venenatis vestibulum. Curabitur blandit tempus porttitor. Curabitur blandit tempus porttitor. Donec id elit non mi porta gravida at eget metus.

Sed posuere consectetur est at lobortis.

Integer posuere erat a ante venenatis dapibus posuere velit aliquet. Aenean lacinia bibendum nulla sed consectetur. Cras justo odio, dapibus ac facilisis in, egestas eget quam. Vivamus sagittis lacus vel augue laoreet rutrum faucibus dolor auctor. Cras mattis consectetur purus sit amet fermentum. Vivamus sagittis lacus vel augue laoreet rutrum faucibus dolor auctor.​